Erhalten Sie Zugang zu diesem und mehr als 300000 Büchern ab EUR 5,99 monatlich.
- Herausgeber: Fox Chapel Publishing
- Kategorie: Lebensstil
- Sprache: Englisch
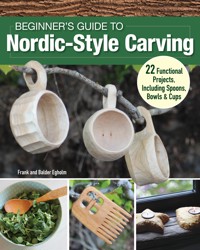
Nordic-style woodcarving is steeped in tradition. Yet, it is a remarkably easy technique for beginners to learn and master. In Beginner's Guide to Nordic-Style Carving, noted carvers, Frank and Balder Egholm, introduce you to this fascinating art form with 22 quick and functional rustic projects including a citrus reamer, spoon rack, dinner, spoon, and cake server. Starting with an overview of wood types, including how to work with and prepare green -- or found -- wood, materials, tools, and safety tips through finishing and embellishing your designs, every aspect of Nordic-style carving is covered in an easy-to-understand manner.
Sie lesen das E-Book in den Legimi-Apps auf:
Seitenzahl: 69
Veröffentlichungsjahr: 2024
Das E-Book (TTS) können Sie hören im Abo „Legimi Premium” in Legimi-Apps auf:
Ähnliche


ABOUT THE AUTHORS
Frank Egholm has been a woodworking teacher for more than twenty years. He has written several books on carving and been part of initiating a wood carving festival in Denmark.
Balder Andreas Egholm is a teacher at a special needs Waldorf school who runs carving workshops for both children and adults in his spare time. Find him on Instagram under the handle @tallmancarving.
ABOUT THE PHOTOGRAPHERS
Lillian Egholm has been a kindergarten teacher for many years. She has illustrated most of Frank’s books, as well as a few of her own. She also photographs parts of Frank’s books.
Sidsel Maria Fribert is a Danish photographer and art therapist who currently lives in Denmark. As an art therapist, she works daily with children with special needs at the internal special school at the Marjatta organization.
Check out our other book Quick & Easy Whittling for Kids, available at Fox Chapel Publishing, foxchapelpublishing.com.
© 2024 by Frank and Balder Egholm and Fox Chapel Publishing Company, Inc., 903 Square Street, Mount Joy, PA 17552.
Beginner’s Guide to Nordic-Style Carving is an original work, first published in 2024 by Fox Chapel Publishing Company, Inc. The patterns contained herein are copyrighted by the author. Readers may make copies of these patterns for personal use. The patterns themselves, however, are not to be duplicated for resale or distribution under any circumstances. Any such copying is a violation of copyright law.
All rights reserved. No part of this publication may be reproduced, stored in a retrieval system or transmitted, in any form or by any means, electronic, mechanical, photocopying, recording or otherwise, without the prior written permission of the copyright holders.
Print ISBN: 978-1-4971-0421-1eISBN: 978-1-6374-1298-5
Managing Editor: Gretchen Bacon
Acquisitions Editor: Kaylee J. Schofield
Editor: Kelly Umenhofer
Designer: Mike Deppen
Proofreader: Joseph Borden
To learn more about the other great books from Fox Chapel Publishing, or to find a retailer near you, call toll-free 800-457-9112 or visit us at www.FoxChapelPublishing.com.
We are always looking for talented authors. To submit an idea, please send a brief inquiry to [email protected].
For a printable PDF of the patterns used in this book, please contact Fox Chapel Publishing at [email protected], with Beginner’s Guide to Nordic-Style Carving 978-1-4971-0421-1 in the subject line.
TABLE OF CONTENTS
GETTING STARTED
Choosing Woods for Carving
Working with Green Wood
Materials and Tools for Carving
Carving Techniques
Safety
Sharpening and Honing
Finishing Your Projects
PROJECTS
Dinner Spoon
Spatula
Spoon Rack
Citrus Reamer
Cake Server
Jam Spreader
Butter Knife
Coffee Scoop
Serving Bowl
Serving Dish
Egg Cup
Kuksa Cup
Comb
Multipurpose Brush
Crochet Hook
Hair Clip and Pin
Shoehorn
Back Scratcher
Postcard Stand
Tealight Holders
Wall Shelf
Coat Hook
GETTING STARTED
Before jumping into your first carving project, familiarize yourself with the materials, tools, and carving and finishing techniques you need to know to create successful pieces. Be sure to review the discussions on safety tips, wood selection, and how to sharpen and hone your carving knives, as well.
CHOOSING WOODS FOR CARVING
The best carving wood is whatever you have available, which is part of why we’ve used different types of found green wood for the projects in the book. You may prefer working with prepared wood blanks or may have many types of trees in your area, so it’s important to know that some types of wood are more suitable for carving than others. This section explores a few of the woods commonly used for woodcarving. For beginners, we recommend carving with basswood until you are more comfortable. Also, make sure that any milled lumber you use is straight-grained and free of knots. If you decide to try working with found green wood of any type, there are additional items to keep in mind and techniques to know. (See Working with Green Wood.)
Basswood/Linden—Basswood, also known as American linden, is a cream-colored, soft hardwood that holds detail well. It’s a great beginner wood for carvers because it’s lightweight and consistent in grain, with no prominent air pockets. For kitchen utensils, we recommend using a denser hardwood, such as maple or birch, as utensils will see more use and wear than other types of carvings.
Basswood/Linden
Birch—There are several varieties of birch, but generally, it is a light-colored hardwood that is usually a bit harder than basswood.
Birch
Butternut—Butternut is a beautiful, medium-dark wood that looks like a light walnut. It has an amazing grain, so it is often left unpainted.
Butternut
Maple—Similar to birch, maple is a light-colored hardwood that carves nicely and is ideal for carving kitchenware.
Cherry—Cherry is a reddish-brown hardwood that is normally left unpainted to display its color and grain pattern.
Cherry
Poplar—Poplar is a greenish-brown hardwood that is ideal for carving due to its fine grain direction. If making kitchen items, we recommend not using poplar, as it is a porous wood and can absorb a lot of liquid, which can lead to cross-contamination.
WORKING WITH GREEN WOOD
Green wood refers to any wood that is freshly felled or preserved with 100% moisture content. We prefer to use green wood since it is readily available and provides a rustic feel to the finished product. If you won’t be working with green wood, feel free to skip this section and continue with your review of the Materials and Tools section beginning.
To carve with green wood, you usually only need a few tools (see here for more information on these tools). You can find pieces of green wood in your local community or even in your own backyard.
Once you finish carving green wood, let the project dry before adding any finishes to it. Remember that green wood is harder to carve once it has dried, which makes it difficult to continue carving. To prevent your piece from drying out before you are done carving, put it in a freezer to maintain the moisture. Store bigger pieces under a large, shady tree.
Axing Techniques
If you decide to use green wood for any of the projects in this book, you will need to cleave and axe out the wood before you can begin carving.
Cleaving Wood
Place the wood vertically on a steady surface. Place the axe on the end grain and hit the back of the axe with a mallet. If you have a partner, one person can hold the axe and the other can wield the mallet. Stand to the side so the axe won’t come down on you. Remember to take it slow. When cleaving, you should always cleave into two equal pieces: first halves, then quarters, eighths, and so on. You can try to cleave off smaller bits, but the split might run to one side.
When you are cleaving green wood, make sure to cleave into equal pieces, such as halves, quarters, and eighths.
Axing Out
You should take special care when using the axe. If you can, leave the wood a bit longer and shorten it after axing it out. Hold the wood in one hand and tuck your fingers in toward your palm. Place the wood slightly askew on your chopping block. Take a wide stance and mind your legs. Only chop from the halfway point and down. The axe head should never be lifted so high that it can hit your hand or fingers. Hold the axe close to the head for more control. Take off small chips at a time. If you want to take off larger sections, you can make relief cuts to make the split run away from the center of the wood.
For safety reasons, only chop from the halfway point of a log and down.
WHAT TO LOOK FOR
Even though green wood is readily available, it is important to make sure you are collecting quality pieces to carve. Here are some key elements to keep in mind while searching for and gathering green wood.
• Green wood pieces with larger and clearer grains will create fewer problems for you while carving. For example, the area where a branch joins with the trunk makes a great coat hook, since the opposing grain directions support the shape of the project.
• In addition to the wood selections mentioned, fruitwoods (apple, pear, peach, plum, etc.) are good carving woods.
•


