Erhalten Sie Zugang zu diesem und mehr als 300000 Büchern ab EUR 5,99 monatlich.
- Herausgeber: Fox Chapel Publishing
- Kategorie: Lebensstil
- Sprache: Englisch
- Veröffentlichungsjahr: 2022
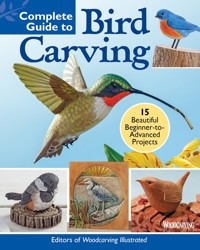
No matter what kind of carver you are or what difficulty level you've reached, bird wood carving is for you! Featuring a compilation of 15 step-by-step projects from Woodcarving Illustrated, Complete Guide to Bird Carving includes easy-to-follow guidance, expert tips, and wood carving patterns for a variety of recognizable birds, including woodpeckers, chickadees, owls, blue herons, goldfinches, and more. From simple whittled songbirds and a comfort bird to realistic hummingbirds and a stylized wren, this must-have project guide features various techniques on how to carve wood birds – such as whittling, relief carving, and power carving – and is perfect for tailoring to your comfort and skill level, from beginner to advanced. Also included are helpful overviews on materials, tools, adding texture, painting, and finishing. Original projects and patterns contributed by well-known and talented carvers in the industry, including Chris Lubkemann, Greg Young, Randy Conner, Sandy Czajka, and others.
Sie lesen das E-Book in den Legimi-Apps auf:
Seitenzahl: 135
Das E-Book (TTS) können Sie hören im Abo „Legimi Premium” in Legimi-Apps auf:
Ähnliche


© 2022 by Fox Chapel Publishing Company, Inc., 903 Square Street, Mount Joy, PA 17552.
Complete Guide to Bird Carving is an original work, first published in 2022 by Fox Chapel Publishing Company, Inc. All projects were previously published in Woodcarving Illustrated. The patterns contained herein are copyrighted by the author. Readers may make copies of these patterns for personal use. The patterns themselves, however, are not to be duplicated for resale or distribution under any circumstances. Any such copying is a violation of copyright law.
Print ISBN 978-1-4971-0277-4eISBN 978-1-6374-1083-7
Library of Congress Control Number: 2021946988
To learn more about the other great books from Fox Chapel Publishing, or to find a retailer near you, call toll-free 800-457-9112 or visit us at www.FoxChapelPublishing.com.
We are always looking for talented authors. To submit an idea, please send a brief inquiry to [email protected].
For a printable PDF of the patterns used in this book, please contact Fox Chapel Publishing at [email protected], with 9781497102774 Complete Guide to Bird Carving in the subject line.
Foreword
Welcome to the wonderful world of bird carving! The craft is as unique and diverse as there are birds in the sky. To show you how accessible and rewarding the craft can be, we searched the archives of Woodcarving Illustrated to offer this collection of step-by-step tutorials for bird carvers of every interest and skill level. Whether you’re into stylized songbirds, wrens in the round, or realistic warblers, this book has something for you.
The projects in this book are divided into three sections based on difficulty level. The first section includes beginner-friendly projects with simplified features and minimal tools. The second section offers a slew of designs ideal for the intermediate carver, with slightly more challenging details. The third section includes projects perfect for advanced carvers who have mastered the basics and want to take their skills even further.
Each project is presented with instructions and a full materials and tools list to guide you through the crafting process. We’ve also included the basics on safety, tools, and accessories—everything you’ll need to start making woodchips. Corresponding patterns for each project are provided in the back of the book.
Whether you’re just getting started or have been carving for years, the following pages offer resources and projects that you’ll want to turn to again and again.
Happy carving!
—Editors of Woodcarving Illustrated magazine
Table of Contents
Getting Started
Materials & Tools
Basic Bird Anatomy
Safety
Hand Carving Basics
Power Carving Basics
Adding Texture
Woodburners
Painting & Finishing
Projects
Beginner Projects
Regal Eagle
Comfort Bird
Oval Owl
Simple Songbird
Twig Rooster
Intermediate Designs
Smooth Nuthatch
Tiny Woodpecker
Blue Heron
Loon Pin
Wren-in-the-Round
Advanced Carves
Stylized Goldfinch
Baby Chickadee
Ruby-Throated Hummingbird
Yellow-Rumped Warbler
Shoveler Hen Walking Stick
Patterns
About the Authors
Like the Projects in this Book?
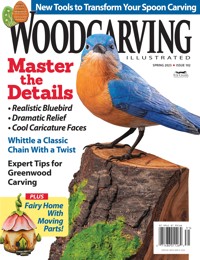
Then you’ll loveWoodcarving Illustratedmagazine!
Woodcarving Illustrated is a quarterly magazine produced by Fox Chapel Publishing. Each issue is packed with all the latest and greatest projects, user-friendly patterns, tool reviews, tips, and features for carvers at all skill levels. Whether you’re a fan of caricature, relief, chip carving, spoon carving, whittling, power carving, or flat-plane carving—or just want to expand your woodworking repertoire—we’ve got something for your specific interests. Visit foxchapelpublishing.com/magazines to subscribe.
Then, once you’ve tried your hand at some of our out-of-this-world projects, join the community! We’re on Instagram and TikTok @woodcarvingilllustrated, and on Facebook at Woodcarving Illustrated Magazine. Also, be sure to check out our message board at forum.woodcarvingillustrated.com or sign up for our regular newsletter at woodcarvingillustrated.com/enews.
Once you’ve made one (or a dozen) of the projects in these pages, write to us directly! Send an email to [email protected] to share photos and information about your creations. We love hearing from you!
Getting Started
Materials & Tools
Each project in this book includes a full list of materials and tools you will need. Among the specific materials and tools needed for each project, common items include a saw for preparing blanks, assorted grits of sandpaper, cyanoacrylate (CA) glue, clamps, and a drill press and bits.
Other Useful Items
Acrylic paints, stains, and dyes: For adding color.
Chisels, gouges, and V-tools: To add texture after the initial roughing out is complete.
Epoxy putty: For creating lifelike eyes.
Carving knife: For roughing out and/or detailing a handcarved project. Alternately, you could use a traditional bench knife to rough out a project and add texture and detail with a rotary tool.
Paper towels: For wiping off excess glue or finish. Be sure to properly dispose of oil-soaked towels and rags, as they can spontaneously combust (See Minimize Fire Hazards here).
Paintbrushes: For applying acrylic paints, stains, dyes, and/or finishes.
Rotary tool: For shaping and adding texture.
Toothpicks: To add fine details, such as eyes and decorative dots.
Woodburner: For adding details and creating lifelike feathers before paint is applied.
Sanding Through the Grits
The grit number on a length of sandpaper refers to the average number of particles per square inch. The lower numbers, such as 60 and 80, are the coarser grits, which remove the most wood and are used for rough shaping. The higher numbers—220 and above—refer to finer grits that remove less wood and are used for smoothing. “Sanding through the grits” simply means using progressively finer sandpapers to smooth the scratches left by coarser grits. Rub sandpaper on a project until the wood is smooth and shaped the way you want, and then move on to a finer grit of paper and repeat, sanding with the grain when possible.
Basic Bird Anatomy
For those inclined to skip this segment, avoid the temptation. Understanding how a bird is put together will help your bird carving skills progress. In this section, we will touch on some important points of anatomy; however, we encourage you to do a deeper study on your own.
The external anatomy of a bird is known as topography, as it is a sort of map of feather groups and anatomical features. Ornithologists, those who study birds, have developed a common nomenclature that names these features. Color changes often demarcate these feather groups and features, particularly on the head. You’ll notice that many of the projects in this book stick to common descriptions, but it is important to know anatomical features as a bird carver.
Birds come in many shapes and sizes, but the basic feather groups shown below are present on nearly all flying birds. The obvious differences are the shape, size, and color of the feathers within those groups specific to any particular species.
Safety
Heeding a few safety precautions will ensure you can carve effectively for years to come. When hand carving, always wear a carving glove on your non-carving hand and a thumb guard on your carving hand to avoid injury. Position a nonslip pad under the wood blank to keep it in place and protect your body while carving. Make sure your knife is sharp by periodically honing the blade with compound and a simple leather strop. Having a sharp knife allows you to cut with less force and gives you more control, reducing the risk of injury.
Always use a dust collection system, avoid loose-fitting clothes, tie back long hair, and wear personal protective equipment (such as a dust mask and safety glasses) while power carving.
Protect Your Pipes
Dust inhalation is the biggest risk power carvers face. Cutting, grinding, and sanding all generate dust. The small particles of wood that remain in the air can cause respiratory problems when inhaled. While the more serious risks are normally associated with exotic hardwoods, you should always take dust control seriously. It is imperative to use a good dust collection system. These systems operate like a vacuum, pulling air and dust particles into the system and trapping the particles in a filter. Dust collection systems come in all sizes and price ranges. Some are portable and can be moved easily, whereas others are larger and fit into a complete workstation. Some larger dust control machines can be installed in the ceiling and operated remotely.
Construct a shopmade dust collector by encasing a standard box fan in a wooden frame with furnace filters. Sandwich the fan between the filters, using a lower-efficiency filter on the intake side and a high-efficiency HEPA filter on the exhaust side.
No dust control system will trap all of the dust particles generated while carving, so power carvers should wear a dust mask in addition to using a dust collection system. When selecting a dust mask, bypass a paper or cotton fiber mask in favor of a more effective model that has a cloth or rigid body and replaceable filters. Make sure your mask is comfortable and fits your face well; the better a mask fits and feels, the more effective it will be, and the more likely you will be to wear it.
Minimize Fire Hazards
Fire hazards occur where dust is not collected and correctly disposed of. Uncontrolled and uncollected, airborne dust particles settle and build up on any exposed area or item. In a studio workshop, where all aspects of carving are dealt with, many situations can generate a spark. Anywhere dust has settled, a fire path exists from the spark or flame source to anything combustible within the shop, and finally to the building itself. The answer to this type of hazard is to treat dust immediately as it is generated, direct it to a location for disposal, and not allow it to settle anywhere but where you want it. Even then, inspect and clean your shop regularly to remove casual dust, and dust from partially uncollected or uncollectible sources, like a table saw.
Hand Carving Basics
For the handcarved projects in this book, a few basic cuts are often used: the stop cut, the push cut, the paring cut, and the V-shaped cut. Master these four basic types of cuts and you’ll be ready to tackle a multitude of projects.
Stop Cut
As the name suggests, the stop cut is used to create a hard line at the end of another cut. Your hand position depends on the placement of the cut you need to make. Regardless of your hand position, simply cut straight into the wood to create a stop cut. Make a stop cut first to prevent a consecutive cut from extending beyond the intended area. Make a stop cut second to free a chip of wood remaining from a primary cut.
Push Cut
For the push cut, hold the wood in one hand. Hold the knife in your other hand with the thumb on the back of the blade. Push the knife through the wood, away from your body. This type of cut is also called the straightaway cut. For additional control or power, place the thumb of the wood-holding hand on top of the thumb on the blade, and use the wood-holding thumb as a pivot as you rotate the wrist of your knife-holding hand. This maneuver is often called the thumb-pushing cut or lever cut.
Paring Cut
The paring cut gives you a great deal of control but requires you to cut toward your thumb. Wear a thumb protector or be aware of the knife position at all times, especially if it slips beyond the anticipated stopping point. To perform the paring cut, which is also called a draw cut, hold the wood in one hand. Hold the knife in the other hand with four fingers. The cutting edge points toward your thumb. Rest the thumb of your knife-holding hand on the wood behind the area you want to carve. Extend the thumb as much as possible. Close your hand, pulling the knife toward your thumb, to slice through the wood. This is the same action used to peel (or pare) potatoes.
V-Shaped Cut
To make a V-shaped cut, hold a knife the same way you do when making a paring cut. Anchor the thumb of the knife hand against the wood and cut in at an angle with the tip of the knife. Rotate the wood, anchor your thumb on the other side of the cut, and cut in at an angle, running beside the first cut. Angle the two cuts so the bottom or deepest part of each cut meets in the center. This creates a V-shaped groove. Use the center of the cutting edge to make intersecting angled cuts on the corner of a blank, creating V-shaped notches.
Power Carving Basics
Carving with power involves the use of motorized equipment that rotates a shaft with a cutting bit mounted on the end. Because the rotating bit grinds away wood in a highly controlled manner, power carving allows you to create delicate designs and intricate details that would be extremely difficult to carve with traditional hand tools.
About 90% of bird carvers use power for some or all of their carving. In addition to providing more control, power carving tools generally remove wood faster than traditional edged tools. They also let you create thin carvings and achieve highly detailed pieces. It is possible to accomplish similar effects using edged tools, such as knives, gouges, and V-tools, but it is much more difficult. For example, it’s easier to create a delicate hummingbird bill without breaking it when using power; however, one small slip with a knife or gouge and the bird’s bill is destroyed. Power carving does not preclude the use of edged tools but enhances your ability to achieve the desired effects in your carving. Carving with power also opens up a world of opportunities for carvers with arthritis and some other physical limitations.
Choosing the Right Bit
Just as there are a variety of power tools available, there are many bits offered in different shapes, sizes, and materials—from diamond to ceramic. The bits are often referred to as burrs, cutters, carvers, stones, and discs. While the descriptions may seem baffling, all bits perform the same important operation: wood removal. Once you have the nomenclature mastered and acquire an understanding of bit composition, including the fact that “grit” is used here as it is when referring to sandpaper grade, the rest should be easy to follow. The finer the grit, the smoother the final surface. For this reason, most texturing stones are ideal for smooth finishing, but finish is not dependent on bit grit alone. The other critical factor is the rotary tool’s speed, measured in revolutions per minute (rpm). Follow this general rule: the coarser the grit, the slower the rpm; the finer the grit, the faster the rpm.
Bit Shapes
BALL:
• Use to create concave cuts and to hollow out areas
• Creates a cut similar to a U-gouge
CYLINDER:
• Use to cut flat areas, round edges, and make stop cuts and V-cuts
• Creates a cut similar to a knife or straight chisel
• Hold the tool at an angle and use the top corner to make V-cuts
• Smooth-end or safe-end bits are the most useful
FLAME:
• Use to make concave cuts and V-cuts, and to recess areas
• Creates a cut similar to a U-gouge when using its side and a V-tool when using the tip
PEAR:
• Use to round edges and create lumps and bumps
BULL NOSE/BALL NOSE:
• Combines a ball with a cylinder
• Use to make concave cuts and hollow out areas using the top
• Use the side to cut flat areas and round edges
• Creates a cut similar to a U-gouge with the top and a knife cut with the side
LARGE TAPER:
• Use to round edges, make concave cuts, and access hard-to-reach areas
SMALL TAPER:
• Use to access hard-to-reach and angled areas
• Create feather barbules
OVAL:
• Use to round edges, create lumps and bumps, and make concave cuts
INVERTED CONE:
• Use to make V-cuts for feather barbules
DISC:
• Use to undercut feathers and make channel cuts
• Cut off thin pieces of unwanted wood
Practice Technique
Now that you’ve learned about power carving bits, it is important to know how to use them. This section serves as a brief introduction to power carving techniques you might encounter over the course of a project. We’ve included general information, practical advice, tips, and illustrations to allow you to dive right in or improve your skills.
1Lightly rough out and shape. Use a micro motor, medium-grit cylinder-shaped carbide cutter. Hold the tool with an overhand grip. Smaller, coarse cutters are available for smaller areas.
2Continue light roughing.


