FEATURES
58
Create a realistic duck
decoy with full-color
step-by-step instructions.
FALL 2010
n
ISSUE 52
in this
issue
➚
Interactive 3-D Model
Handcarving a Realistic Squirrel pg. 66
Grab a hold of the carving with your cursor
and view it from any angle you please!
➚
Bonus How-to Photos
Shelf Sitter Elf, pg. 87
Our studio photographer captured tons of
great photos we just didn't have room to print!
➚
Convenient Online Reference
Sawing Carving Blanks, pg. 82
Share this great technique with online friends.
Additional online features: • community forum • carver galleries
• article index • free patterns • tips • product reviews • subscriber services
www.
woodcarvingillustrated
.com
Check out
WCI
on Facebook,
bit.ly/12YRLr
Follow us on Twitter,
twitter.com/woodcarving
16
The Whittling Whimsy
of Walt Garrison
By Kathleen Ryan
Retired pro-football
player loves to carve
19
Gifts for Carvers
Find the perfect gift or
use
the guide to drop
a
not-so-subtle hint
26
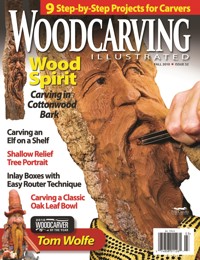
Tom Wolfe:
Woodcarver of the Year
By Bob Duncan
Record-holding author honored
for his impact on woodcarving
LOG ON TODAY!
www.woodcarvingillustrated.com
3
30
Carving a Pierced Relief Tree
By MaAnna Stephenson
Texturing and back
cutting add dimension
to this shallow relief project
40
Making a Carved
Jack-O’-Lantern
By Sandy Smith
Light up this fun Halloween project
with battery-operated tea lights
44
Carving an Oak Leaf Bowl
By Chris Pye
Relief carved leaves create
an elegant border
49
Carving a Private Investigator
By Dennis Thornton
Laminate on additional wood
to accommodate the details
52
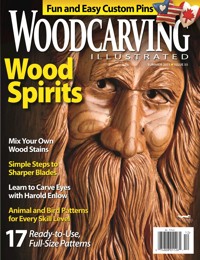
Carving a Woodspirit
in Cottonwood Bark
By Edward Otto
Bring this mythical being to life with
well-proportioned facial features
58
Power Carve a Canvasback Duck
By Chuck Solomon and Dave Hamilton
Learn the basics of texturing
feathers with this half-size decoy
66
Handcarving a Realistic Squirrel
By Leah Goddard
Woodburned details and dry
brushing bring this cute critter to life
74
Relief Carve an Autumn Scene
By Bob Biermann
Use acrylic paints to add color
to this charming design
PROJECTS
78
Making Maple Leaf Pins
By John Hoesman
Quick and easy project
is perfect for beginners
84
Miniature Scarecrow Ornament
By Gerald Smith
Quick and easy carving adds a
whimsical touch to fall décor
87
Shelf Sitter Elf
By Floyd Rhadigan
Fantasy caricature hangs
out on any ledge
36
Embellishing with
Basswood Inlays
By David Stewart
Use a router to insert a soft inlay
into hardwood for easier carving
82
Sawing Carving Blanks
By Jim Willis
Speed up the roughing-out
process by cutting three views
with your band saw
TECHNIQUES
4
Editor’s Letter
6
From Our Mailbag
8
News and Notes
10
Tips and Techniques
12
Reader Gallery
96
Calendar of Events
102
Coming Features
103
Ad Directory &
Classifieds
104
Woodchips
DEPARTMENTS
Woodcarving Illustrated
|
FALL 2010
4
Identification Statement: Woodcarving Illustrated vol. 14, no. 3
(Fall 2010) (ISSN#1096-2816) is published four times a year in the months of
February, May, August, and November by Fox Chapel Publishing Co. Inc.,
1970 Broad Street, East Petersburg, PA 17520.
Periodical Postage paid at
East Petersburg, PA, and additional mailing offices.
POSTMASTER: Send address changes to Woodcarving Illustrated,
1970 Broad Street, East Petersburg, PA 17520.
Woodcarving and the use of associated equipment can potentially result in health hazards and
injuries.
While we cannot impose safety standards in every article, we do ask that you make safety
your number one priority.
Protect your respiratory system, hearing, vision, and the rest of your body
with the proper safety equipment and prudent precautions.
Read manuals supplied with your tools.
Be aware most accidents occur when you are tired or distracted.
And when in doubt, seek advice from
professionals, on how to keep your tools sharp and maintained.
Volume 14, Number 3 (Issue No. 52)
How-To Magazine for Carvers™
Internet: www.WoodcarvingIllustrated.com
Woodcarving Illustrated Magazine
1970 Broad Street, East Petersburg, PA 17520
Phone: 717-560-4703
Fax: 717-560-4702
Our Mission:
To promote woodcarving as an
artform and an enjoyable pastime.
Publisher
Alan Giagnocavo
Editorial Director
John Kelsey
Editorial Manager
Shannon Flowers
Technical Editor
Bob Duncan
Creative Director
Troy Thorne
Art Director
Jon Deck
Founding Editor
Roger Schroeder
Contributing Editors
Barry McKenzie
Lora S. Irish
Mike Burton
Studio Photographer
Scott Kriner
Technical Illustrators
Irene Bertils
Carolyn Mosher
Ad Sales
Paul McGahren
Domestic Newsstand Distribution
Curtis Circulation Company
©2010 by Fox Chapel Publishing Co. Inc.
All Rights Reserved. Printed in USA
Subscription rates in US dollars:
One year
$19.95
Two years
$39.90
Canada
One year
$22.50
Two years
$45.00
International
One year
$27.95
Two years
$55.90
Customer Service for Subscribers
Please call toll-free 888-506-6630,
or visit our Website:
www.WoodcarvingIlllustrated.com
Display Advertising/Classifieds
Please call or e-mail Cindy Fahs, (ext. 26)
for rates and/or
a media kit.
Wholesale/Distribution
Woodcarving Illustrated is available to retailers for
resale on advantageous terms.
Contact Paul McGahren (ext. 42) for details.
Fall 2010
Note to Professional Copy Services — The publisher grants you
permission to make up to ten copies for any purchaser of this
magazine who states the copies are for personal use.
Customer Service for Subscribers
Visit www.WoodcarvingIllustrated.com, call 888-506-6630,
or write: Woodcarving Illustrated, 1970 Broad Street,
East Petersburg, PA 17520
Printed in USA
editor’s
letter
Carving in Cottonwood Bark
I met Edward Otto at the Conewago Carver’s show
(
conewagocarvers.tripod.com
) last October. I immediately
asked Ed to write an article for the magazine (see page 52)
and signed up for his class. I warned him I had very little
experience, but he assured me I would do fine.
The first thing we did during the class was choose
our piece of bark. Ed had quite a selection and after
choosing our future woodspirit, we students were tasked
with mounting the bark to a piece of plywood. Everyone
else’s bark was mounted vertically and ready to carve. Mine was
a bit askew. But then I've always been a little quirky so it suited
me just fine. Ed showed us how to remove the bark so we could
start positioning the face. Armed with very few tools of my own, I
borrowed what Ed referred to as his ice cream scoop and took off
the first few layers, revealing a beautiful red canvas.
I followed along as Ed guided us in setting in the nose and
eye sockets. It wasn't long until my hand was raw from the rough
bark—I highly recommend wearing a carving glove on both hands
when working with cottonwood bark! But the blood was easily
carved off of the workpiece, once again revealing a beautiful clean
canvas for my woodspirit face.
I found the wings of the nose to be the most difficult part of the
carving. I just couldn’t get that angle right and Ed had to clean up
my mistake and help me try again. The nose ended up a bit more
petite than I would have liked, but I'm really proud of my work.
During the class, I borrowed several of Ed’s tools and afterward
I purchased the two gouges I borrowed most often. With a slightly
larger, but still very modest, tool collection, I was determined to try
again. I vowed to produce a woodspirit
with a more masculine nose this
time. I wish I would have taken more
studious notes during the class. I still
haven’t ventured out to try another
woodspirit on my own. But now, I have
Ed’s full instructions at my fingertips
and I’m feeling pretty confident I can
create a friend for my first woodspirit.
Give the project a try—remember
to wear two gloves! I’d love to see
your results. Send me a picture or
post your results on our website,
www.woodcarvingillustrated.com
,
in the carver galleries.
Shannon Flowers
Editor Shannon Flowers
created this woodspirit
during a class with Ed Otto
.
Woodcarving Illustrated
|
FALL 2010
6
from our
mailbag
FOX HUNT
Russell Ford of Elmore, Ala., and Craig
Johnson of Brandon, S.D., are the winners
drawn from the correct entries received for
WCI
Summer 2010 (Issue 51). The fox was on
Page 94, in the Coming Features photo of the
autumn relief carved plate.
Find the fox in this issue, and contact
us with the page number and location.
Two readers randomly selected from all
correct replies will receive a $25 Fox Chapel
Publishing gift certificate. Entries must be
received by October 10, 2010, to be eligible.
NOTE: With his feet on the “ground,” the contest
fox faces left (other foxes in
WCI
don’t count).
Send your entry to
Woodcarving Illustrated
,
Attn: Find the Fox, 1970 Broad St.,
East Petersburg, PA 17520, or enter
online under the contests link at
www.woodcarvingillustrated.com
.
Carving Blanks
Help Beginners
A big thumbs up on
Woodcarving Illustrated
Summer 2010 (Issue
51). I have only had a couple weeks of training in woodcarving, but
I enjoy reading your magazine.
You have had beginner projects in the past, but I have trouble
obtaining the right size basswood, and I don’t own a band saw to
cut out the blank. Thus, my attempts end in failure.
Thank you for the article by Christine Coffman on
Carving
a Caricature Pig
. Christine offered a carving blank and a very
detailed video.
I haven’t gotten it quite right yet, but thanks to her and your
magazine, I am able to start this project and hopefully have
something that resembles a pig when I finish. Perhaps you can
convince other authors who present articles for beginners to
offer carving blanks. A big thanks to Christine Coffman and to
Woodcarving Illustrated
.
Dorothy Ellison
Gadsden, Ala.
Band-sawn blanks for the caricature pig are
available at
www.Christmas-carvings.com
.
Dave Francis shares these two
Santa projects in the upcoming
special holiday issue (available
mid-September).
More Santas please
I am writing to voice my complaint with
Woodcarving Illustrated
Holiday 2009 (Issue
37). I am probably not disgusted enough at
this point to cancel my subscription. However,
I am completely disappointed. Couldn’t you
find more Santas to put in this holiday edition?
Yet, you found room to put baby rattles, a
lighthouse, spoons, farm animals, and birds.
I am very dissatisfied with the holiday issue.
Nick Vaccarelli
Via e-mail
Editor’s Note: We never like to hear we have
disappointed our readers. Choosing the number
of Santas to include in the holiday issue is a
challenge. For every letter we receive saying
there are not enough Santas, we receive another
letter saying there are too many.
Woodcarving Illustrated
is releasing a
special holiday issue in September 2010.
This
special issue is in addition to our regular
holiday issue and will be chock full of Santas,
ornaments, and carved gift ideas. Readers can
receive the special issue free with a paid two-
year subscription or purchase it separately.
news and
notes
Woodcraft
Announces
Contest
Winners
Glendale, Calif., artist Nairi Safaryan took top honors
in the Woodcraft & Pfeil Carving Artistry Contest for
his ornate carved wooden jewelry box.
Woodcarving
Illustrated
author Roger Strautman from Woodburn,
Ind., earned a set of Pfeil carving tools for his piece
called
The Shroud
, a chip-carved cross with carved
wooden linen.
“We were overwhelmed by the quantity and quality
of the submissions we received for this contest,” said
Jeff Forbes, president of Woodcraft Supply. “This effort
truly confirms that world-class woodworking is being
conducted in home workshops all across America.”
Nairi’s piece was carved from a solid block of pear
wood, which like most fruit woods, is hard and dense.
Nairi Safaryan won first place in the Woodcraft & Pfeil Carving
Artistry Contest for his intricately carved jewelry box.
Roger Strautman received a second place prize
consisting of a Pfeil carving set for
The Shroud
.
Nairi crafted the block into a grapevine box inspired by
Armenian carvings. The grapevines and leaves curve
to the contours of the box and large grape canes form
the feet of the box. Grape stems encircle the sides and
sprout tendrils among the grapes and branches. The
piece, which measures 8" by 8" by 12" was finished with
only beeswax. Nairi received a 4-day/3-night trip for
two to Brienz, Switzerland, and private woodcarving
training with master carver Paul Fuchs at the Kantonale
Schnitzlerschule Brienz woodcarving school.
Roger’s cross was carved from basswood with a
walnut frame. The cross measures 2" deep by 3' 2"
wide by 5' 4" tall. The project was carved in five pieces
and attached to a backer made from pine. The frame
was designed to hide the joints. The shroud, which
measures 3" deep by 2' 6" wide by 2' 9" tall, was carved
from butternut. Roger bleached the carved shroud
and attached it to the cross with bloodwood nails. The
Apostle’s Creed was chip carved onto the shroud. Roger
will receive a Pfeil Swiss Made Brienz Collection boxed
carving set, valued at nearly $900.
More than 370 woodworkers submitted entries to
this year’s Woodcraft & Pfeil Carving Artistry Contest.
Submissions were reviewed and judged by woodworking
experts at
Woodcarving Illustrated
. Submissions are
available for review at
www.woodcraft.com/swiss
.
In addition to the two top prize winners, several
dozen entrants won Pfeil carving sets and Woodcraft
gift cards. The contest ran from November 2009
through February 2010.
www.woodcarvingillustrated.com
9
Woodcarving Illustrated
|
FALL 2010
10
TOP TIP
in our Holiday Issue wins a bent
knife from Preferred Edge Carving Knives
& Supplies,
www.PreferredEdge.ca
.
Our
condolences go out to Mike Komick’s family.
Mike, owner and manufacturer of Preferred
Edge Knives, recently passed away.
Send your tip to
Woodcarving Illustrated
,
1970 Broad Street, East Petersburg, Pa., 17520,
or e-mail
.
Transparent Patterns
From Leslie Blazevich,
Missoula, Mont.
I use an ordinary paper pattern
to cut out the carving blank, but
use a transparent copy to transfer
the details. Make a copy of the
pattern onto transparency film.
The transparent copy can be used
from either side so it doubles as a
reverse copy of the pattern. Use the
transparent pattern to help position
symmetrical features, such as eyes
and ears. The transparent pattern
is also a great way to check your
progress as you carve.
Auxiliary Table
From H. Harlan Baker, Mt. Morris, Ill.
When cutting small pieces on a
band saw, you often risk dropping
or damaging the small pieces
because of the gap in the table
around the blade. To prevent
this, I add a simple auxiliary
table made from a piece of thin
plywood. Cut the plywood the
same size as your band saw table
and then cut in to the center of
the plywood with the band saw.
Back the blade slightly out of the
cut and clamp the plywood to
the table.
From Roy Smith, Clovis, Calif.
It’s easy to make a rack for carving tools out of
1"-diameter PVC pipe. First, choose the length to make the
rack. Take into account the size of your workspace and avoid
making the length longer than 24" because the pipe can sag.
Drill " to "-diameter holes every 2". Add a 90° elbow to
both ends. Cut two short lengths of pipe for the legs. Cut
two T-sections in half the long way and insert the legs into
these bases. You can control the size of the tools the rack
will accommodate by the length of the legs. If you need a
more stable rack for heavier tools, leave the T-sections uncut
and attach short lengths of pipe to the T-sections for a wider
base. In addition to being inexpensive and easy to construct,
the rack is portable and allows you to see the tips of the tool
to ensure you grab the correct one each time.
TOP
TIP
✔
Transfer details and check your
progress with a transparent
copy of the pattern.
Inexpensive
Tool Rack
A shopmade tool holder protects tools,
but keeps them within easy reach.
tips and
techniques
reader
gallery
Realistic Relief
Walter Goltermann
, age 92, of Bodega Bay, Calif.,
created this relief carving based on a friend’s sailboat.
Walter started out with 2"-thick basswood and carved
the background down to " thick at the horizon line.
The water is carved from cedar and the boat is carved
from pine and inserted into the water. Walter cut
individual piling pieces and glued them to the outside
of the carving to act as a frame.
▲
Jamaican Dancer
Edwin McClure
of Franklin, Ind., created
this full-figure male Jamaican dancer based on
an Ian Norbury carving. Edwin has carved a
variety of human figures and sea life, and has
even created scenes of men and women riding
sea creatures.
▲
Golden Trout
Owen A. Lowe
of Belington,
W.Va., created this golden trout
carving. Owen took a pattern he
found and adapted it to include
open gill slits to show the gills
he carved from wood. The trout
has a 14" girth and is 22" long.
Owen took the measurements
for his carving from a large
brood trout caught in his area.
▲
Woodcarving Illustrated
|
FALL 2010
16
To football fans, the name
Walter Benton Garrison