Erhalten Sie Zugang zu diesem und mehr als 300000 Büchern ab EUR 5,99 monatlich.
- Herausgeber: Fox Chapel Publishing
- Kategorie: Lebensstil
- Sprache: Englisch
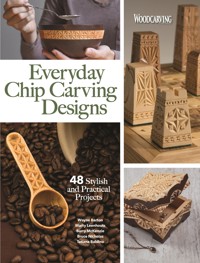
A must-have project guide for chip carvers of any skill level, Everyday Chip Carving Designs features a compilation of 48 original projects from the archives of Woodcarving Illustrated. Useful as they are decorative, carve a collection of achievable chip carved designs for your home and everyday life! From bowls, boxes, and beard combs to Christmas decorations, coasters, coffee scoops, and so much more, each original project includes detailed step-by-step instructions, coordinating photography, full-size chip carving patterns, complete supplies and tools lists, and expert tips. Written by several contributors to Woodcarving Illustrated, industry-leading artists, and bestselling authors, including Wayne Barton, Marty Leenhouts, Charlene Lynum, Vernon DePauw, and many others.
Sie lesen das E-Book in den Legimi-Apps auf:
Seitenzahl: 104
Veröffentlichungsjahr: 2021
Das E-Book (TTS) können Sie hören im Abo „Legimi Premium” in Legimi-Apps auf:
Ähnliche


Shutterstock photography noted here: page 35 (couple on the beach)/Machekhin Evgenii.
© 2021 by Fox Chapel Publishing Company, Inc., 903 Square Street, Mount Joy, PA 17552.
Everyday Chip Carving Designs is an original work, first published in 2021 by Fox Chapel Publishing Company, Inc. The patterns contained herein are copyrighted by the authors. Readers may make copies of these patterns for personal use. The patterns themselves, however, are not to be duplicated for resale or distribution under any circumstances. Any such copying is a violation of copyright law.
Print ISBN 978-1-4971-0171-5
eISBN 978-1-6374-1053-0
Library of Congress Control Number: 2021936074.
To learn more about the other great books from Fox Chapel Publishing, or to find a retailer near you, call toll-free 800-457-9112 or visit us at foxchapelpublishing.com.
We are always looking for talented authors. To submit an idea, please send a brief inquiry to [email protected].
For a printable PDF of the patterns used in this book, please contact Fox Chapel Publishing at [email protected], with 9781497101715 Everyday Chip Carving Designs in the subject line.
Contents
Getting Started
Materials & Tools
Pattern Transfer
Five Basic Chip Cuts
Applying Finishes
Setting Up Your Workspace
Making a Carver’s Lapboard
Practice Project: Simple Coaster
Projects for Hosting
Pineapple Welcome Sign
Cozy Candle Plate
Modern Chess Set
Art Deco Light Switch Cover
Family Photo Frame
Rosette Cribbage Board
Projects for Dining
Coffee Scoop
Summery Supernova Coasters
Simple Cereal Bowl
Afternoon Tea Caddy
Projects for Dressing
Stylish Combs
Aloe Leaf Earrings
Keepsake Box
Milk Paint Jewelry Box
Trio of Barrettes
Projects for Celebrating
Perpetual Calendar
Bethlehem Star
Holiday Snowflakes
“Stained Glass” Baubles
Nostalgic Sleds
Classic Flower Ornament
About the Contributors
Introduction
Chip carving as an art form has been around for thousands of years. The classic “chip carved” look—featuring precise groupings of geometric shapes set into a smooth surface—appears on grand cathedrals throughout Europe from the 12th century on. But the style has also adorned humbler, homier objects, from folk art toys to boxes and drinking vessels. These items were not simply decorative; they had an everyday function around the house. And they could be carved by newcomers to the craft, using just one or two simple tools.
In this spirit, we’ve gathered some of the best chip carving projects from our archive, including cereal bowls, barrettes, coffee spoons, holiday ornaments, and even a cribbage board. Each one is both elegant and practical—and many, such as Roman Chernikov’s “Summery Supernova Coasters” (here), can be completed in an afternoon. If this is your first time picking up a knife, don’t worry—we’ve included tips and techniques from today’s leading chip carvers, such as Wayne Barton, Marty Leenhouts, and Charlene Lynum, to guide you through your first cuts.
Happy carving from the Woodcarving Illustrated team!
Hannah Carroll
Jon Deck
Kaylee Schofield
Kelly Umenhofer
Materials & Tools
One of the wonderful things about chip carving is that you need a limited amount of materials and tools to begin—you may already have a few of the necessary items lying around your shop! The remainder can be found online or through craft or carving supply stores.
Knives
The two main knife varieties used for chip carving are the cutting knife and the stab knife.
The cutting knife is the primary knife used in chip carving. The carver typically holds the knife at a 65° angle for most actions. When kept very sharp, it can be used to cut two-corner, three-corner, four-corner, free-form, and even layered chips cleanly on a variety of flat or rounded surfaces.
The stab knife is used to incise decorative elements into the wood, embellishing an existing design. The carver typically holds the handle perpendicular to the surface of the blank, rocking the blade quickly along its sharp edge. Unlike the cutting knife, this tool is typically not used to remove chips of wood.
Wood
The two main types of wood used for chip carving are basswood (known as linden or limewood in countries outside the United States) and butternut.
Basswood is light-colored and soft with a consistent, tight grain. Beginning carvers often start with basswood, as it is well suited to a range of carving styles, including chip carving, caricature carving, and relief carving.
Butternut, part of the walnut family, is a medium-brown color and is slightly harder than basswood. However, its tight structure and striking grain make it an elegant choice for certain projects, particularly those where deeper cuts are required.
Additional Items
If you’re building a chip carving kit for the first time, these items will also come in handy.
Bow compass – used to apply symmetrical designs to a piece of wood.
Graphite transfer paper – used to transfer a photocopied or sketched design onto the wood.
Mechanical pencil – used to sketch pattern elements and center points onto the wood, either directly or in combination with graphite transfer paper.
Sandpaper – occasionally used to remove lingering pattern lines or smooth certain areas on a carving. Note: The beauty of chip carving lies in its crisp lines and stark geometry. It is not recommended to sand the entire surface of a project after carving.
Sharpening tools – used to maintain chip carving knives so they cut cleanly without tearing the wood. A leather strop and honing compound or a set of ceramic sharpening stones works nicely.
T square or ruler – used for drawing straight lines on the surface of the blank.
White eraser – used to remove lingering pattern lines without smudging.
Pattern Transfer
Chip carving is a precise art, so finding a method of accurate pattern transfer that works for you is key. There are many ways to transfer a pattern to the wood blank before carving, but two of the most common are the following:
Graphite Paper
1. Place the pattern right side up on the center of the project. Secure one edge with tape, lift the pattern, and slide a piece of graphite paper between the pattern and the wood, dark side down.
2. Replace the pattern on top of the graphite paper and sketch along the pattern lines with a colored pencil. This way, you can see which lines you’ve already drawn.
1 Tape down one end of the pattern and slide the graphite paper under it, facedown.
2 Follow the pattern lines with a colored pencil or pen.
Heat Transfer
1. Use a laser printer or copier to make a mirror-image printout of the pattern. Place it face down in the center of the project and secure one side with tape so it doesn’t slide around.
2. Go over the surface of the paper with a heat transfer tool, never staying in one spot for too long. Check your work as you go to ensure the pattern transfer is successful.
1 Tape the pattern facedown on the wood.
2 Slide the transfer tool over the surface until the pattern transfers.
Five Basic Chip Cuts
Most chip carving projects will include these five basic cuts. Practice each on scrap wood until you can produce them consistently.
1The traditional angular deep chip. This chip can be any size, as long as the cuts all converge at the deepest point in the middle of the chip. Hold the knife at the same angle to make all of the cuts. After you free the chip, go back and lightly carve into the corner to remove any splintered wood and clean up the chip.
2The shallow chip. Draw the chip the same as the angular deep chip, but cut it differently. Make vertical cuts on both sides of the triangle. The deepest cuts are at the triangle’s point and decrease in depth as you approach the triangle’s base. Hold the knife nearly horizontal and cut from one side of the base to the other, sliding the tip of the knife up to the deepest part of the chip at the tip of the triangle.
3The old-world-style chip. Traditionally made using chisels, gouges, and skew knives, this chip can be made with a chip carving knife. It requires two angular cuts and two vertical cuts. Hold the knife at an angle and cut along the two sides of the large triangle towards the point of the small triangle. Make two vertical cuts along the sides of the small triangle to release the chip. Do not remove the wood for the small triangle.
4The flare or free-form angular line cut. Establish the bottom of the chip with the first cut, and free the chip with the second cut. The angle at which you hold the blade changes depending on the depth and width of the line. As the chip gets deeper, the angle increases until the knife is nearly vertical. For the shallow areas, the angle decreases until the knife is nearly horizontal.
5The straight line cut. Establish the bottom of the chip with the first cut and release the chip with the second cut. Depending on the width of the line, you may need to make short cuts on either end of the line to free the chip. The blade is held at an identical angle while making all of the cuts. The depth of the cut is the same from end to end.
Applying Finishes
This step is crucial to the presentation of your art; a poorly executed finish can detract from the beauty of the carving, rather than enhance it. Here are a few common finishing methods to try:
Clear Finish
Simple and understated, this method puts the shadows in your carved piece on full display. Just apply two to four coats of brush-on or spray-on polyurethane to the surface of the carved piece, letting dry and sanding very lightly between coats. You could also use a clear lacquer. This method is preferred by regular Woodcarving Illustrated contributors Charlene Lynum and Marty Leenhouts.
Clear finish.
Gel Stain
Bold and dramatic, this method adds contrast to your carved piece by making use of differences in grain absorption. The cut areas will absorb finish at a higher rate than the uncarved areas, making for shadowy chips set into a lighter surface. First, seal the carving with clear polyurethane, allowing time for the wood to absorb the sealer. Then wipe off the excess with a rag. Once dry, apply your preferred gel stain over the surface with a paintbrush. Wipe off the stain right away, making sure to remove any globs from the crannies. When dry, spray with more clear polyurethane. This method is preferred by master carver Wayne Barton.
Gel stain.
Alternate Method: Finishing Before You Start
This method produces a dramatic effect distinct from the gel stain technique. Before carving, seal the blank with polyurethane and let dry. Then apply gel stain to the entire surface and let dry completely. Apply the pattern using your preferred method, and then carve through the stain in the specified areas. Once all of the chips are carved, finish with a clear coat of your choice.
Setting Up Your Workspace
Take the time to properly prepare your workspace so that your chip carving experience is safe and enjoyable. Work in a well-ventilated space and surround your carving setup with good, even lighting. Daylight-rated bulbs are a great option. Place an old sheet of plywood under your workpiece or use a Carver’s Lapboard (here) to catch the chips.
Practice Boards
One of the main challenges for beginners is knowing how deeply to undercut a facet or how much pressure to apply with a knife. Practice boards are great tools for building muscle memory around these techniques. Use a premade board or create your own. Transfer the pattern using your preferred method (here). Be sure to leave enough blank space to experiment and practice the five basic cuts (here).
Safety
Although chip carvers produce more chips than dust, preparing blanks makes enough dust to be a potential concern. When using power tools such as drum sanders and band saws, employ a benchtop dust collector to protect your lungs and help keep your work area clean. Wear a dust mask and safety googles, tie up long hair, and secure loose clothing. Before you sit down to carve, invest in a carving glove and thumb guard, and stretch your wrists and fingers periodically to ensure that you can chip carve without difficulty for years to come.
Use carving gloves and a thumb guard to protect your hands from errant cuts.
Practice boards are great tools to learn basic chip carving skills needed for more challenging projects.
Construct a shop-made dust collector by encasing a standard box fan in a wooden frame with furnace filters. Sandwich the fan between the filters, using a lower-efficiency filter on the intake side and a high-efficiency HEPA filter on the exhaust side.
Making a Carver’s Lapboard
By Gary MacKay
W


