
Erhalten Sie Zugang zu diesem und mehr als 300000 Büchern ab EUR 5,99 monatlich.
- Herausgeber: IMM Lifestyle Books
- Kategorie: Lebensstil
- Sprache: Englisch
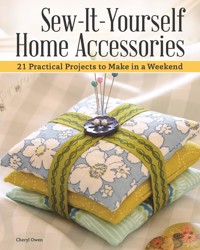
This beautiful and easy-to-follow guide teaches all the skills you need to make individual furnishings for your own home. Each technique is explained with clear step-by-step instructions and beautiful photographs, and then applied to a range of contemporary projects including cushions, chair and headboard covers, bed linens, tablecloths, curtains, and more. Use this book to create stylish and useful items for each room in the house, using your own choice of fabrics and colors. Projects and inspiration are provided for every level of skill. Beginners can start with simple skills such as pinning, cutting and making seams. Later techniques introduce more complex methods like hems, curved seams, casings, borders, linings, and decorative touches such as edging, frills, ruching, and tassels.
Sie lesen das E-Book in den Legimi-Apps auf:
Seitenzahl: 138
Veröffentlichungsjahr: 2015
Das E-Book (TTS) können Sie hören im Abo „Legimi Premium” in Legimi-Apps auf:
Ähnliche


HOMESEWING
TECHNIQUES
HOMESEWING
TECHNIQUES
Essential sewing skills to makeinspirational soft furnishings
Cheryl Owen
CONTENTS
INTRODUCTION
GETTING STARTED
TECHNIQUES AND PROJECTS
Seams
Oxford pillowcase
Round tablecloth
Zigzag stitching
Zigzag flower mat
Gussets
Soft cuffed box
Shopping bag
Hems
Towels with borders
Striped rug
Slip-over stool cover
Bias bindings
Cafetière cosy
Piping
Headboard cover
Bolster cushion
Envelope opening
Envelope duvet cover
Zips
Round piped cushion
Handles, ties and rouleaux
Portable doorstop
Buttonholes, loops and buttons
Button-fastened cushion
Casings
Toy sack
Borders
Mitered border runner
Scallops
Café curtains
Trimmings and fringing
Wavy line throw
Ribbon-trimmed sheet
Fringed coasters
Gathering and frills
Ruffle cushion
Pleats
Chair seat cover
Upholstered footstool
Pleated tablemat
Curtains and lining
Horizontal border eyelet curtain
Vertical border curtain
Curtain headings
Cupboard curtain
Filled shapes
Bird potpourri sachet
Tassels
Bound-edge napkin
Patterns and templates
Acknowledgements
Introduction
Soft furnishings can completely change the look of your home, making it fashionable, comfortable and a joy to live in. You don’t need to spend a lot of money or be an accomplished needleworker to attempt most home sewing projects. A few simple items such as a cushion or throw are quick and easy to make, and will give you the confidence to move on to more challenging projects. Making major features such as curtains can save you a serious amount of expense, as well as affording you the opportunity to custom make them to the exact size you need and in the fabric you want.
This book will guide reassuringly through all the techniques involved in home sewing, each explained in turn with one or more accompanying projects that demonstrate not only the featured method but some of the other key techniques. This means that you will soon become adept at applying the whole range of sewing skills to create fabulous fabric items with ease. Many of the projects would be lovely to make as gifts – a handcrafted present is always extra special and shows you really care. Most of the items use small amounts of fabric, which means you can delve into that stash of enticing fabrics you may already have just waiting for the right home décor idea. But otherwise, there is an amazing choice available to buy nowadays from stores and online. If you are already an enthusiastic needleworker, be bold and use these projects as inspiration to design your own innovative soft furnishing creations.
GETTING STARTED
It is important to check that you have all you need before you embark on your home sewing endeavours. There is nothing more frustrating to find that once you have started making something you are missing a vital piece of equipment or that you don’t have enough fabric for a project, especially if you then discover that your chosen colourway or pattern is no longer available.
When it comes to basic sewing skills, there is more to home sewing than just stitching. Cutting out the fabric is a major part of the process too, and will often give you a sense of how the finished item will look.
Equipment
Even if you are a novice needleworker, you will probably have some basic sewing equipment. Gather these items together and store in one place, using this equipment only on fabrics and trimmings so they don’t become dirty and blunt. Work on a clean, flat surface that is well lit – daylight-simulation light bulbs are kind to the eye and won’t distort the colour of fabrics and threads. Keep sharp implements out of the reach of young children or pets.
Pattern-making papers
Pattern paper is available from haberdashery (notions) stores; some large department stores will also sell sewing materials and tools. Tracing paper or greaseproof (wax) paper can also be used, and is especially useful when you need to see through the pattern, for example, when positioning motifs.
Pattern-making tools
Draw patterns with a fine pen or a propelling pencil. Draw straight lines against a ruler and describe small circles with a pair of compasses. Use a set square for accurate angles.
Pattern-making tools
Measuring tools
Use a plastic-coated or cloth tape measure to measure curves and to check fabric measurements. A transparent 30 cm (12 in) ruler is a handy size for making patterns and checking measurements. Draw against a metre (yard) stick for long lengths and to measure fabric quantities. A retractable steel measure can be used to measure windows and beds, and is also useful when measuring long lengths of fabric – curtains for example. A 15 cm (6 in) long sewing gauge has a slider that can be set at different measurements for marking hems and seams, and as a guide for quilting.
Rulers and tape measures
Scissors
Cut paper patterns with paper scissors. Bent-handled dressmaking shears are the most accurate and comfortable to use for cutting fabric – the angle of the lower blade allows the fabric to lie flat. Shears are available in different sizes, so test before buying – find a pair that feels comfortable to your hand. The best-quality shears are expensive, but if cared for they will last a lifetime. A small, sharp pair of embroidery scissors are indispensable for snipping fabric and threads. For protection, keep them in a cloth case when not in use.
Scissors
Fabric markers
Marks made with an air-erasable pen will gradually fade away and those made with a water-soluble pen can be removed with water. Traditional tailor’s chalk comes in different colours in wedge and pencil form; the marks will mostly brush off but a slight residue will remain. Always test fabric makers on fabric scraps first. A fine, sharp pencil can be used on fabric, but the marks will stay.
Fabric makers
TIP: A good iron and ironing board are essential pieces of sewing equipement. Use a sturdy ironing board. Since you will often be handling large and weighty pieces of fabric, the board must be able to take the strain. Buy the best-quality iron you can afford, ideally a steam/dry iron that has a variable and reliable heat setting.
NEEDLESSewing machine needles
These needles come in a range of sizes with different-shaped points, the lower the number the finer the point. Universal needles in size 70–90 (9–14) are the most commonly used. Stitch non-woven fabrics with a ball-point needle. Replace sewing machine needles regularly, as they soon become blunt and put strain on your sewing machine.
Sewing machine needles
Hand sewing needles
In this case, the higher the number the shorter and finer the needle. Sharps needles are long, general-purpose needles – use them for tacking, slipstitching and sewing on buttons. Crewel embroidery needles have a large eye, so are easy to thread with embroidery thread (floss). Mattress needles are very long and are ideal for sewing through cushions, for example, to attach buttons.
Pins
Dressmaking pins come in various thicknesses, but household pins are the most versatile. Lace and bridal pins are particularly fine and will not mark delicate fabrics. Coloured glass-headed pins show up well on a large expanse of fabric such as a curtain.
Bodkin
A bodkin is a needle-like tool with a large eye and a blunt tip. Fasten a bodkin to the end of a rouleau to turn it right side out (see page 77) or to a drawstring to draw it through a channel (see page 85). A safety pin can be used in place of a bodkin.
Needles and bodkin
Rouleau turner
Also called a tube tuner, a rouleau turner has a latch hook to hook onto the end of a rouleau to turn it right side out instead of a bodkin (see page 77). A safety pin can be used instead of a rouleau turner but it will be a slower process.
Rouleau turner
Bias-binding maker
Draw a bias-cut or straight strip of fabric through this clever metal gadget to turn under the fabric edges, then press in place to make a binding (see page 56). Bias-binding makers come in a range of widths.
Staple gun
Use a staple gun for simple upholstery jobs – it is fast and efficient for attaching fabric to wood (see pages 109 and 114–115). It is a powerful tool so make sure that you don’t leave a staple gun where children might play with it.
SEWING MACHINE
The sewing machine is your best friend when it comes to home sewing. There will always be a place for hand sewing, but stitching by machine saves time and gives a professional finish. There are many factors to consider when choosing a sewing machine because it is the biggest and most important investment for the sewing room. Always buy from a reputable dealer and test-run a few machines to make comparisons in order to see which you prefer. Also ask your friends and family for their recommendations. Check that the machine is simple to thread and that the speed is easy to control. A machine that does straight stitch, zigzag stitch and neat buttonholes will cover most people’s needs, but you may fancy experimenting with machine embroidery and there are many exciting models available that offer push-button or computerized controls.
Sewing machine
Machine embroidery thread
How it works
Although there is a huge range of sewing machines on offer, they are all fairly similar to operate. Read the sewing machine manual to familiarize yourself with the machine’s features and operations. Basically, the presser foot holds the fabric in place, while the needle, which is threaded with the upper thread, penetrates the fabric and goes into the bobbin area below to pick up the lower thread in order to form a stitch. This particular machine (below) has a lift-up lid that conceals the spool holder, which holds the reel of upper thread, the bobbin winder, foot pressure dial and the thread tension dial. This is a good design feature, as the lid stops these machine parts getting dusty if the machine is left out. The thread tension dial regulates the tension between the upper and lower thread to form flat, even stitches. The stitches will pucker if the tension is too tight, but if it is too loose, the stitches will also be loose and won’t hold the fabric layers together.
Stitch length dial
The numbers on the dial represent either the length of the stitch in millimetres or the number of stitches per inch.
Stitch width dial
Use this dial to set the width of a zigzag stitch. Set it at 0 for straight stitching.
Reverse stitch lever
Lift the reverse stitch lever to stitch backwards. Reverse stitch at the start and finish of a seam to stop the ends of the seam unravelling, or to reinforce a short seam.
Presser feet
Most machines will have a standard presser foot and a few specialist presser feet (see below for the most commonly used by home sewers). There will be a lever to lift the presser foot up and down. The feet can be changed by snapping them on and off or unscrewing and screwing them on.
• Standard foot Use for straight stitches and zigzag stitch (this foot will be the main one you will use).
• Zipper foot Use when you need to stitch beside a raised surface, such as stitching a zip in place – it can be fitted to the right or left of the needle.
• Piping foot Use to stitch in place piping or other raised trimmings such as a pompon trim (or you can use the zipper foot instead).
• Buttonhole foot Use for working buttonholes.
• Overlock foot Use for zigzag stitching.
• Blind hem foot Use for making invisible hems – it ensures that the needle catches only one or two threads.
Needle plate
This metal plate covers the area under the presser foot. The needle enters a slot in the centre of the plate to grab the bobbin thread concealed below. Some needle plates will have a series of lines you can use as seam width guides.
Power supply
For safety, keep the power supply turned off when setting up your machine. Check that the electrical voltage of the machine is the same as your power supply. Plug in the cord socket, then insert the plug into the power supply and switch on the power. Always switch off the machine when it is not in use and pull out the plug from the socket.
Sewing light
Always work in good light. The sewing light on the machine will keep the stitching area well lit and is especially useful when stitching dark colours.
Foot control
Make sure the foot control is placed on a flat floor surface. The harder the foot control is pressed, the faster the machine will run. The sewing speed can be varied on most machines.
Bobbins and presser feet
Bobbins
Small metal and plastic spools called bobbins are wound with the lower thread and housed underneath the stitching area. When the bobbin thread runs out, it can be refilled and wound on the bobbin winder on top of the machine.
Hand wheel
Once the machine is threaded and the stitch set to the correct length, lift the presser foot and turn the hand wheel to raise the needle. Position your fabric under the needle, then turn the hand wheel to lower the needle until it just touches the fabric. Now lower the presser foot and you are ready to start stitching with the machine.
Materials
Choosing fabrics for home accessories such as cushions is fun and will give you confidence to tackle more challenging choices such as curtain fabric, which has a large impact on the look of your home.
FABRICS
If embarking on a large project such as curtains, always get samples to view in situ. Look at the fabric in both daylight and electric light, and place it in its intended position. Take care when mixing patterns, as they may coordinate well together but be unsettling to live with on a daily basis. Up-to-the-minute fabrics are inspiring but will date, so limit them to smaller items such as cushions.
Soft furnishing fabric
These fabrics are usually 137 cm (54 in) wide. Check their purpose – some soft furnishing fabrics are suitable for curtains and bedspreads but not heavy use such as for chair covers. Soft furnishing fabrics come in many finishes such as chintz – a closely woven cotton – and damask, which features woven surface designs. Some soft furnishing fabrics have the added bonus of a protective stain-resistant finish.
Soft furnishing fabric
Cotton
Most of the projects in this book are made from cotton, which is a natural fabric that is easy to work with. Cotton is usually inexpensive and comes in various weights and thicknesses. Printed and plain cottons produced with patchwork and quilting in mind are a good choice for beginners. Cotton sheeting is available in very wide widths to make bedding.
Cotton fabric
Linen
This natural fabric is very strong and drapes well, although it creases easily. Linen blended with polyester is easier to handle but the quality is poorer.
Linen fabric
Chenille
This tactile fabric is woven from fringed yarns to give a soft pile. Chenille is not suitable for heavy use, as the pile will wear.
TIP: Plain ready-made chenille throws are inexpensive and can be decorated with embroidery or cut up to make into cushion covers.
Curtain lining
This smooth fabric is available in wide widths to line curtains (see pages 118–121). Choose a natural-coloured lining rather than a distinctive colour, which will fade in sunlight.
Curtain lining
Interlining
Interline curtains for heat insulation and to add structure (see page 119). Polyester or cotton interlining is available in a few different weights. Interlining is applied between the curtain and the lining, providing an extra layer of warmth.
Curtain interlining
Curtains hang better if they have been lined.
Interfacing
Stiffen fabric with interfacing to add strength and support. Interfacing is available in different weights and as an iron-on (fusible) or sew-in application. Press the shiny side of iron-on interfacing to the wrong side of the fabric. When pressing, hold the iron in place for a few second then lift and place it in another position and continue. Sliding the iron over the interfacing could make it wrinkle. Tack (baste) sew-in interfacing to the wrong side of the fabric pieces around the outer edges.
• Medium interfacing is soft and lightweight; use when you want to add a bit of body to an item.
• Firm interfacing is stiffer and will add definition when applied to fabric and pressed-in pleats.
• Firm flexible interfacing, as its name suggests, is firm but will still allow movement in the fabric.
• Iron-on medium-loft fleece adds soft structure to fabric. Press the fabric to the fleece, as the heat doesn’t penetrate the fleece surface easily to fuse it to fabric.
TIP: Don’t be nervous about pressing an item that has fleece – it will retain its bounce.
Wadding (batting)


