Erhalten Sie Zugang zu diesem und mehr als 300000 Büchern ab EUR 5,99 monatlich.
- Herausgeber: Fox Chapel Publishing
- Kategorie: Lebensstil
- Sprache: Englisch
- Veröffentlichungsjahr: 2020
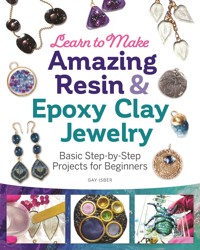
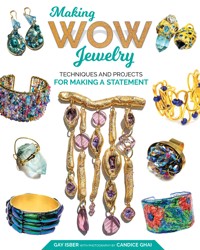
Featuring expert tips and tricks to achieving beautiful results every time, see for yourself the limitless possibilities of making one-of-a-kind jewelry! Award-winning jewelry designer and author of Making Wow Jewelry, Gay Isber brings you this comprehensive guide to everything beginning jewelry makers need to know about working with resin and epoxy clay. You'll learn how to colorize resin using micro powders and tints, make a mold, embed objects in clay, and much more. With thorough introductory info about both resins and clays and 26 DIY jewelry projects – from necklaces and bracelets to earrings and more – this fun, hands-on guide is perfect to start a new and exciting hobby in the colorful world of jewelry making!
Sie lesen das E-Book in den Legimi-Apps auf:
Seitenzahl: 113
Das E-Book (TTS) können Sie hören im Abo „Legimi Premium” in Legimi-Apps auf:
Ähnliche


Gay Isber
Dedication
Dedicated to my grandmother, Ruby Robbins, who schooled a curious little girl in the art of creating, so long ago.
I’m so grateful that she was my grandmother.
I hope to inspire others, too.
Gay Isber
Copyright
© 2020 by Gay Isber and Fox Chapel Publishing Company, Inc., 903 Square Street, Mount Joy, PA 17552.
Learn to Make Amazing Resin & Epoxy Clay Jewelry is an original work, first published in 2020 by Fox Chapel Publishing Company, Inc. All rights reserved. No part of this publication may be reproduced, stored in a retrieval system or transmitted, in any form or by any means, electronic, mechanical, photocopying, recording or otherwise, without the prior written permission of the copyright holders.
Print ISBN 978-1-4971-0120-3
eBook ISBN 9781607658214
Library of Congress Control Number: 2020935253
To learn more about the other great books from Fox Chapel Publishing, or to find a retailer near you, call toll-free 800-457-9112 or visit us at www.FoxChapelPublishing.com.
We are always looking for talented authors. To submit an idea, please send a brief inquiry to [email protected].
Because working with resin, epoxy clay, and other materials inherently includes the risk of injury and damage, this book cannot guarantee that creating the projects in this book is safe for everyone. For this reason, this book is sold without warranties or guarantees of any kind, expressed or implied, and the publisher and the author disclaim any liability for any injuries, losses, or damages caused in any way by the content of this book or the reader’s use of the tools needed to complete the projects presented here. The publisher and the author urge all readers to thoroughly review each project and to understand the use of all tools before beginning any project.
Introduction
Jewelry making can be so much fun when you conquer a few products and techniques. This book focuses on two specific products and the techniques that go with them: two-part casting resin and epoxy clay. It can seem intimidating at first to mix together and prepare these products, but once you start using them, you’ll understand their limitless creative potential. They’re worth the effort and fun to try.
This book will teach you all the basics you need to know about resin and epoxy clay. It will expand your jewelry-making capabilities so that you can create jewelry that you’ll enjoy and others will admire! You’ll learn how to mix each product, plus its uses, storage, safety, cleaning, and associated tools. Then you get to experiment with different techniques for creating unforgettable, one-of-a-kind jewelry pieces. Plus, if you’re totally new to the world of jewelry making, the basics of the craft are all covered in the first chapter. So don’t be afraid to pick up this book and start creating!
—Gay
Gay Isber
This project is reversible! It showcases photos in clear resin that was cast in plastic packaging as the mold. See the full instructions for the project on page 48.
Gay Isber
Contents
Cover
Title Page
Dedication
Copyright
Introduction
JEWELRY-MAKING BASICS
Tools
Jump Rings
Findings
Wire
Beads and Bead Links
ALL ABOUT RESIN
Introduction
How It Works
Uses
Tools
Instructions for Use
Cleaning and Storage
Safety
Tips and Tricks
ALL ABOUT EPOXY CLAY
Introduction
How It Works
Uses
Tools
Instructions for Use
Cleaning and Storage
Safety
Tips and Tricks
RESIN PROJECTS
Oh Snap! Photo Necklace
Sweet Heart Candy Necklace
It’s All Clear to Me Earrings
Purple Rules Jewelry Set
Sparkle Power Pendant
Textured Barrettes
Gay Isber
Gay Isber
Dazzling Cellophane Dangles
Molded Bangles and Cuffs
Glow-in-the-Dark Bug Necklace
Fly Butterfly Necklace
Speed Dating Necklace
EPOXY CLAY PROJECTS
Golden Coin Necklace
Happy Colors Layered Necklace
Roses Are Red Shark Tooth Pendant
Button Collection
Beaded Fabric Charms
Brilliant Bead Caps
Magic Mineral Pendants
Spell It Out Initial Necklace
Stick To It Pressed Jewelry Set
Gem Cascade Necklace
Ancient Stones Pendants
RESIN & EPOXY CLAY PROJECTS
Stained Glass Window Necklace
Chunky White Pendants
Chocolate Charm Necklace
The Leaves Have It Necklace
Templates
About the Author
Index
Gay Isber
Gay Isber
Gay Isber
Jewelry-Making Basics
This book focuses on resin and epoxy clay, but it incorporates some standard basic jewelry-making terms and techniques that you’ll need to know in order to turn your resin and clay creations into actual wearable jewelry. Review this section if you’ve never made jewelry before!
Tools
To make jewelry, you’ll need a pair of flush cutters, which are essentially small jewelry wire cutters, for cutting wire. You’ll also need, at a minimum, one pair of jewelry pliers (either round-nose pliers or straight pliers), but it’s best to have two pairs (see Jump Rings, right). Pliers allow you to manipulate the wire, jump rings, findings, earring hooks, and clasps you’ll use to assemble wearable jewelry. You should always have a standard, good pair of round-nose pliers in your jewelry-making kit. If you want to, you can buy a special kind of pliers called rosary chain pliers, which are round-nose pliers with a flush cutter included, making creating bead links (see page 10) an even faster process. Straight pliers (or chain-nose pliers) are also useful depending on how you are assembling your jewelry or what specific wires/beads/findings (i.e., clasps, chains, etc.) you are using. In general, for the projects in this book, you can use round-nose pliers.
Jump Rings
Jump rings are the building blocks of a lot of jewelry. They are simple metal rings with a break in them that can be opened and closed, allowing you to easily connect different items. It’s important that you know the basic rule for opening and closing a jump ring. Shown below are both the correct method (marked with ) and the incorrect method (marked with ). Use two pairs of pliers, one gripped on each side of the jump ring’s opening, to direct each side away from the other in a vertical orientation. Do not simply pull the opening straight apart horizontally, as this will weaken the metal and potentially break it. The rule to remember is simple: twist open, don’t pull apart.
Round-nose pliers
Lora S. Irish
Flush cutters
Lora S. Irish
Straight (chain-nose) pliers
Lora S. Irish
Jump rings
Lora S. Irish
Findings, including chain, a lobster claw clasp (top right in silver), and earring hooks (bottom center).
Helen Driggs
Findings
Findings are any of the various jewelry-making building blocks you can buy at the store and use to make jewelry. Jump rings are an example of findings. Clasps, such as lobster claw clasps (which you attach via jump rings), are another example you’ll use a lot in this book to create closures for bracelets and necklaces. Earring studs and hooks allow you to attach items to create earrings. Blank pendants and metal hoops can be used as bases for creating with resin and clay. Lengths of chain that you can cut to size make creating necklaces and bracelets super easy. All of the various miscellaneous findings mentioned in this book (and more!) can be found at your local craft store.
Wire
Wire, typically sold in spools, is useful for attaching things together and for creating bead links (see page 10). One of the most important decisions you’ll need to make when creating with wire is what gauge to use. Wire gauge is measured from thickest (lower numbers) to thinnest (higher numbers). Use the thickest wire (the lowest gauge) that the beads you want to use can accommodate. Fine wire is often quite delicate. 20-gauge wire is a good choice for necklaces, and sometimes 18-gauge wire is good if you need a piece to be really strong. Men’s and children’s jewelry are good projects in which to use 18-gauge wire. For smaller, daintier projects, 22-gauge wire is a good choice.
Lora S. Irish
Gay Isber
Beads and Bead Links
Beads come in a limitless array that will surely inspire you as you shop for them in stores. In this book, you will be able to use countless different beads by embedding them in resin or clay, but you’ll also want to incorporate them indirectly through jump rings and wire. Stringing beads onto a wire or thread is pretty self-explanatory but also somewhat limiting. Creating bead links is more interesting and requires a bit more effort.
A bead link is simply a bead (or beads) collected on a short piece of wire, usually with a wire loop rolled on each end. The loop secures the beads in place and acts kind of like a jump ring. Connecting beads by creating bead links is one of the most basic jewelry-making skills you will learn. You’ll often need to use this skill to connect your clasps to your finished pieces, too. Once you have mastered the skill of creating bead links, sometimes called the rosary style of linking, you can make anything. Follow along with the tutorial starting on page 11 to learn all the basics you’ll need.
In order to follow this tutorial, you’ll need a variety of small and large beads, flush cutters, pliers, 20- or 22-gauge wire, a length of chain, jump rings, and a lobster claw clasp. When it actually comes time to make specific projects in this book that include bead links, you may need some or all of these supplies.
HOW TO MAKE BEAD LINKS
Gay Isber
1. Thread a bead onto the wire and hold it in your left hand. You’ll need about ½" (1.3cm) of wire to protrude from the top of the bead. Do not cut the other end of the wire off of the spool yet.
Gay Isber
2. Bend the short end of the wire 90 degrees, into a right angle. You can push it over with your fingertip, or use pliers if doing it manually hurts your hands.
Gay Isber
3. If your wrist could rotate 360 degrees, you could do this in one step, but our wrists don’t work that way. Therefore, completing the loop is typically a two-step movement. Use your pliers to create a J shape at the tip of the bent wire, using a rolling motion.
Gay Isber
4. Now grab the wire in the pliers again, at the J, and continue to roll the wire closed so that the end connects neatly with the bead’s hole. Keep your eye on the bead’s hole when you are making this final movement. It needs to match up, not sort of or almost—it needs to be a clean, closed loop.
Gay Isber
5. Now flip the bead over, cut the wire off of the spool leaving ½" (1.3cm) of length, and repeat on the opposite side to create a second, identical loop.
Gay Isber
6. Once the first bead link is finished, start on the next. Before you close the second loop of the second bead link, link it into one of the other bead link’s loops. Only then should you close the second loop of the second bead link. You’ve connected your first two bead links!
Gay Isber
7. As you can see here, both loops should be completely closed and not overlapping. The loops should be approximately the same size. You can use your pliers to adjust the loops if necessary.
Gay Isber
8. Continue linking beads this way until you are happy with your result. Check all of the links once you are completely finished by holding the piece up to eye level and allowing it to dangle. If you see anything too big or crooked, you can correct it.
Gay Isber
9. The easiest way to connect the ends of your bead link chain to a finishing chain is by using jump rings; it creates a nice, clean finish. Sometimes, you can connect the bead links directly to the chain using the loops in the same way that each bead link is connected to the next. Remember to open the jump rings properly (see page 8).
Gay Isber
10. If you’re making something with a clasp, cut the chain and attach the clasp (such as this lobster claw clasp) to one end. Make sure the clasp is the right size to close through the chain. If the clasp is too chunky for the gaps in the chain, the closure won’t work.
All About Resin
Introduction
If you have never used casting resin before, then this book is a great place to start. When I first started using resin, I was immediately hooked, and you will be too.
Resins occur frequently in nature and have played a part in human history as well, so it’s basically in our DNA to enjoy them! Think of the tree sap that you might have seen on the outside of a tree; it’s a sticky substance that hardens with time. You might already be familiar with amber and frankincense, too—they are also resins. Amber has been documented in jewelry since the Neolithic times, more than 12,000 years ago. The fossilized resin that becomes amber (also called resinite) is from coniferous (pine) trees and other tree species. Resins from the cones from the cedar trees of Lebanon were used in the mummification of Egyptian pharaohs. And if you have ever used turpentine, you guessed it—it’s distilled from pine tree resin. Isn’t it fun to realize how much history resin has behind it?


