Erhalten Sie Zugang zu diesem und mehr als 300000 Büchern ab EUR 5,99 monatlich.
- Herausgeber: Fox Chapel Publishing
- Kategorie: Lebensstil
- Sprache: Englisch
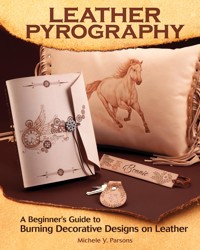
Pyrography isn't just for wood! For absolute beginners or passionate wood burners that are curious to work on a new medium, this book is a must-have, detailed guide to leather pyrography. Containing six projects for a bookmark, key fob, journal cover, and more that increase in difficulty, as well as step-by-step instructions and photography, both beginner and experienced pyrographers will learn a completely new way to burn decorative pieces and accessories. Understand different types of pens and how they interact with leather as opposed to wood, how to fix mistakes, and so much more in this comprehensive guide! Author Michele Y. Parsons teaches workshop-based pyrography classes all over the US, writes for Pyrography Magazine, and is the founder of Parsons Wood Artistry.
Sie lesen das E-Book in den Legimi-Apps auf:
Seitenzahl: 146
Veröffentlichungsjahr: 2020
Das E-Book (TTS) können Sie hören im Abo „Legimi Premium” in Legimi-Apps auf:
Ähnliche


© 2019 by Michele Y. Parsons and Fox Chapel Publishing Company, Inc., 903 Square Street, Mount Joy, PA 17552.
Leather Pyrography is an original work, first published in 2019 by Fox Chapel Publishing Company, Inc. The patterns contained herein are copyrighted by the author. Readers may make copies of these patterns for personal use. The patterns themselves, however, are not to be duplicated for resale or distribution under any circumstances. Any such copying is a violation of copyright law.
For a printable PDF of the patterns used in this book, please contact Fox Chapel Publishing at [email protected], quoting the ISBN and title of this book, as well as the pattern or patterns required.
ISBN 978-1-4971-0044-2eISBN 9781607657200
The Cataloging-in-Publication Data is on file with the Library of Congress.
“Zentangle®,” the red square, and “Anything is possible, one stroke at a time” are registered trademarks of Zentangle, Inc. The Zentangle teaching method is patent pending and is used by permission. You’ll find wonderful resources, a list of workshops and Certified Zentangle Teachers (CZTs) around the world, a fabulous gallery of inspiring projects, kits, supplies, tiles, pens, and more at www.zentangle.com.
To learn more about the other great books from Fox Chapel Publishing, or to find a retailer near you, call toll-free 800-457-9112 or visit us at www.FoxChapelPublishing.com.
We are always looking for talented authors. To submit an idea, please send a brief inquiry to [email protected].
CONTENTS
INTRODUCTION
CHAPTER 1: LEATHER
Leather Types and Terms
Leather Purchasing and Thickness
CHAPTER 2: TOOLS AND EQUIPMENT
Workspace Equipment
Pyrography Burners
Pens and Pen Tips
Cords and Adapters
Pyrography Torches
Additional Accessories
CHAPTER 3: TECHNIQUES
Setting Up to Burn
Leather Preparation
Pattern Transfer
Burning Techniques
Tonal Values
Touching Up Mistakes
CHAPTER 4: COLOR AND FINISH
Adding Color to Pyrography
Adding Finish to Pyrography
Color and Finish Testing
CHAPTER 5: PROJECTS
Coaster
Key Fob
Bookmark
Journal Cover
Fringed Pillow
3D Quail
CHAPTER 6: PATTERNS
RESOURCES
Leathercrafting Associations
Leathercrafting Museums, Shows, and Events
Leathercrafting Magazines, Newsletters, and Blogs
Leathercrafting and Pyrography Books
Pyrography Equipment Suppliers
Leathercrafting Equipment and Leather Suppliers
About the Author
Acknowledgments
Photo Credits
INTRODUCTION
After numerous years as a pyrography artist and instructor, one day I finally tried my hand at leather pyrography and was hooked! Burning on leather is very smooth and relaxing when compared to burning on wood and dealing with wood grain. I embraced leather burning and started teaching small classes as an alternative to woodburning classes while I taught at the International Woodcarving Congress, the Southeastern Woodcarving School, and the Fox Chapel Open House. The reaction I most commonly received from students was that burning on leather is like burning on butter. Students seemed to love the freedom from dealing with wood grain that leather allowed. As I continued the pursuit of leather pyrography, I started selling pyrography-suitable leather products in my online store for my students. Then I began to receive inquiries from customers about leather pyrography, and I realized that I couldn’t teach these customers what they needed to know over the phone or through email, especially when they did not have any pyrography experience. That is when I started researching leather pyrography, looking for book or video resources to sell in my online store or to point customers in the direction they needed. However, I found that the information available on leather pyrography is severely lacking—so I decided to write this book.
While deciding what this book would cover, I thought about why leather crafters would want to use pyrography instead of stamping, carving, and modeling leather. I’ve seen beautiful work done using traditional leathercrafting methods to render images on leather. What pyrography brings to the table is the ability to render extremely fine detail and extremely subtle shading on leather. For example, if a feather was created on leather using traditional tooling methods, the lines would typically be cut. But if I burn the same feather on leather, I can use a thin skew tip and burn thin lines that are so close together that I can render a highly realistic feather. Likewise, I can use a shader pen to portray the subtle tones in an eye’s iris to make it appear realistic. Pyrography gives you the ability to create subtleties in your art that other leathercrafts do not.
This book will focus on teaching the basics of pyrography as it applies to leather. I will share with you the methods I use for leather pyrography, but realize there are different methods for accomplishing this art form. After reading this book and trying the techniques and projects, I hope you enjoy leather pyrography as much as I do and continue creating.
Michele Parsons
What’s Pyrography?
Why do I use the “fancy” term pyrography? The word has its roots in the Greek and Latin words of pyro (fire) and graphy (writing/drawing). My pyrography students are very familiar with me getting on my soapbox about the use of this special word. Pyrography means burning patterns, text, or images on a variety of mediums, including but not limited to wood, gourds, leather, cork, canvas, tagua nuts, bone, and paper. One of the most popular mediums that people burn is wood. If a person is burning on wood, then woodburning is a perfectly acceptable word to use. Due to the popularity of woodburning, though, I have heard people refer to “woodburning on leather.” This is definitely a misnomer, but I’ve even seen large companies refer to woodburning on leather, too, because they are aware that the public is not familiar with the term pyrography. It would be proper to say leather pyrography is “burning on leather”— just don’t use the phrase “woodburning on leather.”
Chapter 1
LEATHER
Leather Types and Terms
Leather is a material made from animal skins prepared for use by tanneries. Tanned leather is processed using several methods, such as with chemicals (chrome and dyes) or with natural, organic ingredients (bark and plants), also called vegetable tanning. When leather is burned, fumes are released into the air. Therefore, to avoid breathing chemicals, you do not want to burn on leather that has been chemically processed. Only burn on undyed, natural vegetable-tanned leather. Leather at the store or online is not always clearly labeled with the kind of tanning used to produce it. You can identify vegetable-tanned leather (also frequently called vegtanned leather) by its tan color and its classification as “tooling leather.” Vegetable-tanned leather is the type of leather that leathercrafters use for stamping, molding, and tooling. The most common and readily available vegetable-tanned leather in the United States is cowhide.
The smooth side of tanned leather is called the grain side. It is the side the hair was on when the animal was alive. The rough side of the processed leather is called the flesh side. It is the underside of the hide.
Leather Purchasing and Thickness
Leather is cut and marked in square feet (square meters) by the tannery to be sold as a whole hide or commonly cut parts of the hide:
• Whole: the entire animal skin or hide
• Side: half of the entire animal skin or hide from the neck to the tail
• Double Shoulder: the shoulder area from a Whole
• Single Shoulder: the shoulder area from a Side
• Back: the portion of a Side with the Belly removed
• Belly: the portion of a Side with the Back removed
Leather is priced by the quality of the grain (smooth) side. If there are a lot of blemishes, such as cuts or branding marks, the hide is sold as Economy leather. If there are only a few blemishes, the hide is sold as Good Quality leather. Finally, if the hide is blemish free, it is classified as Excellent Quality leather.
Leather is also priced by the weight of a square foot (square meter) of the hide. When leather is processed, it is split so that its thickness becomes more even. Due to natural variation in thickness even after splitting the hide, leather is marked and sold using a weight range, such as 6 to 7 oz. Due to the weight being determined by the thickness of the leather, there are common usages of leather in certain weight ranges (see table on page). Leather of any thickness can be used for pyrography. However, care must be taken on the thinnest leathers with the skew pen tips. The skew is like a knife and, when hot, can slice right through the leather if pressure is applied.
A simple gauge can help in readily identifying the thickness of leather.
Thickness
Thickness in Ounces
Thickness in Inches
Thickness in Millimeters
Characteristics
Common Uses
2 to 3 oz
1/32" to 3/64"
0.8mm to 1.2mm
very thin and pliable
Used for molding, embossing, quilting, appliqués, linings, and jewelry
3 to 4 oz
3/64" to 1/16"
1.2mm to 1.6mm
thin and pliable
Used for molding, embossing, repoussé, appliqués, linings, thin clutches, thin wallets, and billfolds
4 to 5 oz
1/16" to 5/64"
1.6mm to 2.0mm
thin and pliable
Used for molded leather masks, appliqués, clutches, wallets, billfolds, wristbands, and conceal carry holsters
5 to 6 oz
5/64" to 3/32"
2.0mm to 2.4mm
sturdy and pliable
Used for die stamping, small cases, and notebook and journal covers
6 to 7 oz
3/32" to 7/64"
2.4mm to 2.8mm
sturdy and flexible
Used for die stamping, handbags, medium cases, journal covers, and straps
7 to 8 oz
7/64" to 1/8"
2.8mm to 3.2mm
sturdy
Used for die stamping, knife sheaths, narrow belts, straps, handles, and small holsters
8 to 9 oz
1/8" to 9/64"
3.2mm to 3.6mm
very sturdy
Used for die stamping, belts, holsters, and saddle bags
9 to 10 oz
9/64" to 5/32"
3.6mm to 4.0mm
extremely sturdy
Used for die stamping, belts wider than 1 ½" (3.8cm), and larger holsters
Chapter 2
TOOLS AND EQUIPMENT
A leather pyrography studio can be very simple and set up in a small area. Here is a detailed list of the various equipment and tools that you will need.
Workspace Equipment
Tables and Chairs
Pyrography can be accomplished holding a piece of art while sitting in a chair, on a couch, or sitting at a table. It is important to have your arm and shoulder at a comfortable height while burning. When your burning surface is too high, it forces your shoulder to be raised, which will create tension in your shoulder and neck after extended periods of time, and which also reduces the amount of control you have with your pen. Working on a table is ideal because it provides room for your burning equipment and tools and, with the proper chair height, provides an ideal shoulder height for the best control when burning. However, I have found that there are times when working on a large object, such as a box or bowl, that working on a table would make the burning surface too high, so working in a chair or on a couch becomes necessary. When working in a chair or on a couch, you will need to provide a steady surface to hold your equipment. A supplemental table, a large tray, or a large wood board can provide space for your equipment. Ensure that it is stable so the equipment cannot be knocked over and hot pens cannot roll off.
Fans
A carbon-activated filter fan.
Using fans can help reduce the amount of burning fumes that reach your lungs and help with the smell of burning leather. There are several fan options to choose from.
You can use a small fan to blow the fumes away from your work. Do not blow the fan toward your work, because the moving air will change the temperature of your pen tips as you move in and out of the airflow. You need to have good ventilation in the room, such as open doors and windows; otherwise, the fan will just circulate the fumes around the room and you will still inhale them.
Another option is to use a carbon-activated filter fan. Activated carbon traps fume particles. These fans will not clean the air one hundred percent, but the difference is obvious: A room that uses a carbonactivated filter fan only has a faint odor that can barely be detected when compared to a room that is using a regular fan for ventilation. Carbon-activated filter fans only work well when the fan is right next to the burning material. The fumes have to go through the fan immediately when burning; otherwise, they will simply escape and circulate around the room anyway. I set my fan very close to my work and, because I use a rotating easel, I place my fan on a couple of wood blocks to raise it high enough to trap the fumes as they roll off the edge of the artwork. I recommend carbon-activated fans that have an airflow rated at least 85 cfm (cubic feet per minute) (or 2.5 cubic meters per minute) to remove the smoke. There are some inexpensive models on the market, but they don’t have enough fan power to make a difference.
Another option is to build a ventilation system that vents directly to the outdoors. This is a permanent option that does not allow for carrying your work to a temporary location, such as when you can take a fan to a pyrography class. A ventilation system can include several options: a hooded vent located over the burning area, a fan to blow the fumes outdoors, or a carbon-activated filter fan to draw the fumes through the filter before they are channeled outdoors.
Easels
This easel tilts and rotates.
Tilting and rotating easels are considered optional equipment for pyrography, but they offer several advantages.
As we grow older and our eyes don’t see as well, or if we simply don’t have great eyesight to begin with, there is a natural tendency to lean in over our work and put our face close to the action so we can see better. Doing this means the burning fumes go straight up into our nose and eyes. Using a tilted easel or a slant board allows you to sit upright in your chair while bringing the surface of the artwork closer to your face so you can see better. The fumes still rise vertically from the surface, but your face is not directly over those fumes. The tilted table or slant board also reduces overhead lighting from reflecting off your burning at an angle that causes glare. Additionally, a tilted table or slant board allows burning at the top of a large piece while sitting, as opposed to having to lay the large work on a flat table and then lean far over it to burn for sometimes hours, which can strain your back. Because of the slant of a tilted easel, it is helpful to cover the surface in non-slip shelving liner to prevent the artwork from sliding.
A rotating table provides the benefit of being able to quickly turn your work without delaying or stopping burning to turn your artwork. The ability to turn your piece while burning is very important for stroke direction so that you are not forcing your hand and arm into uncomfortable positions, following curves in a continuous motion while using skew tips, and creating directional shading fades.
Lighting
Do not underestimate the importance of good lighting. The better you can see your work, the better you will burn. If the room you are working in has low lighting, even if it is only at night or on overcast days, supplement the lighting with a portable lamp.
Pyrography Burners
There are two types of pyrography burners: those that heat solid brass tips (solid point burners) and those that heat nichrome wire tips (wire tip burners). Both types of burners have several options, advantages, and disadvantages.
Solid Point Burners
Solid point burners, sometimes called craft burners, look similar to soldering guns. The name solid point refers to the solid brass tips, which come in a variety of shapes. The tips are interchangeable and screw into the handles. A solid point burner can be purchased as either a single temperature burner or a burner with a rheostat (a current regulator) to adjust the temperature.
Advantages of solid point burners include:
• The cost to purchase the burner and tips is very inexpensive.
• The unit and tips are very portable.
• The brass tips hold heat very well and, therefore, burn dark blacks very well.
Disadvantages of solid point burners include:
• Brass is very malleable when heated, which means it gets very soft and can bend easily when pressure is put on the tips. It also means the threads that screw the tip into the handle can easily be stripped if the tip is hot while taking it in or out of the handle.
• Solid point burner handles get very hot, especially the handles that are only plastic with no rubber cover.
• The solid point burner handle is very large in diameter and the hand position is a long way from the point of the tip; both of these features reduce the amount of control you have over your strokes.
•


