Erhalten Sie Zugang zu diesem und mehr als 300000 Büchern ab EUR 5,99 monatlich.
- Herausgeber: Fox Chapel Publishing
- Kategorie: Lebensstil
- Sprache: Englisch
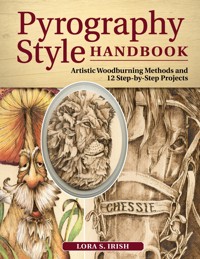
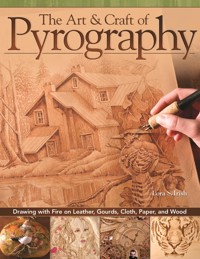
A must-have resource for any beginner or intermediate pyrographer, this is a comprehensive guide to all of the major styles used in pyrography. Including 31 finished samples and line art, author and respected pyrography artist Lora Irish provides step-by-step instructions for each art style, from silhouettes, engraving, and cross hatching to pointillism, realism, pencil shading, and texture stroke painting. From this book, you'll be given the chance to work, experiment, and experience some of the major art styles that you can use with any pattern or design. You'll be able to realize which style offers the most comfort and the best results, and what's the most controllable so you can become a consistent master! Learn essential skills and techniques from a leading expert in the field, and discover how style affects the image to expand your artistic range! Lora Irish has several best-selling books on pyrography, woodcarving, and other craft hobbies, and is also a frequent contributor to Woodcarving Illustrated and Scroll Saw Woodworking and Crafts magazines.
Sie lesen das E-Book in den Legimi-Apps auf:
Seitenzahl: 117
Veröffentlichungsjahr: 2020
Das E-Book (TTS) können Sie hören im Abo „Legimi Premium” in Legimi-Apps auf:
Ähnliche


Acknowledgments
I wish to extend my deepest thanks to Tiffany Hill, Colleen Dorsey, and Chris Morrison for their excellent work in the creation, development, and refinement of this manuscript. As an author, it is a wonderful experience to be working with such a well-skilled team.
© 2020 by Lora S. Irish and Fox Chapel Publishing Company, Inc., 903 Square Street, Mount Joy, PA 17552.
Pyrography Style Handbook is an original work, first published in 2020 by Fox Chapel Publishing Company, Inc. The patterns contained herein are copyrighted by the author. Readers may make copies of these patterns for personal use. The patterns themselves, however, are not to be duplicated for resale or distribution under any circumstances. Any such copying is a violation of copyright law.
For a printable PDF of the patterns used in this book, please contact Fox Chapel Publishing at [email protected], quoting the ISBN and title of this book, as well as the pattern or patterns required.
Print ISBN 978-1-4971-0013-8eISBN 978-1-6076-5735-4
To learn more about the other great books from Fox Chapel Publishing, or to find a retailer near you, call toll-free 800-457-9112 or visit us at www.FoxChapelPublishing.com.
We are always looking for talented authors. To submit an idea, please send a brief inquiry to [email protected].
Leather hides image here courtesy Michele Y. Parsons.
INTRODUCTION
To my total surprise in 2005, my husband, Michael, had a present waiting under our Christmas tree for me that would be life-changing for me as an artist. It was a dual-pen Razertip SS-D10 pyrography unit with a small variety of pen tips. To complement his wonderful gift was a stack of fifty birch plywood boards.
I was not new to pyrography as a crafter, having used a one-temperature Walnut Hollow tool for nearly twenty years. But recently I had picked up a new Walnut Hollow tool at my local craft store. It wasn’t because there was anything wrong with my older tool, but because there were too many times where I wanted to quickly change pen tips during a work session. By running two units at the same time, I could switch from one tip to another easily.
With my husband’s gift, I now had a brand new, variable-temperature burning unit, enough tips to do just about anything, and fifty blank canvases waiting to be filled with new designs, patterns, and artistic ideas. Michael had decided that it was time for me to step up to a temperature-regulated unit. That was at the end of December 2005, and by the end of January 2006, I had more than thirty of those plywood canvases finished with landscapes, animal portraits, moon face designs, and even a dragon-accented chess board; all in all, I had completed the projects for my first pyrography book with Fox Chapel Publishing, Great Book of Woodburning.
Why the flurry of artist action? Why did this change my life? I suddenly had a drawing pen for wood, leather, paper-mache, and even watercolor paper that could translate my fine art training into wonderfully detailed tonal value images. My thinking as a pyrographer broke out of the black outlines and silhouette work of a one-temperature tool into the territory of unlimited shades and three-dimensional, realistic burnings.
Today I still have and use my two Walnut Hollow units. To these and Mike’s gift of the Razertip I have added the Walnut Hallow variable-temperature Versa-Tool, the Walnut Hollow Creative Woodburner variable-temperature unit, the Colwood Detailer with a variety of permanent pens, and the Optima 1 Dual unit with the heavy-gauge cords and a variety of pens. Each tool gets used regularly as each has its own special features (which you can learn more about here).
In my passion for pyrography and with the support of Fox Chapel Publishing, this book, Pyrography Style Handbook, joins my six other publications all about woodburning: Great Book of Woodburning; The Art & Craft of Pyrography; Little Book of Pyrography; Pyrography Basics; The Art of Leather Burning; and Landscape Pyrography Techniques & Projects.
So what makes this book different from the previous books?
Pyrography has changed, matured, and exploded from accent line work into fine, detailed artwork in the last twenty years since I moved from a one-temperature tool to a variable-temperature unit. The number of pyrography units available to the fine artist has dramatically increased while the prices have dropped into a crafter’s budget range. Plus, there is a huge pen tip profile selection that gives artists total control over their images. So, for me, it’s time to step up once again and bring to you many of the fine art styles and techniques that you can use in your burning.
Over the years and through my previous six books, we have talked about and learned how to choose your patterns; how to prepare your wood or leather; and how to execute a design through texture, tonal values, and shading. Now let us take an in-depth look at the different artistic styles of rendering a design we can use in our burnings: silhouette, engraving, crosshatching, pointillism, shaded drawing, texture painting, and realism.
In the pages of this book and the projects presented, I hope to be able to teach you how many wonderful art styles there are and how you can use them to create your own unique art.
CONTENTS
PROJECT GALLERY
CHAPTER 1: BASIC SUPPLIES AND TECHNIQUES
CHAPTER 2: ALL ABOUT PEN TIPS
CHAPTER 3: PRACTICE BOARDS AND TONAL VALUES
CHAPTER 4: ART STYLES
Silhouette: High-Contrast Solid Fills
Engraving: High-Contrast, Fine, Thin Lines
Crosshatching: Fine, Crossed, Layered Lines
Pointillism: Density through Dots
Shaded Drawing: Pencil Shading Effects
Texture Painting: Combining Textures for Creative Effects
Realism: Imitating What You See
CHAPTER 5: STEP-BY-STEP PROJECTS
Gothic Rebirth Green Man (Silhouette)
African King on Alert (Engraving)
Logging Beast of Burden (Crosshatching)
Trumpet In the Holidays (Pointillism)
Don’t Mess with Me (Pointillism)
Merry March Mushroom (Shaded Drawing)
Ceremonial Eagle Mask (Shaded Drawing)
Ironwork Retro Owl (Texture Painting)
Appliqué Quilted Barn Landscape (Texture Painting)
Steampunk Mechanical Dragon (Texture Painting)
Well-Worn Blue Jeans (Realism)
Nature Does Not Come with Outlines (Realism)
CHAPTER 6: PATTERNS
About the Author
PROJECT GALLERY
Here’s a preview of the projects you’ll be able to tackle in this book. Come back to these pages for detailed, large images to refer to as you work.
Gothic Rebirth Green Man (Silhouette); see here
This green man design represents rebirth, the cycle of growth, and the return of spring by combining branches, vines, and other botanical elements into the facial features of a human. Like zoomorphism, which applies animal attributes to non-animal objects, the green man blends our humanity with the flora of our environment.
Solid shapes, black and white tonal values only, crisp edges, and unburned pattern lines create the silhouette technique. Our eye is used to seeing art created using solid-fill black line work. But with silhouette work, the tonal value emphasis is reversed so that the details and outlines are left in the pure color of the media—white—while the solid areas of the work are black. This green man’s mustache is visually dominant not because it was burned, but because it was left unburned in the natural tonal value of the wood.
African King on Alert (Engraving); see here
The dramatically changing tonal values of the hair clusters in this majestic lion portrait create a perfect design for flowing line work that emphasizes the length, thickness, and changing direction of the mane.
Incising a design with fine line work is the name of the game for engraving. Shading is created through the density of the line work. Lines flow and curve with the profile of the area being shaded. In engraving, burned lines will vary in thickness both in the line itself—thick or thin—as well as when compared to the neighboring line thicknesses.
Logging Beast of Burden (Crosshatching); see here
The gentle eye of this hybrid between a female horse (mare) and male donkey (jack) shows the best of the breed. Stronger than his sire and as intelligent as his dam, this mule will give it his all in dedication to finishing the job. His portrait is worthy of the time it takes to execute it, as it represents the mule’s patient and hardy efforts.
Creating tonal values through tightly packed parallel fine lines, called crosshatching or etching, began as a printmaking technique often worked in metal or wood. Fine, consistent lines are burned parallel and independent of the profile of the area being shaded. Tonal values are created by adding layers of line work one after the other, with each layer burned at a new angle relative to the layers below.
Trumpet In the Holidays (Pointillism); see here
This quick, fun, and easy pattern of a swan adorned with a holly leaf makes a perfect burn for a little added color pencil accent. The pointillism shading of the burning combined with the simple coloring of the decorative elements adds to the stylized feeling of this project.
Pointillism was introduced in the late 1800s by artists George Seurat and Paul Signac. This art form is classically worked in primary paint colors where the choice of color and the density of the dots visually create secondary and tertiary colors. By adding colored pencil work over our pointillism pyrography dots, we capture the feeling of the pointillists’ artwork.
Don’t Mess with Me (Pointillism); see here
The intensity of this cougar’s stare is created through the black tones that shade the eye from the eyebrow ridge and the black rings of the lower eyelid. Because of the texture of the cougar’s coat, using pointillism gives this a very realistic finish.
The size of each dot and how densely packed an area is worked creates the tonal value for that area. It’s an easy method to accomplish a gradual shading that moves from light tonal values (done with openly packed dots) to dark tonal values (done with thickly packed dots). The small dots that create this style of burning can easily be pulled into short lines instead of dots to imply the fur of the face of the cougar.
Merry March Mushroom (Shaded Drawing); see here
Where the green man (see here) gives botanical elements to a human face, this fellow has human features added to a common forest fungus. By using a shaded drawing technique, you can create the folds and curves of the eyes, cheeks, nose, and chin that come out of the mushroom stem.
Using strong tonal values in your pyrography helps create a three-dimensional look in your two-dimensional artwork. These monochromatic designs are worked in just one color using the full tonal value range of that color from white to black. The eye is drawn to dominant tonal values rather than specific textures or lines. And this shading will show nicely through a light layer of colored pencil.
Ceremonial Eagle Mask (Shaded Drawing); see here
Woodcarving, beadwork, raffia string, twigs, and eagle feathers come together to create this stylized Native American ceremonial mask—all through the pyrography tool! Specific textures or line work, such as the speckles on the feathers, stand out as highlights.
Shaded drawing pyrography allows the artist to combine multiple aspects such as line direction, line thickness, tonal values, and graduated textures to create a three-dimensional effect with the subject. Other art styles may also incorporate shaded drawing as well to help smoothly blend one area into another for a realistic effect.
Ironwork Retro Owl (Texture Painting); see here
A combination of decorative ironwork and new trends in quilt stippling inspired this 1950s-style project. The simple shapes and large, non-detailed areas of the stylized owl can easily be used to play and experiment with new, small design work, line work, and even tonal value shading.
Texture can be used as repetitive patterns in specific areas to unify an otherwise open, loose design. By choosing and using one texture throughout your pattern for one specific element, you can reinforce the impression that those elements are the same. In this owl, all the half-round shoulder feathers feature the same three joined lines in a dark tonal value worked from the overlapping feather toward the tip of the feather. The action of repeating the pattern consistently is more important that what pattern you choose to use.
Appliqué Quilted Barn Landscape (Texture Painting); see here
In appliqué quilting, we use small pieces of colored, printed fabric to create the elements of our design. This barn scene is created with the same idea using a different texture, line design, and tonal value for each element of the pattern. Pine trees are created using dark, deeply burned lines; hay bales are made with sweeping, curved lines; and tree leaves come from a continuous scrubbie stroke.
The repetitive texture patterns that you burn do not necessarily need to relate to the actual texture of the element you are working. Instead of burning every individual leaf on your background tree, you can use a scrubbie stroke to imply the changing tonal value of leaf clusters. That’s the magic of textures.
Steampunk Mechanical Dragon (Texture Painting); see here
Texture painting is a wonderful way to capture the leather, wire, and metalwork of steampunk while also creating the three-dimensional shading of this winged dragon. You will be able to emphasize the curvature of each area through the shading while implying the base material of each steampunk element.
Texture painting, like shaded drawing, can use multiple art techniques to create the final finish to your design. Crosshatching, engraving, and silhouette art styles—compare the black background to the white of the wing feathers, teeth, and jawline—are combined for this dragon to emphasize the printed illustration look.


