Erhalten Sie Zugang zu diesem und mehr als 300000 Büchern ab EUR 5,99 monatlich.
- Herausgeber: Fox Chapel Publishing
- Kategorie: Lebensstil
- Sprache: Englisch
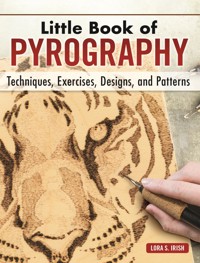
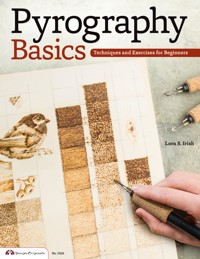
Little Book of Pyrography makes it easy to learn the creative craft of woodburning! All that aspiring beginners need is this book and an inexpensive wood burning tool to start adorning wood, gourds, leather, paper and more with beautiful images and patterns. Legendary pyrography artist Lora S. Irish expands on the techniques and projects from her bestselling book Pyrography Basics—all of which are included here—and explores new ways to achieve lovely varieties of tone and texture. In this handsome hardcover gift edition, Lora provides a thorough introduction to basic tools, materials and techniques. Readers will learn how to set up a practice board to experiment with strokes and settings before moving on to working projects with confidence. Seven skill-building projects provide step-by-step exercises in using temperature, time, layering, and texturing to create artistic tonal values.
Sie lesen das E-Book in den Legimi-Apps auf:
Seitenzahl: 111
Veröffentlichungsjahr: 2018
Das E-Book (TTS) können Sie hören im Abo „Legimi Premium” in Legimi-Apps auf:
Ähnliche


Acknowledgments
I wish to extend my deepest thanks to Chris Reggio, Tiffany Hill, Kaitlyn Ocasio, Justin Speers, and David Fisk for their excellent work in creation, development, and refinement of this manuscript. As an author it is a wonderful experience to be working with such a well-skilled team.
© 2018 by Lora S. Irish and Fox Chapel Publishing Company, Inc., 903 Square Street, Mount Joy, PA 17552.
Little Book of Pyrography (ISBN 978-1-56523-969-2) is a gift edition of Pyrography Basics (ISBN 978-1-57421-505-2) with previously published material reproduced from The Art and Craft of Pyrography (ISBN 978-1-56523-478-9) and Great Book of Woodburning (ISBN 978-1-56523-287-7), all published by Fox Chapel Publishing Company, Inc. The patterns contained herein are copyrighted by the author. Readers may make copies of these patterns for personal use. The patterns themselves, however, are not to be duplicated for resale or distribution under any circumstances. Any such copying is a violation of copyright law.
Print ISBN 978-1-56523-969-2eISBN 978-1-60765-939-6
For a printable PDF of the patterns used in this book, please contact Fox Chapel Publishing at [email protected], stating the ISBN and title of the book in the subject line.
The Cataloging-in-Publication Data is on file with the Library of Congress.
To learn more about the other great books from Fox Chapel Publishing, or to find a retailer near you, call toll-free 800-457-9112 or visit us at www.FoxChapelPublishing.com.
We are always looking for talented authors. To submit an idea, please send a brief inquiry to [email protected].
Table of Contents
Introduction
Pyrography Systems
Pyrography Tips
General Supplies
Basic Supply List
Surfaces
Practice Board
Creating a Wood Practice Board
Tonal Values Practice Board
Light and Dark Exercise One: Temperature of the Tip
Light and Dark Exercise Two: Burning Time
Light and Dark Exercise Three: Layers of Strokes
Light and Dark Exercise Four: Texture Pattern
Light and Dark Exercise Five: Putting It All Together
Texture Exercise: Putting Textures Together
Finding Tonal Values: Composition of a Good Woodburning
Tonal Value Exercise: The Pocket Watch
Project
Step-by-Step: The Dragonette
Gallery
About the Author
What is pyrography?
Pyrography: The art of burning a design or pattern into a natural surface, such as wood, gourds, leather, or cotton rag watercolor paper using heated one-temperature or variable-temperature woodburning tools or a fine flame.
Introduction
Whether you’ve never tried pyrography before or you’ve simply used it for small projects and want to refresh yourself on the techniques, this booklet will show you how to create beautiful pieces with only a pyrographic tool. Today’s pyrographic equipment can be both inexpensive and readily available, so getting started is easy to do.
Although it is often referred to as woodburning, the art of pyrography can be worked on just about any natural surface, which gives you a wide variety of possibilities on which to explore this craft. Wooden box tops, gourd bluebird houses, watercolor paper that’s suitable for framing, and even leather belts are used as working surfaces for burned designs. For this booklet, I worked the finished samples on several different species of wood, such as birch plywood and basswood; however, the techniques and instructions do apply to other materials, such as leather, paper, and gourds.
As you work your way through the booklet, we will explore what materials and tools you will need for your woodburning kit and how to practice creating and controlling woodburned tonal values through the use of textures and layers. The booklet ends with a section of exercises and accompanying projects, giving you the opportunity to apply what you have learned. With the basic instructions in this book and a little practice, you will soon be able to woodburn any project with confidence and expertise.
Pyrography Systems
There are two types of pyrography systems—the one-temperature unit and the variable-temperature system.
One-temperature tools heat to a preset temperature and create tonal value by controlling your texture or burn strokes and by the speed of your burning stroke.
Variable-temperature tools allow you to adjust the temperature of the tips from a very cool setting to extremely hot.
The number of distinct tonal values that can easily be created increases with the variable temperature tool because you control how cool or hot the tip is during the work.
One-Temperature Tools
Once plugged into an electrical outlet, the tool gradually reaches an even but high temperature, so the textures you make, the strokes that you use, and the speed of the stroke control the tonal value work in your project.
Using a light pressure to the tip against the wood and moving the tool tip quickly through the burn stroke creates very pale tonal values. Medium pressure and slower motion bring darker tones. One-temperature burning tools are inexpensive, readily available at your local craft or hobby store, and excellent for first-time pyrographers to give the craft a try.
Options. From single- to variable-temperature units, pyrographers can choose from many options. Your skill level, your goals as an artist or craftsman, and your budget are among the factors that will influence your decision.
Temperature control. The single-temperature burner on the left takes time to heat up but holds its temperature well. The variable-temperature burner on the right heats up—and cools—quickly.
Variable-Temperature Burners
Variable-temperature systems have a dial thermostat that allows you to control how cool or hot your tip is. You can adjust the temperature setting quickly, making it easy to control your tonal values in your project. This style has two types of pens—the fixed-tip pen, where the tip is permanently set in the handgrip, and the interchangeable pen, where different wire tips can be used with the handgrip. There are many excellent burning systems available to the hobbyist. Which manufacturer you choose depends on your budget, your pen style preferences, and what is available to you locally or online.
Pen types. Pens with tips allow you to increase your inventory of tip shapes without spending a lot of money. Fixed-tip pens (blue grip above) eliminate any heat or energy loss where the tip connects with the unit.
Dual-pen system. With a dual-pen system, plug two pens, each with a different tip, into the unit during any burning session. A selector switch allows the user to change from one pen to the other, and a thermostat controls the temperature setting for whichever tip is in use.
The pens for this unit are slim and lightweight, making it comfortable for long sessions of burning. The handgrip area may be covered with foam wrap or cork to reduce the heat that reaches the hand.
Handpiece wires. Most woodburners use an RCA plug (top photo) to connect the burning pen to the handpiece wire. Some units (bottom photo) use a ¼" (0.5cm)-diameter phone jack for the connection.
Single-pen unit. Many single-pen units have a range of temperature settings. Changing fixed pens or changing tips on the interchangeable pens is quick and easy. The temperature dial system is very reliable for quick tonal value changes. This particular unit can reach very hot temperatures, and working to the extreme black tones is simply a matter of turning up the heat.
The cork handles are very comfortable and dramatically reduce the heat transfer from the tip to your hand. This style uses a positive, tight connector at the front of the pen for the interchangeable-tip pen, making the exchange of tips easy.
Pen grips. The thick blue foam on the pen above insulates the user’s fingers from the heat of the pen. Vents and distance on the pen below move the user’s fingers back from the hottest part of the pen.
Adaptability. Most manufacturers sell adapters that allow you to use other manufacturers’ pens with their control units. Some units come with a full set of adapters.
Pyrography Tips
Tips come in many shapes and bends, from the tight bend used in the standard writing tip to half circles that can create fish scales and even square tubes that make a textured pattern on your board. Three basic pen tips are used throughout this book—the standard writing tip, the micro writing tip, and a small flat spoon shader.
Standard writing tip pen. For wide line shading and texture work, try the standard writing tip. By holding the pen in an upright position, 90° from the working surface, fine detail lines can be pulled. To create wider lines in your texturing, drop your grip to about 45° from the wood. The angle change allows the side of the wire to touch the board giving you more metal-to-wood contact.
Standard tip sample. The standard tip pen creates a strong, wide line perfect for both outlining and shading.
Micro writing tip pen. The micro writing tool is manufactured using thinner wire and a tighter bend at the tip than the standard writing tool. The tip’s shape allows little metal to come into direct contact with the working surface and produces fine detailing lines. Fine, dense textures can be layered using this tool to burn an area into an even, smooth tonal value.
Micro tip sample. For extremely fine line work, try the micro tip pen.
Spoon shader pen. This small flat shader creates a wide path of smooth tonal values and is excellent for general shading within your design. Shader tips come in several profiles, such as spoon-shaped, square, and half rounds.
Spoon shader sample. Large areas can quickly be toned using the spoon-shaped shading tip.
General Supplies
You will want to gather a small tool kit of craft supplies for your pyrography. Many of these items are common household items you may already have on hand.
For sanding:
Sandpaper, from 220- to 320-grit
Sanding pads
Foam core fingernail files
Your wood surfaces need a light sanding to create a smooth surface for burning. Use fine-grit sandpaper, 220- to 320-grit, to remove the fine ridges and loose fibers on the wood. Coarse sandpaper, less than 220-grit, can leave sanding lines that can affect the quality of your burn lines. Even fine ridges will cause your tool tip to skip or move as you pull the stroke, resulting in uneven or non-straight lines.
Sanding pads have a foam core and are flexible, making them great for curved surfaces, as on a wood plate or the routed edge of a plaque. Available at your local drug store, foam core fingernail files are a nice addition to your tool kit.
For cleaning tool tips:
Emery cloth or silicon carbide cloth
Fine-steel wool
Leather strop, strop rouge, red oxide or aluminum oxide
It is important to keep your tool tips well cleaned during any burning session to ensure even heat to the tip and consistent color tones to your burning. As you work, notice that the tool tips become dark or dull as carbon from the burning builds up on the wire. The carbon can affect the heat coming from the tip to the wood and leave black carbon smudges on your work. Clean the tips of your tools often.
Scraping the tip with a special tool provided by the manufacturer or with a sharpened knife can quickly clean the tip. Emery cloth, fine-steel wool, or a woodcarving leather strop prepared with either red oxide rouge or aluminum oxide are alternatives.
For tracing:
Pencils
Colored-ink pen
Carbon or graphite paper
Transparent tape
Two products used to transfer the design to your work surface are carbon and graphite papers.
Both products are laid under your paper pattern so that the transfer side is against your work surface. Both should be used carefully, as they are not easily removed from your work surface after burning is complete. Graphite paper, with its soft pale-gray coloring, is especially appropriate for gourds, papier-mâché, and darker woods.
You can also blacken the back of your pattern paper with a soft pencil, covering it completely. Place the pattern onto your work surface and trace over the pattern lines, leaving a fine line of pencil graphite on your work surface. The pencil lines can later be removed with a white artist eraser.
Smooth surface. Sanding wood surfaces before tracing your pattern onto the medium ensures as smooth a working surface as possible. Paper, cloth, and leather do not require sanding.
Cleaning your tips. There are several methods for cleaning the wire tips of the variable-temperature tool.
And generally…
White artist eraser
Transparent tape
Dusting brush
Old toothbrush
Assorted soft paintbrushes
Ceramic tile or wood palette
Rulers and straight edge
T-square or right-angle triangle
Cardboard
Canvas stretchers
Long quilter’s straight pins
Bench knife or utility knife
X-Acto® knife
Small round gouge
Many common household items and tools are used for pyrography to prepare the working surface, secure your pattern, trace the design, and finish the completed burning.
If you will be adding paint to your finished burning, you will need an assortment of soft bristle brushes, a paint palette, water pans, and, of course, the thinning media for whichever type of paint you have chosen to use.
Bench knives or X-Acto® knives can be used to carefully carve away small mistakes in the burning and to cut fine highlight lines into an area that has already been burned. Some pyrographers also use them as scrapers to clean the tool tips.


