
Erhalten Sie Zugang zu diesem und mehr als 300000 Büchern ab EUR 5,99 monatlich.
- Herausgeber: Fox Chapel Publishing
- Kategorie: Lebensstil
- Serie: Great Book
- Sprache: Englisch
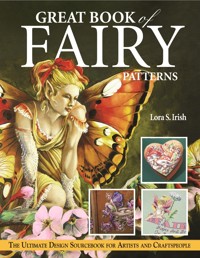
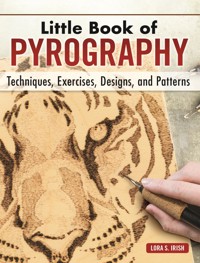
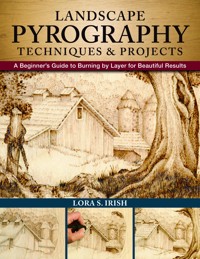
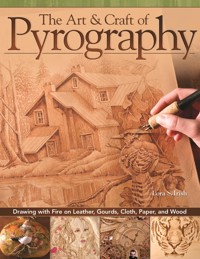
Learn to create beautifully burned images from any drawing, pattern, or photograph! A complete and contemporary update to the best-selling resource for woodburners, nationally known artist Lora Irish reveals her secrets in this newly revised edition! Beginner and advanced pyrographers alike benefit from more than 40 original traceable line art designs, technique exercises, and clear step-by-step instructions for transferring a pyrography pattern. New to this edition are up-to-date features on tools and techniques, additional projects and designs to offer a wider range of variety, a new gallery of finished art, and so much more that makes this woodburning book a must-have for pyrographers of every level!
Sie lesen das E-Book in den Legimi-Apps auf:
Seitenzahl: 188
Veröffentlichungsjahr: 2022
Das E-Book (TTS) können Sie hören im Abo „Legimi Premium” in Legimi-Apps auf:
Ähnliche


© 2006, 2022 by Lora S. Irish and Fox Chapel Publishing Company, Inc.,903 Square Street, Mount Joy, PA 17552.
Great Book of Woodburning, Revised and Expanded Second Edition (ISBN 978-1-4971-0314-6) is an expanded edition of the book Great Book of Woodburning (ISBN 978-1-56523-287-7) published in 2006 by Fox Chapel Publishing Company, Inc. Revisions include two updated chapters (12–35, 38–45), a new project (55–57), and seven new patterns (108–9, 116–17, 138–39, 150–51, 172–73, 186–189).
All rights reserved. No part of this publication may be reproduced, stored in a retrieval system or transmitted, in any form or by any means, electronic, mechanical, photocopying, recording or otherwise, without the prior written permission of the copyright holders.
Print ISBN 978-1-63741-151-3ISBN 978-1-63741-151-3
Library of Congress Control Number: 2022938453
To learn more about the other great books from Fox Chapel Publishing, or to find a retailer near you, call toll-free 800-457-9112 or visit us at www.FoxChapelPublishing.com.
We are always looking for talented authors. To submit an idea, please send a brief inquiry to [email protected].
For a printable PDF of the patterns used in this book, please contact Fox Chapel Publishing at [email protected], with 9781497103146 Great Book of Woodburning, Revised and Expanded Second Edition in the subject line.
Dedication
This work is dedicated to Michael, my beloved husband and best friend, who has encouraged and emotionally supported me in so many loving ways through my life’s journey as a fine artist.
Acknowledgments
I would like to extend my deepest appreciation to the team at Fox Chapel Publishing—to Alan Giagnocavo, Peg Couch, Gretchen Bacon, Troy Thorne, and Linda Eberly for their work on the last edition; and to Gretchen Bacon, David Fisk, Wendy Reynolds, and Christa Oestreich for this edition. It is a true delight to work with such a professional group dedicated to creating the best books and instruction manuals possible.
Contents
About the Author
Introduction
Gallery
Part One: Woodburning Basics
Woodburning Tools and Equipment
Woodburning Media
Sanding the Wood Blank
Transferring a Pattern
Finishing Steps for Woodburning
Part Two: Practice
Practicing Woodburning Pens and Tips
Creating a Practice Board
Patterns for Practice
Composition of a Good Woodburning
Part Three: Projects & Patterns
Beginning Projects
Creating the Dragonette Step-by-Step
Dragonette Chessboard
Our Daily Bread
Celtic Stag
Ivy Line
Wild Rose Corner
My Room Gingerbread Man
Single Briar Rose
Summer Morning Sun Face
Dancer
Intermediate Projects
Creating the Mallard Drake Step-by-Step
Buffalo Skull Dream Weaver Circle
Western Horse
Wood Spirit
Old-Timer Fireman
Solar Flare Sun Face
Mule Deer Portrait
White-Tailed Deer Lodge
American Eagle
Owl on Branch
Oak Man
Advanced Projects
Creating The Country Church Step-by-Step
Cowboy Boots
The Philadelphia Derringer
Dragon
The End of the Road
Grandpa’s Pride and Joy
Hide ’n Seek
Horned Owl
Harrisburg Star Barn
Our Town Mantel
Green Man
Celtic Bird
Glossary
About the Author
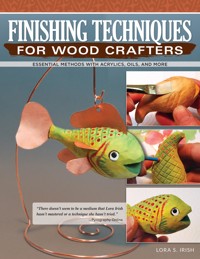
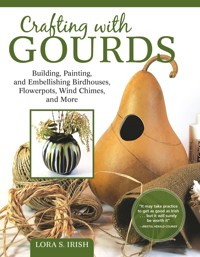
Lora S. Irish is an author, artist, carver, and pattern designer residing in Mount Airy, MD. She has written Landscape Pyrography: Techniques and Projects, Crafting with Gourds, Finishing Techniques for Woodcrafters, and many other Fox Chapel Publishing books. For more of her work, visit lsirish.com.
Introduction
Whether you’ve never tried pyrography before or you’ve simply used it to sign or enhance projects created in other media, this book will show you how to create beautiful pieces with only a pyrographic tool. Today’s pyrographic equipment can be both inexpensive and readily available, so getting started is easy to do.
Although it is often referred to as woodburning, the art of pyrography can be worked on just about any natural surface, which gives you a wide variety of possibilities on which to explore this craft. Wooden box tops, gourd bluebird houses, watercolor paper that’s suitable for framing, and even leather belts are used as working surfaces for burned designs. For this book, I worked the finished samples on several different species of wood, such as birch plywood and basswood. However, the techniques and instruction do apply to other materials, such as leather, paper, and gourds.
As you work through the lessons, ideas, and patterns in this book, you will learn how to start with a drawing or a photograph and translate it to a fully finished, finely detailed woodburned project. Working step-by-step, we will explore what materials and tools you will need for your woodburning kit, which woods might best suit your project, how to prepare the wood surface and transfer your patterns, how to judge the depth of color or tonal value for each area of your design, and of course, how to create and control the woodburned tonal values through the use of textures and layers. Once your woodburning is complete, we will focus on how to add color to the burning as well as what top finishes you may wish to use.
You will also notice, as you browse through the pages, that the step-by-step projects and the patterns are broken into beginner, intermediate, and advanced sections. This breakdown of patterns and projects is designed to get you started in woodburning and to provide you with ideas and patterns to match your skill level as you continue to grow in your art. The projects are presented so that you can learn not only how to woodburn a design or pattern but also why a particular technique, tonal value, or texture was used. With the basic instructions in this book and a little practice, you will soon be able to woodburn any drawing, pattern, or photograph with confidence and expertise.
What is Pyrography?
Pyrography: The art of burning a design or pattern into a natural surface, such as wood, gourds, leather, or cotton rag watercolor paper using heated woodburning tools or a fine flame.
Pyrographic Process: The action of creating a detailed drawing onto a natural surface by using a woodburning tool to control the depth and thickness of the burned line and to develop tonal depths of shading. Pyrographic designs and patterns include landscapes, house portraits, dragons, comical firemen, wall clocks, wild roses, cowboy boots, old cars, flying mallard ducks, Western horses, and many other subjects.
Pyrographer: The person who gets to have all of the fun, excitement, and enjoyment of creating those burned drawings on clocks, box lids, jewelry, gourd birdhouses, tabletops, bookshelves, door hangers, Christmas ornaments, leather key holders, belts, cowboy chaps, greeting cards, framed art, and much more!
This Western Dragon banjo was created using half of a dried kettle gourd for the banjo’s barrel, 1/8" (3.2mm) birch plywood for the banjo’s faceplate, and sugar pine for the neck. The dragon’s tails were elongated to flow and intertwine into the neck area.
Gallery
Once you learn how easy it is to create a stunning and dramatic woodburned design, you will discover a wide variety of project surfaces that are perfect for your next burning. In this gallery section, I will share a few of my ideas, including a gourd banjo, thumb drums, a basswood boat oar, and even an office desk set.
Birch plywood comes in several thicknesses, from ¾" (2cm) for large furniture construction to 1/8" (3.2mm) for small wall plaques and framed pictures. Plywood sheets allow you to combine your favorite hobbies, such as scroll sawing or woodworking, with woodburning. This Church Mantel design, burned into a birch plywood wall shelf, will make a lovely backdrop for your favorite collectible.
Mule Deer Portrait (see pattern here) was the perfect design for this handcarved basswood canoe oar. Basswood burns easily, creating the dark tones needed to capture the deep tones of the deer’s face. The feather design was taken from Buffalo Skull Dream Weaver Circle (see pattern here).
Woodburning is perfect for outdoor decorations, such as house signs (see White-Tailed Deer Lodge pattern here), deck chairs, and wooden planters. Once burned, the brown colors of the design are permanent and weatherproof.
A large dried kettle gourd, 1/8" (3.2mm) birch plywood, and a key set were used to create the thumb drum of Summer Morning Sun Face/Pentagram Star (top and inset) and the thumb drum of American Eagle (bottom right and left). These would make wonderful gifts for your burgeoning musician (see patterns 1 and 2).
The Berry Green Man has been worked on a desk envelope holder. His dark eyes are accented by the dark shadows on the leaf and berry areas.
The Oak Man was used on the stationary/file holder box as the second piece of this desk set (see pattern on page 152). The back of the box is tall enough to include a small secondary accent of leaves.
Woodburning Basics
Woodburning as an art form has many benefits. In addition to being a wonderful way for an artist to express himself or herself, the tools and materials are rather minimal when compared to other art forms like woodcarving and woodturning. In this part of the book, we’ll take a look at the tools and equipment you’ll need to get started woodburning and address how to keep them in top running order.
Woodburning Tools and Equipment
Woodburning (also known as pyrography) is the art of creating simple line designs, highly detailed renderings, and shaded drawings using a hot-tipped pen on natural wood or wood-like surfaces. As the pen is pulled across the surface, the tip literally burns the material to create pale through dark tonal value lines. The pattern of lines and shading strokes that you use in your woodburning work determines the art style of the finished project. Any pattern can be worked in any art style or in a combination of styles.
Safety
Let us take a moment and consider a few simple safety precautions.
1. Your project material, whether it’s wood, leather, etc., should be an untreated, unpainted, and unfinished natural surface. Paints, polyurethane sealers, varnishes, and chemicals used in treating wood can release toxic fumes during the burning process.
2. Use the internet to research the material you will be burning to discover if it has any toxic properties. There are several excellent data bases available.
3. Work in a well-ventilated area. A small fan set on your table that points away from your work will help circulate the smoke and fumes. Whenever possible, work near an open window.
4. Avoid laying your project in your lap during the burning steps. This places your face directly above the fumes, which increases your chances of inhaling smoke.
5. Unplug your burning unit from the wall socket whenever you are not working. An unattended hot pen tip can cause fires.
6. While working, set your pens either on the pen stand provided by the manufacturer or on a ceramic tile.
Woodburning/pyrography systems
A woodburning is created with five elements: the woodburning unit, the pen tips, the material on which you are working, the pattern or design you will burn, and the art style you will use to create the design. Let’s look at the pyrography systems first.
There are three systems for woodburning: one-temperature tools, rheostat-controlled tools, and variable-temperature tools. Which you choose depends on both your interest in this craft, your pyrography budget, and the material on which you will be working.
One-Temperature Tool
The one-temperature tool has the heating elements inside of the handle of the tool. It comes with a variety of interchangeable brass tips that are placed in a threaded receptacle at the end of the tool. Tips for this burning system include the universal tip, calligraphy tip, cone tip, large ball shader, and large flat shader (see Figure 1.1). When used delicately, brass tips are perfect for wide, thick black line work on heavily sapped woods, such as white pine, sugar pine, and cedar.
Figure 1.1. The screw-in brass burning tips shown here fit both the one-temperature burning unit and the rheostat unit.
Once plugged into an electrical outlet, the tool reaches an even but high temperature in about five minutes (see Figure 1.2). The tonal value work in your project must be controlled through the textures or strokes that you use and the speed of the stroke. Very pale tonal values are burned by applying light pressure to the tip against the wood and moving the tool tip quickly through the burn stroke. Darker tones use a medium pressure and slower motion.
Figure 1.2. Top is a regular one-temperature tool that reaches around 950 degrees Fahrenheit. The one-temperature tool on the bottom has a low-temperature setting around 750 degrees Fahrenheit.
A full range of tonal values can be burned using a one-temperature tool. Burn your pale tones as the tool tip begins to heat up and save your darkest tones for when the tool tip has reached its full setting. Tools in this system with a low temperature maximum are also great for more delicate materials (see Figure 1.3).
Figure 1.3. A one-temperature tool with a low temperature is perfect for leather and cloth burnings.
One-temperature burning tools are inexpensive, readily available at your local craft or hobby store, and excellent for first-time woodburners to give this craft a try. I began woodburning twenty-five years ago with this style of tool. Several years ago, I purchased a new one-temperature unit so I would have two tools on the table, each with a different tip, ready for use in my projects. Although I now favor two variable-temperature system tools, I still use my one-temperature system on a regular basis.
Rheostat Tool
This inexpensive beginner’s woodburning pen has a rheostat on the power cord, which means you can control the temperature of the burning tip (see Figure 1.4). The sample rheostat burner uses the same interchangeable brass tips as the one-temperature tool (see Figure 1.1).
Figure 1.4. The rheostat control on the cord of this burning unit allows you to adjust the heat settings from very pale, cool tonal value burns to the purest hot black lines.
Create tonal values with this system by controlling the pressure of the tip on the wood, the speed of the stroke, and the density of the lines burned, as well as by adjusting the rheostat temperature settings.
Variable-Temperature Tool
Variable-temperature systems have a dial thermostat that allows you to control how cool or hot your tip is. You can adjust the temperature setting quickly, making it easy to control the tonal values in your project. This style has two types of pens: the fixed-tip pen, where the tip is permanently set in the hand grip, and the interchangeable pen, where different wire tips can be used with the hand grip.
Because the temperature controls for variable-temperature tools are separate from the burning pen, the pen handle shapes are thin, lightweight, and easy to grip for long-term burnings. A long cord from the control unit to the pen gives you free movement of your pen as you make your burning strokes (see Figure 1.5).
Figure 1.5. For the projects and practice board shown in this book, I use a Walnut Hollow Creative Woodburner. It’s a variable-temperature tool with four interchangeable pen tips.
Woodburning pen tips
Variable-temperature pens come in two varieties: fixed-tip pens and interchangeable-tip pens. A fixed-tip pen has the burning wire permanently set in the pen (see Figure 1.6). Interchangeable pens allow different tip styles to be inserted into the end of the pen. Interchangeable pens often allow you to purchase a wider variety of burning tips, a great advantage to the new pyrographer.
Figure 1.6. The burning tip is permanently attached to the pen handle for fixed-tip pens.
Tips comes in many shapes and bends, from the tight bend used in the standard writing tips to half circles that can create fish scales. Even square tubes make a textured pattern, which you can test on your practice board. Each pen tip creates its own width and shape of line burn; therefore, each is more suitable for specific textures (see Figure 1.7). Thin-edged spear tips or curved shader tips cut thin, deep lines. Loop tips and ball tips burn thick, shallow lines.
Figure 1.7. Each tip profile creates its own distinct burning stroke. A practice board (discussed in Part Two) is a great way to discover how you can control each pen tip burn.
I use four basic tools throughout this book: the loop tip, ball tip, spear shader, and spoon shader. These are the four snap-in, interchangeable tips that comes with the Walnut Hollow Creative Woodburner® (see Figure 1.8).
Figure 1.8. Each manufacturer has their own names for the pen tip profiles. In general you will use a loop tip, curved spoon shader, ball tip, and flat spear shader.
A basic beginner’s set of tips may include a tightly bent loop writing tip, a ballpoint writing tip, a flat spoon-shaped shader, add a curved-edge spear shader. These tips will burn any pattern or project in this book. Specialty tips can be added as you discover your style of burning. Tip shapes and names vary depending on the manufacturer of your burning unit and are often offered in several sizes. Check their website to see what tips are available for your pen.
Each manufacturer creates their pens to specifically fit the electric voltage, wire, and connections used in their woodburning units. Although some manufacturers sell conversion kits that allow you to use another manufacturer’s pens on their heating unit, I do not recommend this practice. Using another company’s pens can void your warranty and damage both your pens and your burning unit.
When purchasing your variable-temperature unit, consider the power features of the unit, the pen construction, how the pens connect to the unit, the guard grip construction, and the variety of tip profiles available for your unit.
Other tools
In addition to your woodburning tool, there are several other items you will want to gather into your woodburning kit before you start your first project (see Figure 1.9).
Figure 1.9. Some of the items you’ll need. From left to right: scissors, bench knife, compass, #2 or softer graphite pencil, fine-point permanent marking pen, white erasers, and an architect’s erasing pad.
Foam-core emery boards, 200- to 250-grit sandpaper, and silicon carbide cloths all serve several purposes in woodburning kits. They are used to keep your tool tips of the one-temperature tools clean from carbon build-up, which we will discuss in Cleaning Your Tips here. Finer grade sandpapers or emery cloths give a smoother polish to your tip, which ensures more even, consistent heating for your burned lines. A leather strop and aluminum oxide honing compound will also work to keep your tool tips clean. Regardless of what type of tool you choose, you will also be using sandpaper to prepare the wood surface for the pattern tracing and to sand lightly after the burning is completed.
What you’ll need
•Ceramic tile or wood palette
•Cardboard
•Long quilter’s straight pins
•Canvas stretchers
•Several grades of foam-core emery boards
•200- to 320-grit sandpaper and/ or silicon carbide cloths (emery cloth)
•Leather strop and aluminum oxide honing compound
•White artist’s eraser, gum eraser, and/or architect’s eraser pad
•Graphite pencils, #H to #2B hard pencil through #4B to #6B soft pencil
•Masking tape, transparent tape, or low-tack painters’ tape
•Small screwdriver (for variable-temperature tools)
•Needle-nose pliers (for one-temperature tools)
•Small round woodcarving gouge, bench/utility knife, and/or X-Acto knife
•Lint-free cloths, large drafter’s dusting brush, and/or old toothbrush
•Metal ruler or straightedge
•T-square and/or 90-degree drafter’s triangle
•Vellum tracing paper or onionskin tracing paper
•Artist-quality colored pencils
•Artist-quality watercolor paints and brushes
•Artist-quality oil paints and brushes
•Polyurethane spray sealer, tung oil, or Danish oil finish
•Paste wax
A white artist’s eraser is excellent for removing the pattern tracing lines and guidelines that you will use during the burning work. Avoid using erasers that are colored, such as the large, pink, office-supply style. These erasers can leave their color behind on the wood. The colored streaks are permanent and require sanding to remove them. Architecture eraser pads are also excellent for cleaning graphite, pencil rubbings, pencil lines, hand dirt, and even fine fibers that may have risen from the burning process.
A variety of graphite pencils, from a #H to #2B hard pencil through a #4B to #6B soft pencil, should be added to the kit. The harder grades of pencil, #H to #2B, are used for tracing the pattern lines. Soft pencils, #4B to #6B, can be used to coat the back of your pattern to create graphite tracings. Throw a roll of masking tape and transparent tape into the kit to secure the paper patterns to your board.
Tool tips need to be changed during the burning work. For variable-temperature tools, a small screwdriver will do the job. One-temperature tools will require a pair of needle-nose pliers.
A small round woodcarving gouge is great to have handy. We all make mistakes. Sometime during a woodburning you will invariably burn the wrong area or burn an area too dark. Using a small round woodcarving gouge, you can gently carve away the incorrect burning, lightly sand to remove any marks left by the gouge, and then re-burn that area correctly. Bench knives or X-Acto knives can be used to carefully carve away small mistakes and to cut fine highlight lines into an area that has already been burned. Some woodburners also use them as scrapers to clean their tool tips.
Large dusting brushes are excellent to remove the dust created during the preparation stage of sanding your wood surface. Old toothbrushes can also be used; they also are useful in removing any excess rouge from your tool tips when cleaning them. Lint-free cloths are also useful during these steps.
For guidelines and pattern placement, you will need a metal ruler or a straightedge plus a T-square and/or a 90-degree drafter’s triangle. My kit includes all of these. Choose a metal ruler, not plastic, so you can use it to guide the woodburning tool as you work. (Note:


