Erhalten Sie Zugang zu diesem und mehr als 300000 Büchern ab EUR 5,99 monatlich.
- Herausgeber: CompanionHouse Books
- Kategorie: Lebensstil
- Sprache: Englisch
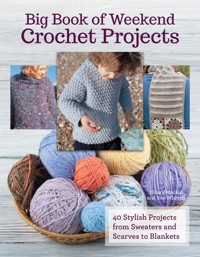
Crochet is Back! Combining the latest, fabulous yarns with traditional techniques, this book presents a wonderful collection of 40 glorious crochet designs. The projects are divided into four chapters: *Sweaters and Tops *Accessories *Children's Fashions *Home Accessories. Some of the items are remarkably quick and simple to make, such as the skinny scarf or the baby blanket, while others make use of more complex crochet techniques, such as working motifs, using charts, or working in rounds. From simple, sleeveless vests and tops to warm, cozy jackets and sweaters to bags, scarves, and capes, there is something here to suit every style. All the information for each pattern is clearly given alongside beautiful photographs of the finished items. In addition, a section at the front of the book takes the reader through all the crochet basics, from choosing hooks and yarns to following patterns and checking tension. Essential techniques are explained with step-by-step instructions and photographs. There are 40 adorable crochet projects; designs for the latest and best yarns, such as metallic, mohair, ribbon, 4-ply, and worsted; simple patterns for the beginner; and more complex patterns for those with more experience. Maybe it's time for you to fall in love with crochet again. These projects will help!
Sie lesen das E-Book in den Legimi-Apps auf:
Seitenzahl: 293
Veröffentlichungsjahr: 2019
Das E-Book (TTS) können Sie hören im Abo „Legimi Premium” in Legimi-Apps auf:
Ähnliche


Big Book ofWeekendCrochet Projects
Big Book of Weekend Crochet Projects
CompanionHouse Books™ is an imprint of Fox Chapel Publishers International Ltd.
Project TeamVice President–Content: Christopher ReggioEditor:Amy DeputatoCopy Editor: Kaitlyn OcasioDesign: Mary Ann Kahn
Copyright © 2018 by IMM Lifestyle Books
All rights reserved. No part of this book may be reproduced, stored in a retrieval system, or transmitted in any form or by any means, electronic, mechanical, photocopying, recording, or otherwise, without the prior written permission of Fox Chapel Publishers, except for the inclusion of brief quotations in an acknowledged review.
ISBN 978-1-62008-297-3
The Cataloging-in-Publication Data is on file with the Library of Congress.
This book has been published with the intent to provide accurate and authoritative information in regard to the subject matter within. While every precaution has been taken in the preparation of this book, the author and publisher expressly disclaim any responsibility for any errors, omissions, or adverse effects arising from the use or application of the information contained herein.
Fox Chapel Publishing903 Square StreetMount Joy, PA 17552
Fox Chapel Publishers International Ltd.7 Danefield Road, Selsey (Chichester)West Sussex PO20 9DA, U.K.
www.facebook.com/companionhousebooks
We are always looking for talented authors. To submit an idea, please send a brief inquiry to [email protected].
Printed and bound in Singapore21 20 19 18 2 4 6 8 10 9 7 5 3 1
Contents
Introduction
Getting Started
Crochet Techniques
SWEATERS AND TOPS
Asymmetrical Jacket
Cool-Weather Capelet
Casual Cardigan
Chevron Classic Halter
Casual Comfort Jacket
Lacy Openwork Tunic
Tunic with Lace Borders
Bolero Sizzle
Simple Chic Shrug
Sunny Stripes Top
Little Red-Hooded Poncho
Tie-Front Bolero
Go-Anywhere Vest
Summer Breezes Top
Wraparound Jacket
ACCESSORIES
Tote Bag with Motif Border
Striped Scarf
Openwork Hip Hugger
Ruffled Boa
Luxurious Shawl
Retro Tote
Skinny Scarf
Classy Cloche
CHILDREN’S FASHIONS
Mittens, Booties, and Hat or Bonnet
Duffle Coat and Hat
All Zipped Up Cardigan
Soft-Touch Baby Afghan
Fisherman’s Sweater
Sunday Best Set
Hooded Sweater
Itty-Bitty Cardigan
Ribbons 'n' Bows Sweater
Ruffles Galore Bolero
Rag Doll
HOME DECOR
Rag Rug
Patchwork Cover
Looped Pillows and Rug
Rainbow Lap Throw
Chevron Throw
Springtime Table Topper
Index
About the Authors
Photo Credits
Introduction
In recent years, crochet has become as popular as knitting—both crafts made more interesting due to the wonderful yarns available as well as the trends in fashion. Crocheted accessories not only look stunning, but they are also comfortable to wear.
To crochet, you need to grasp just a few basic stitches. All pattern stitches are variations on these basic stitches, providing interesting textures and different looks. You can crochet just about anywhere, so slip your project into your bag if you have a train or bus ride, or crochet while waiting for an appointment. Onlookers will be fascinated by your expertise and dexterity and astonished at how quickly the work grows.
The possibilities are endless. With just a hook and some yarn, you can create anything from a delicate lacy tunic to a warm jacket. Using some of the wonderful specialty yarns available, you can also create some stunning accessories, from shimmery scarves to hats and bags. Making items for babies and children is a real joy because there is such a wonderful range of soft and colorful yarns to choose from. And once your wardrobe is complete, you can begin to transform your home with some wonderful crocheted pieces, such as a stylish bedspread, a colorful throw, or a fun faux-fur rug and pillows.
This book includes some simple patterns aimed at the beginner as well as more complex patterns for those who prefer something a little more challenging. So give it a try—you’ll soon be “hooked” on this fun, rewarding, and fashionable craft!
Getting Started
Crochet is incredibly versatile, and the beauty of this wonderful craft is that you can achieve so many different effects with the simplest of materials. All you really need to get started is a crochet hook and a ball of yarn. In this section, you will find valuable information about tools, yarns, and following a pattern successfully.
Crochet Hooks
Available in a wide range of sizes, crochet hooks are graded by several different systems. The simplest system is the metric one, which is used in Europe and is becoming familiar in the United States. Metrically sized hooks range from a tiny 0.6-mm (0.02-inch; a little narrower than a pin) up to a chunky 15-mm (0.6-inch).
Crochet hooks come in many sizes.
Medium- and large-sized American hooks—referred to as “regular” (or “jiffy” in the case of large ones)—are graded by letter and/or number (the latter corresponding to knitting-needle sizes), with the size increasing along with the number or rank in the alphabet. The smallest is a B/1 (2.25 mm [0.09 inch]), and the largest are graded Q or S (about 16 and 19 mm [0.6 and 0.75 inch], respectively). These medium-to-large hooks and their metric equivalents are commonly made of aluminum, plastic, or, less often, wood, bamboo, or bone. Small American hooks, made of steel, are sized in reverse numerical order, from 00 (about 3 mm [0.12 inch]) down to a minuscule 14 (about 0.6 mm [0.02 inch]).
Extra-long crochet hooks are used for Tunisian crochet (also called afghan stitch); some of these have a hook at each end of the shank for making double-faced, two-color fabrics.
The table shows metric and U.S. equivalent sizes. Please note, however, that the equivalents are not usually exact and there are even slight variations between American manufacturers. If you cannot obtain the correct gauge using an American hook, you might do better with the metric equivalent.
Crochet Hook Conversion Chart
Steel hooks
U.S.
Metric (mm)
14
0.60
12
0.75
10
1.00
8
1.25
7
1.50
5
1.75
Aluminum or acrylic hooks (wood or bamboo)
U.S.
Metric (mm)
B/1
2.00
C/2
2.50
D/3
3.25
E/4
3.50
F/5
3.75
G/6
4.25
7
4.50
H/8
5.00
I/9
5.50
J/10
6.00
K/10
7.00
L/11
8.00
M/13
9.00
N/15
10.00
Yarns
Traditional crochet consisted almost exclusively of delicate openwork designs made of very fine crochet cotton (smooth and tightly twisted) and worked with tiny steel hooks. This form of crochet was used mainly for household objects, such as place mats, dressing-table sets, and tablecloths. It was also used to embellish clothing with lacy collars and cuffs. This intricate work is for the more advanced crocheter.
Today, crochet is used mainly for clothing and for sturdier household accessories, and the range of yarns available for this kind of work is vast. In addition to American yarns, there is a host of imported yarns. All of these are designated by different terms—some relating to the thickness, or “weight,” of the yarn, some to its construction, and some to its traditional use. As you gain experience in crochet, you’ll become familiar with these terms. Here are some of the most common:
Knitting worsted (U.S.)—A relatively heavy, smooth wool yarn. “Worsted weight” describes a similar yarn spun from synthetic or a blend of natural and synthetic fibers.
Double knitting or DK (British/Continental)—Finer than knitting worsted, this type of yarn is so named because it is about twice as thick as “4-ply” yarn even though it also is spun from four plies, or strands.
Sport weight (U.S.)—A medium-weight yarn, somewhat lighter than double knitting.
4-ply (U.K.)—This type of yarn is a little lighter than sport weight. Note that many other yarns, including knitting worsted and DK, have four plies; the name of this yarn identifies its particular weight.
You’ll also encounter fisherman (U.S.)/Aran (U.K.) yarns, which are smooth yarns about the same weight as knitting worsted; bulky or chunky yarns; and fine fingering (U.S.) and two-ply Shetland yarns (U.K.), which are often used for lacy patterns. Novelty yarns come in a huge range of weights, textures, and colors, including multicolored effects.
Many of today’s crocheted fashions use thick yarns, both smooth and textured, which are quick and easy to work, especially with an oversized hook and an openwork pattern. As a rule, the yarns made for knitting are equally suitable for crochet, although bouclé and nubby yarns can be difficult to handle, especially in patterns requiring you to work several stitches together. A smooth yarn will show off the stitch pattern well, and one that is tightly twisted will give a firm finish. For a soft, fluffy effect, choose a long-haired yarn.
Choosing Yarns
All the patterns in this book specify the yarn to be used, and for the best results it is advisable to use this recommended yarn. If you cannot find this yarn, choose one of similar weight and type; also make sure that the total length of the substitute yarn is at least as long as the total length of the original yarn. Many yarn labels give the length in the ball (if not, ask the salesperson); multiply this by the number of balls required and do the same for the recommended yarn. Make a gauge swatch (see page 18-19) to check that the crochet will be the correct size.
Yarns Used in This Book
(Note: Lengths per ball are approximate, depending on the dye, and the weights in ounces are approximate conversions of the total grams.)
Colinette Graffiti: 100 percent wool; 87 yards (80 m) per 3.5-oz. (100-g) hank
Colinette Lasso: 100 percent polyamide; 224 yards (205 m) per 3.5-oz. (100-g) hank
Colinette Tagliatelle: 90 percent Merino wool, 10 percent nylon; 158 yards (145 m) per 3.5-oz. (100-g) hank
Lion Brand Boucle: 79 percent acrylic, 20 percent mohair, 1 percent nylon; 57 yards (52 m) per 2.5-oz. (70-g) ball
Lion Brand Cotton: 100 percent cotton; 236 yards (212 m) per 5-oz. (140-g) ball
Lion Brand Jiffy: 100 percent acrylic; 135 yards (123 m) per 3-oz. (85-g) ball
Lion Brand Micro Spun: 100 percent microfiber acrylic; 168 yards (154 m) per 2.5-oz. (70-g) ball
Rowan 4-Ply Cotton: 100 percent cotton; 186 yards (170 m) per 1.75-oz. (50-g) ball
Rowan Calmer: 75 percent cotton, 25 percent acrylic/microfiber; 175 yards (160 m) per 1.75-oz. (50-g) ball
Rowan Cashsoft Baby DK: 57 percent extra-fine Merino, 33 percent microfiber, 10 percent cashmere; 142 yards (130 m) per 1.75-oz. (50-g) ball
Rowan Cash Cotton DK: 35 percent cotton, 25 percent polyamide, 18 percent Angora wool, 13 percent viscose, 9 percent cashmere; 142 yards (130 m) per 1.75-oz. (50-g) ball
Rowan Cotton Glace: 100 percent cotton; 126 yards (115 m) per 1.75-oz. (50-g) ball
Rowan Handknit Cotton DK: 100 percent cotton; 93 yards (85 m) per 1.75-oz. (50-g) ball
Rowan Kid Classic: 70 percent lambswool, 26 percent kid mohair, 4 percent nylon; 153 yards (140 m) per 1.75-oz. (50-g) ball
Rowan Soft Baby: Wool blends; 164 yards (150 m) per 1.75-oz. (50-g) ball
Rowan Summer Tweed: 70 percent silk, 30 percent cotton; 118 yards (108 m) per 1.75-oz. (50-g) hank
Sirdar Breeze DK: 60 percent acrylic, 40 percent cotton; 28 yards (26 m) per 3.5-oz. (100-g) ball
Sirdar Cotton DK: 100 percent cotton; 184 yards (169 m) per 3.5-oz. (100-g) ball
Sirdar Country Style DK: 45 percent acrylic, 40 percent nylon, 15 percent wool; 347 yards (318 m) per 3.5-oz. (100-g) ball
Sirdar Foxy: 100 percent polyester; 98 yards (90 m) per 1.75-oz. (50-g) ball
Sirdar Funky Fur: 100 percent polyester; 98 yards. (90 m) per 1.75-oz. (50-g) ball
Sirdar Silky Look DK: 93 percent acrylic, 7 percent nylon; 147 yards (135 m) per 1.75-oz. (50-g) ball
Sirdar Snuggly DK: 55 percent nylon, 45 percent acrylic; 98 yards (90 m) per 1.75-oz. (50-g) ball
Sirdar Snuggly 4-Ply: 55 percent nylon, 45 percent acrylic; 98 yards (90 m) per 1.75-oz. (50-g) ball
Sirdar Tuscany: 57 percent polyester, 38 percent acrylic, 5 percent nylon; 62 yards (57 m) per 1.75-oz. (50-g) ball
Sirdar Wash ’n’ Wear: 55 percent nylon, 45 percent acrylic; 347 yards (318 m) per 3.5-oz. (100-g) ball
Twilleys Freedom Cotton: 100 percent cotton; 93 yards (85 m) per 1.75-oz. (50-g) ball
Other Essentials
Tapestry needles: These blunt-pointed needles with large eyes are used for sewing seams; a sharp-pointed needle might split the yarn and weaken it. The oversized eye allows for easy threading.
Tape measure: Use a good-quality tape measure that won’t stretch; accurate measurements are important when checking gauge.
Pins: Use long pins with large heads for holding pieces together prior to seaming because they are less likely to get lost in the crochet.
Scissors: Have a sharp pair of scissors on hand for cutting lengths of yarn.
Following Patterns and Sizing
Before beginning a pattern, it is important to check a few things so that you won’t be disappointed with the end result. Start by checking the “actual” measurements given with the pattern. Depending on the style of the garment, there may be less or more ease than you prefer for the fit you require. If in doubt, measure one of your favorite garments and compare its measurements to those given with the pattern.
It is best to read the whole pattern before starting to crochet. This gives you a valuable overall picture of how the stitch pattern works and how the whole article is put together.
Most of the patterns for garments in this book give more than one size. The instructions are given for the smallest size first, with figures for the larger size(s) following in parentheses ( ). Where the figure “0” appears, no stitches or rows are to be worked in that particular size. Where there is only one set of figures given, this applies to all sizes.
Work the figures in brackets [ ] the number of times stated after the second bracket; for example, “[ch 1, skip 1 ch, 1 dc into next st] 5 times.” Brackets can also be used to clarify working a number of stitches into one stitch: for example, “[1 tr, ch 3, 1 tr] into next st.” Stitch counts are also given throughout the patterns, at the end of a row; this helps you check that the number of increasing and decreasing stitches is correct.
Asterisks are used to indicate a repetition of instructions. The whole sequence between the asterisk and the next semicolon is to be repeated as many times as necessary to reach the end of the row; for example, “* ch 1, skip 1 ch, 1 tr into next st, ch 1, skip 1 ch, 1 tr into each of next 3 sts; rep from * to end, turn.”
Abbreviations and Definitions
Abbreviations are used for many of the repetitive words that occur in patterns (see the following list). Abbreviations that are specific to a pattern will be given with the rest of the pattern information.
Common Abbreviations
Crochet Terms and Abbreviations
Base (Foundation) Chain
The length of chain made at the beginning of a piece of crochet as a basis for constructing the fabric. It is made up of a number of chain stitches.
Turning/Starting Chain
One or more chains, depending on the length of the stitch required, worked at the beginning of a row (or end of the last row). This sometimes counts as the first stitch on a new row (starting chain) when working in rounds.
Gauge
Probably the most important factor in making a successful garment is to obtain the correct gauge. This is the number of stitches or rows worked over a given measurement.
Often, we are so eager to get on with our crocheting that we assume our gauge will be correct. The gauge is governed not only by the size of the yarn and hook but also by the tension with which the crocheter works (for this reason, gauge is called “tension” in Britain). It is worth spending a little time to get the gauge right, because a too-loose gauge will produce a larger garment, and the fabric will be too floppy to hold its shape; you could also run out of yarn. A too-tight gauge will produce a smaller garment, and the fabric will be too stiff.
The best way to check your gauge is to make up a swatch of crochet fabric about 6 inches (15 cm) square, using the yarn and hook size recommended in the pattern and working the stitch pattern for the design as stated at the beginning of the pattern. Lay the swatch on a flat surface, being careful not to stretch it. Using long pins, mark the gauge measurement given in the pattern (usually 4 inches [10 cm]) in both directions. Count the number of stitches and rows within this area, remembering to include any half stitches. If you have too few stitches and rows, your work is too loose, and you should try a smaller hook. If you have too many stitches and rows, your work is too tight, so try a larger hook.
Work another gauge swatch and measure again. Repeat, if necessary, until you have the correct gauge. Where a pattern uses different hook sizes in one garment, you will have to adjust all of the hooks in the same way.
Note: The hook size suggested in the pattern is only a guide. You must use whichever hooks give you the correct gauge.
Here’s a hint: Stitch gauge is generally more important than row gauge because a pattern normally instructs you to work until you reach a certain length; therefore, the number of rows within that length can vary slightly without affecting the size.
Checking the gauge.
The number of stitches, however, is dictated by the pattern, so their size will govern the width of the garment.
Pressing and Blocking
Always read the manufacturer’s instructions on the yarn label to see if pressing is recommended and, if so, what iron temperature is suggested. The yarn label will also give you any care instructions. If any pressing is necessary, it is best to press on the wrong side of the work. Cover the item with a clean cloth before pressing. Pressing is different from ironing in that you do not slide the iron over the surface; rather, you lower the iron onto the fabric for a second or two and then lift it away.
When a piece of crochet fabric is very textured, it is sometimes better to block the item rather than press it. For blocking, use a clean, flat surface into which you can stick dressmaker’s pins, such as an ironing board. Pin the piece out to the correct measurements and then cover it with a damp cloth and allow it to dry.
Crochet Techniques
Once you have mastered the basic stitches, you can go on to create a whole range of wonderful crochet pieces. Discover how to work longer stitches, work increases and decreases, and create decorative effects. You will also learn how to finish your crochet items for a professional look.
Note for left-handers: Work from these photographs, but use a mirror so that the diagrams are a “mirror image” (in reverse). When you read the instructions, replace “left” for “right” and “right” for “left” where applicable.
Making a Slip Knot
Almost all crochet begins with a base, or foundation, chain, which is a series of chain stitches beginning with a slip knot. To start, make a slip loop about 6 inches (15 cm) from the cut end of the yarn. Slip the loop over the crochet hook and pull up the end so that the loop sits comfortably around the crochet hook, just below the actual hook section.
Holding the Hook
Hold the hook in the right hand (left hand if you’re left-handed) in the same way as a pencil, with the thumb and forefinger over the flat section of the hook. Alternatively, you can hold it in a firmer, overhand grip.
Making a slip loop.
Holding the hook with a pencil grip.
Holding the Yarn and Work
The left hand holds the work and controls the yarn. Try to keep the grip of the thumb and index finger of the right hand near the new stitch; this helps to keep the gauge correct.
Once the first loop is on the hook, wind the yarn once around the little finger and then over the ring, middle, and index fingers. Use the index finger to manipulate the yarn as you work, and use the middle finger and thumb to hold the work. Pull the yarn gently so that it lies around the fingers firmly. Remember to keep the tension even so that all stitches are the same size.
Holding the hook with an overhand grip.
Holding the work.
Starting Out
Follow these simple steps to begin crocheting.
1 | Hold the hook in the right hand between the thumb and index finger, resting on the second finger, and then place the hook under the yarn between the first and second finger on the left hand from front to back.
2 | Let the hook catch the yarn and then turn the hook counterclockwise to draw the yarn through the loop on the hook, thus replacing the slip knot with one chain stitch. Repeat this action to make the required number of chains. This is called the foundation, or base, chain.
A foundation chain of six stitches (viewed from the front).
Chain Stitch (ch)
Besides serving as the foundation of a piece of crochet, chain stitches are also used in patterns to make spaces and arches between stitches or to reach the height of other stitches when turning and working in rows or rounds. To work chain stitches, follow these simple steps.
1 | With the yarn in position and the chain loop on the hook, pass the hook under the yarn held in the left hand and catch it with the hook.
2 | Turn the hook to draw the yarn through the loop on the hook. Repeat until you have the required number of chains or until the foundation chain is the desired length.
3 | Count each chain stitch, looking at the front (flatter part) of the chain, ignoring the loop on the hook— when counting the chain stitches, you do not count the original slip loop from which the first chain was made.
A foundation chain of six stitches (viewed from the back).
Note: Try to work the foundation chain quite loosely. If these stitches are too tight, it will be difficult to work into them, and the edge will be too tight. If the foundation chain does seem too tight, try using a hook one or two sizes larger to achieve a slightly looser chain.
Basic Stitches
A variety of stitches can be worked into the foundation chain to form a crochet fabric. Each stitch gives a different texture and varies in depth. Whatever the stitch, the top edge of each row forms a new line of chains into which the next row is worked.
At the beginning of a row, one or more chain stitches must be worked in order to lift the working loop on the hook to the height of the following stitches; this is called a turning chain. The number of turning-chain stitches required depends on how many times the yarn is wrapped around the hook to form the first stitch in that row.
The chart on this page gives the number of turning chains needed for the basic stitches. This is the general rule, but you may find that fewer chains—for example, two turning chains instead of three at the beginning of a row of double crochet—is satisfactory to reach the height of the rest of the stitches and will give a neater edge.
Slip Stitch (ss)
This stitch has virtually no depth and is used to work over a fabric made from other stitches. It can be used to move from one point in the fabric to another—for example, to decrease a number of stitches at the armhole shaping, thus avoiding having to break and rejoin the yarn. A slip stitch is also used to close a ring when working in rounds and for finishing the garment by joining two pieces together.
To work into a base chain (or stitch), insert the hook into the second chain (or next stitch) from the hook, wind the yarn around the hook—called yarn over hook or just yarn over—and draw it through both loops on the hook. Repeat this action until you reach the required position and then continue as stated in the instructions.
Working a slip-stitch row.
Notes: When working into the base chain, take the hook under two strands of each chain unless otherwise instructed. Additionally, it is best to count the number of stitches in the row periodically to check that you still have the required number.
PLACING STITCHES
Most stitches are worked under both strands of the top of a stitch, and this is how to work the stitches in this book unless instructed otherwise (Fig. A).
Fig. A
You create a different effect if you work into only the front or back strand of the stitch. For example, if you work into the back strand of each stitch on every row, the unworked front loop will give a ridge effect (Fig. B).
Fig. B
To create a lacy effect, work into the space between the stitches on the previous row instead of the two strands at the top of the stitch (Fig. C). This will open up the stitches on the previous row. It is quick and easy to do, especially when using textured or bulky yarns, which can be difficult to handle when working into the tops of stitches in the usual way.
Fig. C
Single Crochet (sc)
Single crochet creates a dense fabric when used alone. It is popular for working crochet edgings. To work single crochet, follow these steps.
Single crochet fabric.
1 | At the start of a row of sc, begin with 1 chain for turning. Put the hook into the second stitch to the left of the hook. Yarn over hook and draw a loop through. There are now 2 loops on the hook (Fig. 1).
2 | Yarn over hook and draw it through the 2 loops on the hook. Now 1 loop remains on the hook. Continue working each stitch this way (Fig. 2).
3 | After the last stitch, turn and work 1 chain to count as the first single crochet of the next row, then skip the first single crochet of the previous row, and then work 1 single crochet into each stitch, including the turning chain at the beginning of the previous row (Fig. 3).
Note: In some patterns, the turning chain is counted as the first stitch in the row; in others, it is disregarded. Follow the instructions given on the pattern and be consistent throughout the work.
Half-Double Crochet (hdc)
This stitch is halfway between a single crochet and a double crochet. It, too, is a popular fabric and not as dense as single crochet.
Half-double crochet fabric.
1 | Begin with 2 chains for turning. Wind the yard over the hook and put the hook into the third stitch to the left of the hook (including turning-chain stitches); yarn over hook and draw a loop through. There are now 3 loops on the hook (Fig. 1).
2 | Yarn over hook and draw the yarn through the 3 loops on the hook. Now 1 loop remains on the hook. Work each stitch this way (Fig. 2).
3 | After the last stitch, turn and make 2 turning chains, to count as the first half-double crochet, and then work one half-double into each stitch to the end of the work, including the turning chain at the beginning of the previous row.
Double Crochet (dc)
This is one of the most commonly used stitches because it is of medium height. It produces a light fabric that is firm but also flexible.
Double crochet fabric.
1 | Begin with 3 chains for turning. Wind the yarn over the hook and then put the hook into the fourth stitch to the left of the hook (including turning chains); yarn over hook and draw through a loop. There are now 3 loops on the hook (Fig. 1).
2 | Wind the yarn over the hook and draw it through the first 2 loops on the hook. Yarn over hook and draw it through the remaining 2 loops. Now 1 loop remains on the hook. Continue working each stitch this way (Fig. 2).
3 | After the last stitch, turn and make 3 turning chains, to count as the first double crochet, and then work one double crochet into each stitch to the end of the work, including the third of the 3 turning chains at the beginning of the previous row.
Triple Crochet (tr)
This stitch is worked in the same way as the double but is taller. It is used mainly for openwork patterns. A fabric made solely of triples would be loose and open, and the rows would appear to be joined by “stems.” A scarf worked in triples, using thick yarn and a large crochet hook, would be a suitable project for the beginner.
Triple crochet fabric.
1 | Start with 4 chains for turning. Wind the yarn around the hook twice and then put the hook into the fifth stitch to the left of the hook (including turning chains); yarn over hook and draw a loop through. There are now 4 loops on the hook (Fig. 1).
2 | Wind the yarn over the hook and draw through the first 2 loops on the hook (there are now 3 loops on the hook).
3 | Wind the yarn over the hook and draw it through the first 2 loops on the hook (there are now 2 loops on the hook).
4 | Yarn over hook and draw it through the remaining 2 loops on the hook. Now 1 loop remains on the hook. Continue working each stitch this way.
5 | After the last stitch, turn and make 4 turning chains, to count as the first triple, and then work one triple into each stitch to the end of the work, including the fourth chain of the 4 turning chains at the beginning of the previous row.
Working Longer Stitches
Longer stitches—double triple (dtr), triple triple (trtr), quadruple triple (quadtr), and quintuple triple (quintr)—are worked in basically the same way as the double: by wrapping the yarn three, four, five, etc., times around the hook before you start the stitch, and by wrapping and drawing it through however many times it takes to complete the stitch (see chart).
Fastening Off
Fasten off the working yarn permanently when the last stitch has been made. Cut the yarn, leaving a short end of approximately 2 inches (5 cm) or longer if you need to sew pieces together. Draw the end through the loop on the hook and tighten it gently.
Increasing and Decreasing
Increases and decreases are used to give a garment shape, such as decreasing for the neckline or increasing for sleeve shaping, and are worked by adding or taking away a number of stitches to or from a row. Shaping is usually worked at the ends of rows, but it can also be worked during the course of a row.
Single Increase
To increase one stitch, simply work twice into the same stitch.
Note: When increasing at each end of the row, work twice into the first and last stitches of the previous row. When using thick yarns, it is best to work the increases into the second stitch at the beginning and into the next-to-last stitch at the end of the row. This will give the crochet fabric a smoother edge.
If you need to increase more than one stitch at one time, it is better to increase two stitches at regular intervals across a row than to work a larger number of stitches into one space.
Single increase.
Multiple Increases
When increasing a number of stitches at both ends of a row—for example, to add sleeves to the main body of a garment—you need to work additional chains at the beginning and end of the row.
1 | When you reach the end of the last row before the increases, work a foundation chain instead of a turning chain. Work one chain for each of the new stitches, plus any turning chains (Fig. 1).
2 | Turn and work across the row in the usual way (Fig. 2).
3 | When you reach the end of the row, you again need a length of foundation chain, but you cannot just work the chain from this point, because it would then serve as a foundation for the following row. Because of the height of crochet stitches, the work would look unbalanced. Instead, remove the hook from the working loop (pulling the loop up a bit so it doesn’t unravel) and then, using a separate length or ball of yarn, work the required number of foundation chains (no turning chain is needed) and fasten off. Return to the working loop and continue on the new stitches (Fig. 3).
Note: Count the stitches to make sure you have the correct number, as stated in the pattern.
Working two stitches together.
Single Decrease
To decrease one stitch, simply work two stitches together as one. That is, work the first stitch up to, but not including, the step that would complete the stitch, and then work a second stitch into the next stitch in the row below, completing it and the first stitch at the same time.
This basic method can be used to decrease several stitches together. Specific instructions will normally be given in the pattern and abbreviated, for example, as dc2tog or tr3tog.
Another method of decreasing within a row is simply to skip a stitch in the previous row.
Decrease One Single Crochet during the Course of a Row
To decrease one single crochet in the course of a row, just skip one stitch of the previous row at the stated point; this will not show as a gap because single crochet is a short stitch.
Decrease One Half-Double Crochet during the Course of a Row Work along the row to the stated position.
1 | Yarn over hook and insert the hook into the next stitch; yarn over hook and draw through the loop (3 loops on the hook); yarn over hook and insert the hook into the next stitch; yarn over hook and draw through the loop (5 loops on the hook) (Fig. 1).
2 | Yarn over hook and draw through all loops on the hook. One half-double has now been decreased (Fig. 2).
Decrease One Double Crochet (and Longer Stitches) during the Course of a Row
Work along the row to the stated position and follow these steps.
1 | Yarn over hook and insert the hook into the next stitch; yarn over hook and draw through the loop; yarn over hook and draw through 2 loops on the hook.
2 | Yarn over hook and insert the hook into the next stitch; yarn over hook and draw through the loop; yarn over hook and draw through 2 loops on the hook.
3 |


