Erhalten Sie Zugang zu diesem und mehr als 300000 Büchern ab EUR 5,99 monatlich.
- Herausgeber: Fox Chapel Publishing
- Kategorie: Lebensstil
- Sprache: Englisch
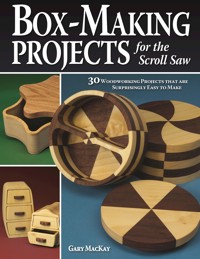
Discover 30 woodworking projects that are surprisingly easy to make! Now woodworkers of any skill level will be able to easily make their own decorative and functional wooden boxes, using just one tool - the scroll saw. Author and heirloom box-maker, Gary MacKay, provides step-by-step photo demonstrations to create wood boxes with checkerboard, diamond and pinwheel effects. Patterns include eye-catching designs for jewelry and recipe boxes, tissue boxes, knitting trays and desk organizers.
Sie lesen das E-Book in den Legimi-Apps auf:
Seitenzahl: 103
Veröffentlichungsjahr: 2006
Das E-Book (TTS) können Sie hören im Abo „Legimi Premium” in Legimi-Apps auf:
Ähnliche


Acknowledgments
Thanks to the following people who have encouraged and inspired me to write this book:
My wife, Helen, whose suggestions and photography were constantly appreciated.
My book editor, Gretchen Bacon, Peg Couch, and the staff at Fox Chapel Publishing Company.
Friends and customers who have kept me busy working on my scroll saw.
© 2006 by Gary MacKay and Fox Chapel Publishing Company, Inc., East Petersburg, PA.
Box-Making Projects for the Scroll Saw is an original work, first published in 2006 by Fox Chapel Publishing Company, Inc. The patterns contained herein are copyrighted by the author. Readers may make copies of these patterns for personal use. The patterns themselves, however, are not to be duplicated for resale or distribution under any circumstances. Any such copying is a violation of copyright law.
For a printable PDF of the patterns used in this book, please contact Fox Chapel Publishing at [email protected], quoting the ISBN and title of this book, as well as the pattern or patterns required.
Print ISBN 978-1-56523-294-5
eISBN 978-1-60765-901-3
Publisher’s Cataloging-in-Publication Data
MacKay, Gary.
Box-making projects for the scroll saw / Gary MacKay. -- EastPetersburg, PA : Fox Chapel Publishing, 2006.
p. ; cm.
ISBN 978-1-56523-294-5Includes index.
1. Wooden boxes. 2. Woodwork--Patterns. 3. Woodworking tools. 4. Jig saws. I. Title.
TT180 .M33 2006684/.08--dc22 0609
To learn more about the other great books from Fox Chapel Publishing, or to find a retailer near you, call toll-free 800-457-9112 or visit us at www.FoxChapelPublishing.com.
Note to Authors: We are always looking for talented authors to write new books. Please send a brief letter describing your idea to Acquisition Editor, 1970 Broad Street, East Petersburg, PA 17520.
About the Author
Gary MacKay is a designer and box maker who lives with his wife, Helen, in Myrtle Beach, South Carolina. He has been designing, making, and selling boxes in craft galleries for more than 20 years.
Gary first started woodworking during his high school years when he used a jigsaw to make an end table from pine. After buying a band saw in 1985, he sold band saw boxes through consignment shops in northern Vermont. Now, he concentrates on designing and making wooden items that can be cut on a scroll saw. He is currently juried through the South Carolina Artisans Center, one of the craft galleries where his work is on display.
Gary likes to use his scrap wood to make snowflake ornaments and intarsia projects. Whenever he is not working in his woodshop, he can be found out on the golf course or in the vegetable garden. Gary is a frequent contributor to Scroll Saw Woodworking & Crafts magazine. This is his first book for Fox Chapel Publishing.
CONTENTS
Introduction
Chapter One: Box-Making Basics
Wood
Tools
Techniques
Finishing
Safety
Chapter Two: Making Boxes with Lids
Square Box
Triangle Box
Star Box
Heart Box
Peanut Box
Sewing Box
Chapter Three: Making Boxes with Drawers
Peaked-Top Box
Round Four-Drawer Box
Tall Box
Curves Box
Round Three-Drawer Box
Flat-Top Box
Chapter Four: Making Laminated Boxes
Checkerboard Oval Box
Checkerboard Horseshoe Box
Diamond Box
Four Woods Box
Pinwheel Box
Pie Segment Box
Chapter Five: Making Boxes with Box Joints
Knitting Box
Making Wooden Hinges
Recipe Box
Tissue Box Cover
Paper Clip Box
Pencil and Pen Box
Notepad Box
Chapter Six: Making Jewelry Boxes
Jewelry Chest
Pierced Earring Holder
Scroll Sawn Dividers Box
Ring Tray Box
Small Two-Drawer Box
Small Three-Drawer Box
Appendix: Lamination Quick Reference Chart
INTRODUCTION
The purpose of this book is to show woodworkers several scroll sawing techniques that can be used to make boxes on the scroll saw. We’ll look at several different types of boxes including boxes with lids, drawers, contrasting woods, wooden hinges, box joints, ring trays, pierced earring holders, and compartment dividers.
The first chapter focuses on boxes with lids, an ideal starting point because these are the easiest boxes to make. Next are boxes with drawers, which were designed to show how easy it is to use stacked layers for box making, and laminated boxes, which include some simple techniques for laminating contrasting woods. Boxes that use box joints follow, and this chapter includes some great techniques for creating box joints on the scroll saw. Finally, we’ll take a look at the different types of compartments you can make to customize the perfect jewelry box. In each chapter, you’ll find a complete step-by-step demonstration followed by patterns for additional projects. A Quick Cuts box is included for each project to provide you with a quick reference to the general steps necessary to create each part of each box. The Quick Cuts steps are grouped by part rather than by the step-by-step order, so you’ll want to refer back to the step-by-step demonstration for additional information.
Though some of the techniques may be slightly more difficult than others, all of the boxes in this book are deceptively simple. Each box may look like it took hours and a complex pattern to complete, but, actually, the boxes are made using simple patterns and techniques. Many of the boxes use a scroll sawing technique called stack cutting. The great thing about stack cutting wood on a scroll saw is that you do not need to follow the pattern lines precisely. Stack-cut pieces of wood will fit perfectly to their adjacent pieces of wood. By stack cutting laminated wood, you can produce boxes with checkerboard, diamond, pinwheel, and pie-piece-shaped designs—just about any shape you can think of. The end result is a beautiful box that looks like it took hours upon hours to create.
While each type of box teaches different skills, they are also designed to be decorative and useful. My main passion is designing and making jewelry boxes, projects that serve both form and function. The ones in this book feature three unique designs: ring trays, pierced earring holders, and dividers. I have also included several other boxes with practical uses: The opened lid of the Recipe Box holds the recipe while you cook. The Paper Clip Box, Pencil and Pen Box, and Notepad Box will keep your desk organized. Each project is designed to show off your woodworking skills by creating a beautiful, yet functional, end product.
I hope that you enjoy making the boxes in this book and that you will use some of the techniques presented to create other scrolling projects.
—Gary MacKay
1BOX-MAKING BASICS
Making boxes is a rather simple prospect—once you understand a few basic principles. In this chapter, we’ll explore the basic elements of box making. You’ll learn about the types of wood recommended for these projects, the tools you’ll need to make them, and tips to adding some finishing touches.
WOOD
I used 11 different wood species to make the boxes featured in this book. Some of the woods were ones that I’ve used many times before, like cherry, poplar, and walnut; others, like alder and sassafras, I used for the first time.
“Machine-ability,” or how a wood cuts on the scroll saw, is the most important factor in choosing wood for your boxes. For example, red oak and maple are more difficult to cut on a scroll saw than some of the other woods. If you are new to using a scroll saw, you’ll want to start with wood that is softer than red oak and maple.
In addition to the degree of difficulty in cutting the wood, you’ll also want to consider its color. By using contrasting woods to create the patterns, you will make your boxes really stand out.
The finished look of the wood is another consideration when you are choosing wood. All of the boxes in this book are given a natural, or clear, finish to show off the grain of the wood. A fancy jewelry box is an ideal candidate for a highly figured and beautifully colored wood like cherry or walnut. A heart-shaped keepsake box for a small child would be best made out of a durable wood like red oak. If you plan to paint your box, you’ll want to choose an inexpensive wood that will sand very smooth, like basswood or poplar.
One final consideration is cost. I used some of the more expensive woods, like cherry, mahogany, and walnut, on the thinner front and back pieces for some of the boxes in this book. Using these woods in limited areas helped to cut down on the cost of the woods but still gave the boxes a high-class, expensive look.
You’ll want to consider machine-ability, color, grain pattern, and cost when choosing wood for your boxes. Shown here are four of the woods used in this book—alder, poplar, red oak, and walnut.
In addition to a scroll saw, box making requires several types of clamps, a simple jig, a few varieties of adhesives, and some common household items.
TOOLS
You don’t need a lot of tools to make boxes on a scroll saw. In fact, in addition to a scroll saw, all you will need are some clamps, a simple jig, and a few different types of adhesives.
SCROLL SAWAND BLADES
You can use any scroll saw to make boxes. I recommend that your scroll saw have a dust blower to keep the pattern lines free of dust. A light with a magnifier will help you see the pattern lines when you are cutting. You do not need a scroll saw with a speed control or quick-change blade clamps to make boxes because all of the boxes in this book can be cut on one speed and do not require frequent blade changes.
For cutting boxes on your scroll saw, I recommend the following blades:
• #5 reverse-tooth blade for woods ¼″ to ½″ thick
• #7 reverse-tooth blade for woods ¾″ thick
• #12 reverse-tooth or thick-wood blade for woods greater than ¾″ thick
OTHER TOOLS
Of the other tools that are useful in box making, clamps are some of the most important. At a minimum, it is a good idea to have two screw-type clamps, two quick-grip clamps, and several 2″ spring clamps.
A band saw with a ¼″-wide blade is an optional tool that can be used on some boxes to cut the outside profile. (The same cuts can be made with a scroll saw; however, they will be more difficult. Use a #12 reverse tooth or a thick-wood scroll saw blade and proceed slowly.)
Another optional but handy tool is the stationary belt sander. I recommend this tool because of its ease and speed of use. You can get the same results, however, with a handheld power sander or with several grits of sandpaper wrapped around a wood block or dowel and some elbow grease.
JIGS
When making boxes, it is very handy to have a simple jig made from wood that you can use as a flat, square surface for gluing up wood. In this book, a gluing jig will be used for gluing lami-nations, box lids, and boxes. The jig allows you to clamp the wood together to create a tight wood joint (see the sidebar, “Making a Gluing Jig,” at the right).
Always protect the surface and rails of your gluing jig from glue squeeze-out with a single sheet of old newspaper as shown in the top right photo.
GLUES, ADHESIVES, AND TAPES
Glues, adhesives, and tapes are important materials in box making. Don’t try to omit their use from your project. The few minutes it takes to add packaging tape over a pattern or to position and reposition glued, clamped wood will pay off in the end with a nicer finished project.
Wood glue: I use wood glue for all of the boxes I make. I always place a single sheet of old newspaper on a flat surface when gluing pieces of wood together. Be sure to check for glue squeeze-out and remove it with a flathead, or slotted, screwdriver or a rag.
When gluing two pieces of wood together, apply glue to both mating surfaces. With glue, as soon as you apply pressure on the first clamp, the mating surfaces will slide out of position. You may need to unclamp and reposition your pieces several times before they stay in the position you want.
A simple gluing jig gives you a flat, square surface for gluing up wood.
MAKING A GLUING JIG
TOOLS AND MATERIALS
Wood glue
Square
1 to 2 screw clamps
STOCK
One piece ¾″ × 18″ × 24″ pressboard, MDF (medium-density fiberboard), or plywood
One piece ¾″ × ¾″ × 17″ oak rail
One piece ¾″ × ¾″ × 22¼″ oak rail


