Erhalten Sie Zugang zu diesem und mehr als 300000 Büchern ab EUR 5,99 monatlich.
- Herausgeber: IMM Lifestyle Books
- Kategorie: Lebensstil
- Sprache: Englisch
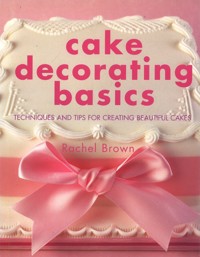
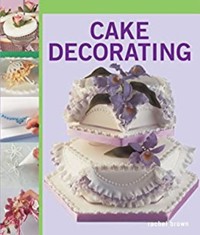
Cake decorating is a richly rewarding skill that anyone can master with a little help, and this fact-packed volume answers all the basic questions that beginners frequently ask: How do I level off a domed cake? What is the best way to cut a dowel? How can I get a modeled figure to sit? Plus, there's detailed information on covering cakes with marzipan, adding ribbons, simple piping with royal icing, creating special effects with sugar paste, and basic modeling. And dessert lovers with special dietary requirements will enjoy the gluten, egg, sugar, and dairy-free treats. Each chapter features color photographs that provide step-by-step guidance—so your cakes will turn out perfectly, the first time and every time.
Sie lesen das E-Book in den Legimi-Apps auf:
Seitenzahl: 155
Veröffentlichungsjahr: 2016
Das E-Book (TTS) können Sie hören im Abo „Legimi Premium” in Legimi-Apps auf:
Ähnliche


Reprinted in 2011
Published in 2007 by
New Holland Publishers (UK) Ltd
London • Cape Town • Sydney • Auckland
www.newhollandpublishers.com
Garfield House, 86–88 Edgware Road, London W2 2EA, United Kingdom
80 McKenzie Street, Cape Town 8001, South Africa
Unit 1, 66 Gibbes Street, Chatswood, NSW 2067, Australia
218 Lake Road, Northcote, Auckland, New Zealand
Copyright © 2007 text: Rachel Brown
Copyright © 2007 photographs and illustrations: New Holland Publishers (UK) Ltd
Copyright © 2007 New Holland Publishers (UK) Ltd
All rights reserved. No part of this publication may be reproduced, stored in a retrieval system or transmitted in any form or by any means, electronic, mechanical, photocopying, recording or otherwise, without the prior written permission of the publishers and copyright holders.
ISBN 978 1 84537 518 8
EDITOR: Anne Konopelski
EDITORIAL DIRECTION: Rosemary Wilkinson
DESIGN: Casebourne Rose Design Associates
PHOTOGRAPHY: Shona Wood
ARTWORK: Carrie Hill and Sue Rose
PRODUCTION: Hazel Kirkman
10 9 8 7 6
Reproduction by Pica Digital Ltd, Singapore
Printed and bound by Times Offset, Malaysia
Disclaimer
The author and publishers have made every effort to ensure that all instructions given in this book are safe and accurate, but they cannot accept liability for any resulting injury or loss or damage to either property or person, whether direct or consequential or however arising.
CONTENTS
Introduction
BAKING BASICS
Equipment
Types of Tins (Pans)
Lining Tins (Pans)
Lining Frames
Lining Novelty Tins (Pans)
Before Baking the Cake
Special Dietary Needs
THE CAKE ITSELF
Fruit Cake
Sponge Cake
PERFECT CAKE COVERINGS
Working with Marzipan
Working with Sugarpaste (Rolled Fondant or Ready to Roll Icing)
SIMPLE DECORATING TECHNIQUES
Ribbons
Sausage Edges
Texture
Twisted Edges
Stippling
Embossing
Crimping
Cut-Outs
Inserts
Quilling
Painting
ADVANCED DECORATING TECHNIQUES
Frills
Piping
Special Effects
Modelling
EASY TIERED WEDDING CAKES
Tiered Wedding Cakes
Using a Cake Stand
Using Pillars
Using a Separator
Making Stacked Cakes
THE ESSENTIALS
Storage and Transportation
Cutting Cakes
Portion Guide
Recipes
Index
INTRODUCTION
Decorating a cake — whether it is a child’s party cake or a sugarcraft masterpiece — is a skill anyone can master with a little practice. It really is fun, and all you need to do is learn a few of the basics.
Throughout my many years in the cake-decorating business, I have often been asked to write down my experiences. That is exactly what I have done here — and believe me; I have included all of my secrets! This book takes you back to the beginning. It covers essential equipment, methods for lining tins (pans), delicious cake recipes (including several that are suitable for people with food allergies and intolerances) and step-by-step instructions for decorating your cakes in dozens of different ways.
Each chapter includes invaluable hints, plus all of the information you need to successfully make and decorate a cake for a special occasion. Enjoy the book and happy cake decorating.
CHAPTER ONE
BAKING BASICS
This section gives you all of the information you need to know before you start making a cake. There is useful advice on choosing and lining various tins (pans), plus tips on making suitable cakes for allergy sufferers and diabetics.
Equipment
There is no need to rush out and buy everything on this list before you decorate your first cake. Generally, tins (pans), a rolling pin, sharp knives, a palette knife (metal spatula), a smoother and, if you plan to work with sugarpaste (also known as rolled fondant or ready-to-roll icing), a paintbrush will suffice. Over time, you will work out which pieces of equipment you need most, and your collection will gradually build.
Airtight bottles (4) Useful for storing the alcoholic mixture used to ‘feed’ fruit cakes.
Airtight containers (16) A selection of large and small containers stores ingredients between use and protects fruit cakes while they mature.
Baking trays Use with frames to prevent cake mixture from spilling out during baking.
Balling mat (13) Use with a balling tool to frill or give ‘movement’ to sugarpaste and Mexican paste.
Balling tool (14) Use to model shapes and figures, and to frill or give ‘movement’ to sugarpaste and Mexican paste.
Boards (6) Place under cakes as a finishing touch; boards should always be 7.5cm (3in) larger than cakes.
Cake wire (2) Use to slice sponge cakes in half for filling.
Cel stick (11) A slender stick with a pointed end used to model shapes and figures; usually made of durable, non-stick plastic.
Cling film (plastic wrap) (8) Use to line novelty tins and to prevent sugarpaste and marzipan from drying out.
Cocktail sticks (toothpicks) (10) Ideal for adding colour to sugarpaste and royal icing.
Cooling racks (20) Use to cool cakes.
Crimpers (1) Tweezer-like tools used to create patterns on sugarpaste.
Cutters (17) Available in a variety of shapes and sizes.
Dowels (19) Run through pillars, separators and stacked cakes to support the tiers; available in plastic and can be cut to size.
Drums (7) Thick boards that lift up cakes for decorating.
Embossers (15) Leave imprints of pictures or words when pressed into sugarpaste.
Food colouring (18) Adds colour to sugarpaste, marzipan, royal icing and buttercream; available in paste, powder and liquid forms.
Food dust Apply with a paintbrush to add colour to sugarpaste and marzipan.
Garrett frill cutter (12) Scalloped cutter that gives sugarpaste and Mexican paste frilled or scalloped edges; ones with interchangeable centres are the most versatile.
Glue stick (3) Essential for attaching decorations to boards and drums.
Greaseproof (waxed) paper (21) Use to line tins (pans) and to make piping tubes (nozzles) and templates; comes in pre-cut rolls and sheets.
Icing ruler (5) Smoothes buttercream and royal icing; usually made of metal or plastic.
Kitchen (aluminum or tin) foil (9) Adds an extra layer of protection to fruit cakes while they mature.
Kitchen paper (paper towels) Use with embossers and food dust, and to tidy up imperfections on cake coverings.
Measuring spoons (12) Ensure you use the right quantities of ingredients every time you make recipes.
Mixing bowls (7) Essential for making cake mixtures, buttercream, marzipan, sugarpaste and royal icing.
Paintbrushes (20) Use to paint and to add delicate details and food dust to marzipan, sugarpaste and Mexican paste. Also useful for dampening modelled figures before assembling them.
Palette knife (metal spatula) (19) Useful for spreading jam (jelly) and buttercream on sponge cakes, and for lifting small pieces of sugarpaste and dried royal icing.
Pillars (5) Use to separate tiers of a cake; often made of plastic and can be round, square and octagonal.
Piping (decorating) bags (3) Use with piping tubes (nozzles) to pipe royal icing; usually made of greaseproof (waxed) paper.
Piping tubes (nozzles) (1) Come in a range of sizes and shapes, including plain writing tubes and star and shell tubes (see page 66 for the most useful sizes); the metal ones last the longest.
Pizza wheel (18) Use to cut marzipan, sugarpaste and Mexican paste when crisp, clean edges are required.
Plastic bags (4) Can be wrapped round fruit cakes while they mature, and sugarpaste before use, to prevent them from drying out.
Rolling pins (14) Invaluable for rolling out marzipan, sugarpaste and Mexican paste.
Scissors (13) Use to cut linings for tins (pans) and to make piping (decorating) bags and templates.
Scriber (scalpel) (11) Essential for marking outlines on marzipan, sugarpaste and Mexican paste.
Separators (6) Use to separate tiers of a cake; available in a range of shapes and sizes.
Sharp knives (10) Use to shape and slice cakes, and to trim marzipan and sugarpaste.
Side smoother (15) Smoothes marzipan and sugarpaste round the sides of cakes.
Sieve (strainer) (9) Use to sieve (sift) flour and icing (confectioners’) sugar, and to create sugarpaste special effects.
Smoother (16) Invaluable for smoothing out the lumps and bumps on marzipan and sugarpaste cake coverings.
Stands (see page 102) Useful for displaying two- to five-tier cakes; usually made of metal or Perspex.
Sugar shaker (22) Use to dust work surfaces with icing (confectioners’) sugar to prevent marzipan, sugarpaste and Mexican paste from sticking and tearing.
Tape measure Measures the height and circumference of cakes; a washable variety is the best.
Tins (pans) (see page 14) An assortment of shapes and sizes comes in handy.
Turntable (2) Lifts, turns and in some cases tilts cakes, enabling you to decorate the sides with ease.
Veiner (17) Creates realistic vein effects on sugarpaste and marzipan flowers and foliage.
Wooden spoons (8) Use to stir cake mixtures.
Types of Tins (Pans)
Tins (pans) can be broken down into three categories: tins (1), frames (see page 16) and novelty tins (2). The cake you are making will determine the kind of tin you need – but don’t forget that you can always hire them, thereby reducing your outlay costs.
Tins
There are all sorts of tins available for making cakes, ranging from round and square ones to petal- and oval-shaped varieties. Always go for a good, sturdy make. You will not only get a better-quality cake from it but, if you look after it, it will last for a lifetime.
If possible, avoid square tins with rounded corners. Cakes made in these tins never look good when they are covered and decorated, because their edges are not crisp enough. Tins with loose bottoms are also a poor investment as their bases warp with time, resulting in leaks. Finally, non-stick tins may seem like time savers, but their nonstick surfaces gradually wear off – requiring you to line them anyway.
Staff at most sugarcraft and cook shops will be able to help you find a suitable tin. If you make a lot of cakes, it is a good idea to buy a selection. That way, you will always have the right one to hand regardless of the occasion. Sizes range from 10cm (4in) up to 40.5cm (16 in).
Tools of the Trade
If you make a lot of cakes, you can buy reusable cake liners at any sugarcraft or cook shop. They come in all sizes and last for years. Large sheets, which can be cut into the shapes you require, are particularly useful. Just wash them after use, and they will be as good as new.
Frames
Frames, also known as number tins, have sides just like tins but no bases. This makes it easier for you to push out cakes once they have been baked. Frames often have strengthening bars if they have cut-out middle sections (e.g. zero and nine). Make sure these bars run across the tops of frames when you are lining them; otherwise you will make your job unnecessarily difficult.
Since frames are mainly used to make children’s cakes – and most children dislike fruit cake – you will rarely make number fruit cakes. If you do find yourself in this position, however, use the ingredient amounts for a 20-cm (8-in) square fruit cake (see page 111) for all frames.
Novelty Tins
There is a huge selection of novelty tins, which increases yearly with each new hobby and children’s television programme. Most novelty tins are American and come with instructions for decorating cakes with buttercream. Do not be put off by this. Chapter Four, Simple Decorating Techniques (see page 46) explains how to decorate novelty cakes without resorting to piping tubes (nozzles) – though if you would like to give piping a try, it is explained in detail starting on page 66.
Like frames, most novelty tins are used to make children’s cakes – and since most children dislike fruit cake, you will probably not make many novelty fruit cakes. This is a good thing, because most novelty tins are too weak to hold a fruit-cake mixture. But should you receive a special request for a novelty fruit cake, use the ingredient amounts for a 23-cm (9-in) square fruit cake (see page 111) for all novelty tins.
Lining Tins (Pans)
Lining tins (pans) may seem boring, but it keeps the cake mixture from sticking to the bottoms and sides of tins, and ensures your cakes turn out perfectly. When lining tins and frames, you will need plenty of good- quality greaseproof (waxed) paper, plus butter or margarine. Novelty tins, however, will require you to use cling film (plastic wrap) or flour with the butter or margarine.
1.Place the tin on a piece of greaseproof paper of approximately the same size and draw round its base. Cut out the shape and slip it into the bottom of the tin (Fig. 1). There is no need to grease the bottom of the tin first.
Troubleshooting
Never leave tins to dry naturally. Wash them in warm, soapy water and dry them in a warm oven. This prevents them from rusting and prolongs their lives.
2.Lightly grease the sides of the tin with butter or margarine, then use a tape measure to measure the tin’s height. Either use greaseproof paper on a roll that is 2.5cm (1in) wider than the height of the tin (Fig. 2) or cut a strip or greaseproof paper to this measurement to line the sides. Roll it round the inside of the tin, allowing the ends to overlap slightly.
With square tins, make sure you push the greaseproof paper right into the corners. This will make it impossible for the cake mixture to leak out and stick to the tin during baking.
Lining Frames
Because of their strengthening bars and irregular shapes, frames are the trickiest kinds of tins (pans) to line. Take it slowly at first to make sure you get it right.
1.Since frames do not have bases, you will need to create them. First, set a sheet of greaseproof (waxed) paper that is at least 15cm (6in) bigger than the frame all the way round on top of a baking tray. Then position the frame upside-down – so the strengthening bar (or bars) runs across the top – on this.
2.Take the four corners of the greaseproof paper and twist them. This brings the paper up round the outside of the frame and ensures the mixture will not spill out (Fig. 1).
3.Line the sides of the frame as described in Lining Tins (Pans), step 2 (see page 15) (Fig. 2). Do not add the extra 2.5cm (1in) to the greaseproof paper’s width, though, or it will be difficult to work round the supporting bar. If the frame has a cut-out section in the middle, line this in the same way as the sides.
Lining Novelty Tins (Pans)
The whole point of using novelty tins (pans) is to create cakes embossed with their detailing, so you cannot line them with greaseproof (waxed) paper or the details will be obscured. Instead, line them with cling film (plastic wrap) or a light dusting of flour, depending on your oven (see below).
Electric Ovens
First, grease the tin with butter or margarine, then line it with a generous amount of cling film (Fig. 1). (Cling film shrinks during baking, and you do not want to be caught short.) Remove the tin from the oven after baking. Once the cake has cooled, turn it out and peel off the cling film. Alternatively, follow the instructions for gas ovens below.
Tools of the Trade
When you are lining novelty tins (pans), use a good-quality cling film (plastic wrap) that is suitable for use in the microwave to achieve the best results.
Gas Ovens
Cling film is not suitable for use in gas ovens, because it can burn if it comes too close to the flame. Instead, thoroughly grease the tin with butter or margarine, then sprinkle flour all over it. Tap the sides of the tin with your hand to give the entire tin an even coating of flour (Fig. 2), then turn it upside down to get rid of the excess.
Troubleshooting
If you have a fan oven, you may find that you end up with a hump on top of your cakes. Try placing a sheet of greaseproof (waxed) paper – with a small, 3-cm (1½-in) hole cut out of the middle – over the tin (see below), taping it down with masking tape if necessary. This creates a barrier between the cake and the heat source, and prevents your cake from burning. Remove the greaseproof paper after the first 45 minutes of baking for sponge cakes, or after the first 1¼ hours for fruit cakes. If you are making a fruit cake, you should also place a bowl of water in the bottom of the oven. The steam keeps moisture in the cake and ensures it stays soft. Top up the bowl with water throughout baking.
If you prefer, you could use ‘cake spray’ instead of butter or margarine. It works well and does not require you to flour the tin.
Before Baking the Cake
There are several questions you should ask yourself and the recipient of your cake before you start baking. Establishing the answers well in advance will ensure that your cakes are well received, each and every time.
How many people will the cake need to serve?
Once you know this, consult the Portion Guide on page 109. This will tell you how many portions of sponge cake or fruit cake you can expect to get from different sizes and types of tins (pans).
What sort of cake does the recipient like?
Are there any special dietary needs to consider?
It could be a disaster if you make a fruit cake covered in marzipan – which is packed with almonds – for someone with a nut allergy. Consult Special Dietary Needs below to find out which recipes are suitable for people suffering from food allergies, food intolerances and diabetes.
Does the cake need to travel far?
Storage and Transportation on page 108 tells you everything you need to know to get your cake safely to its final destination.
Is there anything you can do in advance?
Home-made marzipan should be used as soon as possible (though it is worth noting that ready-made versions keep well), but royal icing will keep for one week in an airtight container, and sugarpaste (rolled fondant or ready-to-roll icing) will keep for two. (There is no need to refrigerate royal icing or sugarpaste; just give the royal icing a good stir, and the sugarpaste a good knead, before use.) Buttercream freezes well, as do freshly baked and cooled sponge cakes, which can be frozen plain or buttercreamed for up to a month. Fruit cakes can – and really should – be baked three months before they are needed to allow the flavours to develop. Store them during this time in plastic bags or airtight containers in a cool, dark place.
You will find classic fruit and sponge cake recipes in Chapter 2, The Cake Itself (see pages 22 and 23) and variations in Recipes, which starts on page 111.


