Erhalten Sie Zugang zu diesem und mehr als 300000 Büchern ab EUR 5,99 monatlich.
- Herausgeber: Fox Chapel Publishing
- Kategorie: Lebensstil
- Sprache: Englisch
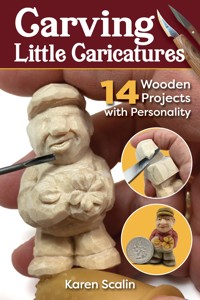
Pack a punch of personality into small carving projects! Using a precut block and a few hand tools, Carving Little Caricatures is a must-have guide for woodcarvers of all skill levels to learn valuable techniques to add movement and expressive details into a small piece of wood. Featuring detailed overviews on tools and materials, basic cuts, painting, finishing, and other essential tips, this complete guide also includes 14 unique character designs for small, skill-building carvings. From a Santa and a gnome to a mountain man and more, all projects in this book can be carved with a standard-size piece of basswood. Caricature projects also slowly progress in difficulty with each design getting more dynamic and technical so you can incrementally build your skills.
Sie lesen das E-Book in den Legimi-Apps auf:
Seitenzahl: 122
Veröffentlichungsjahr: 2022
Das E-Book (TTS) können Sie hören im Abo „Legimi Premium” in Legimi-Apps auf:
Ähnliche


For the two most precious to me, who gave me their strength and love. Who always were, and will always be, with me.
© 2022 by Karen Scalin and Fox Chapel Publishing Company, Inc., 903 Square Street, Mount Joy, PA 17552.
Carving Little Caricatures is an original work, first published in 2022 by Fox Chapel Publishing Company, Inc. The patterns contained herein are copyrighted by the author. Readers may make copies of these patterns for personal use. The patterns themselves, however, are not to be duplicated for resale or distribution under any circumstances. Any such copying is a violation of copyright law.
Photo Credits: Pg. 17: timerBabyboom/Shutterstock.comPg. 71: exercise weight Happy Stock Photos/Shutterstock.comPgs. 89 & 109: backyard backgroundvaruna/Shutterstock.com
Print ISBN: 978-1-4971-0296-5ISBN: 978-1-63741-116-2
Library of Congress Control Number: 2022941559
To learn more about the other great books from Fox Chapel Publishing, or to find a retailer near you, call toll-free
800-457-9112 or visit us at www.FoxChapelPublishing.com.
We are always looking for talented authors. To submit an idea, please send a brief inquiry to [email protected].
For a printable PDF of the patterns used in this book, please contact Fox Chapel Publishing at [email protected], with 9781497102965 Carving Little Caricatures in the subject line.
Introduction
Welcome to my “little” world.
If you’re reading this, you may already have an interest or even a fascination with all things small or miniaturized. If you haven’t yet had the opportunity to carve small figures, you are in for a real treat. You’ll soon be able to create little characters that pack a whole lot of expression and attitude into tiny packages. My goal is to help you build the skills that will allow you to go on and carve amazing new pieces. The effects you can achieve with different facial expressions and body positions will greatly enhance the overall spontaneity and uniqueness of your carvings.
If woodcarving is a new experience for you, or if you’re still becoming more adept each day, or even if you have been at this for years, you’ll find plenty in this book to help you understand the process of carving characters out of wood. For some, there will be new tricks and tips, and for others, reminders of what we knew or were taught and may have forgotten.
The projects in this book move from the beginner stages and go on to intermediate and advanced once you’ve achieved a solid foundation of carving ability. Each section adds new sets of skills to help you move from more basic body positions and expressions to more active body motion and added features or details.
I’ve always been one to ask not just “why,” but also “how.” I want to understand the “how to get there.” Once you understand the “how to get there,” it will allow you to expand and challenge yourself in the creative process. Then, as you begin to create a new piece, ask yourself, Who do I see? What’s their story? What are they telling me?, or What can I make up about them?
An added benefit of miniature carving is that you can create these pieces with only a minimal investment in tools and supplies. When I first started out, a knife and a couple of gouges were all I ever used. But don’t worry, the more you carve the sooner you’ll find you need (translated as “I really want”) to expand your basic tool set.
Now what’s it really all about? It’s about having fun! Why do I do them? Because they make me and lots of other folks smile! Remember, they may be mini, but you still have a lot of room to create your own amazingly expressive little guys and lots more smiles. But be aware, you’ll find it increasingly harder and harder to part with your new “friends.” Enjoy!
—Karen
PS. You’ll be amazed at how many chips you get from a 1" x 1" x 2" block of wood!
Table of Contents
Introduction
Carving Basics: What You Need, and Need to Know, to Get Started
About Wood
About the Tools
Tool Tips and Safety
Sharpening and Stropping
Types of Cuts
Stuff No One Tells You—Or Hasn’t Told You Yet
Let’s Head Off: Carving Facial Features
Beginner Projects
Herman from Lake Marigold, MN
Jerome Gnome
Monte the Mountain Man
Gina Generic
Jack Benny Wannabe
Intermediate Projects
Sam the Natty Dresser
Santa
Oscar the Retired Bodybuilder
It’s Just George
Hopeful Henry
Advanced Projects
Wanda the Wandering Witch
Tootin’ Toots
Shoutin’ Shirley
Eager Ernie
Painting and Finishing
Gallery
About the Author
Index
Carving Basics:
What You Need, and Need to Know, to Get Started
About Wood
Many people get confused when it comes to talking about wood. Trees are categorized as being either hardwood (deciduous) or softwood (conifers). But these two categories don’t actually designate how hard or soft the wood of a tree can be, especially in terms of carving. Within each of these two categories, the trees are then classified as to their degree of actual hardness or softness.
For many North American carvers, the carving wood of choice (for those who carve with knives and hand tools) is basswood (Tilia americana). Basswood is classified as a “soft” hardwood. Aside from being easier to carve, the main reason for its favor among carvers is that it generally has a tight grain pattern that holds carved detail well. This tight grain pattern causes the wood to appear almost clear, without any visible lines. This can be important if you are painting a piece with a thin paint wash, or if you are just using a stain of some sort, because it will not detract or cause noticeable lines that may be undesirable in your completed project.
Choosing Wood to Carve
There are notable differences even within basswood. We classify it, depending on where it’s grown, as either northern or southern. Northern basswood tends to be very light—whiter—in appearance than its southern counterpart. Southern basswood tends to be darker in color and sometimes can be a bit softer or stringier, shredding or splintering as you carve; it also may not hold detail as well. However, no matter what type of wood you use, even in wood from trees grown in the same area, there will be variations. Some of my wood stock is over 20 years old and I never know what I’ll encounter. Some of it will be so smooth as to cut like butter, while some will be hard as a rock, and then there is what I call “crumblewood.”
Basswood is by no means the only wood to carve, but is a good choice for beginning carvers. Wherever you live, use what is available to you, learn its nuances, and experiment with different varieties. Also, the type or style of project you carve may dictate what wood to use. As an example, butternut (Juglans cinereal) may be used for stylized carvings that will have a natural finish. For carvers in other parts of the world, there will always be suitable wood that has similar characteristics.
Southern basswood (left), Northern basswood (right)
Grain Direction and Carving
What is grain pattern in wood and why is it important? Wood is made up of fibers that run the length of the tree. “Grain” refers to the direction in which the wood fibers are aligned. We often tend to think about grain as only running vertically, but very few trees grow perfectly straight, so there can be many grain variations within the tree.
In carving, we use several terms relating to grain—carving with the grain, where you are cutting parallel to the fibers; carving across the grain, where you are cutting at a right angle to the fibers; and finally, carving against the grain, where you are cutting at an angle into the fibers. You may be carving and suddenly find the knife or tool is digging in, or causing an uneven or ragged cut in the wood. The direction of the grain has changed and that is what is causing you to now carve against the grain. At this point, you need to continue the cut from the opposite direction.
Butternut is a great choice for carvings with a natural finish.
Grain Orientation
Lastly, the overall orientation of the grain in the wood matters, depending on your carving subject and its features. For example, a leg carved in a piece of wood with grain that runs horizontally has less strength and is much more likely to break off than if the wood is aligned vertically. The wood that you use for all the projects in this book should have the grain running vertically through the block.
Cutting with the grain.
Cutting across the grain.
Cutting against the grain (where the tool digs into the wood).
About the Tools
This is where the fun really starts: acquiring the knives and tools to begin your journey!
As woodcarvers, we have a number of options. You can choose to carve with hand tools, knives, power tools, or any combination of these. This section will focus on hand tools and knives.
Hand tools are broken down into palm tools and longer-shaft tools which may be used with or without a mallet. There are various types of hand tools to use, starting with chisels, skews, gouges, V-tools, micro tools, and specialty tools.
• Chisels have a flat surface and straight edge.
• Skews are chisels with an angled edge.
• Gouges have a curved cutting edge.
• A V-tool (or parting tool) is two chisels joined together to form a sharp point, or sometimes to a softer, rounded point.
• Micro tools are miniature versions of the above tools.
• Specialty tools can include tools such as back-bent or spoon gouges.
These are some basic hand tool options.
Hand tools are then classified based on several more factors:
• Size: the width of the cutting edge listed either in millimeters or fractions
• Sweep: the shape or curvature of the cutting edge
• Straight, bent, or curved: the shape of the shaft of the tool
Each tool is assigned a number that identifies its sweep. The flat-edged tools, chisels, and skews are classified as #1 and #2. Gouges run from #3 to #11 (#10 and #11 are known as veiners, or U-gouges). The number represents the degree of curvature: the lower the number, the shallower the curve. V-tools are classified based on the degree of opening of the cut (60 degrees, 90 degrees, etc.). The benefit of a curved- or bent-shaft tool is that it can help bring the tool back up and out of the cut, or to reach areas more easily.
Woodcarving knives are categorized as bench, rough-out, detail, upsweep, skew, or chip-carving knives. There are numerous blade shapes and styles, but many carvers will predominantly use some style of straight-edged blade. Others will prefer a blade that has some curvature at the cutting edge, generally an upsweep. A knife that is commonly referred to as bench or rough-out tends to have a heavier or thicker blade, often used when initially shaping or removing larger amounts of wood. Many carvers will use a detail knife, which may have a shorter blade length, may come to a finer point, and generally be of thinner steel, for finer detail cutting. An upsweep knife may be used for either purpose. Chip-carving knives generally have a short, straight cutting edge that is angled downward.
Try different knives to determine which is best for you. Key things to consider are handle shape, blade length/shape, and overall comfort.
There is no right or wrong knife shape or style to use. If you can, try out a variety of knives to find what style or styles you are most comfortable using. You will also find a lot of variation in handle styles and dimensions.
Many people think a short-bladed detail knife is necessary to carve miniatures. Actually, the longer the blade, the easier I find the actual usage. I often use only the tip. A longer blade, or different shape of blade, can allow you to reach areas not otherwise accessible with a short blade. So, what is the right knife?
Whatever combination of handle shape and blade length or style you are most comfortable with!
Reading books and magazine articles or watching videos can be helpful in showing you how someone uses a tool or knife, how it’s being held, and what kind of cuts you can make with it. It’s especially helpful if you have any physical limitations. Seeing other ways of using the knife or tool and other ways of holding it can enhance your abilities as well as potentially allow you to succeed in ways that you couldn’t previously.
Tool Tips and Safety
Think safety first and foremost!
You’ve bought some tools or knives and wood, and you want to get started, but before you do, the most important purchase you can make is for your own safety. You will be holding the wood in your hand as you carve, so you need to protect that hand with a carving glove. A cut-resistant type glove is worn on the holding hand to prevent a knife or tool from slicing into you instead of the wood. A thumb guard, carving tape, or vet wrap is used to protect the thumb of the hand using the tool.
You may find the glove a bit slippery when trying to hold a piece of wood. Some gloves will come with rubberized dots to help reduce slippage. If yours does not, you can use a fabric paint, or Sock Stop, or even a liquid rubberized tool dip that can be dabbed on to create the same effect.
Be sure to get personal protective equipment before you begin carving.
Note: The projects in this book are pictured being carved without a glove. A protective glove should be worn at all times when carving.
Next, here are some simple tips to keep you and your tools safe in your carving space as you work.
• When engrossed in the carving process, we often don’t pay attention to our surroundings, and a cluttered work space can lead to more Band-Aid use. To keep from cutting yourself as you reach for a knife, keep all blades’ cutting edges facing in the same direction. As an example, here are two knives (below) that look almost identical. However, the cutting edges are on opposite sides; by consistently lining knife blades all up in the same direction you will save your fingers from disaster.
• Lay some gripping shelf/drawer liner on your carving area to keep tools from rolling around or off. (#1 in bottom photo)


