Erhalten Sie Zugang zu diesem und mehr als 300000 Büchern ab EUR 5,99 monatlich.
- Herausgeber: IMM Lifestyle Books
- Kategorie: Lebensstil
- Sprache: Englisch
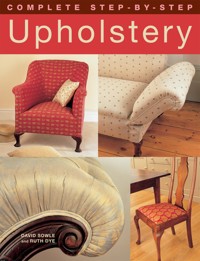
With 15 easy to follow, fabulously illustrated step-by-step projects, this book is just what the beginning upholsterer needs. The first eight items—including a drop-in-bottom chair, overstuffed seat, and box cushion—teach the fundamental techniques required to tackle any upholstery task that might arise. After that, it's time to get more creative, with a beautiful Art Deco armchair, chaise longue, leather chesterfield, and more. Each project includes a list of tools and materials, a quick overview of the key skills, and tip boxes to make the work go more smoothly.
Sie lesen das E-Book in den Legimi-Apps auf:
Seitenzahl: 151
Veröffentlichungsjahr: 2017
Das E-Book (TTS) können Sie hören im Abo „Legimi Premium” in Legimi-Apps auf:
Ähnliche


COMPLETE STEP - BY - STEP
Upholstery
COMPLETE STEP - BY - STEP
Upholstery
DAVID SOWLE and RUTH DYE
Published in 2005 by
New Holland Publishers (UK) Ltd
London · Cape Town · Sydney · Auckland
Garfield House, 86–88 Edgware Road
London, W2 2EA
United Kingdom
www.newhollandpublishers.com
80 McKenzie Street, Cape Town 8001
South Africa
14 Aquatic Drive, Frenchs Forest, NSW 2086
Australia
218 Lake Road, Northcote, Auckland
New Zealand
Copyright © 2005 text: David Sowle and Ruth Dye
Copyright © 2005 photographs: New Holland Publishers (UK) Ltd
Copyright © 2005 New Holland Publishers (UK) Ltd
David Sowle and Ruth Dye have asserted their moral right to be identified as the authors of this work.
All rights reserved. No part of this publication may be reproduced, stored in a retrieval system, or transmitted in any form or by any means, electronic, mechanical, photocopying, recording or otherwise, without the prior written permission of the publishers and copyright holders.
Print ISBN: 978-1-8433-0929-1eISBN: 978-1-6076-5306-6.
Senior Editor: Clare Hubbard
Editorial Direction: Rosemary Wilkinson
Step-by-step photographs: David Sowle
Finished projects and close-ups: Shona Wood
Design: Peter Crump
Illustrations: Stephen Dew
Location: pp 51, 75, 83, 91, 117, 141www.lightlocations.co.uk
Location: pp 35, 43, 59, 67, 101, 109, 149www.1st-option.net
Production: Ben Byram-Wigfield
Reproduction by Modern Age Repro House Ltd, Hong Kong
Note
The author and publishers have made every effort to ensure that all instructions given in this book are safe and accurate, but they cannot accept liability for any resulting injury or loss or damage to either property or person, whether direct or consequential and howsoever arising.
Thanks to GP & J Baker for the upholstery fabric and to Andrew Muirhead & Son for the leather used in the projects.
INTRODUCTION
GETTING STARTED
BASIC UPHOLSTERY TECHNIQUES
BASIC SKILL
1 Drop-in seat
2 Pin-cushion seat
3 Overstuffed seat
4 Overstuffed chair with springs
5 Deep-buttoned stool
6 Caning
7 Box cushion
8 Re-covering upholstery
APPLYING BASIC SKILLS
9 Art Deco armchair
10 Classic armchair
11 Wing chair
12 Tub chair
13 Chaise longue
14 Drop-arm sofa
15 Buttoned leather chesterfield
Glossary
Suppliers
Introduction
If you want to learn upholstery all you need is a book, some basic tools and a chair. That’s how we began, and this is the book we wish we’d had.
Our upholstery business started when Ruth decided she wanted to have a go at upholstering a chair. I went over the road to a friend who had an antiques shop and asked if Ruth could have a chair, and we hunted around local junk shops for secondhand tools. Our friend gave me an old oak carver and a Victorian nursing chair from the basement and said Ruth could do what she liked with them. It seemed to take days just to strip them, but finally they were both clean of their old upholstery. Ruth asked another friend, who made cushions and curtains, to order some materials from her supplier and slowly, by following the instructions in an old upholstery book and plenty of trial and error, Ruth reupholstered the two chairs. Neither could be described as fine examples, but, our friend was more than happy to put them in his shop and when they sold – as they both did – he split the proceeds with us.
From then on he supplied as much upholstery work as Ruth could handle. Small things at first, but many and varied – boxes, piano stools, fire surrounds with cushion tops – anything bought cheap at auction and in need of upholstery. If the finished article sold in his shop – and they all did sooner or later – he shared the profits with us.
Soon Ruth had enough work and confidence in her upholstery skills to give up her day job. We couldn’t afford to rent or buy a shop, so we began offering our furniture through our website at www.oldsofas.com. We now reupholster and sell old sofas and chairs to customers all over the UK and Europe.
This book is full of step-by-step photographs, taken in real time, of Ruth upholstering 15 different pieces in our workshop. To that we’ve added advice on Getting Started – what tools and materials to buy, where to find furniture and what to look for – all the things you need to know before you embark on your first project. This is followed by a section on Basic Upholstery Techniques, in which we’ve covered areas that we haven’t been able to mention in conjunction with the projects, or ones we felt needed a little more explanation than the reference in the projects allowed. Stripping furniture, webbing, tying springs, knots, stuffing, regulating, edge roll stitching, hand stitching, buying fabric, making cutting plans, making single and double piping and cushion inners are all included in this section. For those of you on upholstery courses we’ve even included the Van Dyke join. This is the part of the book to return to if you’re unsure of the basics at any point.
We’ve divided the 15 upholstery projects into two sections: Basic Skills and Applying Basic Skills. Basic Skills comprises eight upholstery projects that introduce and teach you all the basic skills that must be mastered in order to progress to more complex projects.
The first three projects use simple, inexpensive chairs to illustrate the three most common upholstery methods; stuffed pad, pin-cushion and overstuffed. Project 4 – Overstuffed chair with springs – introduces springs to an upholstered seat, and project 5 – Deep-buttoned stool – shows you how to put deep buttons into upholstery. Project 6 – Caning – shows you how to cane; a skill that all well-rounded upholsterers should have; and project 7 – Box cushion – demonstrates the principles and practice of how to make piped, removable outer cushion covers. The last of the basic skills projects, project 8 – Re-covering upholstery – rounds things off with a detailed explanation of how to do a re-covering job.
The Applying Basic Skills section takes the skills learnt in the previous eight projects and applies them to seven more advanced projects. Culminating in a sumptuous buttoned leather chesterfield, the projects in this section all offer something to add to the basic skills, but demonstrate that any upholstery project, no matter what the piece is, breaks down into the application of one or more of the basic skills.
Project 9 – Art Deco armchair – introduces more complex seat springing and arm covering techniques and project 10 – Classic armchair – explains sprung arms and finishing scrolls. Project 11 shows how to upholster a chair with wings and project 12 is a masterclass on dealing with curves explaining how to upholster a beautiful tub chair. Project 13 takes the buttoning skills learnt in project 5 and expands and applies them to a fabulous Victorian chaise longue. Project 14 gives a detailed explanation on how to upholster a sofa with a drop arm and project 15 combines leather, deep buttons and curves with the classic Victorian chesterfield.
None of the 15 projects in this book should be looked at in terms of difficulty. Project 1 – Drop-in seat – takes a lot less time and work to complete than project 15 – Buttoned leather chesterfield – but that doesn’t mean it is easier. You will certainly need to know how to perform more upholstery operations to complete a chesterfield, but bad upholstery looks bad whether it’s on a pin-cushion seat in a junk shop window or on a Louis XV chaise in a museum.
Reupholstering old furniture combines good old-fashioned craftsmanship with modern aspirations to recycle. It takes time to build the confidence necessary to take on the more complex projects, but with practice, and a little help from this book, your results will soon be every bit as good as the professionals. Take pride in all the pieces you upholster and enjoy yourself.
Getting started
Before you can make a start on your first upholstery project there are three things you need to acquire: tools, materials and a piece of furniture.
Tools
These can be divided crudely into two categories: upholstery tools that you’ll have to buy, and general tools that you probably have already. The golden rule for any tool is that good ones will perform well and last a lifetime, so buy the best you can afford. Whenever you’re out searching second-hand shops and auctions for reupholstery bargains, search for tools as well: fine-quality tools can be bought for a fraction of their brand-new cost.
A basic upholstery tool kit comprises: wooden mallet, magnetic tack hammer, webbing stretcher, tack lifter, 13 cm (5 in) spring needle, 30 cm (12 in) double-ended needle and 25 cm (10 in) stuffing regulator.
Wooden mallet: this is used mainly when stripping, to hammer the tack lifter when removing old tacks and staples. There is no need to spend too much money – a normal carpenter’s beech mallet will do. Soak it in linseed oil for 24 hours before you use it for the first time and you’ll never need to buy another one.
Magnetic tack hammer: an essential upholstery tool. One end of the head is magnetic and acts like a third hand. If you sprinkle some tacks in a small container, you can pick them up, one at a time, with the magnetic end, then tack and hammer home while holding the material in place with your free hand. You can buy expensive bronze-headed versions, but in this case the cheaper ones work just as well.
Webbing stretcher: this is used to tension the webbing in a seat base tighter than you can using your hands alone (see here). They come in various styles, but all use some method or other to grip the webbing and lever against the seat frame to achieve the required tension.
The peg-and-slot version is the least expensive but it is a little slow to use because the webbing needs to be passed through the slot and held by the peg (see photo above). Soak it in linseed oil for 24 hours before you use it for the first time and you’ll never need to replace it.
Tack lifter: used for removing old tacks and staples during stripping, tack lifters come in various shapes, but are all designed to lever out tacks. Loose tacks can be levered out manually, but generally the tack lifter is designed to be hammered with a wooden mallet. You don’t have to spend a lot of money on a tack lifter but, as with all tools, you get what you pay for. Our advice is to buy a good one because you’ll be using it over and over again.
Needles: the spring needle and double-ended needle are used for stitching with various upholstery twines. The former is for sewing springs to webbing and hessian, and for sewing stuffing ties. The latter is for stitching edge rolls, sewing through stuffing ties and for buttoning.
Upholstery skewers: small, bright metal skewers with a loop end and point. Usually 10 cm (4 in) and 7.5 cm (3 in) long, they are used in upholstery applications instead of pins to hold hessian, calico and fabric in place, usually while they are being positioned ready to hand stitch.
Stuffing regulator: this is a strong, thick needle, rather like a knitting needle, with either a flat end or plastic handle. When you cover fibre or horsehair stuffing with hessian or calico, you’ll usually find that the stuffing needs to be distributed more evenly, moved up to make a firmer edge or pushed into corners. This is done by using a stuffing regulator to lever the fibre inside the pad to wherever you want it.
Other tools: in addition to these specialist upholstery tools, you will need a pair of scissors, a tape measure, pincers, a knife and needles for hand stitching.
Sewing machines: most of the projects in this book can be completed without a sewing machine. However, there are some jobs – making cushions and piping, for example – that are impractical without one. For a handful of projects a year, a domestic sewing machine should be perfectly adequate. If you are likely to sew heavy upholstery fabrics on a more regular basis however, you really ought to consider investing in an industrial machine – one that will cope easily with leather and other heavy fabrics.
Materials
Traditionally upholstered furniture consists of a strong wooden frame, supplemented and filled in with webbing, which then supports individual springs. Layers of hessian and calico are placed over the top of the springs and frame, with one or two layers of stuffing – usually in the form of vegetable fibre or horsehair – sandwiched between them. Finally, a layer of wadding is laid over the upholstery and covered by the top fabric. All of the elements that make up the upholstery are variously stitched, tied and nailed to each other and the frame using twine, cord and tacks.
Modern upholstered furniture is made of a less substantial wooden frame, which is supplemented and filled in with plywood and cardboard, and padded with man-made foam sheets and edgings of varying thickness, shape and density. If webbing is used, it is made of rubber. Finally, a layer of synthetic fleece is laid over the padding and covered by the top fabric. Glue and staples are used to attach the materials and fabric to each other and the frame.
Webbing: this comprises a series of tightly woven strips in varying widths – from 5–10 cm (2–4 in) – made of cotton, flax, jute, or a mixture of two.
Vegetable fibre: this is black or ginger, hairlike fibre made from coconut husks or other vegetable stalks. All vegetable fibre manufactured for use in upholstery will have been treated to make it fire retardant.
Horsehair: a traditional stuffing, this can be washed and reused if found when stripping old upholstery, though only good-quality, long, curly hair is worth saving. Wild boar hair can be used as a modern substitute.
Hessian: a thick, strong material that comes in various weights from 200–400 g (7–16 oz). The strongest, or heaviest, is often called tarpaulin. Don’t get too concerned with using different weights for different jobs, just buy a strong, quality hessian that you like working with and stick with it.
Calico: a strong, cotton cloth, usually bleached, used as a final layer over the top of stuffing before the application of wadding and top fabric. Sometimes a black version is used for bottom cloths. It is available in various weights, and 140 g (5 oz) is fine for most upholstery applications.
Wadding: this comes in sheets 2.5 cm (1 in) thick, but can be peeled apart to half thickness. It is used as a final, smooth layer on top of the coarser stuffing, underneath the top fabric.
Synthetic fleece: a fine, light, manmade fleece 12 mm (½ in) thick which comes in huge expanded rolls. It adds nothing to the padding of the upholstery but is used as a thin layer between the cotton wadding and top fabric to stop the wadding from sticking to the back of the fabric.
Twine: there are various types available. Flax twine comes in different thicknesses, usually denoted by a number. No.1 is the thickest and is used for tying springs to webbing and hessian. Nos. 2 and 3 are thinner and used for stitching edge rolls and stuffing ties. Buttoning twine is made of nylon and can be used as an alternative to flax twine. It’s extremely strong and so best used for buttoning.
Lay cord: this is a thick cord made from jute or hemp and is used for tying springs together.
Tacks: upholstery tacks must be used for upholstery; other varieties of tack and nail are not suitable and can damage wooden frames. They come in sizes from 10–20 mm (⅜–¾ in) and two varieties of each: improved tacks have larger heads than fine tacks. As a guide use 20 mm (¾ in) improved tacks for attaching lay cord and webbing, 13 mm (½ in) improved tacks for hessian, calico and top fabric, and 10 mm (⅜ in) fine tacks for scrolls and finer work.
Netting staples: sometimes used to secure springs to the wood on the top of arms and the front edge of seats. We generally hold springs in place by attaching a length of webbing over their bases, but sometimes it’s easier to use netting staples. Ordinary galvanized netting staples are used; there’s no upholstery equivalent.
Tacking strip: a 12 mm (½ in) wide strip of strong card that comes in rolls and is used most commonly to invisibly attach the outside arm fabric to the underside of an arm or wherever else an invisible join is required. The tacking strip is laid over the underside of the fabric and tacked in place so that it forms a smooth, straight edge when the fabric is pulled over it. You often find tacking strips improvised from bits of cereal packets.
Upholstered furniture: what to buy and where
Being a good upholsterer and buying the right furniture to upholster are two different skills. We have been buying upholstered furniture for many years and yet we still occasionally pay good money for pieces that turn out to be bad buys. There’s an overlap between the two skills: the better you are at buying furniture, the easier it will be to turn it into something you are proud of. Whatever your upholstery ambitions, your best starting point is to get out there and train your eye to spot a bargain.
Start close to home: if you’re new to upholstery your confidence will be fortified if you start with small, uncomplicated projects: the sorts of pieces you probably have already – dining chairs or a piano stool, for example. If you don’t have anything yourself, the chances are there’ll be auntie’s old chair in a relative’s loft somewhere. Beg, borrow or steal from your family before you go out and buy anything to work on.
Antiques shops:


