
10,79 €
Mehr erfahren.
- Herausgeber: Ryland Peters & Small
- Kategorie: Lebensstil
- Sprache: Englisch
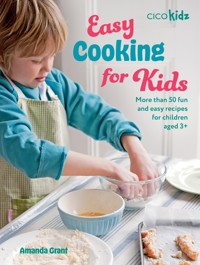
"Cook School is a practical and inspiring cookery book for young children. Parents will be thrilled by the skills their children will develop." Marguerite Patten, CBE Children's reading books, toys and games are often targeted at specific age groups, and this new book by 'one of the country's leading children's food educators', Amanda Grant teaches core cooking skills designed for children aged 3-5 years, 5-7 years and 7-10 years. Each skill is presented at the stage when a child's development, self-confidence and independence are ready. With plenty of step-by-step photographs for children to follow and easy, tasty and fun recipes that they will love to learn, this is an invaluable book for parents to help teach their kids practical kitchen skills that will remain useful throughout life. As well as explaining hygiene and kitchen safety, there are more than 50 recipes specially suited to particular age groups. Amanda Grant is a food writer, broadcaster and mother of three young children. She has written many books, mostly specializing in children's food and nutrition including Healthy Lunchboxes for Kids and Grow It, Cook It with Kids, both published by Ryland Peters & Small. She adapted and wrote the recipes for The Silver Spoon for Children (published by Phaidon). She is the food expert for Sainsbury's Little Ones magazine and writes for several other publications. Amanda is on the committee for the first ever dedicated Children's Food Festival and travels the country teaching children about good food and nutrition. Her television credits include her own series Power Food and BBC2's Food and Drink. To keep up to date with Amanda's news, take a look at www.amandagrant.com
Das E-Book können Sie in Legimi-Apps oder einer beliebigen App lesen, die das folgende Format unterstützen:
Veröffentlichungsjahr: 2014
Ähnliche


cook school
Amanda Grant
PHOTOGRAPHY BY SUSAN BELL
LONDON NEW YORK
For Ethan and Noah, my two new, very special nephews and all the wonderful children who live in our street.
Senior Designer Iona Hoyle Senior Editor Céline Hughes Location Researcher Jess Walton Production Toby Marshall Publishing Director Alison Starling
Prop and Food Stylist Amanda Grant Photoshoot Assistants Brenda Bishop and Esther Webb Indexer Hilary Bird
First published in the UK in 2011 by Ryland Peters & Small 20–21 Jockey’s Fields London WC1R 4BW www.rylandpeters.com
10 9 8 7 6 5 4 3 2 1
Text © Amanda Grant 2011 Design and photographs © Ryland Peters & Small 2011
The author’s moral rights have been asserted. All rights reserved. No part of this publication may be reproduced, stored in a retrieval system, or transmitted in any form or by any means, electronic, mechanical, photocopying, or otherwise, without the prior permission of the publisher.
eISBN: 978-1-84975-316-6
ISBN: 978-1-84975-135-3
A CIP record for this book is available from the British Library.
Printed in China
NOTES
• All spoon measurements are level unless otherwise specified.
• Ovens should be preheated to the specified temperatures. All ovens work slightly differently. We recommend using an oven thermometer and suggest you consult the maker’s handbook for any special instructions, particularly if you are cooking in a fan-assisted oven, as you will need to adjust temperatures according to manufacturer’s instructions.
• All eggs are medium, unless otherwise specified. It is recommended that free-range eggs be used.
• Recipes containing raw or partially cooked egg, or raw fish or shellfish, should not be served to the very young, very old, anyone with a compromised immune system or pregnant women.
Neither the author nor the publisher can be held responsible for any claim arising out of the information in this book. Always consult your health advisor or doctor if you have any concerns about your child’s health or nutrition.
contents
Foreword by Marguerite Patten, CBE
Introduction
STAGE 1: 3–5 YEARS
STAGE 2: 5–7 YEARS
STAGE 3: 7–11 YEARS
Index
Acknowledgements
Foreword by Marguerite Patten, CBE
Cook School is a practical and inspiring cookery book for young children.
Amanda Grant has helped parents by producing excellent books on feeding children. Now she is showing children how to achieve a sense of achievement and pleasure by learning to cook.
The accepted method of teaching children to read is by giving them books, toys and information suitable for their age. This approach is followed in Cook School.
Interesting information and suitable recipes are given under the ages of 3–5 years, then 5–7 years and 7–11; in the case of food preparation, physical ability must also be considered.
Parents will be thrilled by the extra skills their children will develop.
introduction
THIS BOOK BELONGS TO
………………………………………
Put your name in the space above and keep this book somewhere safe. Treasure it and enjoy it! You are about to learn some skills that you can use for the rest of your life. If you start cooking now, you will have lots of fun ahead of you making good food for you and your family and friends.
We all need to eat every day and it is much more exciting if you have helped to make some of those meals, instead of always eating food that others have made for you. Have you ever cooked a meal for anyone? When you do, you will see just how happy it makes people feel and how grateful they are for the time and care you have taken. This will make you feel proud too. It feels good when you cook for others.
THE SKILLS
Learning to cook is a bit like learning to read. When you learn to read, you learn the letters first and then you start to put the letters together to form words. It is similar to this when you learn to cook. You first learn some basic skills that you can later put together to make meals.
Cooking is not just about making something to eat; you will be practising maths (measuring, weighing, sharing); literacy (reading and writing if you jot down some notes about the recipes) and geography (learning about food and where it comes from) and much more.
Cooking uses all your senses. You can look at food, smell it, touch it, taste it and listen to it as it cooks. This is something my mum taught me when I was young. I think that’s pretty exciting; I hope you do, too.
THE RECIPES
My children Ella, Lola and Finley have helped me to put this book together. They have guided me as to which recipes are the most fun to make and eat! They have also tested the recipes with the help of some friends, in particular Rosie, Libby and Tess.
The book has 3 main chapters – Stage 1 (3–5 years), Stage 2 (5–7 years) and Stage 3 (7–11 years). Even though the recipes in Stage 1 are suitable for children aged 3–5 years, if you are older than that and have just picked this book up you can still make the recipes from this section. The recipes in Stage 1 are great for mixing and matching with the other recipes in the book to make a complete meal. For example, crunchy paprika chicken (page 28) is great after pretty prawn cocktails (page 58) for a special supper, or three fruit salad (page 44) is a lovely pudding to have after pizzas (page 88).
I have included classic favourites like crumble topping (page 76), Victoria sponge (page 122), pastry (page 112), white sauce (page 96) and pizza dough (page 88). This is because I think that these are the basic building blocks for learning to cook. I was fortunate to be taught these recipes by my mother, my grandmother and my design technology teacher.
There are also lots of other exciting recipes in the book which use some ingredients that we are lucky enough to find in shops today. You can have a go at making your own sushi (page 102), you can see how to use corn tortillas (page 106), and you can have fun adding herbs and flowers to water to make your own ice bowl (page 70).
Remember that food is expensive, so don’t be too disappointed if your parents don’t want you to cook every day of the week. But the more you offer to make food that you can all eat as a family, the more likely it is that you will be able to cook, as your parents can include your food in their weekly budget.
THE PHOTOS
The children in the pictures in this book are friends of ours and they came to my kitchen to make the food you see in the photos. Some children asked if they could keep cooking in between having their photos taken, as they were enjoying it so much. For example, while Hector on page 112 was having his photo taken making toffee apple tarts, Sam was making the same tarts in the background because he didn’t want to miss out!
YOUR NOTES
As you work your way through a recipe, try to think about it: did you like cooking it and would you like to cook it again? You might like to write some notes in the book. I know that normally you are told not to write in books, but this one is for you to keep forever and you might find it handy to jot down a few comments to remind you of something for next time. For example, would you add more herbs or spice to a recipe? Or make double the amount so that you have enough for friends to share, too?
WHY WE NEED TO EAT
The main reason why we need to eat good food is because it helps us to grow, develop and stay healthy. Ideally we need to eat 3 meals a day, with 2 small snacks in between. We also need to run around and play sport as much as possible, too, to help keep us fit and healthy.
There are certain types and amounts of food that we need to eat every day. We can eat everything, but we need to eat more of some foods than others. There are 5 main food groups:
1 Bread, rice, potatoes, pasta and other starchy foods
2 Fruit and vegetables
3 Milk and dairy foods
4 Meat, fish, eggs, beans and other non-dairy sources of protein
5 Foods and drinks that are high in fat and or sugar
Each day, ideally, we need to eat the following food:
Each meal or snack should contain a food from the bread, cereals and potatoes section. This means that we eat these foods 5 times a day.
Each meal or snack should also contain a fruit or vegetable. We need 5 portions of fresh fruits and vegetables a day.
3 portions of milk and dairy foods.
1 or 2 portions of meat, fish and alternatives a day.
We don’t need to eat foods from the fatty and sugary food section every day, as fats and sugars are often found in foods in the other food groups above, but we can have them as treats. Homemade cakes and biscuits are good for putting into packed lunches.
Did you know that all the food we eat comes from plants or animals? If possible, try to visit a local farm to see where animals are looked after and where crops are grown.
BEFORE YOU START COOKING
Always ask an adult before you start to make sure that they are happy you are cooking and to check that they will be around to help if you need it.
Try to find all the ingredients and the equipment that you will need for the recipe before you start. Oven gloves are especially important!
You might like to wear an apron. This can help keep the dirt from your clothes falling into the food and also stop the food that you cook going all over your clothes.
Wash your hands before you begin and dry them on a clean towel.
Always try to help clear up after you have made something, and help with the washing and drying up or loading the dishwasher. Your parents are far more likely to let you cook if you don’t leave a huge mess behind.
This book is the beginning of your adventure with food and cooking!
STAGE 1 3–5 YEARS
Grown-ups: this page is for you
CHILDREN: YOU CAN SKIP THIS BIT AND HAVE FUN COOKING!
I am sure you already know this, but I can’t stress enough how cooking with children at this stage can have a positive benefit on their development in so many areas. As much as possible, try to let your child complete each step of the recipe on her own to help her to gain a sense of independence in the kitchen.
♦ Cooking will help your child with her physical development, for example her fine motor skills as well as her coordination of movement and eye-hand coordination. Just think about the range of physical skills that she needs to use scissors for cutting fresh herbs, to scoop flour from a container or bag or to brush melted butter onto pastry.
♦ She can measure with spoons and is likely to be able to learn to count. This is why all the ingredients in this section need to be counted or measured with spoons (except for the chocolate kisses).
♦ She will start to work out how to share food evenly, e.g. dividing the fruit between the pies (page 42).
♦ She will start to understand the concept of time, e.g. how long things take to set or cook.
♦ Encouraging your child to cook at this stage can be helpful, as she can make a snack (page 26) or dinner for the family (page 28). She will become more confident with the recipes the more she makes them.
♦ Her attention span will be increasing and she will be able to choose to stop an activity and then come back to it again later.
♦ She will begin to sort things into simple categories, become interested in what causes things to happen, and often ask ‘why?’
♦ She will begin to be able to understand the concept of ‘lots’ or ‘a little’; and she will be able to start to recognize primary colours.
♦ She will be able to help find the ingredients or equipment in the kitchen and match them to the pictures in the book.
♦ At this age, children love repetition. She will want to try the new skills over and over again.
♦ She is likely to be starting to enjoy the social element of sitting, talking and eating the food she has made with the rest of the family, and she can start to help with jobs like washing vegetables, laying the table and tidying away.
SKILLS
You might find these skills useful for other things that you do (not just cooking), like pouring water onto plants.
USING AN OVEN
Have you ever turned an oven on? Look at the recipe to see what temperature the oven needs to be at and then ask an adult to show you how to set the oven to that temperature. Most ovens have a little light that will go off when the oven has reached the right temperature. Always use oven gloves when you are putting food in or taking food out of the oven.
USING A SPOON TO SCOOP
For example, you could try scooping some flour from a big bowl into a little bowl.
STIRRING & MIXING
Try mixing ingredients together with different spoons, for example in the red dip on page 20.
COUNTING
Practise counting the number of spoonfuls or ingredients that you need.
SORTING
Look at the introduction on page 11 of the book to see the different categories of food. You could try sorting basic foods into each category.
SPREADING
Use a table knife to spread something soft like honey or butter onto toast. You will need to gently press the knife onto the food as you spread. Look at pages 26 and 27 for more spreading ideas.
POURING
Use small jugs that are not too heavy, for pouring liquids from one container to another.
CUTTING WITH A TABLE KNIFE
A table knife is the knife you use to eat your meal with. It is not sharp. Practise cutting something soft like butter or avocado with a table knife.
OPENING & CLOSING JARS
Try opening the lid on a jar. Some jars will be very stiff and you will need some help opening them.
DIPPING
Sometimes you will need to coat a food in a crisp coating to protect the food when it is being cooked and to give it a lovely, crisp texture.
CARRY WITHOUT SPILLING
Practise carrying liquids in containers without spilling them. The first time my son carried his lollies to the freezer with me when he was three years old we lost half the juice on the way to the freezer but now we hardly ever have any spillages!
WASHING FRUIT & VEGETABLES
Wash them in a bowl of water or put some water into the sink. It is a good idea to give salad vegetables and root vegetables, like carrots and potatoes that grow underneath the ground, a wash before they are eaten to remove the soil. Mickey had fun washing the vegetables for his dip on page 20.
DRAINING IN A COLANDER
A colander is like a bowl with holes in it. It is useful for draining food like vegetables after you have washed them.
MEASURING WITH SPOONS
The recipes will either say ‘tablespoon’, which is a big spoon or ‘teaspoon’, which is a small spoon. Make sure that you use the right spoon when you are measuring your ingredients.
SHARING
In some recipes you will need to make sure that you share the food evenly, like sharing the fillings between tarts. You don’t want all of the filling in some of the tarts and none in the others!
FREEZING
Most homes have a freezer, even if it is very small. Freezers were invented to help keep food fresh for a long time without it going bad. How does food freeze? Most food contains lots of water. Freezing works by changing this water to ice. Put a liquid into a freezer and watch it change to a solid. The solid is called ice. See page 39 for ice lollies.
TOUCHING FOOD
When you touch food, think about how it feels – is it cold, slimy, hard or soft? On page 28 Lara loved touching the cold chicken and dipping it in the soft tomato purée and then the crunchy biscuits. Just remember never to lick your fingers after you have touched raw meat or fish.
MASHING
This is when you squash food using a potato masher, fork or pestle and mortar. Practise with soft fruits, e.g. page 36, or garlic, e.g. page 18.
TEARING
Try tearing some fresh herbs or salad leaves and then smelling them. My children like to smell mint, as they think it smells like toothpaste!
HULLING STRAWBERRIES
Use your fingers to pull the green stalks off the top of strawberries. You might need to dig your fingers into the fruit slightly so that you pull out the hard bit where the fruit and the stalk meet.
CUTTING WITH BISCUIT CUTTERS
Press the cutter into bread or pastry and twist it slightly to make sure that it cuts all the way through, and then lift the cutter up.
CUTTING WITH SCISSORS
Always make sure that your fingers stay away from the scissors so that you don’t cut them accidentally.
BRUSHING
Use a pastry brush to brush milk, melted butter or oil. For example, brushing oil onto baking trays helps to stop the food from sticking to the trays.
ROLLING
Use a rolling pin to flatten something like bread (see page 22) or pastry (see page 42). When you roll pastry, try to roll small pieces of pastry, one at a time; it is much easier than rolling one big piece. Push the rolling pin down onto the pastry and roll it away from you.
SHAPING
Use your hands to mould the food into a shape. For example, for the strawberry sweets (page 38), you will need to mould the dough to make strawberry shapes. For the chocolate kisses (page 46), you need to mould the dough into small balls.
BASHING WITH A PESTLE
You don’t have to have one of these, but if you do, try bashing a peeled clove of garlic to make the salad dressing on page 18.
CRUSHING GARLIC
Garlic grows in a ‘bulb’ with lots of small ‘cloves’ inside. Before you crush a clove of garlic you will need to peel it to remove the papery skin. Dig a fingernail into the skin to break it, then pull the skin away. To crush the clove put it in a garlic crusher and squeeze the crusher to close. You may need to scrape the crushed garlic off the crusher with a table knife. If you don’t have a crusher, just bash the garlic with a rolling pin to release some of its juices and flavour and keep it whole.
LAYING THE TABLE
Have fun laying the table and clearing away. The fork sits on the left of the plate and the knife on the right. The knife blade faces towards the plate.
TASTING NEW FOODS
Try something new – you might like it. You will also need to taste the food that you have made to check that its tastes good before other people try it. Use a teaspoon to taste your food.
KITCHEN EQUIPMENT
These are a few things that you might find useful to have in the kitchen, however you don’t need them all to do some cooking.
OVEN
There are so many different types of ovens. Ask your parents to show you how yours works. Most ovens have a little light on them which will go off when the oven has reached the right temperature.
OVEN GLOVES
You can’t cook safely without these. Whenever you help to put anything in or take anything out of the oven you must always put your oven gloves on! It is very easy to burn yourself.
SCISSORs
If you don’t have kitchen scissors, use paper scissors to snip herbs but make sure that you wash them before and after you use them to cut up food. When you use scissors, always keep your fingers away from the blades so that you don’t accidentally cut yourself.
MEASURING SPOONS
You will need 2 different sizes of spoon for recipes: a ‘tablespoon’, which is a big spoon, and a ‘teaspoon’, which is a small spoon. Make sure that you use the right spoon when you are measuring your ingredients.
ROLLING PIN
These come in all different sizes, they are easy to use and great fun. They are needed for rolling out pastry or bread and they can be used for bashing olives to help remove their stones and bashing garlic cloves to help remove their skins!
CUTTERS
These come in all different shapes and sizes. Have fun cutting out circles of bread for the tasty bread tarts (page 34).
SIEVE
Why do we need to use a sieve? To remove any lumps and also to add air so that the food we cook or bake is light.
MIXING SPOONS
Wooden and melamine spoons are both great for mixing ingredients together.
PASTRY BRUSH
This is useful for brushing melted butter onto pastry, like the mini fruit pies on page 42 or for brushing oil onto baking trays e.g. the burgers on page 64 (if you are not using greaseproof paper).
PESTLE & MORTAR
You don’t need one of these but they are fun to use for bashing food like cloves of garlic to make a dressing for a salad like on page 18. If you don’t have one you can use a small rolling pin and a little bowl instead. The pestle is the stick and the mortar is the name given to the bowl.
POTATO MASHER OR FORK
This is for mashing soft fruit and vegetables.
MELON BALLER
If you don’t have one of these, you can use a small teaspoon instead.
GARLIC CRUSHER
Peel the garlic clove first and then put the clove inside the garlic crusher. Push down to squeeze the garlic out (see page 15, above).
CHOPPING BOARD
Always wash your chopping board after you have used it. This is very important if you have used it to cut meat, poultry or fish.
MUFFIN TIN
You need this for the bread tarts on page 34 and you can also use it to make small cakes.
BAKING TRAY
These are very handy. For example, you will need one for the DIY pizzas on page 32, and many other things which you cook in the oven.
MIXING BOWL
These come in all different shapes and sizes. They are useful for so many different recipes, whether you are making a cake or mixing leaves together to make a salad.
COLANDER
This is like a sieve but it has bigger holes. It is great for draining things like cooked pasta or a jar of olives.
WIRE COOLING RACK
You don’t have to have one of these, but it is useful for helping food to cool down.
SMALL JUG
Try to use small jugs for pouring, even if it means that you have to fill the jug up more than once.
FORK, TABLE KNIFE, SPOON
This is the cutlery that you use to eat with.
BIG & SMALL BOWL, PLATE
Hopefully this will not be too difficult to find in your kitchen cupboards.
salad bar with Susan’s dressing
This is a recipe for a salad dressing. It is very useful to know how to make a good dressing so that you can always enjoy eating yummy salads. My friend Susan makes the best salad dressing and it tastes just like this. It is my children’s idea to make a ‘salad bar’. They like to choose salad ingredients from the fridge, put them into bowls and then we all help ourselves. Sometimes they choose things like grated carrot, tinned sweetcorn and crunchy bread croutons to go with the salad leaves.
SKILLS
♦ USING PESTLE & MORTAR
♦ MEASURING WITH SPOONS
♦ MIXING
♦ CUTTING WITH TABLE KNIFE
♦ WASHING
♦ POURING
1
1 To make Susan’s dressing, peel the thin, pink skin away from the garlic clove and if you have a pestle and mortar, put the garlic into the bowl, add a tiny pinch of salt** and bash the garlic until you have a paste. If you don’t have a pestle and mortar, crush the garlic in a garlic crusher and put into a jug, then use a small whisk to whisk everything together.
2
2 Add the mustard, balsamic vinegar and white wine vinegar and a little freshly ground black pepper and mix again.
3
3 Add the olive oil a little at a time – keep mixing all the time so that you end up with a smooth dressing. This will come with practice. Keep making it every time you have a salad!
For 4 people you need:
SUSAN’S DRESSING
1 garlic clove
tiny pinch of salt**
1 teaspoon mustard (English, wholegrain or Dijon are all fine)
1 teaspoon balsamic vinegar
1 tablespoon white wine vinegar
a little freshly ground black pepper
6 tablespoons olive oil
SALAD INGREDIENTS
You can use any salad ingredients that you like. Here are some that we often use: ripe avocado* and cooked, peeled fresh beetroot (you can chop these using a table knife)
salad leaves e.g. lettuce leaves, rocket, watercress, baby spinach leaves
cherry tomatoes, pitted olives, pine nuts, small mozzarella balls
EQUIPMENT
pestle and mortar ♦ table knife chopping board ♦ several small bowls colander ♦ clean tea towel ♦ small jug
4
4 If you have some soft foods, like avocado* or beetroot, you might like to cut these into small pieces using a table knife and then put them into bowls.
5
5 Wash the lettuce in a colander in the sink, then shake or dry with a clean tea towel. Put the lettuce in a bowl and then put all your other salad ingredients into small bowls. Pour your dressing into a jug. Let everyone help themselves to the pick ’n’ mix salad bar. You will have some salad dressing left over to use another day. Keep it in a clean jam jar in the fridge.
* Please ask an adult or older child to cut the avocado in half.
** I don’t add salt to any recipes for children, but this is an exception, as the salt helps you to mash the garlic to a paste.
red dip with crunchy veggies


