
Erhalten Sie Zugang zu diesem und mehr als 300000 Büchern ab EUR 5,99 monatlich.
- Herausgeber: CICO Books
- Kategorie: Lebensstil
- Sprache: Englisch
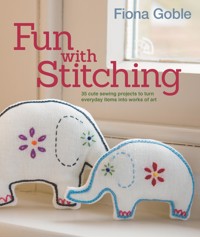
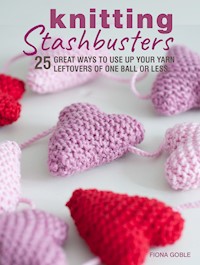
Learn how to knit by working through these adorable projects by experienced knitter and author, Fiona Goble. Even beginners will be able to pick up a pair of needles and start making simple knitted items. Starting with the tools and materials chapter, you'll learn every stitch you'll need, all illustrated with helpful artworks. Then move onto the projects, which are grouped by skill level - 'Getting Started', 'Getting Better' and 'Now You Are Really Good'. In the first chapter, find out how to make a cute cosy for your phone, a pretty heart garland to decorate your room, and a striped cushion cover. Moving on to the next level, there are sweet woodland-themed key rings and simple tablemats, as well as larger projects, such as a hot water bottle cover or book cover. Finally, try the patterns that are aimed at more experienced knitters - from a delicate tea light shade or draught excluder to a backpack or throw. With easy-to-follow instructions and helpful hints and tips throughout, you're bound to want to knit all of these projects, both for yourself and as gifts for friends.
Sie lesen das E-Book in den Legimi-Apps auf:
Seitenzahl: 147
Veröffentlichungsjahr: 2015
Das E-Book (TTS) können Sie hören im Abo „Legimi Premium” in Legimi-Apps auf:
Ähnliche


Cute & Easy Knitting
Cute & Easy Knitting
Learn to knit with these 35 adorable projects
Fiona Goble
Published in 2013 by CICO Books
An imprint of Ryland Peters & Small
519 Broadway, 5th Floor, New York NY 10012
20–21 Jockey’s Fields, London WC1R 4BW
www.rylandpeters.com
10 9 8 7 6 5 4 3 2 1
Text copyright © Fiona Goble 2013
Design, photography, and illustration copyright © CICO Books 2013
The author’s moral rights have been asserted. All rights reserved.
No part of this publication may be reproduced, stored in a retrieval system, or transmitted in any form or by any means, electronic, mechanical, photocopying, or otherwise, without the prior permission of the publisher.
A CIP catalog record for this book is available from the British Library.
eISBN: 978-1-78249-268-9
ISBN: 978-1-78249-041-8
Printed in China
For digital editions visit www.cicobooks.com/apps.php
Editor: Marie Clayton
Designer: Julie Bennett
Artworks: Stephen Dew
Photographer: Caroline Arber
Stylist: Sophie Martell and Nel Haynes
Contents
Introduction
Knitting Know-how
CHAPTER 1
Getting Started
Bunting
Mug cozy
Coathanger cover
Pot holder
Striped pillow
Phone cozy
Tablet cozy
Heart garland
Lacy scarf
Owl lavender bag
Clutch bag
Pencil pot
CHAPTER 2
Getting Better
Washcloth
Hot water bottle cover
Cottage doorstop
Woodland keyrings
Bolster pillow
Bath mat
Egg cozies
Napkin rings
Placemats
Fingerless mitts
Storage basket
Grocery bag holder
Coasters
Pull-through cravat scarf
Pencil case
Pot cover
Book cover
CHAPTER 3
Now You Are Really Good
Tea light shade
Tea cozy
Lampshade
Dog draft excluder
Market bag
Wallet
Stripy throw
Backpack
Suppliers
Index
Acknowlegments
Introduction
While I love traditional knitted items, for this collection I wanted to create something a bit different. I wanted the designs to be pretty, quirky—and to have a slightly vintage feel. In other words, I wanted to produce a range of knitted items that I’d like to have in my own home—or, in some cases, round my own neck or on my own hands! The collection includes patterns for newbie knitters as well as seasoned pros – and just about every stage in between.
I’ve divided the collection into three sections. The patterns in the first part are suitable for those who have just started to knit but still want to produce something lovely—either for themselves or as a gift.
In the second part the projects are aimed at knitters who have mastered the basics; they’re up for something of a challenge but don’t want anything too fancy or intricate. If you think this might be you but you haven’t picked up your needles for a while, have a look through the Knitting Know-how section that begins on page 8. I think knitting is a bit like riding a bike —once you’ve learned how to do it, it’s easy to get going again even after a bit of a break.
In the final part of the book, I’ve included projects for slightly more experienced knitters. But don’t worry too much—this isn’t a book for people who want to embark on projects that take several months of solid knitting, or those who want to spend their entire pay packet on knitting yarns.
And while on the subject of yarns, all the projects in the book are knitted in standard yarns. If you can’t find the one specified or simply want to knit the item in something different, then choose a similar yarn of the same thickness. Remember to knit your gauge (tension) square first, though, to make sure that you are happy with the look and that your finished creation will be the right size.
For me, the most satisfying thing about knitting is how you can create such gorgeous items from something so simple—just a pair of knitting needles and a ball of yarn. All right, I admit that you usually also need a needle to sew your project together and a few adornments, but I’m sure you know what I mean.
I have loved working out the patterns in this book and I hope you will have fun recreating the items, perhaps in your own colors or with your own unique twist. I would love to hear how you get on—so please feel free to contact me via my blog at fionagoble.wordpress.com.
Tools & materials
The knitting needles, yarn, and other items that you need are listed at the beginning of each of the pattern instructions.
Knitting needles
Standard knitting needles can be made of metal, bamboo, or plastic and which type you choose is a matter of personal preference. The different sizes are based on the needle diameter but they also come in different lengths. Choose shorter needles for smaller projects because you will find them easier to work with.
• A couple of projects in this book use a circular knitting needle, which has a point at each end and a flexible section in the middle, usually made of plastic. Because they are much longer than standard needles you can use them to knit extra-wide projects such as the Stripy Throw (see page 118) and Lampshade (see page 106). Circular needles also enable you to knit a tube although we do not use them in this way in the projects in this book.
Pins
Pins can be used to hold pieces of knitting together before you sew. You can get special pins for knitting but any long pins with large heads will work fine.
Cable needle
These are short needles with a point on each end, used to make a cable pattern in your knitting. Sometimes they have a dip in the middle to help make sure your stitches stay in place on the needle.
Scissors
A small pair of sharp scissors is a vital tool for all knitters. They are used for snipping the yarn once your work is finished, and for trimming yarn tails after you have woven them in.
Point protectors
You can pop these over the point of your needles when you are taking a break from your knitting. They will stop the needles poking through your knitting bag or basket and keep your stitches on the needle.
Tape measure or ruler
A tape measure or ruler is essential for checking your gauge (tension) square and measuring your work.
Yarn sewing and other needles
Large-eye yarn needles are used to sew your projects together. They are usually slightly blunt so that you do not split the yarn as you sew. Always choose the smallest size possible for the yarn used because this will make your work easier.
• For some projects you will also need an embroidery needle, which has a sharper point than a yarn sewing needle. Remember to select a needle with an eye large enough to thread the yarn.
• A standard sewing needle is used for sewing on buttons, snap fasteners, and other items.
Stitch holders
These are useful to hold a group of stitches while you work on another part of your knitting.
Safety pins
Ordinary small safety pins are useful to mark particular stitches or rows that you will need to come back to later on. For some projects, you will also need a safety pin to thread trimmings or lengths of elastic through your work.
Water-soluble pen
These look like ordinary felt pens but the ink disappears when sprayed or dabbed with water. They are useful for marking particular points in your knitting where you want to embroider some finishing touches.
Pompom maker
These useful gadgets make creating pompoms quick and easy. However if you do not have one, you can always use two circles of cardboard with a hole cut in the center (see page 25).
Buttons
Some of the projects require buttons or other small embellishments. If you haven’t already got one, it’s a good idea to start a button collection so you have a few choices for your project.
Crochet hook
The projects in this book do not involve crochet as such, but some of them have a crochet edging (see page 25) or simple cord made of a length of crochet chain (see page 24). Crochet hooks are normally made of metal or plastic—the material you choose is up to you.
Fiberfill toy filling
You will need some fiberfill toy filling for some of the projects. It is specially made for stuffing handicrafts and soft toys, and is available from most haberdashery and craft stores. Check that the one you use conforms to all safety regulations.
Row counter
Some people find it helpful to have a row counter on one needle so they can keep track of where they are in their knitting pattern. Alternatively, you could simply make a note with a pencil and a piece of paper!
Yarn
The specific yarn required for each project is given in the instructions. You can substitute other yarns for those specified, but always make sure that the yarn you use is the same thickness, is made of a similar mix of fibers, and knits up to the recommended gauge (tension).
Substituting yarn
Balls of two different brands of the same type of yarn won’t necessarily contain the same quantity of yarn— even if the balls weigh the same, it’s the yardage (meterage) that’s important. If the substitute yarn has a different yardage (meterage) per ball to the pattern yarn, then you need to do a sum to work out how many balls to buy.
1 Multiply the yardage (meterage) in one ball of pattern yarn by the number of balls needed to find out the total yardage (meterage) of yarn required.
2 Then divide the total yardage (meterage) by the yardage (meterage) in one ball of the substitute yarn to find out how many balls of that yarn you need to buy.
Example:
The substitute yarn has 123 yd (112 m) of yarn in each ball.
Before buying all the substitute yarn, buy just one ball and knit a gauge (tension) swatch to be absolutely certain that you can get the right gauge (tension) with that yarn.
Working a gauge (tension) swatch
The gauge (tension) is given as the number of stitches and rows you need to work to produce a 4-in. (10- cm) square of knitting.
1 Using the recommended yarn and needles, cast on 8 stitches more than the gauge (tension) instruction asks for—so if you need to have 10 stitches to 4 in. (10 cm), cast on 18 stitches. Working in pattern as instructed, work eight rows more than is needed. Bind (cast) off loosely.
2 Lay the swatch flat without stretching it (the gauge/tension is given before washing or felting). Lay a ruler across the stitches as shown, with the 2 in. (5 cm) mark centered on the knitting, then put a pin in the knitting at the start of the ruler and at the 4 in. (10 cm) mark: the pins should be well away from the edges of the swatch. Count the number of stitches between the pins. Repeat the process across the rows to count the number of rows to 4 in. (10 cm).
If the number of stitches and rows you’ve counted is the same as the number asked for in the instructions, you have the correct gauge (tension). If you do not have the same number then you will need to change your gauge (tension).
To change gauge (tension) you need to change the size of your knitting needles. A good rule of thumb to follow is that one difference in needle size will create a difference of one stitch in the gauge (tension). You will need to use larger needles to achieve fewer stitches and smaller ones to achieve more stitches.
Abbreviations
These are the knitting abbreviations that you will need to know to follow the instructions in this book.
alt
alternate
beg
beginning
C4F
four-stitch front cable (see
page 18
)
C6B
six-stitch back cable (see
page 19
)
cont
continue
inc1
increase one stitch by knitting into the front then the back of the next stitch
K
knit
k2tog
knit the next 2 stitches together kwise by knitting the stitch or stitches together
LH
left hand
M1
make one stitch by picking up the horizontal loop before the next stitch and knitting into the back of it.
P
purl
p2tog
purl the next 2 stitches together
patt
pattern
psso
pass slipped stitch over (the stitch just worked)
pwise
by purling the stitch or stitches
rep
repeat
rem
remaining
RH
right hand
RS
right side
s1
slip one (slip a stitch onto the right-hand needle without knitting it)
ssk
slip, slip, knit (slip 2 stitches one at a time then knit the slipped stitches together)
st(s)
stitch(es)
st st
stockinette (stocking) stitch
tbl
through back loop (work through the back loop of the stitch only)
WS
wrong side
cm
centimeter
g
gram
in.
inch
mm
millimeter
m
meter(s)
oz
ounce
yd
yard
yo
yarn forward (see
page 21
)
yo twice
yarn over twice (see
page 21
)
yrn
yarn round needle (see
page 21
)
[]
Square brackets are used around instructions that you need to perform more than once. For example: [k2tog] 3 times means that you need to knit two stitches together three times.
()
When you have worked a row to increase or decrease the number of stitches on your needle, the number of stitches you should have after completing the row is given in round brackets at the end. For example: (6 sts) means that you should have six stitches on your needle.
Techniques
If you’re brand new to knitting or just want to refresh your skills, it’s a good idea to grab your needles and a ball of yarn and practice a few basic techniques and stitches before you launch into your first project. These pages contain all the information you need to get going and are a resource to come back to when you come across a new technique.
Holding needles
If you are a knitting novice, you will need to discover which is the most comfortable way for you to hold your needles. This applies when using either a pair of knitting needles or a circular needle.
Like a knife
Pick up the needles, one in each hand, as if you were holding a knife and fork—that is to say, with your hands lightly over the top of each needle. As you knit, you will tuck the blunt end of the right-hand needle under your arm, let go with your hand and use your hand to manipulate the yarn, returning your hand to the needle to move the stitches along.
Like a pen
Now try changing the right hand so you are holding the needle as you would hold a pen, with your thumb and forefinger lightly gripping the needle close to its pointed tip and the shaft resting in the crook of your thumb. As you knit, you will not need to let go of the needle but simply slide your right hand forward to manipulate the yarn.
Holding yarn
As you knit, you will be working stitches off the left needle and on to the right needle, and the yarn you are working with needs to be tensioned and manipulated to produce an even fabric. To hold and tension the yarn you can use either your right or left hand. Try both methods to discover which works best for you.
Yarn in right hand
With the ball of yarn on the right, catch the yarn around your little finger then lace it over the third finger, under the middle finger, and over the first finger of your right hand.
Yarn in left hand
With the ball of yarn on your left, catch the yarn around your little finger then take it over the third and middle fingers. Most left-handed knitters will also find that, even if they reverse the direction of knitting (working stitches off the right needle onto the left needle), using the left hand to manipulate the yarn will be easier to manage.
Making a slip knot
You will need to make a slip knot to form your first cast-on stitch.
1 With the ball of yarn on your right, lay the end of the yarn on the palm of your left hand and hold it in place with your left thumb. With your right hand, take the yarn round your top two fingers to form a loop. Take the knitting needle through the back of the loop from right to left and use it to pick up the strand nearest to the yarn ball, as shown in the diagram. Pull the strand through to form a loop at the front.
2 Slip the yarn off your fingers leaving the loop on the needle. Gently pull on both yarn ends to tighten the knot. Then pull on the yarn leading to the ball of yarn to tighten the knot on the needle.
Casting On (cable method)


