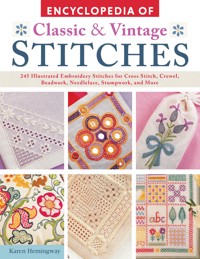
Encyclopedia of Classic & Vintage Stitches E-Book
Erhalten Sie Zugang zu diesem und mehr als 300000 Büchern ab EUR 5,99 monatlich.
- Herausgeber: IMM Lifestyle Books
- Kategorie: Lebensstil
- Sprache: Englisch
It's the ultimate sourcebook for stitchwork practitioners! This hardworking, stunningly illustrated reference and project book provides an essential guide for embroiderers at any level. Inside you'll find 245 embroidery stitches photographed close-up, accompanied by stitch-by-stitch instructions, hundreds of illustrations, and meticulous charts and diagrams. Twenty-four superb projects offer practice-makes-perfect work on every kind of embroidery, from cross-stitching and huck-weaving, crewel, and needlelace to smocking and bargello. For each type of embroidery, full details are also given on suitable fabrics, types of threads and needles, how to prepare the fabric, and best uses for the embroidery.
Sie lesen das E-Book in den Legimi-Apps auf:
Seitenzahl: 258
Veröffentlichungsjahr: 2020
Das E-Book (TTS) können Sie hören im Abo „Legimi Premium” in Legimi-Apps auf:
Ähnliche


THE ENCYCLOPEDIA OF
STITCHES
THE ENCYCLOPEDIA OF
STITCHES
Edited by Karen Hemingway
Contents
General Techniques
COUNTED THREAD WORK
Cross stitch
Blackwork
Huck weaving
FREE EMBROIDERY
Free embroidery
Beadwork
Shisha work
Crewel work
Silk ribbon embroidery
Stumpwork
Shadow work
Insertion stitching
Net embroidery
Metallic thread work
CUTWORK
Cutwork
Drawn thread work
Pulled fabric work
Hardanger
Needle weaving
Needlelace
SMOCKING
Smocking
CANVAS WORK
Needlepoint
Bargello
Suppliers
UK Terms List
For the convenience of the UK reader, below is a list of US terms used in this book and their UK equivalents.
US Term
UK Term
allowance
turning
baste
tack
batting
wadding
cardboard
card
cotton blends
cotton mix
dishtowel
tea towel
embroidery floss / stranded floss
embroidery cotton / stranded cotton
flashlight
torch
grosgrain
Petersham
heavy Pellon interfacing
Pelmet Vilene
mat board / mat
mount board / mount
muslin
calico
overcast
oversew / overstitch
pearl cotton / pearl thread
coton perlé / perlé thread
pillow form
cushion pad
pinwale corduroy
fine needlecord
quilting thread
quilting cotton
scattered
powdered
sewing thread
sewing cotton
tapestry yarn
tapestry wools
tatting cotton
fil à dentelles
thumbtacks
drawing pins
A Note About Colors
For the projects in this book, general colors are given along with brand-specific color numbers. These numbers are suggested colors only; the generic color names preceding them are a guide for what to look for if you are using a different brand or can’t find the specific suggested color, not the actual name associated with the color number given. Use what works for you!
General Techniques
Tempting as it may be to start stitching straightaway, it is well worth preparing and mounting the background fabric properly before you get down to work: time invested at the outset will always result in a professional finish. Almost all embroidery will benefit from being worked within a frame: the even tension prevents puckered fabric and distorted stitches, and you will quickly get used to sewing in this way. Protect your work in progress by pinning a clean handkerchief over the embroidery, then store the frame in a cotton pillowcase or wrap a larger piece with sheeting.
Lucinda Ganderton
PREPARING THE FABRIC
When cutting out the background, add on a margin of at least 3 in (8 cm) all around the design area to allow for mounting. If necessary, wash and press linen or cotton, to prevent any later color run or shrinkage. Some cloth, and most canvas, will fray along the cut edges, so hem or zigzag loosely woven fabrics and bind canvas with masking tape.
Always mark the center of the fabric. Lightly press it in half length-and widthwise, then work a line of contrasting running stitch along each crease, following the weave carefully. This will assist accurate placement of the design and help establish a good tension when the fabric is mounted.
Silks, satin and lawns will need to be reinforced with a second layer of fabric to support the weight of the stitches. Cut a piece of muslin 3 in (8 cm) larger all around and baste the finer fabric centrally onto the backing, diagonally from corner to corner, across the center lines and around the edge. Where the embroidery is a small part of a larger piece for, say, a garment, trim away the surplus muslin, so that it only backs the embroidery.
MOUNTING THE FABRIC
Lightweight wooden hoops are portable and ideal for small-scale work. To mount the cloth, loosen the screw and separate the two rings. The inner ring may be wrapped with bias or seam binding to protect the fabric and prevent it from slipping. Place the fabric over the inner ring and slip the outer ring in place. Stretch gently until it is taut like a drum, check that the guidelines are straight, then tighten the screw.
Using a scroll frame
Needlepoint and larger embroidery projects are worked on a scroll or “slate” frame. Hand-sew the top and bottom of the fabric to the webbing on the two roller bars. Adjust the bars to tighten the fabric, then secure the nuts. Lace the edges to the side bars with thick thread to keep the horizontal tension. For a long piece of work, the fabric will need to be rolled upwards as each section is completed and the sides re-laced.
Canvas mounted on a scroll frame
Using a stretcher frame
These simple frames are made from four lengths of wood. Canvas should be cut to the same size and anchored onto the top with thumbtacks: starting from the center top and bottom, then center sides, stretch it across the frame and work out towards the corners. Fabric can be wrapped over the edges and pinned to the back. To prevent snagging, the pins should be covered with masking tape.
Fabric mounted on a stretcher frame
WORKING ON EVENWEAVE FABRICS
Evenweave fabrics – linen, canvas and Aida cloth – are used for needlepoint, cross stitch and other techniques where the stitches need to be evenly spaced and of regular length. They are woven with the same number of threads in each direction to give an even grid across the surface. The thicker these threads, the greater the “count” or number of threads per inch (or 2.5 cm). This can vary from fine 24-count linen down to chunky 7-count canvas: high count fabrics necessitate small stitches in delicate threads, while the low count cloths require bolder stitches in thick thread.
Use a blunt needle and count the threads carefully to produce regular stitches. For horizontal stitches, count across the vertical threads; for upright stitches, count across the horizontal threads.
Working horizontal stitches on evenweave fabric
For diagonal stitches, count the intersections where the two sets of thread cross.
Working diagonal stitches on evenweave fabric
Following charts
Counted thread patterns are charted in colored squares or symbols across a fine grid, which resembles the mesh of evenweave fabric or canvas. Each square represents a single tent or cross stitch and the color or symbol corresponds to one of the thread shades. An identification key is given. Start stitching at the center of the design and work out. Make each stitch over the given number of threads or thread intersections.
TRANSFERRING THE DESIGN
Whether you follow a project or create your own pattern, the outline of a free embroidery design has to be transferred onto the background fabric. This can be done in various ways; the most appropriate method depends on the type of stitch, threads and fabric being used. Bear in mind that the outline must be accurate and that none of the marked lines should be visible on the completed embroidery. Enlarge or reduce the design to the size required using a photocopier. To make sure the design will be central, draw a horizontal and a vertical line to divide it into quarters and match these guidelines to the basted cross on the background fabric.
Tracing
Drawing straight onto the fabric is quick and straightforward. Sheer fabrics can be placed directly over the design, but for denser cloth a light box is necessary. This can be improvised by resting a sheet of glass on two stacks of books and setting up a lamp or flashlight in the space below. Tape the design to the glass, then secure the fabric over the paper. Alternatively the design and fabric can be taped onto a window or blank computer screen.
The outline can then be traced. On cotton or linen, this may be done with a sharp pencil if the stitches are not too delicate, but a water-soluble felt-tip pen will give a line that disappears completely. Always follow the manufacturer’s directions and test a sample piece first: not all fabrics are suitable. Fading pens are useful for non-colorfast materials, but you may have to re-draw the lines (or sew very quickly!). A chalk pencil is ideal for simple outlines.
An improvised light box
Dressmaker’s Carbon
This method is useful if a light box is not available. Use a light paper for dark fabrics and vice versa. Tape the fabric onto a flat surface, then place the paper facedown over it. Tape the design on top, then trace over the outline with a ballpoint pen. Brush any visible carbon away when the stitching is complete.
Hot Iron Transfer
Embroidery transfer pencils contain a heat-reactive permanent pigment, so remember that the outline will be indelible. If you iron lightly, the transfer can be used more than once, so this method is suitable for a repeat motif. Trace the design onto thin paper using an ordinary pencil. Turn the paper and draw over the pencil lines with the transfer pencil. Pin the paper facedown onto the fabric (i.e., so that the side with the transfer pencil is against the fabric) and press with a cool iron. For a symmetrical shape, omit the first step and trace directly with the transfer pencil.
Tissue Basting
This method is used for transferring patterns onto dark or textured fabrics, such as velvet and satin, where a drawn line would not show up. It is also traditionally used for metallic thread work. Trace the outline onto tissue paper using a waterproof pen, then baste the paper to the right side of the fabric. Using a contrasting thread, sew through both the paper and the fabric, following the lines carefully. Work in a neat running stitch and use smaller stitches over more detailed areas. When the design is finished, gently tear away the paper, leaving the design “drawn” in thread. Most of the sewing thread will be concealed with stitches: snip away any that is left exposed.
Stitching the design through the tissue paper and the fabric
Image Transfer
Advances in printing technology are creating exciting new ways to embroider. Iron-on image transfer paper can be used to put photographic images or drawings directly onto fabrics. Fine white needlepoint canvas, heavy cotton or linen all work well, although the process will stiffen the fabric slightly.
Blocking a Canvas
A piece of needlepoint which contains diagonal stitches will inevitably end up sloping at an angle, so restore its true shape by “blocking” the canvas. Dampen both sides with a water spray to moisten the canvas stiffener. Place a piece of plastic on a board, then pin down one corner of the canvas. Stretch diagonally and secure the opposite corner, then pull in the opposite direction and pin the other two corners. Use a set square and ruler to check that the sides are straight, then pin the edges to the board. Leave to dry away from any direct heat source.
Blocking the canvas
Lacing over cardboard
Mount a project in this way before framing. Cut a piece of acid-free board to size and draw two lines to divide it into quarters. Trim the border around the embroidery to 1½ in (3 cm) larger than the cardboard on each side and mark the center of each side. Lay the cardboard centrally on the wrong side of the fabric and pin the middle of one side to the board, placing the pin into the edge of the board. Pull and pin the opposite side. Check that the grain of the fabric is square to the board, then pin the fabric at regular intervals down the sides of the cardboard. Starting from the center and using a strong thread, lace the edges together across the cardboard. Fold, pin and lace the top and bottom in the same way.
Lacing over cardboard
Mitering corners
Table linen and samplers are traditionally hemmed with mitered corners. Press under a double hem along each edge, then undo the second fold. Turn and press the corner so that the creases meet to form a square and clip off a triangle of fabric, ¼ in (5 mm) in from the diagonal crease. Refold the hem, then tack in place and stitch down. Slipstitch the miter.
The mitered corner ready for trimming
Counted Thread Work
Cross Stitch
Cross stitch, or sampler stitch, is one of the simplest stitches an embroiderer can learn and yet, potentially, it is the most versatile. It can be used for working straight lines, motifs and intricate borders, and for filling solid shapes. Cross stitch has a long history and, until the advent of modern embroidered pictures, was used almost solely for creating intricate and beautiful samplers intended to display the embroiderer’s stitching skills. Cross stitch samplers traditionally contained the letters of the alphabet, numbers, an assortment of figures and motifs, the year and the name and age of the stitcher.
Tessa Dennison
FABRICS
Cross stitch is always worked on an evenweave fabric – i.e. where the spaces between the warp (vertical) and weft (horizontal) threads are exactly the same – traditionally on linen, but nowadays often on a fabric called Aida. The fabrics can be loosely or tightly woven and are described by the number of threads to the inch/centimeter – called the count of the fabric. The stitches can be worked over one thread intersection (also called a block) for very detailed work or over two threads for less intricate patterns also making a square shape. Aida is available in a wide range of colors from white and cream through to darker shades such as navy and red. Linens tend to be available in natural and pastel shades.
THREADS
Modern cross stitch is worked using stranded embroidery floss. This is made up of six individual strands that can be separated and the appropriate number are used to suit the fabric count, so that the thread covers the background without looking gappy. For example, two strands of floss should be used for 14-count Aida. Stranded embroidery floss is available in a range of colors that stitchers of old could only have dreamed of. Fine pearl cotton, soft cotton embroidery threads and delicate metallic threads can also be used to add texture and depth to cross stitch designs.
NEEDLES
Use blunt-ended tapestry needles in a relatively small size to avoid enlarging the existing holes in the fabric.
USES
Cross stitch is not just limited to samplers and pictures, but can also be used to great effect on household linens and even clothing. There are a number of products available, such as tablecloths, that incorporate evenweave areas ready to be stitched. Aida is also available as a band complete with decorative edges in a variety of widths and colors. These are perfect for making edgings for dishtowels, guest towels, tablecloths and cushions.
PREPARING THE FABRIC
Cut a piece of your chosen evenweave fabric, allowing at least 2 in (5 cm) extra all around. Bind the edges of the fabric to prevent them from fraying (page). Find the horizontal and vertical centers of the fabric and mark them both with a line of running stitches in a brightly colored sewing thread (page). Find the center of your cross stitch chart and mark this too with a pen. Mount the fabric in an embroidery hoop ready to start stitching at the marked center point. Large pieces of work can be mounted in an embroidery frame (page).
STARTING AND FINISHING
To start an area of stitching, bring the needle up to the right side in the required square, leaving a short end on the wrong side of the work. Secure the end by working the first few stitches over it.
To finish an area of stitching and secure the thread, pass the needle back through a few stitches of the same color on the wrong side. Snip off all loose ends as you progress to prevent them from becoming caught up in subsequent stitches.
How to make cross stitches
Single Cross Stitch
This is where an individual cross stitch is completed before commencing the next. Bring the needle up to the right side of the fabric in the bottom right corner of the square to be filled. Then take it down in the top left corner of the square to complete the first part of the stitch. Now bring the needle up in the bottom left corner and take back down in the top right-hand corner to complete the cross stitch.
Rows of Cross Stitch
This is particularly suitable for filling shapes and for working simple borders. Working from right to left, bring the needle up to the right side in the bottom right corner of the first square and take it down in the top left corner of the square. Repeat this first part to make a row of diagonal stitches from bottom right to top left of each square. Then return along the row from left to right, working each stitch from bottom left to top right to complete the cross stitches.
Half Cross Stitch
This is used for creating areas of shading. Although traditionally worked from right to left and from bottom right to top left, this stitch can be worked to slope in the opposite direction to catch the light in a different way. Work the stitches as for the first, or the second, part of basic cross stitch.
The following embroidery may also be used with cross stitch:
•Beadwork
•French knots
•Bullion knots
Three-quarter Cross Stitch
Part stitches are ideal for giving smoother outlines to shapes. Work the short part of the stitch first, from the required corner hole into the center of the square, parting the fine threads that make up the fabric. Then work the second, longer part as for the basic cross stitch.
Quarter Cross Stitch
This can be used as an open filling stitch, as well as to create smoother outlines. Work it in exactly the same way as the first part of a three-quarter cross stitch, always from one corner hole into the center of the square.
Back Stitch
Back stitch adds definition to cross stitch figures and motifs, and therefore a more realistic appearance. It can be worked horizontally, vertically and diagonally, and over one or more blocks or threads. Working from right to left, bring the needle up one square to the right of the required starting point. Take the needle back down into the hole at the starting point to make the first stitch. Bring the needle up again one square farther on and take it back down at the end of the first stitch. Continue in this backward and forward fashion to complete a continuous line of stitches.
Double Cross Stitch(also known as Leviathan Stitch and Smyrna Stitch)
Although this is a canvas work stitch, it makes a very attractive cross stitch motif and can be used either to create interesting borders or on its own in the center of a square or diamond. It can be worked in two colors for decorative effect. Bring the needle up at A and work a large cross stitch over three horizontal and three vertical holes in the fabric. On top of this, work a large upright cross stitch in the sequence E, F, G, H. Bring the needle up again at C to repeat the stitch.
Assisi Work
In this type of work, cross stitch is stitched in the background areas and the motif or pattern areas are left unstitched. Assisi work is usually stitched in just one color and is best suited to dramatic designs made of simple shapes.
Cross stitch sampler chart
How to Stitch the Cross Stitch Sampler
This charming and unusual cross stitch sampler has all the elements of a traditional design and will show off your skills to perfection.
You will need
12 x 15 in (31 x 38 cm) white 14-count Aida fabric
Embroidery hoop or frame
DMC stranded embroidery floss, 1 skein of each of the following colors:
Grass green (701)
Dark blue (796)
Sky blue (798)
Pale blue (809)
Mid-blue (825)
Purple (208)
Coral (351)
Lime green (470)
Mauve (554)
Pale pink (604)
Orange (741)
Yellow (743)
Deep pink (3687)
Tapestry needle
Two pieces of ¼ in (5 mm) diameter dowel, 12½ in (32 cm) long
20 in (50 cm) length of ½ in (13 mm) wide pink gingham ribbon
20 in (50 cm) length of ¼ in (5 mm) wide yellow ribbon
Preparing the fabric and threads
1 Bind the edges and find the center of the fabric (page). Mark the center of the chart with a pen. Mount the fabric in the hoop or frame.
Stitching the center panel
1 Using two strands of the grass green embroidery floss, first work the Assisi leaf panel in the center of the sampler.
2 Then use the four shades of the blue embroidery floss, with two strands each, to work the letters of the alphabet immediately above and below the Assisi panel.
3 Again using two strands of the appropriate colors, add the two narrow borders that separate the rows of letters.
4 Finally work the top and bottom rows of the alphabet.
Stitching the border
1 Using two strands of the coral thread, work the narrow alternating cross stitch border that frames the center panel.
2 Now add the border motifs in two strands of the appropriate colors, following the chart and key. Add back stitch with one strand of deep pink around the outlines of the small pale pink hearts in the top left corner.
3 Complete the stitching by working another alternating cross stitch border in two strands of coral thread.
Mounting the sampler
1 Place the sampler right side down on a clean towel, which will prevent the stitches from being flattened, and carefully press it on the wrong side.
2 Fold back the side edges eight squares outside the borders. Trim if necessary to make a double hem and slipstitch in place on the wrong side, along the border line of cross stitch.
3 Make casings for the dowels by turning back the top and bottom edges eighteen squares above and below the top and bottom borders. Turn under a hem, trimming if necessary and slipstitch in place along the border line of cross stitch on the wrong side.
4 Thread the dowels through the casings and hang with the ribbons.
Key
Dark blue 796
Mid blue 825
Sky blue 798
Pale blue 809
Coral 351
Orange 741
Yellow 743
Deep pink 3687
Pale pink 604
Purple 208
Mauve 554
Grass green 701
Lime green 470
Blackwork
A distinctive form of counted thread embroidery, blackwork was probably of Moorish origin and became popular in England during Tudor times due to the influence of Katharine of Aragon, Henry VIII’s Spanish wife. As its name suggests, it is traditionally worked in black thread and can be embellished with touches of metallic thread. Geometric patterns are built up by repeating stitch sequences within a defined area. The tonal contrasts you can create with blackwork give it great dramatic impact.
Patsy North
FABRICS
Evenweave linen or cotton fabrics are used for blackwork. The finer the weave of the fabric, the finer the finished embroidery will be, but take care not to choose a fabric that is so fine that the threads are too difficult to count. Plain white fabric provides the strongest contrast with the black thread and sets the stitch patterns off to good advantage, giving the technique its striking graphic quality. However, there is no reason why you shouldn’t try off-white, beige or pastel shades of fabric.
THREADS
The type of thread you choose should match the weight of the fabric threads. For a crisp finish, it is best to use a single strand of thread. Pearl cotton, stranded embroidery floss, coton à broder and sewing thread are all suitable. As well as the classic black, other strong colors, such as red, can give an interesting effect. Fine synthetic metallic threads add richness to a design.
NEEDLES
Use a blunt-ended tapestry needle that won’t split the fabric threads as you work.
USES
A sampler is an ideal showcase for the many fascinating stitch patterns you can create with blackwork. Set the stitch patterns inside geometric shapes or stylized floral forms for a traditional look. For a more experimental approach, try working a blackwork picture. Any design with large areas to be filled is appropriate, such as a house portrait, map, simple landscape of hills and fields, or city skyline with skyscrapers. Other items that are suitable for blackwork decoration include table linen, cushions and clothing.
PREPARING THE FABRIC
Cut a piece of your chosen evenweave fabric, allowing at least 2 in (5 cm) extra all around. Bind or overcast the edges of the fabric to prevent them from fraying (page). Find the horizontal and vertical centers of the fabric and mark them both with a line of running stitches in a brightly colored sewing thread (page). Find the center of your chart and mark this too with a pen.
Mount the fabric in an embroidery hoop ready to start stitching at the marked center point (page).
STARTING AND FINISHING
To start an area of stitching, bring the needle up to the right side, leaving a short end on the wrong side of the work. Secure the end by working the first few stitches over it.
To finish, pass the needle back through a few stitches on the wrong side. Snip off all loose ends as you work to prevent them from becoming caught up in subsequent stitches.
How to make blackwork stitches and fillings
Holbein Stitch(also known as Double Running Stitch)
This stitch is used to build up a wide variety of blackwork stitch patterns and looks the same on both the right and the wrong side of the fabric. It is worked in two stages. First work running stitch over the counted threads of the fabric, following the line of the pattern. Complete the stitch by working back along the same line, filling in the spaces with another row of running stitch.
Back Stitch
Back stitch produces a similar linear effect to Holbein stitch and can be useful for certain blackwork patterns. However, Holbein stitch gives a smoother line and is less prone to distorting the fabric weave.
Flower Filling
Work each flower in Holbein stitch with an upright cross in the center. Build up the pattern row by row with flower shapes to fill the desired area. Then work the small squares that link the flowers together. Finally, if you wish, add a border with a line of Holbein stitch.
Pineapple Filling
Using Holbein stitch, start stitching the first row of the outline diamond pattern along the bottom of the area to be filled. Then work back along the row filling in the stitches to complete the diamonds and add the groups of three straight stitches inside each diamond. Continue building up the diamond pattern row by row.
Honeycomb Filling
Using Holbein stitch, begin by working the lower part of the first row of octagons. On the return journey, complete the lower part of the octagons, adding the small linking squares. Continue in this way until the area is filled. Finish by working a small cross in the center of each octagon and a short diagonal in each linking square.
Basketweave Filling
Work the first row by stitching groups of three vertical stitches followed by groups of three horizontal stitches, with each group occupying the same amount of space and a regular amount of space between each group. On the return row, reverse the order of the vertical and horizontal stitches. Repeat as necessary. To complete the basketweave, add cross stitches to link the vertical and horizontal stitches.
Greek Key Filling
Use Holbein stitch to work the Greek key pattern row by row. The rows are separated by one fabric thread.
Square Grid Filling
Work rows of small squares in Holbein stitch to fill the desired area, leaving two fabric threads between each square. Then add cross stitches to link the squares together. Complete the pattern by filling the spaces between the squares with long straight stitches.
How to Stitch the Blackwork Sampler
A pretty picture which demonstrates the different effects of six filling patterns within a geometric border.
You will need
12½ x 14 in (32 x 36 cm) 25-count white evenweave linen
Pins
Colored basting thread
Embroidery hoop
DMC pearl cotton No. 8, 1 reel in black
Tapestry needle
7 x 8¾ in (17.5 x 22 cm) stiff white cardboard (or to fit your frame)
Picture frame (optional) or two curtain rings
The following embroidery may also be used with blackwork:
•Beadwork
•Cross stitch
•Coral stitch
•Chain stitch
Key
All stitches worked in DMC pearl cotton in black
Preparing the fabric
1 Bind the edges and find the center of the fabric (page).
2 Using pins and then basting thread, mark out six 1½ in (4 cm) squares, each 40 x 40 fabric threads, in two rows of three with six fabric threads between each square.
Stitching the sampler
1 Mount the fabric in an embroidery hoop.
2 Following the chart below, fill each square with the appropriate filling pattern. Take care not to pass long lengths of thread across the back of the work, as they will show through on the front.
3 To work the border, count 16 fabric threads out from the outer edges of the patterned squares to give the inner edges of the border. Mark this line with basting stitches.
4 Start at the center of one side, one thread up from the horizontal center line of basting, with a row of running stitch, working the corners with two stitches at right angles as shown in the border pattern diagram. Build up the border with three more rows of running stitch spaced two threads apart. Join the two center rows with straight stitches to make little squares. Join the remaining pairs of rows with cross stitches, working a three-quarter cross stitch at each corner of the border to give it an angled line.
Mounting the sampler
1 Remove all the basting threads. Press the embroidery with the right side down on a padded surface.
2 Place the sampler right side down and place the cardboard centrally on top of it. Lace the fabric over the edges of the cardboard (page).
3 Place the mounted embroidery in a picture frame if you wish or sew two curtain rings to the back for hanging.
For a printable PDF of the patterns used in this book, please contact Fox Chapel Publishing at [email protected], quoting the ISBN and title of this book, as well as the pattern or patterns required.
Border Pattern
Blackwork sampler chart. Enlarge on a photocopier for ease of working.
Corner detail of the border pattern for the sampler.


