Erhalten Sie Zugang zu diesem und mehr als 300000 Büchern ab EUR 5,99 monatlich.
- Herausgeber: Fox Chapel Publishing
- Kategorie: Lebensstil
- Sprache: Englisch
A collection of some of the best framing projects published by American Woodworker magazine with expert step-by-step instructions, workshop tips and matting and mounting instructions. Add a special touch to cherished photos or artwork with hand-made picture frames. The experts at American Woodworker give step-by-step instructions using a variety of woods and styles.
Sie lesen das E-Book in den Legimi-Apps auf:
Seitenzahl: 105
Veröffentlichungsjahr: 2010
Das E-Book (TTS) können Sie hören im Abo „Legimi Premium” in Legimi-Apps auf:
Ähnliche


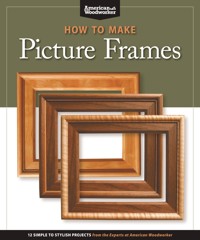
HOW TO MAKE
Picture Frames
HOW TO MAKE
Picture Frames
12 SIMPLE TO STYLISH PROJECTS
from the Experts at American Woodworker
Published by Fox Chapel Publishing Company, Inc., 903 Square St., Mount Joy, PA 17552, 717-560-4703, www.FoxChapelPublishing.com
© 2010 American Woodworker. All rights reserved. No part of this publication may be reproduced in any form without written permission. Readers may create any project for personal use or sale, and may copy patterns to assist them in making projects, but may not hire others to mass-produce a project without written permission from American Woodworker. The information in this book is presented in good faith; however, no warranty is given, nor are results guaranteed. American Woodworker Magazine, Fox Chapel Publishing and Woodworking Media, LLC, disclaim any and all liability for untoward results.
American Woodworker, ISSN 1074-9152, USPS 738-710, is published bimonthly by Woodworking Media, LLC, 90 Sherman St., Cambridge, MA 02140, www.AmericanWoodworker.com.
Library of Congress Control Number: 2009053477
ISBN-13: 978-1-56523-459-8
ISBN-10: 1-56523-459-6
Library of Congress Cataloging-in-Publication Data
How to make picture frames.
p.cm.
Includes index.
Print ISBN 978-1-56523-459-8eISBN 978-1-60765-891-7
1. Picture frames and framing. I. Fox Chapel Publishing.
TT899.2.H693 2010
749’.7--dc22
2009053477
To learn more about the other great books from Fox Chapel Publishing, or to find a retailer near you, call toll-free 800-457-9112 or visit us at www.FoxChapelPublishing.com.
Contents
Featured Projects
Picture Frame Techniques
Weekend Picture Frames
Create Extraordinary Frames With Ordinary Router Bits
Matting and Mounting
Improving Aesthetics and Protecting Your Art
Photo Frames by the Dozen
Two Jigs Let You Crank Them Out Flawlessly!
Tips for Better Picture Frames
Frame Like a Pro With Simple Tools
Router Moldings
Tips on Safely Making Clean-cut Moldings for Your Home and Projects
Three Router-Made Picture Frames
Three Custom Profiles With Infinite Possibilities
Tablesaw Picture Frame
Safely Make Shaper-Quality Molding on Your Tablesaw Without Fancy Jigs
Picture Frame Projects
Rustic Picture Frame
Found Wood Brings Outstanding Results
Oval Picture Frames
Don’t Let Their Shape Intimidate You—Jigs Make Classic Frames Easy
Photo Album
Creating Beautiful, Individualized Display Pieces
Three One-Day Picture Frames
Distinctive Creations Without Mitered Corners
Craftsman Frame
Pegged Half-lap Joints Are the Cabinetmaker’s Way to Build a Beautiful Frame
Fab Frames
No Miters and No Fuss! Multiples and Cool Variations Are Easy
Lindsey Dill’s Fabulous Frames
An Ingenious Young Woodworker Discovers the Fun of Jig-Making
Sycamore Hallway Mirror
Weekend Project Uses Beautiful Wood, Invisible Hinges, and Simple Joinery
Oak Hallway Mirror
Step-by-Step Instructions for Creating an Heirloom
Featured Projects
BASIC PICTURE FRAMES
Rustic Picture Frame
Photo Album
Three One-Day Picture Frames
Tablesaw Picture Frame
Matting and Mounting
Tips for Better Picture Frames
MAKING MULTIPLE FRAMES
Router Moldings
Three Router-Made Picture Frames
Weekend Picture Frames
Photo Frames by the Dozen
ANTIQUE AND CONTEMPORARY FRAMES
Oval Picture Frames
Craftsman Frame
Fab Frames
Lindsey Dill’s Fabulous Frames
Sycamore Hallway Mirror
Oak Hallway Mirror
Picture Frame Techniques
Few things are as personally rewarding as displaying family treasures with beautiful frames you make yourself. Here’s your chance to learn how to make your own frames for family or travel photos, children’s art, samplers, paintings—anything you want to hang on the wall, display on a shelf, or preserve in an album. A variety of styles and woods helps you choose the perfect frame for each photo, piece of artwork, or other image you wish to display.
From relatively simple frames to more complex and highly decorated ones, you will find clear instructions with a wealth of illustrations. Step-by-step photos clearly show the sequence of tasks. Technical illustrations also provide essential information.
Use “Featured Projects” on page to help you choose your projects. You will find ways to make multiple frames, as well as an interesting choice of frame styles. Some have a vintage look. Others have a contemporary or even whimsical style. Instructions for making two distinctive hall mirrors complete the collection.
How to Make Picture Frames is a collection of some of the best projects published by American Woodworker magazine. American Woodworker magazine is committed to providing woodworkers with the most accurate and up-to-date plans and information—including new ideas, product and tool reviews, workshop tips, and more.
by TIM JOHNSON
Weekend Picture Frames
CREATE EXTRAORDINARY FRAMES WITH ORDINARY ROUTER BITS
Here’s a fun way to save money, be creative, make something useful, and use up scrap stock: make your own picture frames. You can start from scratch and have finished frames in a day or less, and the only tools you need are a tablesaw and a router table. The challenge is to create unique profiles using the router bits you already have.
The frames and instructions that follow will get you started. You probably don’t have all the same bits, but that doesn’t matter. Just substitute and experiment. You’ll find that a little tinkering yields an amazing range of profiles.
Most frames are made using small stock, so be sure to work safely. Always use guards, featherboards and push sticks. Never use stock less than 12" long. Create profiles on long stock; then cut individual frame pieces from the profiled stock. Similarly, use wide stock to create thin pieces; rout the profile, then cut to final thickness. Rout large or deep profiles in multiple passes, raising the bit or moving the fence in small increments before each pass.
Create unique frames by experimenting. All of the frames shown here were made by combining tablesaw cuts and profiles made with these common router bits.
3/8" Rabbet
½" Cove
¾" Round Nose
½" Roundover
3/8" Roundover
¼" Roundover
1/8" Roundover
¼" Half-Round
½" Straight
45º Chamfer
½" Round Nose
¼" Straight
1/8" Round Nose
Part A: Start with a 13/16" thick by 2" wide blank.
1) Round over the top edge by making one pass on each face with the 3/8" roundover bit.
2) Saw a 7/16" deep by 7/8" wide groove on the inside face, 3/8" from the rounded edge.
3) Rip the blank to final 1 ¼" width. Orient the blank outside-face down (grooved-face up), with its rounded edge against the fence.
Part B: Start with a ¾" thick by 7/8" wide blank.
4) Rout a ¼" by 3/8" rabbet on the inside face. Orient the blank bottom-edge down, with its inside face against the fence.
5) Rout a ¼" cove on the inside face, using the ½" round nose bit. Orient the blank top-edge down, with its inside face against the fence.
6) Glue Part A to Part B.
Start with a 1 ½" thick by 1 ½" wide blank.
1) Rout a 5/16" chamfer on the top inside edge.
2) Saw a 17° bevel on the top face. Tilt the blade away from the fence, and orient the blank chamfered-edge up, with the chamfer facing the blade. Set the fence so the bevel meets the tip of the chamfer. Make the cut. Then remove the saw marks by sanding or planing.
3) Rout evenly spaced flutes on the beveled face, using the 1/8" round nose bit.
4) Rip the blank to final ¾" thickness. Make the cut with the blank outside-edge down and its beveled face on the outfeed side of the blade. After sawing, the blank’s outside edge should measure 5/16" wide.
5) Rout a 3/8" by 3/8" rabbet on the inside edge. Orient the blank bottom-face down, with its inside edge against the fence.
Start with a ¾" thick by 7/8" wide blank.
1) Rout a 3/8" by 3/8" rabbet on the inside edge.
2) Rout a ¼" by ¼" cove on the top face, using a ½" round nose bit.
3) Rout a 1/8" roundover on the top face. Orient the stock outside-edge down, with its top face against the fence. To create the fillet, raise the bit’s straight shoulder above the table.
Part A: Start with a ¾" thick by 1 1/8" wide blank.
1) Rout or saw a ¼" by ¼" groove on the inside edge, starting 3/8" from the bottom face.
2) Rout a 1/8" roundover on the inside edge of the top face.
Part B: Start with ¼" thick by 1 ½" wide stock.
3) Rout a 1/8" roundover on the top edge.
4) Rip the stock to final ½" width, with the rounded edge on the offcut side of the blade.
5) Glue Part B to Part A.
Part A: Start with a ¾" thick by 1 ¾" wide blank.
1) Rout or saw a 1/8" by ½" groove on the top face, starting 1/8" from the outside edge.
2) Rout or saw a ¼" by ¼" groove on the same face, starting 1 1/8" from the outside edge.
3) Rout a ¼" tall by 3/8" wide cove on the inside edge, using a ¾" round nose bit. Orient the blank inside-edge down, with its top face against the fence. After routing, the remaining inside edge should measure 3/8" wide.
4) Rout a 3/16" deep by 1" tall cove on the top face, using a ½" round nose bit. Use the same orientation as for Step 3: inside edge down, with the top face against the fence.
5) Rout a ¼" by ¼" rabbet on the inside edge.
Part B: Start with a ½" thick by 1 ½" wide blank.
6) Rout ¼" roundovers on one edge.
7) Rip the blank to final 3/8" thickness, with the rounded edge on the offcut side of the blade.
Part C: Start with a ¼" thick by 1 ½" wide blank.
8) Rout 1/8" roundovers on one edge.
9) Rip the stock to final ¼" thickness, with the rounded edge on the offcut side of the blade.
10) Glue Parts B and C to Part A.
Part A: Start with a ¼" thick by 1 5/8" wide blank.
1) Round both edges, using a ¼" half-round bit.
2) Rip the blank in half, to create two completed ¾" wide Part A blanks.
Part B: Start with a ¾" thick by 2" wide blank.
3) Rout 1/8" roundovers on both top face edges. Orient the blank on edge, with its top face against the fence for both cuts. To create the fillets, raise the bit’s straight shoulder above the table.
4) Glue Part A blanks to the edges of Part B.
5) Rout a 3/8" by 3/8" rabbet on the inside edge.
Start with a ¾" thick by 1 ½" wide blank.
1) Rout a 45° chamfer on the inside face, leaving a 1/8" wide edge on the top. Set the fence, orient the blank inside-face down and complete the cut by making several shallow passes.
2) Create the 3/8" deep rabbet with two tablesaw cuts. First, cut a 3/8" deep kerf in the inside face. Set the fence so this cut leaves a 1/8" shoulder between the rabbet and the chamfer.
3) Make the second cut with the blank’s outside face against the fence. Raise the blade to meet the first cut and set the fence at 3/8".
4) Rout a 45° chamfer on the outside face, leaving the bottom edge 3/16" wide.
Part A: Start with a ¾" thick by 1 ¾" wide blank.
1) Rout a ½" cove on the outside edge, leaving the edge ¼" wide.
2) Rout a ¼" by ¼" cove on the inside edge, using a ½" round nose bit. Orient the blank inside-edge down, with its top face against the fence.
3) Rout or saw a 1/8" by ½" groove in the top face, centered between the two coves.
4) Rout a 3/8" by 3/8" rabbet on the inside edge.
Part B: Start with a ¾" thick by 2" wide blank.
5) Rout ¼" roundovers on one edge.
6) Using a ½" straight bit, rout 1/8" deep by ¼" wide dadoes on both faces, starting ¼" from the rounded edge.
7) Rip the blank to final 3/8" thickness, with its rounded edge on the offcut side of the blade.
8) Glue Part B to Part A.
Start with a ¾" thick by 1 ½" wide blank.
1) Rip 1/8" by 1/8" saw kerfs in the top face, starting 3/8" and ¾" from the inside edge.
2) Rout a ½" cove on the outside edge. Orient the blank top-face down, with its outside edge against the fence.
3) Rout a 3/8" roundover on the inside edge. Orient the blank top-face down, with its inside edge against the fence.
4) Rout a 3/8" by 3/8" rabbet on the same edge, with the blank oriented bottom-face down.
Start with a ¾" thick by 1 ¼" wide blank.
1) Rout a ¼" by ¾" cove on the top face, using a ½" round nose bit. Orient the blank inside-edge down, with its top face against the fence.
Make multiple shallow passes, raising the bit incrementally, to complete the cut.
2) Rout a 3/8" by 3/8" rabbet on the inside edge.
Part A: Start with an 11/16" thick by 13/16" wide blank.
1) Rout 1/8" roundovers on the top edge.
2)


