Erhalten Sie Zugang zu diesem und mehr als 300000 Büchern ab EUR 5,99 monatlich.
- Herausgeber: Fox Chapel Publishing
- Kategorie: Lebensstil
- Sprache: Englisch
The most complete visual guide to furniture construction ever published! Includes hundreds of clearly-labeled drawings and exploded diagrams that explain everything there is to know about joints, subassemblies and furniture design.
Sie lesen das E-Book in den Legimi-Apps auf:
Seitenzahl: 351
Veröffentlichungsjahr: 2008
Das E-Book (TTS) können Sie hören im Abo „Legimi Premium” in Legimi-Apps auf:
Ähnliche


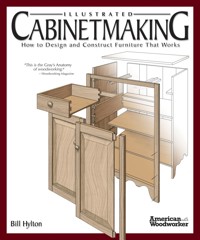
ILLUSTRATED
CABINETMAKING
How to Design and Construct Furniture That Works
ILLUSTRATED
CABINETMAKING
How to Design and Construct Furniture That Works
Bill Hylton
©2003, 2008 AW Media LLC
An American Woodworker book
www.americanwoodworker.com
Published under license by Fox Chapel Publishing Company, Inc.
903 Square Street, Mount Joy, PA 17552
www.FoxChapelPublishing.com
All rights reserved. No part of this publication may be reproduced or transmitted in any form or by any means, electronic or mechanical, including photocopy, recording, or any other information storage and retrieval system, without the written permission of the publisher.
ISBN 978-1-56523-369-0 (softcover)
ISBN 978-1-56523-874-9 (hardcover)
To learn more about the other great books from Fox Chapel Publishing, or to find a retailer near you, call toll-free 800-457-9112 or visit us at www.FoxChapelPublishing.com.
We are always looking for talented authors. To submit an idea, please send a brief inquiry to [email protected].
Printed in China
Because working with wood and other materials inherently includes the risk of injury and damage, this book cannot guarantee that creating the projects in this book is safe for everyone. For this reason, this book is sold without warranties or guarantees of any kind, expressed or implied, and the publisher and the author disclaim any liability for any injuries, losses, or damages caused in any way by the content of this book or the reader’s use of the tools needed to complete the projects presented here. The publisher and the author urge all woodworkers to thoroughly review each project and to understand the use of all tools before beginning any project.
CONTENTS
Introduction
FUNDAMENTALS
Furniture Anatomy
Furniture Styles
Wood Movement
JOINTS
Edge Joints
Case Joints
Frame Joints
Rail Joints
SUBASSEMBLIES
Post-and-Rail Construction
Tabletops
Casework
Door Construction
Drawer Construction
Cabinet Bases
Moldings
FURNITURE
DINING TABLES
Leg-and-Apron Table
Tavern Table
Leg-and-Apron Table with Drawer
Pedestal Table
Trestle Table
Extension Table
Pedestal Extension Table
Draw-Leaf Table
Sliding Folding-Top Table
Drop-Leaf Table
Gateleg Table
Swing-Leg Table
Sliding-Leg Table
Settle Chair-Table
OCCASIONAL TABLES
Demilune Table
Tea Table
Pembroke Table
Swing-Leg Card Table
Expanding-Frame Card Table
Turn-Top Card Table
Butterfly Table
Handkerchief Table
Side Table
Sofa Table
End Table
Splay-Leg End Table
End Table with Drawer
Butler’s Table
Coffee Table
Tripod Table
Tilt-Top Table
Basin Stand
Dressing Stand
DESKS
Writing Desk
Slant-Top Desk
Post-Office Desk
Slant-Front Desk on Frame
Slant-Front Desk
Fall-Front Desk
Secretary
Kneehole Desk
Davenport Desk
Rolltop Desk
Computer Desk
CHESTS
Six-Board Chest
Mule Chest
Frame-and-Panel Chest
Post-and-Panel Chest
Chest of Drawers
Chest-on-Frame
Chest-on-Chest
Tall Chest
Dresser
Bureau
Bombé Chest
Serpentine-Front Chest
Block-Front Chest
Lowboy
Highboy
CABINETS
Wall Shelf
Wall-Hung Cupboard
Hanging Corner Cupboard
Dry Sink
Pie Safe
Spice Cabinet
Chimney Cupboard
Jelly Cupboard
Hutch
Step-Back Cupboard
Sideboard
Huntboard
Buffet
Display Cabinet
Bookcase
Bookshelves
Corner Cupboard
Breakfront
Tall-Case Clock
File Cabinet
Credenza
Entertainment Center
Washstand
Nightstand
Linen Press
Bonnet Cupboard
Armoire
Schrank
Sewing Desk
BUILT-IN CABINETS
Kitchen Wall Cabinet
Kitchen Base Cabinet
Kitchen Corner Cabinet
Pantry Cabinet
Bathroom Vanity
Modular Shelving and Storage
BEDS
Low-Post Bed
High-Post Bed
Pencil-Post Bed
Banister Bed
Sleigh Bed
Daybed
Captain’s Bed
Platform Bed
Headboard
Bunk Beds
Index
INTRODUCTION
When it comes to furniture, we woodworkers like to put our own stamp on the things we make. At the least, we adapt published plans to suit our needs, changing the size or proportions a little, rearranging drawers, or changing the style of the doors. The plans may be excellent, but we’ve just got to put a personal touch on the piece.
More often than not, though, we like to go even further. Disdaining published plans altogether, we like to cook up our own. The inspiration for a project might be a photo in a magazine or catalog. It might be a special piece of furniture we need—bookshelves for all those woodworking books we’ve bought, a stand for the new television, a bed for the child who’s outgrown a crib. And how often has your spouse asked you to make a table or chest like the one they’ve seen in a store or at a neighbor’s house? Happens to me every now and then.
The inspiration is there. The desire is real. You’ve got the tools and materials. You’ve got the woodworking know-how.
But the tough part—always!—is figuring out how to construct the piece. Even when you have a picture of what you want to build, the picture isn’t likely to reveal how it’s put together. So you start off with a list of questions. What joints should you use? What’s the best way to attach the top? Hang the drawers? How long should the legs be? How do you deal with wood movement?
Enter Illustrated Cabinetmaking, unarguably the most comprehensive visual guide to furniture construction and design ever published.
In hundreds of drawings, Illustrated Cabinetmaking takes you inside furniture and shows you classic solutions to ageold construction problems. You’ll see five or six ways to hang a drawer, four ways to attach a tabletop, the best way to peg a mortise. Everything you need to know to construct beautiful—and sound—furniture is here.
The “Joints” section of the book is an illustrated encyclopedia of joints, showing how every joint imaginable—more than 100 of them—goes together. You’ll find the best joints for your applications here (or you won’t find them at all).
In the “Subassemblies” section, you’ll see how to use those joints to assemble tabletops, doors, drawers, and feet. You’ll see how drawers are installed in cases and in tables. You’ll see how complex moldings are built up and installed.
And in the paramount section, “Furniture,” you’ll discover how to combine joints and subassemblies in constructing the final product: a beautiful, functional, durable piece of furniture. In this exhaustive section, you’ll see more than 100 exploded drawings, showing every type of furniture imaginable—gateleg table, huntboard, rolltop desk, dresser, bureau, trestle table, high-post bed, step-back cupboard, bookshelves, kitchen cabinets, tall-case clock, and over 90 more. Most of these exploded drawings are supplemented by one or two close-up details that home in on particularly complex or tricky parts of the construction, making it all the more clear. Every construction drawing is clearly labelled. Cross-references direct you to other furniture pieces or other sections that depict alternative joints or alternative approaches to constructing a subassembly.
With each furniture archetype presented, you’ll see a drawing of the assembled piece with its overall dimensions called out. You’ll find tips on altering the appearance of the piece. And for all but a couple, there’s even a short list of good published plans for similar pieces.
In addition, the book shows rule-of-thumb design standards. For example, How high should a dining table be? And how much space should each person sitting at it have? How deep are kitchen cabinets? Are there standards for setting up a desk for a computer? It’s all here.
So with all this visual information and an easy-to-read, to-the-point text at your instant disposal, you can’t help but have the confidence to tackle any project you want and modify it to suit your taste, your level of woodworking skill, or your equipment.
Bill Hylton
FUNDAMENTALS
FURNITURE ANATOMY
FURNITURE STYLES
WOOD MOVEMENT
FURNITURE ANATOMY
Here is a small dictionary of terms that are used to describe furniture parts. There are good reasons to be familiar with this nomenclature. It’ll be easier to follow plans. You may find it easier to conceptualize a piece and how its components work together. And by getting to know all those parts, you’ll become more aware of furniture styles and how they evolved. In other words, learning the terms can help you develop a sharper eye for identifying styles and appreciating good design and craftsmanship. If there is any truth to the saying that God is in the details, then it pays to get on a first-name basis with the details.
Swing-Leg Table
Gateleg Table
Tavern Table
Blanket Chest
Tilt-Top Table
Slant-Front Desk
Highboy
Step-Back Cupboard
Dresser
Rolltop Desk
Settle Chair-Table
Banister Bed
FURNITURE STYLES
For reasons both good and trivial, furniture weathers trends in popularity. Within just a few years, a chair that had been in vogue may look stale, even in poor taste. But it’s a curiosity of furniture design—and human nature—that today’s castoffs are destined to become tomorrow’s treasures.
Recycling retro styles is nothing new. The Victorians revived classical, Gothic, renaissance, and colonial themes in a period of a few decades. Old styles continue to fascinate us.
You may have noticed that the terms for styles are somewhat tidier than history itself. These names were rarely in use when the furniture was produced, but were coined years later. A result is that there may be a couple of terms for the same style. Baroque and Queen Anne have been used interchangeably. So have rococo and Chippendale. Adding to the confusion, periods of style often overlap; in fact, a given piece of furniture may itself be a hybrid of two periods. Finally, it’s impossible to nail down the birth-and-death dates for any style. Trends typically hatched abroad, migrated to our urban areas, then wended their way into the countryside.
The names of styles may be confusing, but they do serve as reminders of the historic lineage of the furniture we design and build. And within each style, we can learn to look for regional variations that are the pulse of the long-departed woodworkers themselves.
PILGRIM: 1640 TO 1700
A colonial style based on medieval, Renaissance, and English designs, pilgrim furniture is also called Jacobean, from the Latin for James I of England. The furniture is sturdy but heavy, made of solid wood with mortise-and-tenon joinery. Characteristic features include:
• Heavy, simple turnings
• Split-spindle decorations
• Extensive carving
• Bulky perimeter stretchers
Pilgrim Stretcher Table
Pilgrim Lift-Lid Chest
WILLIAM AND MARY: 1700 TO 1730
Named for the Dutch rulers who assumed the English throne and brought with them Dutch and French Huguenot influences, this style is also referred to as baroque. The furniture tends to be dark, using either walnut or lighter woods under an ebony finish. Characteristically, it has straight, angular lines and multiple turnings. Typical are:
• Sculptural carvings
• Vase, trumpet, and ball turnings
• Spanish (paintbrush) feet
• Teardrop pulls
• Decorative veneers
William and Mary Gateleg Table
William and Mary Slant-Front Desk
William and Mary Chest-on-Frame
QUEEN ANNE: 1725 TO 1755
The gracefully curved lines of Queen Anne furniture contrast markedly with the angular lines of William and Mary designs. This style introduced the elegant, S-shaped cabriole leg to America, and indeed the cabriole leg is a prime style marker of the furniture. Makers of Queen Anne furniture favored walnut, as well as cherry, maple, and late in the period, mahogany.
Confusingly, this style was not influenced by England’s Queen Anne, who died before the period. It overlaps both the earlier William and Mary and later Chippendale styles. Queen Anne style markers include:
• Fluid, curving lines
• Cabriole legs, pad feet
• Chinese ornamentation
• Delicately carved shells, rosettes, and leaves
• Finials on pediments
• Veneering on drawer fronts and chair splats
• Butterfly drawer pulls
Queen Anne Handkerchief Table
Queen Anne Tripod Table
Queen Anne Tea Table
Queen Anne Desk-on-Frame
Queen Anne Highboy
Queen Anne Chest of Drawers
CHIPPENDALE: 1750 TO 1780
Named for the widely published London cabinetmaker Thomas Chippendale, and incorporating Chinese, Gothic, and rococo influences, Chippendale furniture represented a change in ornamentation more than form. Carving and fretwork decorated legs, aprons, and stretchers. The straight line was revived as a design element, and tables often had straight, untapered legs.
Mahogany was commonly used in this period, while favored domestic woods included walnut, maple, and cherry.
Philadelphia Chippendale Highboy
Chippendale Pembroke Table
Chippendale Bombé Chest
New York Chippendale Game Table
Among the style markers of Chippendale furniture are:
• Serpentine and bombé case forms
• Piecrust tabletops
• Ornamental stretchers
• Ball-and-claw feet
• Chinese or Gothic fretwork
• Carved rococo shells
• Quarter columns on casework
FEDERAL: 1780 TO 1820
Federal is the name used to delineate the early phase in America of the Neoclassical style, a style so-called because it looked back at ancient Rome and Greece. (Empire is the late phase of the style.) Federal was a reaction to the rococo flourishes of earlier furniture.
Curiously, the names of two English designers, Sheraton and Hepplewhite, are inextricably linked to Federal furniture. Each published a book of neoclassical designs that became popular in the United States. Based on their books, it is difficult to distinguish the designs of one from the other.
Although Europe and England embraced neoclassicism as passionately as America did, Federal has been called America’s first homegrown style because its interpretation of neoclassicism is purely American. Characteristics of the style include:
• Thin, tapered legs
• Spade or arrow feet
• Tambour fronts
• Low-relief carving
• Use of veneer
• Delicate inlay
Federal Swing-Leg Card Table
Federal Tripod Table
Federal Secretary
Federal Serpentine-Front Chest
Federal Sideboard
EMPIRE: 1815 TO 1840
The second phase of neoclassicism swept into America from Napoleonic France. Still inspired by classical Greek and Roman motifs, Empire furniture became heavier and far more ornate, with flamboyant decorative elements. Pieces are typically of mahogany, rosewood, and other exotic veneers. Common design motifs include:
• Turned half columns
• Saber legs
• Center pedestals
• Paw and C-scroll feet
• Bold carving
• Reeding
• Stenciling, painting, gilding
Empire Pier Table
Empire Fall-Front Desk
COUNTRY: 1690 TO 1850
This is the catchall term for furniture produced outside the urban centers. As a type, this furniture is often regarded as being simplified—albeit uninhibited—versions of the rigidly styled forms produced in the cities. Country pieces put more emphasis on function than frills, and joinery is often practical and unsophisticated. Pine, poplar, cherry, walnut, and other native species are among the woods most often used. They frequently are painted to make up for their lack of fancy grain. Typically, the forms display:
Country Kitchen Table
Primitive Chest
• Simple moldings
• Simple scroll cuts
• Broad face frames
• Wooden pulls or latch closures
• Exposed hinges
Country Jelly Cupboard
Country Tall Chest
PENNSYLVANIA DUTCH: 1690 TO 1850
The tradition-loving Pennsylvania Dutch kept alive many characteristics of Old World furniture. Stolid construction harks back to medieval times, as does colorful folk painting. This furniture typically has:
• Simple bracket feet
• Straightforward pulls
• Drawers in base (of chest)
Pennsylvania Dutch Frame-and-Panel Chest
Pennsylvania Dutch Wall Shelf
Pennsylvania Dutch Hutch
SHAKER: 1820 TO 1870
The simple lines of this style were an expression of the values of the Shakers, a religious sect with celibate communities in several states. The woods most commonly used are pine and maple, and these blond species are often painted. In the main, Shaker furnishings have:
• No ornamental moldings
• Slender turnings
• Turned wooden knobs
• Plain feet
Shaker Sewing Desk
Shaker Sewing Table
VICTORIAN DESIGN REVIVALS
The Victorian era brought Gothic, rococo, and Renaissance revival styles, each producing more ornate designs than the last.
Gothic Revival
It’s not known for certain just how this fascination with things medieval came about, but an interest in reading romantic Gothic novels may have been an inspiration—no doubt the only furniture style to have sprung from fiction. The heavy, brooding forms are constructed of rosewood, walnut, and dark-finished oak.
Rococo Revival
A French-inspired style, rococo revival is also known as French Antique or Louis XIV. The richness of the design is underscored by the use of rosewood veneer, walnut, and mahogany.
Renaissance Revival
A highly decorative Victorian style that draws on Renaissance and neoclassical motifs is the Renaissance revival. It was often built in walnut and ornamented with carved doodads and intriguing inlays, but lighter woods also found favor.
DESIGN REFORM
By the mid–19th century, reformers heavily criticized the tasteless designs, misuse of ornamentation, and dominance of the machine. They urged an end to ornamentation and a return to handcrafted furniture.
Eastlake
Charles Locke Eastlake, one such British reformer, pared away the clutter of the preceding revival styles and published designs of straightforward oaken furniture with simple incised decoration. American examples evolved into elaborate offshoots. Characteristics include:
• Turned stiles and spindles
• Scroll-cut brackets
• Low-relief carving
• Inset decorative panels
• Light-colored finishes
Eastlake Dresser
Arts and Crafts/Mission
Arts and Crafts wasn’t just a style, it was a movement. As an antidote to the industrial revolution, English designers John Ruskin and William Morris preached the value of restoring handicraft to making furniture. In America, the movement sparked the mission style, taking its name from the furniture of Franciscan missions in California. Oak was most frequently used. The grain may be emphasized with quarter-sawn stock and a fumed finish. Other characteristics include:
• Squarish components
• Exposed joinery
• Simple slat back
• Leather upholstery
Arts-and-Crafts Dresser
Arts-and-Crafts Wardrobe
WOOD MOVEMENT
Long after it is harvested from the tree, wood continues to change in dimension. This presents a challenge to the woodworker, whose job it is to compose a sturdy, weight-bearing object. So, woodworking involves a repertoire of techniques for constraining wood while allowing some margin for its waywardness.
Wood begins life wet. On the stump, it is saturated with moisture. Fresh-cut “green” lumber oozes sap, and the bulk of this water must go before the wood is suitable for furniture making. There is a long tradition of using air-dried lumber, which is allowed to slowly give up its moisture to the atmosphere. But standard practice today is to dry it in a special kiln, using heat to drive down the wood’s moisture level. Construction lumber may be ready to nail when reduced to 10 to 20 percent moisture, but wood for indoor furniture should be dried to half that range.
Of course, a board’s moisture content doesn’t stay put after drying. Wood will gain or lose moisture, depending upon the moisture content of the air surrounding it. When the wood arrives at a moisture content in balance with the air, we call it equilibrium moisture content, or EMC. When the humidity changes, wood moves to a new EMC, in balance with the new average humidity.
Moreover, a board doesn’t always keep its tidy shape as it dries initially, or as it expands and contracts with the passage of time. Woodworkers know that the movement is primarily across the width of a board rather than along the board’s length; that hardly changes at all. They also know that boards are prone to cup, bow, twist, diamond, and kink as their moisture content comes and goes. Many of these changes are a function of what part of the tree it came from and how it was sawn. The drawing How Wood Moves sums up most of this.
But there’s more. Different species of wood have different rates of shrinkage. Some, like mahogany (a favorite of cabinetmakers for centuries), teak, redwood, catalpa, and northern white cedar, have reputations for stability; their dimensions change very little with humidity change. Others, like certain oaks, change rather dramatically and thus have reputations for being troublesome.
How Wood Moves
Range of Movement
A red oak board that was flat-sawn to a 10-inch width is shown in the drawing Range of Movement. Red oak is one of those troublesome woods. The 10-inch-wide board will shrink to a width of (approximately) 9½ inches if air dried (to about a 14 percent moisture content). Kiln dry it to a 7 percent MC and its width will shrink to approximately 9⅜ inches.
DEALING WITH MOVEMENT
A cabinetmaker combines four of those red oak boards in a tabletop. In summer, when it is humid for a protracted period, the tabletop will be 38 inches wide. In winter, when central heat dries the air, the tabletop will shrink to a 37½-inch width. That’s a lot of movement! The cabinetmaker has to attach that tabletop to a leg-and-apron frame in a way that will accommodate that movement. (One way is shown in the drawing Solid Panel Construction; others, in “Tabletops” on page 78.)
But wood movement is a problem with almost any solid-wood panel—a lid, a door, a case side. It is going to move, so you’ve got to accommodate that movement.
Very early on, cabinetmakers came to grips with the issue of wood movement. A 2-foot-wide panel for a cabinet side might move 1⁄16 to ⅜ inch between summer and winter, depending upon the species of wood used. A case side can’t be attached the way a tabletop can, so what to do?
Frame-and-panel construction: This approach developed early on. It is so effective that it is still widely used. The wide panel, which will move the most, is set into a frame in such a way that it can expand and contract without bursting the frame. Because it is made up of narrow members, the frame doesn’t change much.
Solid Panel Construction
Frame-and-Panel Construction
To make the typical frame, two rails are trapped between two stiles. The frame’s length is set by the stile length. And because normal wood doesn’t move longitudinally, the frame’s length won’t change. Where the change in dimension comes is across the frame: The stiles will expand and contract. But the stiles are only, say, 2 inches wide, so even that red oak will move only about 1⁄32 inch across each stile. Maxed out, that 24-inch-wide frame-and-panel assembly will expand only 1⁄16 inch. A lot more manageable than ⅜ inch.
Chest Construction
The panel, being about 20½ inches wide, will expand and contract about 5⁄16 to ⅜ inch if it is red oak. And set in grooves in the frame, it can do that without damaging the frame.
Chest construction: Another approach to dealing with wood movement involves getting the grain of the parts uniformly oriented. A six-board chest, for example, properly has the grain of the front, sides (or ends), and back extending horizontally. These parts are joined end-grain to end-grain. As the wood expands, the chest gets a little taller. But the joinery is unaffected. When a bottom is attached, the cabinetmaker has to deal only with the movement of the bottom itself, not the chest.
Case construction: Stand a chest on end, and it becomes a case. Having all the boards uniformly oriented ensures that the parts will move in tandem. The problems arise when cross-grain elements like drawer runners and moldings are introduced. Now the parts are moving in two different, conflicting directions. The tensions that result can crack case sides and pop moldings off.
Many solutions to these cross-grain construction problems have been developed. Just one is shown in the drawing Case Construction. Others are shown in “Casework” (page 84) and “Moldings” (page 119).
With a chest of drawers, the cabinetmaker has an additional challenge. Because a drawer is like a chest, it will get taller in high humidity. But because of how the case is constructed, the drawer opening height is stable. The size of the opening must account for this wood movement, or the drawer will stick.
NOT QUITE WOOD
The spunky variability of solid wood can be tamed by converting it to plywood or medium-density fiberboard (MDF). Plywood is composed of thin plies of real wood, of course; but each is positioned at right angles to its neighboring layers, helping to neutralize the effects of movement. MDF is made up of wood particles that are too small and scattered to influence the board.
You wouldn’t want to feature sheets of these materials on the face of a traditional piece, of course, but they serve dependably as backs and other seldom-seen components.
FINISHING
Finishes can’t prevent wood’s natural moisture exchange—nothing can stop it entirely—but many modern furniture finishes will slow it (oil finishes are less effective). Make sure to apply finish over all surfaces of a piece, and not just to visible areas; uneven moisture exchange is an invitation to warping. A project built of kiln-dried wood and finished on all sides will rarely succumb to extreme wood movement. This is because the finish allows the wood to absorb only a limited quantity of water before seasonal changes cause it to lose water again, thus limiting the overall range of movement.
Case Construction
JOINTS
EDGE JOINTS
CASE JOINTS
FRAME JOINTS
RAIL JOINTS
EDGE JOINTS
Two hundred years ago, a six-board chest was built with, literally, six boards, each 2 or more feet wide. The mammoth trees that yielded such boards are long gone. Nowadays, trees are slender and yield mostly narrow boards. To create a 2-foot-wide panel, several narrow boards must be assembled edge-to-edge with edge joints. To build a six-board chest today might require as many as two dozen boards.
A reasonable question: Will that glued-up panel be as strong as a single board?
The answer is yes. Glued edge joints are very strong. The long grain in the surfaces that are being joined glues well. And because you are gluing one long-grain surface to another long-grain surface, you aren’t going to introduce a conflict due to wood movement.
The edge-to-edge joint is only one of the three common types of edge joints. The other two are edge-to-face and face-to-face.
Edge-to-edge is a joint in which flat, narrow boards are set out side by side and pulled together in interlocking and/or glued joints, forming wider boards.
Edge-to-face is a joint in which the narrow surface, or edge, of one board is joined to the broad surface, or face, of another. Sometimes collectively called corner edge joints, they form the vertical corners of cabinets and columns.
Edge-to-Edge Joint
Face-to-face is a joint in which the face of one board is joined to the face of another. When you need a leg blank that is 3 inches square in section, you may have to glue up this blank from thinner boards. You can do the same thing when you need a massive section, wide and thick, as for a sturdy bench seat, a beam, or the top of a workbench.
Edge-to-Face Joint
Face-to-Face Joint
BUTT JOINTS
In edge joinery, where the joints are long-grain to long-grain, the simple butt joint is most effective, especially when the stock is well machined and you are using a modern glue. Splines, biscuits, or dowels don’t make the joint stronger.
Edge-to-Edge
Despite the strength of the glued edge-to-edge joint, many woodworkers also use biscuits, splines, or dowels. Machining the stock for them is extra work that usually doesn’t pay. For a complex assembly, however, or with wood that’s mildly bowed, these alignment devices can help a great deal.
Biscuited edge-to-edge joint: Biscuit joinery can ensure close alignment at the surface of a joint, while permitting a surprising amount of end-to-end movement—as much as ¼ inch. Biscuits come in three standard sizes. Always use the largest that will fit.
Biscuited Edge-to-Edge Joint
Splined edge-to-edge joint: One of the best edge-joint alignment tools is the spline. Grooves (either through or stopped) are cut in the adjoining edges. A strip of plywood or hardboard is fit into the grooves as you glue up the joint, making alignment easier. Fit the spline carefully so it won’t push the boards apart if the wood shrinks.
Splined Edge-to-Edge Joints
Doweled edge-to-edge joint: Dowels are not a good alignment option. It is extremely difficult, first of all, to drill precisely matching holes in the mating boards; and it’s equally difficult to get all the holes parallel to the face of the wood. Even if you succeed in this, dowels make a good edge joint bad by introducing a cross-grain element to a long-grain joint. If the wood shrinks, the dowels can push the joint apart.
Butterfly key: A traditional fastener used for edge-to-edge joints in Japan is the butterfly key. It is often used in contemporary furniture as a decorative element, as well as a functional one. The key can be used to join boards without glue, especially where they might later need to be disassembled.
Butterfly Key
Doweled Edge-to-Edge Joint
Edge-to-Face
The vertical corners of cabinets and furniture present a problem in combining strength and ease of assembly. Since the mating surfaces of the two parts consist entirely of long grain, the simple butt joint has all the strength it will ever need. No additional reinforcement is necessary. There is no cross-grain instability to worry about, since the parts are parallel to one another.
Glued edge-to-face joint: The easiest corner joint to cut is a simple butted corner joint. The parts will glue up into a very strong assembly. The appearance can suffer if there’s a contrast between the grain of the two parts. The seam between the two parts can be concealed by cutting a V-groove on it.
Glued Edge-to-Face Joint
Fastened edge-to-face joint: Fasteners can be used in an edge-to-face joint instead of, or in addition to, glue. While the fasteners won’t strengthen a glued joint, they can eliminate the need to clamp the joint until the glue cures.
Biscuited edge-to-face joint: Keeping a butted corner joint aligned during assembly is the perfect job for biscuits. Use one every 8 inches to maintain alignment. But don’t expect them to strengthen the joint.
Splined edge-to-face joint: Another joint alignment approach is the full-length spline. The mating parts are grooved (either through or stopped) for a plywood or hardboard spline.
Fastened Edge-to-Face Joint
Biscuited Edge-to-Face Joint
Splined Edge-to-Face Joint
TONGUE-AND-GROOVE JOINTS
The tongue-and-groove joint is the older brother of the splined-edge joint. Instead of being separate, the spline is an integral part of the board. In furniture, it is found in case backs, tabletops, and other panels. It’s the joint traditionally used in breadboard constructions.
It is probably most common in applications where it is not glued. It provides a mechanical lock between boards that are fastened to another surface or a frame rather than to each other. This allows the boards to expand and contract without adverse effect. It also provides a rudimentary aesthetic—the wood can shrink without opening the joint enough to expose whatever is behind it.
Tongue-and-groove joints are usually made with a tongue that’s about one-third the thickness of the stock. Thus, the tongue and the two walls of the groove are all about the same strength.
The length of the tongue (and the depth of the groove) is less important than its thickness. If the boards are less than 3 inches wide, and therefore unlikely to expand and contract very much, make the tongues as long as they are thick and cut the grooves to match. If the boards are wider, make the tongues as long as half the stock thickness and the grooves about 1⁄16 inch deeper.
The bead or V-groove commonly seen on the face of a tongue-and-groove joint is camouflage. It’s there to disguise an opening that varies in width due to the seasonal expansion and shrinkage of the boards.
Tongue-and-Groove Joint
Decorated Joint
RABBET JOINTS
A rabbet is an L-shaped cut made into the edge of a board. When a second board is set into the cut, it creates a rabbet joint. This is a right-angle joint, used in joining edge grain to face grain. There are a few variations.
Single-rabbet joint: This is a joint formed when only one of the mating parts is rabbeted. Typically, the rabbet is proportioned so its width matches the thickness of the mating board. This proportion yields a flush fit.
A useful variation puts a chamfer on the edge of the rabbet. The chamfer separates the face grain of one part from the edge grain of the other. Since the chamfer is at an angle to both faces, it will look good regardless of grain pattern differences.
A secondary variation produces a very attractive reversed corner detail, which can be emphasized with paint or a decorative molding and then glued in place after assembly. To produce this reveal, the rabbet’s width is cut slightly less than the mating part’s thickness.
Single-Rabbet Joint
Double-rabbet joint: A bit of an interlock can be created by rabbeting both of the mating boards.
Rabbet-and-groove joint: This is a good rack-resistant joint that assembles easily because both boards are positively located. The groove doesn’t have to be big; often it’s a single saw kerf, no deeper than one-third the board’s thickness. Into it fits an offset tongue created on the mating board by the rabbet.
Double-Rabbet Joint
Rabbet-and-Groove Joint
SHIPLAP JOINT
A substitute for the tongue-and-groove joint is the shiplap. It is formed by cutting identical rabbets cut into opposite faces of the adjoining boards. The rabbeted edges are then overlapped, preventing visible gaps from opening between the boards.
The joint can’t keep the surfaces of the boards flush, however. This difference makes the tongue-and-groove clearly superior. Nevertheless, the shiplap is adequate if the wood is stable and the design allows you to fasten the parts at frequent intervals, as you can when attaching a back to every shelf of a bookcase or hutch.
This joint’s advantage is that it can be cut much more quickly than a tongue-and-groove and with simpler tools.
Shiplap Joint
EDGE MITER JOINTS
Tightly crafted, the miter joint is almost totally hidden: There’s a barely discernible seam, and right there, the wood changes direction sharply. You don’t see any end grain.
The worst thing about the joint is that it is vexing to assemble. Because of the angles involved, a mitered corner always wants to slide out of line when you apply clamping pressure to it.
Glued edge miter: As with all of the other long-grain edge joints, glue alone is enough to hold an edge miter together. The advantage of the miter is that it has more gluing surface than a butt joint.
Nevertheless, glue blocks, either a continuous strip or short blocks spaced along the joint, can be used to reinforce the miter. A plus here is that the grain of the glue blocks parallels that of the joining boards, so wood movement isn’t a problem.
Glued Edge Miter
Fastened edge miter: The need for clamping a glued joint can be eliminated if fasteners are used. Position nails or screws as shown.
Biscuited edge miter: Biscuits in a miter joint prevent the beveled edges from slipping sideways as you apply clamping pressure. How well they function depends on how snugly the biscuits fit and how closely you space them. You have no control over the fit of manufactured biscuits, but you can improve things by spacing them closely, say every 3 or 4 inches.
Splined edge miter: Adding a long-grain, solid-wood spline is a good way to keep an edge miter joint aligned as you’re gluing up. Keep in mind that the spline doesn’t make the joint appreciably stronger; in fact, if the spline isn’t placed properly, it may actually weaken the joint.
Make the width of the groove equal to the thickness of the saw blade, locate it as shown in the drawing, and don’t go deeper than a third of the way through the wood.
Fastened Edge Miter
Biscuited Edge Miter
Splined Edge Miter
ROUTED EDGE JOINTS
Woodworkers are constantly seeking the perfect edge joint, one that provides a maximum of glue surface as well as some form of mechanical interlock to force the boards into perfect alignment during assembly.
Router bit manufacturers have come up with a variety of special bits for edge joinery. All the bits are for router table use only, and each requires but a single setup. The edge configurations they produce offer all the characteristics of the perfect joint.
Glue Joint: The simplest of the bits produces a sort of tongue-and-rabbet profile.
The idea is that one board in a joint is routed face up, the other face down. If the boards are flat and the height of the bit is just right, the two boards will fall together with their faces flush.
Because of the interlock, the boards can’t shift up or down. It’s important to mark the boards clearly so you orient each one correctly when making the cuts.
Glue Joint
Finger joint: This joint is a positive-negative interlock, in which tapered projections (the fingers) on one piece fit into tapered grooves in the other. The profile expands the glue area threefold. You can use it to join boards edge-to-edge and, with some trepidation, end-to-end.
The cutting sequence is the same as with the previously described specialty bits. You rout one workpiece’s edge with the stock face up and the other piece with the stock face down. When the bit height is correct, the two pieces should slide together with their faces perfectly flush.
Lock miter joint: This joint can be used for edge-to-edge joinery as well as edge-to-face. Both joints are easy to assemble, and in either arrangment, the routed joint’s glue area is significantly larger than that of a plain glue joint.
One setup suffices for cuts on both pieces to be joined. To use the joint in an edge-to-face arrangement, one panel is machined while it’s flat on the router table, the other while on edge against the fence. To produce an edge-to-edge arrangement, one board is machined with its face down, the other with its face up.
Finger Joint
Lock Miter Joint
CASE JOINTS
In case construction, boards are joined end-to-end to create a box. In the corner joints used in case construction, strength comes from two potential sources: the mechanical interlocking of the pieces and the glue and/or fasteners used to hold them together.
Fortunately, with case joints, strength usually is not the main issue: Case furniture typically stands, unmoving, supporting itself and whatever is stored inside. The common corner joints shown below have more than enough interlocking wood and gluing area to resist these static loads. While racking stress can be a problem in large cases, interior dividers add stiffness, as does a frame-and-panel or plywood back.
Case Joints
BUTT JOINTS
Butt joints need help if they are to be good case joints. They present a poor situation for gluing, and they lack any sort of mechanical interlock. To make a sturdy butt joint, you need to reinforce the joint.
Glued butt joint: The butt joint gets its name from the fact that one board is butted against the other. In case joinery, this places the end grain of one board against the face grain of its mate. Because end grain glues poorly to face grain, this is not a sturdy joint.
Butt joint with glue block: Glue blocks are triangular or square pieces of wood used to strengthen and support two adjoining surfaces. They can be continuous or intermittent. In case joinery, glue blocks generally are a cross-grain construction.
Butt joint with fasteners: A faster, and less problematic, way to reinforce a butt joint is with fasteners. For additional strength, drive nails at an angle into the wood as shown.
Doweled butt: Dowels, used like nails, can reinforce a butt joint. While this joint is often shown with blind dowels, constructing it that way is extremely difficult. Instead, assemble the joint, then drill holes and drive dowels. You’ll have a strong joint, and the exposed dowel ends can be a decorative element.
Doweled Butt
Biscuited butt: A popular way to reinforce a butt joint is with biscuits. Matching slots are cut into the end grain of one piece and into the face grain of the other. At assembly, a football-shaped wooden wafer, or biscuit, is glued into each pair of adjoining slots, as shown.
Butt Joints
Where a horizontal board tops an upright, the biscuits should be offset. Likewise, biscuits used in joining a shelf to an upright should be located below center to increase the shelf’s resistance to toploading.
DOVETAIL JOINTS
The dovetail joint was developed (before reliable glues and cheap fasteners were available) as a very utilitarian means of holding pieces of wood together. It has some major advantages. The dovetail allows expansion and contraction of the wood without losing any of its structural integrity. This is extremely desirable when joining large pieces of wood, such as cases. It can be used to good advantage in “natural wood” projects.
Biscuited Butt
Dovetail Particulars
The dovetail consists of “pins,” which fit into triangular sockets between the “tails.” The pin at the edge of the board is called a half-pin, not because it is half as wide as the others but because it slopes on only one face. Likewise, the tail at the end of the joint is called a half-tail.
The strength of the joint derives from two things: the interlocking pins and tails and an expansive glue area. The more pins and tails, the stronger the joint will be.
The traditional dovetail joint has broad tails and small pins, with the tails cut in the horizontal piece of wood. Layouts, however, vary widely. Two design factors must be considered in laying out the joint:
Dovetail spacing: There’s no need to space dovetails uniformly. On a wide joint, they often have close pins and small tails near the edges, which has the effect of putting three or four glue lines in the first inch of width, helping to resist cupping.
Dovetail angle: The slope, or gradient, should not vary. If your dovetails have too little slope, they surrender part of their mechanical strength and begin to look like the fingers of a box joint. If they have too much slope, the short grain at the tips of the tails will be weakened and may break off during assembly.
Through dovetails: This is the basic dovetail joint. Both pieces go completely through each other, and the joint is visible on the outside surfaces of both pieces.
Decorative dovetails:


