Erhalten Sie Zugang zu diesem und mehr als 300000 Büchern ab EUR 5,99 monatlich.
- Herausgeber: CompanionHouse Books
- Kategorie: Lebensstil
- Sprache: Englisch
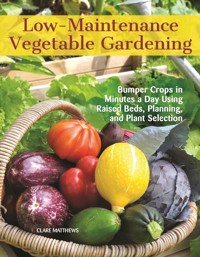
Spend less time in the garden— and get more results! This book demystifies the growing of fruit and vegetables and shows that, with the right approach, it can be done successfully as a weekend project or slotted into a busy week. Experienced garden designer Clare Matthews explains simple short cuts and unusual low maintenance strategies that really work. Her book is filled with inspirational color photography from her own weekend vegetable garden where the principles promoted in this book have been tried, tested and proven. Low Maintenance Vegetable Gardening will appeal to the complete novice planning a new vegetable garden as well as the more experienced gardener who is looking to save time and increase productivity. Filled with fantastic images and sound horticultural advice, it is an indispensible guide for anyone with limited time who still wants to achieve high yields from their vegetable plot. Inside Low Maintenance Vegetable Gardening A no-nonsense guide to growing the vegetables you love to eat the easy way. Explains time-saving techniques, simple short cuts, and effective low-maintenance strategies. Packed with practical advice from planning what to grow and companion planting to dealing with pests and diseases and no-dig gardening. Gorgeous color photography from the author's own weekend vegetable garden, shot by renowned garden photographer Clive Nichols. Essential reading for the time-poor gardener who wants to achieve maximum yields from their vegetable plot with minimum effort.
Sie lesen das E-Book in den Legimi-Apps auf:
Seitenzahl: 274
Veröffentlichungsjahr: 2018
Das E-Book (TTS) können Sie hören im Abo „Legimi Premium” in Legimi-Apps auf:
Ähnliche


Low-Maintenance Vegetable Gardening
CompanionHouse Books™ is an imprint of Fox Chapel Publishers International Ltd.
Project Team
Vice President–Content: Christopher Reggio
Editor: Anthony Regolino
Copy Editor: Kaitlyn Ocasio
Design: Mary Ann Kahn and Justin Speers
Index: Elizabeth Walker
Copyright © 2018 by IMM Lifestyle Books
All rights reserved. No part of this book may be reproduced, stored in a retrieval system, or transmitted in any form or by any means, electronic, mechanical, photocopying, recording, or otherwise, without the prior written permission of Fox Chapel Publishers, except for the inclusion of brief quotations in an acknowledged review.
Print ISBN 978-1-62008-247-8
The Cataloging-in-Publication Data is on file with the Library of Congress.
This book has been published with the intent to provide accurate and authoritative information in regard to the subject matter within. While every precaution has been taken in the preparation of this book, the author and publisher expressly disclaim any responsibility for any errors, omissions, or adverse effects arising from the use or application of the information contained herein.
Fox Chapel Publishing, 903 Square Street Mount Joy, PA 17552
Fox Chapel Publishers International Ltd., 7 Danefield Road, Selsey (Chichester), West Sussex PO20 9DA, U.K.
www.facebook.com/companionhousebooks
We are always looking for talented authors. To submit an idea, please send a brief inquiry to [email protected].
Printed and bound in Singapore
20 19 18 2 4 6 8 10 9 7 5 3 1
Introduction
Growing your own fruit and vegetables has so many advantages. Nothing beats the taste of produce homegrown for flavor rather than for how well it travels or for uniform size and shape. Then, of course, there is the excitement and magic of watching your produce grow and the delight of the first harvest. Finally, let’s not forget the superior levels of nutrients in freshly picked vegetables and the chance to work with nature in a fast-moving world where a connection to the land can seem ever more remote.
At a time when we are becoming far more aware of the importance of the quality of what we eat and the impact food production has on the environment, growing your own is incredibly popular. However, there are still those who are put off by a lack of knowledge and time. But for previous generations, growing your own was second nature.
I remember, as a child, following my grandfather around his pristine, traditional vegetable garden as he gathered a basketful of faultless produce for my family to take home. As we worked our way around the magical plot, I would nibble on tender peas straight from the plant and strawberries warm from the sun. For him, growing great vegetables was just a part of life. As an enthusiastic gardener I always wanted to give my family the same fantastic experience, and while I’d previously dabbled, it wasn’t until a few years ago that my family bought a rural retreat and I had the chance to build a real vegetable patch.
There was, however, a major drawback: for the most part, I would only be able to tend my vegetable patch on weekends, and even then there would be plenty of other demands on my time, such as my work and, as a mother with three children, a chaotic family life. Hiring help wasn’t an option because I actually enjoyed the business of gardening, working with the seasons and having time to connect with nature and wonder at its marvels. For me, tending the vegetables myself is all part of the pleasure. I discovered that with a few tricks up my sleeve I could spend very little time in the garden for most of the year and still get a good yield. After several years of amazing productivity my weekend vegetable garden has proved to be more successful than even I could have hoped.
In this book I explain the strategies that have made my weekend vegetable patch a success despite my limited and fragmented time for gardening. A mixture of common sense, time-saving techniques, and knowing what is really important makes growing vegetables easy. I confess that at times my vegetables have been beleaguered by weeds and subject to mild and sporadic neglect, but harvests have always been good and phenomenally tasty. True, more care may have given me marginally better yields, but I still produce more than enough to make the whole project worthwhile.
So read on and follow my advice for achieving a successful and beautiful low-maintenance vegetable garden. Good luck, but most of all, enjoy!
— Clare Matthews
A small sample of the myriad of marvelous tastes, colors, and textures you can look forward to from your vegetable plot.
The Keys to Success
Once you have decided to embark on a grow-your-own project, the first step is to plan a layout for your vegetable plot that is practical, easy to manage, and not too ambitious. The way your vegetable plot is laid out, its size and the arrangement of the beds, the construction of the paths, and even the location of the garden will go a long way toward determining how easy it is to maintain and how productive it will be.
Plan Ahead
Decide what you want to grow at the beginning of the year, make a “to grow” list, and stick to it. Place an order with a nursery for delivery in late winter so that your seeds, plants, tubers, and sets arrive at just the right time for planting, relieving you of a great deal of planning and thinking.Carefully consider how many plants you need to grow to feed your family and plan exactly where to plant them. Giving away tasty homegrown vegetables feels great, but an extreme glut of one crop is a waste of time and growing space. Leafing through nursery catalogs is tremendously inspiring but there is no point in ordering plants you don’t have the space to grow. The listings on pages 48–161 give a very rough indication of how much of each crop it is reasonable to grow, but this is only a starting point. Experience will show what works for you.Use a notebook to keep lists, information on successes and failures, and repeat sowing plans handy. This doesn’t have to be anything fancy, just practical, as it will inevitably end up a bit grubby.Keep It Simple
Grow a high proportion of undemanding crops that deliver a prodigious harvest for the minimum of work, especially if you are a beginner. These generous, forgiving plants are the mainstays of the low-maintenance vegetable plot. Avoid the unreliable, demanding prima donnas of the vegetable world. Information on the easy-going plants and their fussier fellows are on pages 44–47. Just because a plant is undemanding doesn’t make it less worth growing—potatoes are one of the least fussy there is, but nothing compares to the taste of freshly dug potatoes.Choose varieties with disease and pest resistance wherever possible. This gives an obvious head start in protecting precious crops. The plant listings on pages 48–161 suggest some disease-resistant varieties, but since this is such an advantage, plant breeders are developing new cultivars all the time.Both the leek ‘Pancho’ and beets (beetroot) ‘Boltardy’ are reliable, useful cultivars that taste great.
Grow most crops from transplant (plug plants), or young plants ready to go straight into the garden. This will save a great deal of time, although initially it may feel like a bit of a cheat as we tend to think that real gardeners labor over seed trays, wrestle with the problems of germination and damping off, spend hours pricking out, and worry about keeping the greenhouse at the right temperature. However, if, like me, you just don’t have time for all this, leave it to the experts and order healthy young plants to arrive at your door at just the right time for planting. It is more expensive than growing everything from seed, but I don’t run a greenhouse and my homegrown vegetables are still much less expensive and tastier than those sold in stores. I also get exactly the number of plants I need, making harvests more predictable.Only grow from seed when it can be sown directly into the ground and won’t require a great deal of pampering.Use the organic “no-dig” system described on page 166 to manage the soil. This means that the traditional, physically demanding tilling (digging over) of the plot each autumn becomes unnecessary. Instead, a mulch of compost (garden compost) or well-rotted farmyard manure is spread on the soil early in the year and the worms are left to do the rest, dragging the organic matter down into the soil. Applying mulch is easier than digging, and what’s even better is that this shortcut uses natural processes to improve fertility and is actually better for the soil than all that time-consuming hard labor.Use a variety of mulches to reduce weeds and the need to water. Many materials suitable for use as mulches are quick and easy to spread and freely available. Applying mulch suppresses weed growth, reduces moisture loss from the soil, and is much easier than weeding. See pages 168–169 for information on marvelous, time-saving mulches.Install a simple irrigation system and water wisely. Watering is a chore that seems to overwhelm many vegetable growers, quite unnecessarily, and people are inclined to water too much or in the wrong way. I am positively miserly with water, encouraging plants to put down good roots and so become much less susceptible to drought. There are many plants that will not need watering most of the time, but there are times when you have to water, for example when plants are getting established, and on other occasions when a few gallons of water will really boost yield. The most basic of irrigation systems can take care of the work and the worry of watering. Components can be bought at most DIY stores and are easier to put together than most children’s construction sets. If you leave the garden to fend for itself for long periods, then an adjustable irrigation system is essential. See pages 36–37 for more on this.Don’t run a greenhouse. The maintenance takes time, keeping the ventilation and temperature just right is an exacting task, and purchasing and running a greenhouse can be costly. By buying crops as small plants or sowing seed directly into the soil, the need for a greenhouse is avoided and things are kept simple.Take steps to prevent problems with pests and diseases. This is a much easier strategy than trying to eradicate a pest or disease once it has a good foothold, especially if, like me, you have decided to do without chemical quick fixes. If you only visit your plot on the weekend or once or twice a week, plenty of damage can be done before you know it, robbing you of your eagerly awaited harvest.Talk to local experienced gardeners. Ask them about the soil, what grows well, and which pests are a problem. This is a much quicker route to accumulating knowledge than spending years gardening on a trial-and-error basis. Most gardeners are only too happy to share their tips and triumphs and bemoan their failures.Perfect for Halloween, these ‘Racer’ pumpkins are remarkably simple to grow and a great first plant for children. However, they occupy a good deal of growing area and may not be a sensible use of space in a small plot.
Work on the Soil
Good, fertile soil gives you the best chance of growing trouble-free fruit and vegetables. There is little point in launching enthusiastically into the planting and sowing of seeds until your soil is somewhere near right. It is the one area where you just can’t cut corners. Put simply, the soil nourishes the plants that will hopefully nourish you, and a fertile, living soil is more likely to produce the bumper crops we all want.Plants in fertile soil will be stronger and better able to withstand hardship. The “no-dig” system described on page 166 delivers a fertile soil naturally.Adopt a Relaxed Approach
Know which tasks take priority and focus on them in the time you have. If you are short on time the secret to gardening well is knowing how best to spend what little you have. Getting seeds and plants into the ground is always the most urgent task (if this doesn’t get done there will be no vegetables), along with checking on what needs watering or adjusting the irrigation system. Anything else can wait if it has to.Turn a blind eye to innocuous weeds in unimportant places until you have time to deal with them. Some weeds really can be left, without guilt, for a while. Others are best tackled quickly to save time and trouble later. The details of this pragmatic approach to weeding are explained on page 179.Expect a few failures. All gardeners have them, and sometimes they are completely inexplicable.If you are producing tasty fruit and vegetables you have succeeded, even if your plot is not glossy-magazine perfection. Have realistic expectations; with buckets of time, money, and staff anyone could run a perfect-looking plot, with row upon row of vegetables of every description and the soil looking good enough to eat. Most of us, however, have to settle for something a little less than perfect, but that can still be brilliantly productive.Make It Enjoyable
Grow produce you really want to eat. Keeping the initial bout of enthusiasm going is vital—if your vegetable plot project is to work it needs to have tangible rewards, so growing things you can’t wait to eat is important. Why waste time and space growing cabbage if you rarely eat it when you could be growing something you find delicious?Begin with just a few crops to avoid the vegetable garden becoming a burden. Keeping everything on a manageable scale ensures that your grow-your-own project remains a pleasure and not a chore. As soon as it begins to feel like a weighty responsibility, the pleasure evaporates, leading to neglect and failure. Start small, gain skills and confidence, and then take on more. This is particularly relevant if time is in short supply.Make your plot a great place to spend time and have some fun. If time in the garden is precious, it is much nicer to spend that time in a pretty, charming, comfortable space, even if you are working. Include decorative set pieces and benches or chairs for a quick cup of tea or coffee. Use companion planting and flowers for cutting to infuse the productive rows with color and scent and your vegetable patch will soon become a wonderful place to spend time. Pages 214–217 explain how to make your kitchen garden special.Having a few basic tools in a handy trug or basket that can be grabbed en route to the vegetable patch is a real time-saver.
PART I: Design, Construction, and Planning
If you want everything in your vegetable plot to run smoothly and without unnecessary effort, getting things right at the planning stage really helps. A bit of thought, research, and time spent considering the space available will ensure that you get your garden off to the best possible start. Moreover, with easily maintained beds, practical paths, and a “to grow” list, the garden will keep the family savoring nutritious, homegrown produce throughout the year. Building your garden will be the most costly and time-consuming part of your grow-your-own endeavor, but you don’t necessarily need DIY skills or an enormous budget. There are myriad ways to build a garden, from a simple bed dug in an area of grass to an intricate, geometric pattern of brick-edged raised beds.
Design
Choosing the Right Location
Choosing the right location is the best way to start if you want to grow great vegetables with the minimum of effort. Give the vegetable plot the best growing space in the garden and you will be saving yourself the struggle of trying to modify an area that is less than perfect. While it is perfectly possible to improve the negative aspects of some sites, it is just easier not to. The ideal location is fairly sunny and sheltered with good, well-drained soil that is not prone to flooding, becoming waterlogged, or drying out completely, and where there is no competition from the roots of large trees or areas of shade.
Some difficulties can be overcome. A windy site, for instance, can be protected by adding a windbreak in the form of fencing or a trellis or wires held on posts that are used to support rugged climbers. Poor soil can be worked on and beefed up or escaped by building raised beds (see pages 17–18) and a shady area might be opened up by careful pruning. If the plot has to be close to the house, it can be prettied up enough to be proud of. But regardless of the situation, be realistic about what you can achieve.
The Basics
Give your vegetable plot the area with the most favorable growing conditions in the garden. The ideal is a fairly sunny, sheltered spot, with good soil and good drainage.
Size
Having a large, beautiful, and bountiful kitchen garden is a wonderful dream, but it pays not to get too adventurous too soon, especially if you are a first-time gardener. Getting behind with the work on the vegetable plot or having too many problems with pests and diseases to deal with can soon lead to poor yields and, worse, disillusionment. It is much better to have a patch half or a quarter of the size of the dream garden in your imagination, enabling you to enjoy the time you spend in the garden and gather a healthy harvest. The project is then a pleasure and a triumph rather than a burden, and you can always expand your plot as your knowledge and confidence grows.
My vegetable plot, for example, has been extended twice and is now four times its original area. It started from very tentative beginnings with just ten small, pretty raised beds covering an area of 182 square feet (17 square meters) with the addition of four much larger growing areas during the second year. This all went well, so I added another four large beds in the third year, giving me a total growing area of just over 720 square feet (67 square meters). The final addition was a modest asparagus bed, and while I would dearly love more space, this is the maximum area I’m comfortable managing, and I know not to be too ambitious.
If you have a community garden plot and the space is too daunting to begin with, try sharing with friends or offering a section to a fellow community gardener whose plot is bursting at the seams. Or it is perfectly acceptable to allow half to lie fallow for a while under a mulch of heavy black plastic or green manure until you are ready to expand.
The Basics
Start small, gain confidence and skills, then expand your plot.
These chunky lumber beds look fantastic, are incredibly practical, and will last for years.
Raised Beds
Growing in beds, raised or otherwise, is an alternative to the open or community garden-style productive garden. It is very efficient and offers plenty of benefits for those trying to cut down on the time spent maintaining their vegetable garden. I really don’t think I could successfully manage my plot any other way. It reduces an overwhelming expanse of land into easily tackled chunks, saving time and effort.
A raised bed is a planting area with a soil level significantly above the natural soil level, normally contained within a frame and surrounded by permanent paths. Although often constructed from wood, raised beds can be made from just about anything durable that will form a frame to hold soil. Brick, stone, or low hurdles all work well, although hurdles are not particularly robust or long-lived. The simplest raised bed is constructed of lumber—reclaimed scaffolding boards are perfect—which are nailed or screwed to stakes hammered into the ground. My first set of raised beds was made by a local carpenter out of very chunky lumber with lovely mortise and tenon joints at each corner. They are effectively freestanding “flat pack” beds that can be taken apart and rearranged or reused elsewhere. A product of my doubts about how successful my weekend vegetable plot would be, the design gave me the option of transforming the beds into something else, somewhere else, should my doubts have proved right.
Chic metal raised beds give the vegetable plot a contemporary feel.
The Basics
Raised above the normal soil level and constructed of wood, brick, or other durable materials, raised beds allow you to create excellent, fertile soil and escape problems with bad drainage or thin soil. Crops can be grown more intensively in raised beds, giving you a better harvest for less effort.
Advantages of Raised Beds
Perhaps the most important advantage of all is that raised beds allow you to escape unfavorable soil. This enables you to ensure the best growing conditions possible by filling your beds with a 50-50 mix of good-quality topsoil and well-rotted organic matter to produce great soil and, in turn, vigorous, productive plants. Where the underlying soil is very wet, the ground below the bed needs to be tilled and some gravel or sand worked in before the new soil is added to ensure good drainage. In most circumstances the beds need only be about 12 in. (30 cm) deep, though in very damp areas the depth can be 24 in. (60 cm) or more to ensure good drainage. Higher beds are also an excellent option for gardeners with back problems.When growing in raised beds you only need to maintain, water, weed, and cultivate the core growing area. The beds can be planted more intensively by arranging plants with less space between them than in the traditional open vegetable garden or community garden plot, so you get more tasty produce for the area maintained. Closer spacing also cuts down on weeding, too, since more of the soil is covered with plants and the weeds are deprived of light.The soil in raised beds warms up more quickly in the spring than soil in an open vegetable garden or community garden plot, allowing plants and seeds to get a faster start.Having neat islands of raised garden surrounded by paths makes working in the garden convenient and allows you to harvest crops in all kinds of weather since there is no need to walk on the soil. This is very handy when you are short of time and can’t be picky about when you venture outdoors. Growing in beds also works very well with the time-saving “no-dig” method described on page 166.Plants are easily protected from frost or pests in a neat, regular, confined area. Wire or plastic pipe hoops that neatly span the bed can hold row covers, chicken wire, or insect-proof mesh.A crisp pattern of well-constructed beds will give you a head start in keeping the garden looking neat and well tended. A pretty arrangement of beds instantly makes the garden look more appealing and decorative, adding value and elevating the humble vegetable patch to “truly beautiful kitchen garden.” Taking the time to give your plot what is often termed “good bones,” being a strong, structured design, will go a long way toward engendering the illusion of tidiness even through those inevitable times of slight neglect.If you are lucky enough to have great soil, raised beds may seem unnecessary. In this case, laying out a series of low beds at the existing soil level bounded by permanent paths will give many of the same advantages and can be managed in the same “no-dig” way.This large, ornamental vegetable garden has an arrangement of low beds. Bay trees and teepees add height.
Layout
The way you choose to lay out your beds will have a big impact on how simple they are to tend and how the garden looks. The neatness and beauty of your plot may not trouble you as you may be in it only for the delicious food, but for most gardeners creating a wonderful space and an area to be proud of helps make tending the garden more of a pleasure and less of a chore.
How Much Growing Area?
This will be governed by how much space you have available, what kind of crops you hope to grow, and how much you want to take on in the first year. If you aim to concentrate on salad greens, tomatoes, and cucumbers you will only need a few small beds, perhaps measuring 3 x 4 ft. (1 x 1.2 m). If you want to grow bulk crops like onions and potatoes then more cultivated space and larger beds will be more practical, perhaps 10–16 x 4 ft. (3–5 x 1.2 m). A combination of large and small beds will suit most people and will make for interesting design possibilities. I started with 182 square feet (17 square meters) and this was easily manageable, but this setup lacked the longer beds ideal for bulk crops.
What Size and Shape Beds?
The basic rule is that a bed can be as long as you like but only ever less than twice your arm’s length wide, meaning that you can tend the bed, weed, harvest, and mulch without ever having to walk on the soil. However, in reality very long beds can become a nuisance as you move around the garden. Square and rectangular beds are easiest to cultivate; while intricate shapes, triangles, and circles may look fantastic, they are hard to construct and tend. It is well worth carefully measuring your area and drawing out your proposed pattern to scale, leaving space for decorative elements like benches, trees, or whatever takes your fancy. There is nothing wrong with taking the easy option either; if you plan to use scaffolding boards, making beds the length of each board or half a board cuts down work and is economical. If you have old paving stones to use for paths, make the length of your beds fit neatly with these to avoid cutting stones or having oddly constructed paths and corners.
An intricate pattern of box-edged beds makes this vegetable plot very attractive, although maybe not the easiest to maintain.
The Basics
Beds should be narrow enough to be tended without stepping on the soil, ideally between 3 ft. (1 m) and 4 ft. (1.2 m) wide, and as long as is practical. Complex-shaped beds are likely to be less convenient.
Paths
There is nothing more irritating than trying to maneuver a fully loaded wheelbarrow around tight corners or in confined spaces. So at least some of your paths need to be wide enough to turn a wheelbarrow, keeping in mind that if all has gone to plan by mid summer the beds will be literally overflowing with an abundance of vegetables. To save space, secondary paths can be just wide enough to walk along, so long as all beds are accessible from the major pathways.
The surface of the path is also important. If you are converting a patch of lawn to a productive garden, then the temptation might be to keep the areas of grass between beds as the paths—this is cheap and easy, and I have to concede that carefully mown, lush green grass paths look fabulous. However, mowing the paths takes time, trimming or clipping up against beds is fiddly, and lush green paths soon become slippery or threadbare when the weather is very wet or hot. All-weather surfaces are much more practical; gravel, brick, or concrete slabs work well. For ease, economy, good looks, and practicality, gravel wins for me. It never gets slippery, drains easily, and constructing a gravel path can be done quickly by almost anyone. Any weeds are a cinch to remove as there is little to get their roots into.
Building a Gravel Path
To lay a gravel path in a vegetable garden it is sufficient to cover the area of the path with a heavy-duty weed-suppressing landscape fabric. If possible, tuck the edges of the fabric under the sides of the beds to keep weeds from finding even the hint of a chink of light. Pin down the fabric with large-headed plastic landscape fabric pins and allow a generous overlap where edges meet, then add a 2–3 in. (5–7.5 cm) layer of gravel. Any more and walking becomes hard work; any less and bald patches constantly appear. The same method could be used to build a bark chip path, but this is not nearly so practical or attractive. Bark chips tend to hold moisture, clogging together in wet weather, sticking to boots and barrow, and eventually they will break down and need regular replenishing.
A decorative brick path is a practical and attractive option in the vegetable garden.
The Basics
Main paths should be wide enough for a wheelbarrow to turn, even when the beds are overflowing with luscious vegetables.
Use a rugged, all-weather surface.
This beautiful path of brick diamonds infilled with gravel is lavish in width and construction, in keeping with this rather grand vegetable garden.
Designing the Beds
Ignoring practical considerations will result in a garden that is not as straightforward to look after as it could be. However, practical and delightful can go hand in hand. If you are concerned only with the practical, you have less to think about in laying out your garden, but also much less to look forward to!
A simple geometric pattern of beds works well in both respects. This approach naturally creates vistas and spaces for focal points—this might be a simple bench or standard bay, a rustic scarecrow, or even a piece of sculpture. It is your garden—you can make it as decorative as you want and in your own style, for you to enjoy. Ballerina fruit trees, teepees, standard bays, and trellises can all be used to add some height. (This aspect of the vegetable garden is dealt with on pages 214–217.) As you draw out the pattern of your beds, don’t forget to leave space for some decorative and fun elements if it appeals to you.
The best temporary garden seating is the traditional deck chair—perfect for relaxing in after a burst of gardening.
One word of caution—the kitchen garden tradition, seen perhaps at its most grand in the chateaux of France, often employs a multitude of small box-edged beds, or those edged with lavender. This looks fantastic but really cuts down on the growing space in each bed, and larger beds are required for bulk crops such as potatoes. It can be frustrating to see a large part of the growing area you have worked hard to create supporting an unproductive plant and suffer the inconvenience of working over the low hedge.
If you start small, your successes will undoubtedly inspire you to extend your vegetable patch. It is worth considering how you might do this when planning phase one, leaving options for the further seamless development of the plot. After a couple of seasons growing, you will have a better idea of what works for you and your family.
The Basics
A strong, geometric pattern of beds looks good.
Include decorative elements that appeal to you.
My vegetable garden in its first year during early summer. It soon became a favorite place to relax in and watch the vegetables grow.
Construction
Preparing the Ground
It would be a rare and fine thing if you were fortunate enough to be starting your vegetable garden in an area of perfect, cultivated soil; it is probably at best turf or more likely a neglected mixture of weeds and brambles. There are a number of ways these might be dealt with, some much less work than others. It is worth remembering that getting the preparation right and making the soil as weed free as possible at this stage is in fact a time-saving strategy—dealing with weeds in an empty plot is much simpler than when they pop up among a row of onions or carrot seedlings.
Clearing the Ground by Digging
There is no way to dress it up—clearing the ground by digging is backbreaking, time-consuming, hard work where attention to detail is paramount. If you are a time-poor gardener this may not appeal to you, although I have heard of those who have tried to evoke a party spirit to make the task more bearable, inviting friends along to help, with the promise of good food and wine later! Great, so long as the quality of work stays high. Essentially, this is weeding on a grand scale, and as such the golden rule of weeding applies—“get the entire root out.” The longer the space has been neglected the tougher the job will be, as some perennial plants have roots that spread great distances and to amazing depths. Any short section of root or rhizome left in the ground will grow into a new plant. The reality is that it is impossible to successfully remove all the roots and this is but the first strike in an ongoing battle, so it pays to make this clearance as effective as possible to make regrowth weak and easy to manage. If you are anxious for a quick fix don’t be tempted to try a rototiller—this will just cut weed roots into tiny pieces and replant them all over the area, spreading the problem and ensuring weeds will persist for years to come.
Clearing the Ground by Covering


