14,39 €
Mehr erfahren.
- Herausgeber: Ryland Peters & Small
- Kategorie: Lebensstil
- Sprache: Englisch
Create 35 beautiful planters, decorations and gifts – all using concrete. Follow Hester van Overbeek's simple tutorials to make a huge range of unique concrete projects. You will find everything you need to know – what type of concrete to buy, how to use it and how to decorate it – explained in a comprehensive techniques section. From there you can make chic and on-trend home accessories such as upside-down plant pots, a concrete vase with a wooden base, serving platters, a letter-shaped bookend, fruit bowls and much more.
Das E-Book können Sie in Legimi-Apps oder einer beliebigen App lesen, die das folgende Format unterstützen:
Veröffentlichungsjahr: 2017
Ähnliche


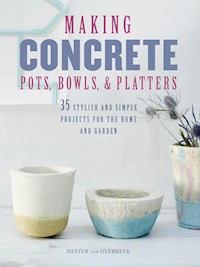
MAKINGCONCRETEPOTS, BOWLS, & PLATTERS
MAKINGCONCRETEPOTS, BOWLS, & PLATTERS
35 STYLISH AND SIMPLE PROJECTS FOR THE HOME AND GARDEN
HESTER VAN OVERBEEK
DEDICATION
For my super creative family: my aunts, uncles, and cousins, who always have some DIY advice and tips handy.
Published in 2017 by CICO Books
An imprint of Ryland Peters & Small Ltd
20–21 Jockey’s Fields
London WC1R 4BW
341 E 116th St
New York, NY 10029
www.rylandpeters.com
10 9 8 7 6 5 4 3 2 1
Text © Hester van Overbeek 2017
Design and photography © CICO Books 2017
The author’s moral rights have been asserted. All rights reserved. No part of this publication may be reproduced, stored in a retrieval system, or transmitted in any form or by any means, electronic, mechanical, photocopying, or otherwise, without the prior permission of the publisher.
A CIP catalog record for this book is available from the Library of Congress and the British Library.
eISBN: 978 1 78249 514 7
ISBN: 978 1 78249 414 0
Printed in China
Editor: Gillian Haslam
Designer: Elizabeth Healey
Photographer: James Gardiner
Stylist and step photographer: Hester van Overbeek
In-house editor: Anna Galkina
Head of production: Patricia Harrington
Publishing manager: Penny Craig
Art director: Sally Powell
Publisher: Cindy Richards
CONTENTS
• • •
Introduction
Getting started
CHAPTER 1 GARDENING & OUTDOORS
Chevron planter
Hanging basket
Asymmetric succulent planter
Upside-down planter
Vertical garden
Recycled planters
Birdhouse
Copper planter with saucer
Plant table
Animal planter
Water feature
CHAPTER 2 FOOD & ENTERTAINING
Cheese board
Serving dish
Concrete tray
Fire bowl
Fruit bowl
Cup and saucer
Cake stand
Coasters
Candlesticks
Canopy with lights
Chargers
Dowel bread basket
Tea light holders
Kitchen trivet
CHAPTER 3 DISPLAY & GIFT
Two-tone decorative bowl
Wood and concrete bowl
Doily bowls
Geometric vase
Display triangle
Bookend
Patterned vase
Phone charging station
Concrete photo art
Storage jar
Resources
Index
Acknowledgments
INTRODUCTION
I love textures—old wood, chipped paint, marble, and concrete are all things I like to work with, so when the opportunity to create this book came along, it got my interest right away.
Concrete is such a lovely medium to work with, but it can have a very industrial image and even my dad said “Are you sure—a whole book of concrete? Isn’t that way too difficult for you?” To be fair, you do need to get to grips with a few basic techniques, but mixing and casting concrete is not difficult for the average crafter to master. If you are a novice, I suggest starting with the small projects first—the asymmetric succulent planter on page 28 and the tea light holders on page 90 are very good introductions to concrete crafts. Once you become more confident in creating the perfect concrete mixture, you can start mixing bigger quantities and try the chevron planter on page 20 or the plant table on page 49.
I use a variety of molds for the projects in this book. I’ve built my own wooden ones, used my silicon baking pans, raided the recycling bin for juice cartons and yogurt pots, and even tried some free casting on sand. Concrete will take any shape you pour it in and will even pick up all the texture inside your molds, so you can get very creative. Most concrete crafts have a strong industrial look, so I also wanted to create some more delicate and unusual pieces, like my doily bowls on page 102, the cake stand on page 76, and the patterned vase on page 114.
Learning how to work with concrete was new to me and I had some disasters along the way—bowls stuck in their molds and mixtures that took forever to set—while running out of concrete mid mega pour and having to dash to the DIY store on a super busy Saturday wasn’t one of my highlights! But practice paid off and by tweaking my designs and working out which molds work best, I had a lot of fun and I’m pleased to share my tips and ideas with you here.
I’m not the most patient crafter, and also have a relaxed approach when it comes to making things, but as curing concrete is a chemical process you do have to be quite precise and learn to play the waiting game as you won’t know if your cast has worked until a day or so after you made it. However, I had so much fun coming up with some unique projects for you to make and I hope you will become a concrete convert too!
GETTING STARTED
• • •
CHOOSING YOUR CONCRETE
Concrete is a super strong building material, but it is also great for crafts. It is a mix of cement and aggregates, to which you add water to create the exothermic chemical reaction which makes concrete set rock hard.
People seem to mix up the words cement and concrete. To clear it up, cement is the “glue” that holds concrete together. You mix cement with aggregates—such as sharp sand (also called builder’s sand), ballast, small rocks, gravel, etc—to make concrete. To make life easy, you can buy packets of premixed concrete, in quick or normal set. Or you can mix your own by combining cement with sand and ballast. On average you mix one part cement with four parts sand/ballast/aggregates, but always follow the instructions on your cement packaging.
I tend to use premixed concrete as it’s relatively hassle-free and you only have to add water, but mixing your own is handy if you want a lighter colored concrete. Most premixed concrete is a gray color, but by using white Portland cement (crushed and finely ground limestone) and colored pigments you can create a lot of different toned projects (see page 71).
Quick-set concrete is also available in premixed packets. This mix will set within an hour—great if you want to make something quickly. Quick-set concrete is perfect for small projects, but I wouldn’t recommend it for the large planters as you will not have enough time to mix all the concrete and pour it before the first lot hardens.
Concrete comes in different textures. There are the very smooth and fine ones and the coarser mixes. The coarse ones are cheaper to buy and contain larger pieces of rubble or stones—this concrete is used by builders to make walls, etc. Smoother concrete mixes have finer milled ballast, resulting in a very smooth finish which is great for delicate projects. All brands are different and it’s best to try several to see which finish you prefer.
SAFETY FIRST
Always wear rubber gloves when you work with concrete as the mixture will make your hands super dry. You may even get skin irritations or chemical burns, so wash off any concrete that gets on your skin.
Protect your eyes from concrete dust by wearing safety goggles. It’s unlikely that powder will get in your eyes when weighing and mixing the concrete, but it could splash up when you pour it into the mold or you might rub it onto your face. Better safe than sorry.
Wear a dust mask when weighing and mixing concrete powder. You don’t want to breathe this in as it can irritate your throat and lungs. I use small, disposable dust masks with elastic around the neck and a metal clasp you tighten around your nose.
Always wear protective gloves when mixing concrete.
MIXING CONCRETE
Adding water has to be done gradually, a little at a time—you want to end up with a mixture that has the thickness of yogurt. If you make the concrete mix too thin, just add some more concrete powder. Follow the instructions on your concrete packaging to calculate how much water to add.
A common mistake when mixing concrete is to make the mixture too wet. Too much water will result in a poor chemical structure and leaves your projects weak, crumbly, and porous, and it may also shrink while drying in the mold.
Make sure the concrete powder and water are properly combined and no pockets of powder are left. Once all combined, mix for a few more seconds just to be sure you have a good mixture. You will notice the mixture will start to set immediately so you need to work fast, especially if using quick-set concrete. For big projects, mix your concrete in batches and work fast, mixing no more then 17½ lb (8kg) of concrete at a time and only mixing the amount of concrete needed for your project.
Getting the thickness just right can sometimes be a little tricky. A thinner mixture is easier to pour, but don’t be tempted to do this as a thin concrete is not as strong as a thicker mixture that you spoon or press into place. Have a look at the mold you use to determine the thickness you need. If you have a mold with lots of details (such as the animal planter on page 52 or the patterned vase on page 114), make the mixture a little thinner so you can pour it into all the crevasses. For your average planter, make your mix the thickness of yogurt so it pours out of your mixing bowl. When you use sand as a mold (see page 63), make your concrete a little thicker so you can pack it into shape without using an inner mold; the same applies to the fruit bowl on page 71.
To make concrete more frost-resistant, it needs to be crack-free and not too wet. Make it as dense as possible for any pieces that will be outside, and if casting, vibrate gently to remove any large air bubbles.
Mixing concrete can look daunting, but don’t let it deter you from the creative process of making your own planters and pots. Concrete mixing is a bit like mixing batter for a cake—once you have discovered the perfect thickness for your mix, it will be a walk in the park.
Kitchen scales are useful for weighing the dry concrete mix.
CALCULATING QUANTITIES
All the projects in this book list the approximate weights of the dry concrete mix I used. Use this as a guideline when making your own projects—if you use a similar size of mold, the concrete needed will be almost the same, and you can adjust the quantity if you use a larger or smaller mold.
For those occasions when you find you have mixed too much concrete, I have included some great little projects to use up leftover concrete, such as the dipped cup and saucer on page 74 and the candlesticks on page 80. I also always keep a few recycled yogurt pots on my worktop ready for turning into little concrete planters for succulents!
MOLDS
Molds hold the concrete mix in place until it has set into the required shape. On most projects you will use two molds—one for the outer shape and one as the inner mold, creating the space within your project for plants, flowers, etc.
You can use a wide variety of products as molds. Anything that is hollow can become a mold, so have a good look around your house to see what you have lying around before setting out to buy molds. Most molds are for a single cast but some you can use multiple times, like the wooden frame mold used on page 120.
Silicon Silicon baking pans make great concrete molds. Once the concrete is dry, you can peel the silicon away, making it very easy to release the finished concrete project. Silicon molds have smooth sides, resulting in a smooth project finish, but the walls will bow a bit with the weight of the concrete mix. To prevent this, you can place a piece of wood or a heavy book next to the mold to stop the walls bulging.
Plastic Any plastic shape can be used as a mold, but shapes with a lot of texture or ridges will make it more difficult to release your project once it is dry. You will see me cut off the rims of bowls in some of the projects as the rim can get stuck in the concrete. Bowls or shapes with a little give work best as something you can pull slightly out of shape makes the concrete easier to release. Very rigid bowls will have to be cut open.
Silicon baking pans make hassle-free concrete molds.
Cooking spray will make it easier to remove your finished projects from the mold..
It is wise to spray a releasing agent like cooking spray or olive oil in your plastic mold before pouring the concrete in. This will make it a lot easier to release your project from its mold.
Wood For square, straight, or rectangular projects you can build your own molds from wood. The smoother the wood, the smoother the finish on your project. I like using melamine furniture board—a particle board (sawdust pressed together with glue) that has a smooth resin coating. Pine also works well, but unpainted/unsealed wood will absorb a little water from your concrete mix which can result in a crumbly finish. If you use wood with a pronounced grain, this texture will also appear in your finished project.
These mini loaf pans are used as molds for the tea light holders shown on the right.
When building molds, make sure all the corners are straight and you fill all the seams with silicon sealant to prevent the concrete mix seeping out. Unmolding is very simple—you just unscrew the screws that hold the wood together.
Wooden molds are perfect if you want to make several planters, pots, etc with the same shape because they can be used over and over again. Just scrape out all the dried concrete residue before using it again.
Recycled Food containers make perfect molds so have a look in your recycling bin for yogurt pots, juice cartons, soda bottles, and milk containers. Plastic drinking cups are great inner molds and unmolding is easy as you just cut the carton open.
Paper You can use cardboard to make molds—this is especially good for swirly shapes like the letter bookend (see page 112). You do have to cover the paper in plastic tape (such as duct tape, gorilla tape, or parcel tape) otherwise the water in the concrete mix will dissolve the paper. Tape the paper mold to a flat surface with strong tape, like duct tape.
Waxed paper, such as juice cartons, make great molds too, as these are already waterproof and don’t require any taping (see pages 106 and 116).
A cardboard mold was used to cast this bookend (see page 112), while sand was used for casting the kitchen trivet (see page 92).
Sand Pouring concrete over sand creates an organic shape, like the serving dish on page 63. The sand will make the negative space and you can really play with swirly shapes, as in the trivet on page 92. If you like a very neat finish, this is not the casting method for you as concrete poured over sand will have a rougher appearance.
When the concrete has dried, simply pull the project away from the sand. Brushing the sand away will take some time. Use a stiff brush, like a dishwashing brush, to rub as much off as you can; letting the sand dry in the sun will also help. If you still haven’t got all the sand off, use a steel brush but be careful not to damage the concrete.
If the inner mold sticks out above the concrete, it will be easier to remove.
Inner molds The inner mold you use will create a negative space (ie the cavity to hold your plants/flowers etc). This mold can be anything that fits easily inside the outer mold. I like using plastic drinking cups, postal tubes, or various plastic containers from my recycling bin. Styrofoam/polystyrene is also good as it can be cut to any shape and makes great knockout pieces for spaces you want to keep clear of concrete, like hanging hooks, watering holes, or planting space. Wine corks make good drainage knockouts too, but they are a bit harder to come by nowadays.
To make it easier to release the inner mold, always make sure it sticks out of the concrete by at least ¾ in (2cm) wherever possible, so it has some pull when you want to remove it.
A releasing agent like a cooking spray, olive oil spray, or mold oil can be use inside the mold to make for easy release. Spray a little inside the mold, especially if the mold has ridges (such as in the storage jar on page 123) before casting your concrete.
Spooning the concrete into the mold and leveling the top.
Gently shaking or tapping the mold to level the concrete.
Pushing the inner mold into place and tapping the sides to get rid of any air bubbles.
CASTING
You can pour concrete, spoon it into the mold, or pack it in with your gloved hands.
Pouring—where you simply pour the concrete into its mold and smooth it off—is used for most small projects. Poured concrete is often very smooth.
Packing/pressing is great for larger projects and builds that need to hold their shape immediately. The concrete mixture you use is drier and will often create more texture in its walls, like veins and holes.
In some projects, you fill the mold two-thirds full with concrete before pushing the inner mold in, while in others you glue the inner mold to the base and you cast the project upside down (as with the hanging basket on page 24).
Some other pressed projects, like the fruit bowl on page 71, don’t even use an inner mold as the concrete mix is strong enough to hold its shape.
After casting, you need to get rid of any air trapped inside your mold. Tap the sides of the mold to release any bubbles that might be trapped in the concrete. When making small projects that are not to heavy, you can also lift the mold slightly and let it drop down again gently on your work surface to remove any air pockets.
The pressure inside the concrete has the tendency to push up your inner mold, so weigh the inner mold down with sand, uncooked rice, screws, nails, or coins to keep it in place.
Make sure your inner mold is centered (unless you have designed something asymmetric) before the curing process starts. You might want to use some lengths of tape to ensure the inner mold stays in place. For big builds, such as the water feature on page 54, the sides of your mold might start to bulge so use planks of wood to keep them straight.
Screws are a perfect weight to keep the inner mold in place. You can also use sand, uncooked rice, coins, or nails.
CREATING PATTERNS
Concrete will take on any pattern your mold might have on the inside, like a wood grain or object. When you use a super smooth mold like melamine, a plastic tub, or silicon ice cube tray, your project will be super smooth as well.
You can play with the appearance of your project by adding shapes to the walls of your outer mold. Do this with rubber or foam flowers as in the fruit bowl on page 71, create letters or shapes with silicon sealant as in the chevron planter on page 20 and the candlesticks on page 80, or use silicon textured mats intended for sugar crafting to give great detailed texture to your project, as in the patterned vase on page 114.
COLORING CONCRETE
Color brings an extra dimension to your project and can either be added into the concrete mix by using pigments or by painting the object after it has been unmolded.
Adding pigments results in an integral color—a color that is dispersed throughout the concrete, not just on the surface. This is great for objects that might have a little wear and tear—for example, when a planter gets chipped the underlying concrete is the same color. Pigments that you add to the concrete mix come in dry and liquid form and although you can use paint pigments (such as in the two-tone bowl on page 96), I’ve had varied results doing this—some colors worked fine while others made the concrete crumbly. Concrete curing is a chemical process so use pigments specially made for concrete to ensure you don’t mess up the chemical reaction.
You can also use gel food colors to add a marbled affect, as in the bookend on page 112. Pour the colors into the base of the mold and swirl them around before pouring the concrete in. You will not know how the color has taken until after unmolding, making this a fun technique. The brighter the pigment and the lighter the concrete, the more it will show up.
Most ready mixed concrete is of a gray color and great for industrial tones, like the phone charging station on page 116, but if you want vibrant colors this gray tone might dull your pigments. In this case mix your own concrete using a white cement, like Portland cement, as the colors will show up a lot more.
Concrete can be painted after unmolding and, unlike the integral method, the color will be just on the surface of your project. You can use all sorts of paint, but I prefer to work with the chalk paints by Annie Sloan as they dry quickly, don’t require any preparation, and the colors are not affected by the gray base of the project.
For a super shiny finish (such as the trivet on page 92) or for a project that will contain water (as on page 54) I use tile paint. This is a bit trickier to apply and it has to dry for a full day, but it can withstand water.
You can also tint the inside of your projects with a slurry, as in the fruit bowl on page 71. To make a slurry you mix colored pigment with white Portland cement and water to create a paste the thickness of yogurt which you smear onto the concrete. This will fill any cracks and dips your project may have and give it a smooth colored layer. You can also use this technique to color the outside of a planter, especially ones that have a lot of air bubbles and cracks in the concrete to create a smoother finish.
DRYING TIME
Concrete setting (or curing) doesn’t mean drying out the water—it’s an exothermic chemical reaction where the water is consumed by the chemical reaction, resulting in a tough material. You will notice the mold getting warm when the curing takes place. When your object feels rock hard and is cold again, it can be time to unmold but if in doubt, always give it a bit longer. I’ve stated my drying times in the projects, but use your common sense. If you take a project out of its mold before it’s cured, it will break.
Small projects, like the succulent planter and candlesticks on pages 28 and 80, can be unmolded after a few hours, larger planters and vases after a full day, and big projects like the chevron planter on page 20 after a few days.
Although your concrete mix will get hard in a few hours or days (depending on its size), it takes weeks for the concrete to fully harden. You will notice the concrete gets lighter the more it cures. Don’t worry when you see dark patches when you unmold your projects—these will dry lighter in time.
The slower the concrete cures, the stronger your build, so you can put your mold in a plastic bag or cover a big project with a plastic sheet so it dries a little slower. I especially like doing this with projects with thin walls that can have a tendency to crack, such as the fruit bowl and plates on pages 71 and 86. If possible, never let your project cure in bright sunlight as concrete that dries too fast will crack.
UNMOLDING
When your concrete has set, you can unmold it. This can be very easy when you have a wood frame which unscrews or a flexible silicon cake pan, or a bit trickier when you use a solid plastic mold.
Always make sure the inner mold sticks out of the concrete by ¾ in (2cm) so you have something to pull on. If you have used cooking spray, the unmolding will be easier as well.
For plastic, remove the inner mold by wiggling it and pulling it away from the concrete (or in the case of a plastic cup you can just scrunch it up). Then pull your outer mold away from the concrete a little to release your build, tip it over, and let your project fall out. If this doesn’t happen you will need to cut open the mold with a Stanley knife. Do this carefully and a little at a time, using protective gloves to protect your hands from sharp bits of plastic and wearing goggles to protect your eyes from bits of plastic that might fly off.
I always like to let my projects “air” a little after unmolding before painting them. This doesn’t have to be long—half an hour is enough.
Molds with smooth sides make it easy to release your projects.
SEALING CONCRETE
After sanding and then painting your project, you can seal it with a clear varnish to make sure the paint lasts longer. Using a satin finish will give your make a shiny finish. I often prefer a matt look, so opt for a matt finish sealant.
Concrete objects that will be used for food or food storage will have to be sealed with a food-grade sealant (ie one that is nontoxic). Apply one coat, let dry, then apply another coat.


