Erhalten Sie Zugang zu diesem und mehr als 300000 Büchern ab EUR 5,99 monatlich.
- Herausgeber: Fox Chapel Publishing
- Kategorie: Lebensstil
- Sprache: Englisch
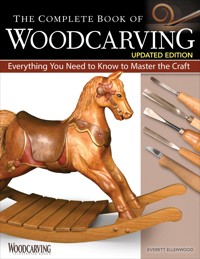
From making the first cut to applying the finish, this comprehensive resource covers every aspect of woodcarving. Everything is here for the beginning or advanced woodcarver, from choosing the appropriate wood; setting up a shop, selecting, using, and sharpening tools; and performing all the fundamental techniques, such as the push cut, pull cut, stop cut, and slicing cut. Every general carving style -- from classical to whimsical to rustic -- are detailed, as are the basic steps of power carving. The included 10 step-by-step projects are designed to help newer woodcarvers build proficiency. Best of all, a handy resource section and a glossary round out this fully illustrated, must-have resource for all woodcarvers. The new edition includes an updated power carving section, newly added step-by-step projects of a simple spoon and a Santa face along with patterns and painting tips, and updated photography.
Sie lesen das E-Book in den Legimi-Apps auf:
Seitenzahl: 399
Veröffentlichungsjahr: 2022
Das E-Book (TTS) können Sie hören im Abo „Legimi Premium” in Legimi-Apps auf:
Ähnliche


© 2008, 2022 by Everett Ellenwood and Fox Chapel Publishing Company, Inc., 903 Square Street, Mount Joy, PA 17552.
The Complete Book of Woodcarving, Updated Edition (ISBN 978-1-4971-0284-2) is an expanded edition of the book The Complete Book of Woodcarving (ISBN 978-1-56523-292-1) published in 2008 by Fox Chapel Publishing Company, Inc. Revisions include metric conversions, new images (15, 65, 86), new text (55, 71, 79, 98), and two new projects (210, 230).
All rights reserved. No part of this publication may be reproduced, stored in a retrieval system or transmitted, in any form or by any means, electronic, mechanical, photocopying, recording or otherwise, without the prior written permission of the copyright holders.
Print ISBN: 978-1-4971-0284-2ISBN 978-1-63741087-5
Library of Congress Control Number: 2022934514
To learn more about the other great books from Fox Chapel Publishing, or to find a retailer near you, call toll-free 800-457-9112 or visit us at www.FoxChapelPublishing.com.
We are always looking for talented authors. To submit an idea, please send a brief inquiry to [email protected].
For a printable PDF of the patterns used in this book, please contact Fox Chapel Publishing at [email protected], with 9781497102842 The Complete Book of Woodcarving, Updated Edition in the subject line.
ACKNOWLEDGMENTS
Ron Bymers
Kent Duff
Wayne Hendrickson
Randy Kinnick
Slim Maroushek (owner of Slim’s Woodshed and Carving Museum)
Ron Morrow
Bob Nowicki
Myron and Laverne Schettl (Shady Haven Tree Farm)
Kathy Ward
For allowing me to photograph their carvings and providing me with various items that enhance my book
A SPECIAL THANK-YOU TO:
John Krantz—retired Department of Natural Resources forester in Forest Products Utilization—for his assistance with and input on Chapter 3, “Wood for Carving”
W. F. (Bill) Judt—for allowing me to reference his “Four-Quadrant Carving”
Dale Knoblock—the developer of Pentacryl and owner of Preservation Solutions—for his contribution on curing woods for carving
Bob Montagno—plant manager at Norton Abrasives, Littleton, New Hampshire—for his review of and input to the information on sharpening stones
Stan Watson—technical director for DMT (Diamond Machining Technology), Marlborough, Massachusetts—for his assistance with and contribution to the sharpening stones information
Robert B. Hanna—professor and director at SUNY, College of Environmental Science and Forestry, Syracuse, New York—for sharing his knowledge and providing me with micrographs of wood
Greg Heisey for his photographic expertise and fellowship while shooting the bird, flower, and snowman projects
Peg Couch, book acquisition editor for Fox Chapel Publishing, for her patience and assistance in making this book a reality
Gretchen Bacon, editor for Fox Chapel Publishing, for correcting my spelling and grammar errors, plus creating magic by condensing the 400 pages and hundreds of photographs I sent her into a book of 304 pages
Troy Thorne, creative director for Fox Chapel Publishing, for his creative layout to make my book aesthetically interesting
AND A MAJOR THANK-YOU TO:
My son, Jeff, for the many hours he spent doing photography for the body of this book. It would have been next to impossible to have completed this book without his assistance. He’s more of a perfectionist than I am.
My daughter, Joleen, who did the photography for the Carved Butternut Spoon and the Happy Santa Face.
My wife, Deloris, for her patience and understanding. Many “Honey Do’s” were left undone during the two years I lived inside this book.
And to all my family, friends, and students who gave me support and encouragement as I made my dreams of writing this book a reality.
CONTENTS
INTRODUCTION
Chapter One: A HISTORY OF WOODCARVING
Chapter Two: TYPES OF CARVINGS
Chapter Three: WOOD FOR CARVING
Chapter Four: CARVING TOOLS
Chapter Five: CARVING ACCESSORIES
Chapter Six: SHARPENING YOUR TOOLS
Chapter Seven: TOOL PRACTICE
Chapter Eight: GETTING STARTED
Chapter Nine: PAINTING & FINISHING
Chapter Ten: STEP-BY-STEP PROJECTS
Stylized Bird
Carved Butternut Spoon
Snowman
Happy Santa Face
Flower Relief Carving
Stylized Cat
Acanthus
Chip Carved Star
Pierced Relief Horse Heads
Rocking Horse Plans
RESOURCES
GLOSSARY
INTRODUCTION
If you’re searching for a hobby that will be with you for a lifetime—not just some fad that’s here today and gone tomorrow—woodcarving puts you on the right track. It’s not a stagnant hobby but one that is stimulating, yet relaxing. Woodcarving is done in many styles, from simple repetitive patterns to intricate sculptures, so it’s a hobby in which you will never run out of ideas for what you can create. It can become a very satisfying and fulfilling part of your life.
In this age of mass production, it’s gratifying to take a piece of wood and create your own piece of art, and because wood comes from a once-living tree, no two pieces will ever be the same. It grows and changes, even after it’s harvested. Each piece will have a beauty and character of its very own. This beauty of wood makes woodcarving a special art.
During the 50-plus years I have been carving, I’ve held classes, written articles and books, and produced videos and DVDs—all to help woodcarvers at different stages of their carving careers. Woodcarving can’t be learned through books alone, but books are a great way to start your journey into woodcarving and a great resource to turn to when you need help on a specific topic.
With that in mind, I’ve included material in this book to help you develop an understanding of woodcarving basics so you have a solid foundation on which to build. Experienced woodcarvers can expand their knowledge of this beautiful art form as well. I recommend you read this book in its entirety, and then refer back to specific chapters if you have questions on a particular topic. This book will take you through
• a history of woodcarving
• the various types of carving
• the anatomy of wood and how its characteristics affect how you carve it
• why some types of wood are better to carve than others
• what to look for when buying wood for carving
• why wood may crack or split and how to minimize it
• what to look for when buying carving tools
• the different types of sharpening stones and their characteristics
• how to sharpen your carving tools
• how to use your carving tools safely
• how to develop an idea into a finished carving
• techniques to finish a carving
I’ve also included 10 projects, each one specially selected to help you become proficient with your carving tools and expand your knowledge of how to carve wood.
Working with wood as a medium, and carving in particular, requires only a few tools to get started, and you can create an unlimited number of things within this art form. I find it totally relaxing and gratifying to see a piece of wood come alive with each chip I remove. Carving is a very satisfying and fulfilling part of my life; I hope it can be a part of yours.
—Everett Ellenwood
THE WOODCARVER
by Everett Ellenwood
I saw this piece of wood one day
When I picked it up it seemed to say
There’s something hiding inside of me
Remove some chips and you will see
I looked to see what I might find
And soon an image came to mind
My task was now to set it free
What’s hidden in this piece of tree
With loving care each cut was made
Wood peeled off with a sharp-edged blade
And as each chip fell to the floor
I could see the object more and more
By one final cut it was set free
My work of art for all to see
This piece of wood which would just lay
And see its body soon decay
Was now transformed and given life
With careful cuts of gouge and knife
By carving something from this tree
It lives again because of me
Chapter One
1 A HISTORY OF WOODCARVING
Woodcarving is one of the oldest developed skills known.
Studying the past can do more than inspire and show you some of the different possibilities; it can also add value to your work by providing a context for it. Whether you eventually fit into the community of caricature carvers or create techniques and works that parallel or advance those of furniture carvers, knowing the history of carving can bring self-satisfaction and a sense of worth, especially if you ever decide to sell your work.
As you will see here, woodcarving is a common thread that has flowed through every nation and culture since the beginning of mankind. No country in the world is without a history of carving in one form or another; it is one of the oldest developed skills. Carving also has a presence in every era. In tough times, men decorated practical objects; during wealthy times, they created more luxurious carved items. The availability and workability of wood—for practical and indulgent purposes—helped woodcarving gain its place in history.
WOODCARVING’S BEGINNINGS
Some of the earliest examples of woodcarving include everyday items found in China that were crafted with simple stone tools, fine wooden hunting spears found in Germany, and a wooden club and digging sticks found in Africa. All of these wooden articles trace carving back to the New Stone Age (about 9000 BCE to 7000 BCE). Even though writings indicate woodcarving’s presence prior to the New Stone Age, any actual examples do not exist because of wood’s susceptibility to the elements.
Although woodcarving was practiced in all parts of the ancient world, ancient Egyptian works provide us with some of the best examples and have survived because of Egypt’s arid climate. Of particular interest is the focus on figure, furniture, and relief carving. Numerous tombs have been excavated, yielding many examples of human and animal mummy cases with likenesses and figures carved on them and their lids. Detailed intaglio wooden molds, used to impress patterns into dough, have also been found. Additionally, expeditions have unearthed wooden furniture with folding seats, similar to modern campstools, and chairs with legs terminating in the carved heads or feet of animals. One of the oldest toys, a little carved boat, was found in a child’s tomb there, and excavations have uncovered seafaring wooden vessels with carved human and animal figureheads dating back before 3000 BCE.
An amazing example of Egyptian woodcarving that withstood the test of time is a 35″ × 7″ (91.4 × 17.8cm) lifelike statue, most of which was carved from a solid block of sycamore around 2500 BCE. Wood was not plentiful in Egypt, and sycamore, so scarce that it was considered sacred, was the only tree suitable for carving. The statue immortalized Ka-Aper, a priest who recited prayers for deceased kings (see photo on here).
In 1860 CE, the tomb of Hesy-ra, the royal physician of ancient Egypt, was opened to reveal yet another tribute to woodcarving’s past. Eleven wooden relief-carved panels, each measuring two feet high, were discovered. These exquisite low relief panels may have been carved around 2500 BCE.
While the Bronze Age (3000 BCE to 1300 BCE) saw the creation of functional carved items, such as coffins found in Germany and Denmark, carvers also worked in figure, incised, and relief carving. In Germany, fine wooden animal statues in bas-relief were found. In southwest China, archaeologists uncovered a painted woodcarving of a head, which measures 31½″ (80cm) long.
In Norway, the Oseberg ship, dating back to 800 BCE, is one of the prime examples of Iron Age (1300 BCE to 300 BCE) woodcarving. The Oseberg is one of only two Viking ships found from this era and is believed by some to be the burial ship of the Viking queen Åsa. Built of oak, the ship measures 70 feet long by 16 feet wide by 5 feet deep and was filled with items for the buried woman to use in the afterlife, such as a wooden cart, bedposts, and rudimentary farming implements.
Carved relief depicting a knight and two figures from a wagon found at Oseberg, Norway. The ninth-century woodcarving is on display at the Viking Ship Museum in Oslo, Norway.
WOODCARVING IN THE COMMON ERA
Few examples exist of very early Common Era carvings, but it’s clear that woodcarving served many of the same purposes it does today. Dating back to the fifth century, panels found in a Roman basilica and adorned with figures and designs provide an excellent example of the religious carving of the time. In northern Canada, a Dorset culture mask from 500 CE to 1000 CE was excavated from the permanently frozen Arctic soil. This painted, life-size mask was carved from driftwood. Culturists think the mask was probably worn in rituals for curing the sick, controlling the weather, or influencing the hunt.
Religious devotion and extensive carved detail marked the art of the Gothic period (1200 CE to 1450 CE). Many of the religious woodcarvings of Europe, including panels, choir stalls, and crucifixes, were executed with proportions and detail that have never been paralleled. Some scholars speculate that the heightened religious devotion of the time spawned the extreme attention to detail. Craftsmen carved not just for carving’s sake; they carved to glorify God and religious ideals. During this time, multitudes of apprentice carvers throughout Europe, Scandinavia, and the Far East worked under the watchful eyes of master carvers.
Because the transition from the Gothic period to the Renaissance (the fourteenth to the seventeenth century) happened gradually and because their spans overlap, it is useful to look at the characteristics of both periods together. Foliage designs were prevalent in both periods, although Gothic artists did not use the scroll design and avoided the repetition of details, which Renaissance artists used to maintain balance and symmetry. As the Renaissance neared, foliage became more realistic, and carvers favored the vine over traditional foliage.
The figurehead of a Viking longship found at Oseberg Norway. From the ninth century, the figurehead is on display at the Viking Ship Museum in Oslo, Norway.
Renaissance and Gothic artists both ornamented many features of the church. Relief-carved foliage and figures appeared in many places, including coves, bosses, ribs, and other architectural elements; roofs; pulpits; rood screens, which separated the clergy from the laity; misericords; and seats. More than just carved with decorative foliage, seats in particular included “green men”—faces in, or often spewing, foliage. Piercing and undercutting techniques were employed to create shadows and realism. Carving in the round also had its place. Baptismal font tops or bench ends were shaped into doves, representing the Holy Spirit, or angels, and life-size carved figures of the Virgin Mary or the Lord also appeared in many churches. Doors and windows were adorned with rosettes or other geometric patterns that resemble some of today’s chip carving. Many carvings of all varieties were beautifully colored through painting.
A carved wooden statue of Ka-Aper, known as Sheikh el-Beled, a headman of his village, from his mastaba tomb in North Saqqara, Old Kingdom. The eyes in the statue were made from rock crystal rimmed with copper. The sycamore carving, which was lifesize, comes from the Egyptian Fifth Dynasty. The piece is on display at the Egyptian National Museum in Cairo, Egypt.
Not reserved for churches alone, foliage and geometric designs were also common in the home on mantelpieces and cabinets. Because the fireplace mantel was the focus of a room, it was exceptionally ornate and could include scrollwork, pilasters with capitals, coats of arms, and figures. Chests and staircases both often displayed coats of arms or other heraldic images. Solid-backed chairs received low relief carvings, and table legs were sometimes decorated with acanthus designs. During the Renaissance, house fronts provided a large canvas for the carver, and animals and acanthus leaves were often used.
During this same time, Arabic craftsmen carved many of the same motifs. Architectural elements and screens of complicated joinery were decorated with geometric designs, scrollwork, intricate interlacing patterns, foliage, and sometimes animals and figures in low relief. In places such as Persia, spoons, boxes, and other small items were embellished with low relief patterns or designs that resembled chip carving patterns.
The Reformation dealt a damaging blow to European woodcarving in 1548 CE. During the reign of Edward VI, the council ordered all rood screens and images of saints removed from churches and destroyed. Almost all of the beautifully carved roods in medieval England were removed or defaced. The only religious carving during this era was done by monks in the secure confines of monasteries. After stabilization of Puritan rule, this edict was reversed. By 1556, almost all churches had altars, images, and rood screens once again, but many exhibited defacement suffered during the Reformation.
Woodcarving continued to gain momentum in the seventeenth century. Deep relief carvings became popular, with vines as a key element. Chip carving and acanthus designs were commonly used for decorating buildings, furniture, and household items. Figurework was also widespread.
In England, Grinling Gibbons, one of the most famous decorative woodcarvers of all time, carved for some of England’s kings and brought decorative carving to new heights. His work still decorates several English churches, most notably Saint Paul’s Cathedral, and aristocratic mansions, including Windsor Castle. Best known for his technical skills, Gibbons’ specialties included foliage, fruit, flowers, birds, and an almost endless array of objects intertwined with drapery, all carved in lime wood up to a foot thick. Flower petals, leaves, and feathers were undercut and stood off the surface in unbelievable detail. The delicacy of his carving has arguably never been surpassed since. Gibbons’ work had an enormous influence on the interior design and décor of this period, along with having a profound influence on furniture craftsmen, such as Thomas Chippendale. Although Chippendale did not carve the variety of motifs that Gibbons did, scrolls, shells, ribbons, and claw and ball feet, all done in very fine relief, are abundant in Chippendale’s work.
WOODCARVING IN NORTH AMERICA
The early 1600s saw the beginning of emigration from Europe to North America, which continued for more than three centuries. Early settlers carved primarily utilitarian items, such as spoons, wooden bowls, and yokes. Parts of wagons, such as spokes for wheels, were also carved. These early settlers were more concerned with survival than making decorative items.
As migration grew from a few hundred to millions of immigrants in the eighteenth century, some of the best carvers from Europe and Scandinavian countries moved to North America. This influx of talent had a tremendous influence on the newly discovered American continent, where immigrants decorated their homes and churches with carvings and architectural moldings.
The coat of arms of the sixth Duke of Somerset was carved in lime wood by Grinling Gibbons (1648–1721). The carving was part of the ornamentation at Petworth House in Sussex, United Kingdom.
As more and more businesses developed, carvers were in great demand to create wooden signs to advertise shops. Because so many immigrants couldn’t read English, signs displayed carved objects instead of words to bridge the language barrier. Pubs were often named after eclectically grouped but easily illustrated elements. The Bell-in-Hand Tavern, established in Boston in 1795 by James Wilson, featured a town crier on its sign. Other popular examples of illustrating a product rather than carving out letters were cigar store Indians in front of tobacconist shops. (Native American Indians were equated with tobacco because they introduced the early explorers to it.) Yet more examples of symbolic carving include the carved barber pole, a key for the locksmith, scissors for the tailor, a shoe for the cobbler, a hat for the haberdasher, and so on. Some signs were so well designed and crafted that they are highly collectible if still around today.
A high relief carving from the fifteenth or sixteenth century, Altarpiece of the Passion was carved by Veit Stoss (1445–1533).
Before the American Revolutionary War, many furniture makers employed skilled carvers to produce Chippendale-style furniture with interlaced splat backs and square chamfered legs. The chair is owned by Mallet & Son Antiques Ltd., London, United Kingdom.
Furniture makers were also in great demand. Records dating from before the American Revolution show at least 150 cabinetmakers in Boston and an equal number in Philadelphia. Craftsmen in some southern states also made fine furniture, especially from cherry and mahogany. Many of these cabinetmakers employed several skilled carvers to produce Chippendale-style furniture with highly decorated hand-carved cabriole legs, backs of chairs, drawer fronts, and bonnets across the tops of chests and highboy furniture.
The use of decorative hand carving declined in the nineteenth century, except in works made for churches and mosques. However, fun and relaxing projects known as whimsies emerged. Duplicating machines, capable of making large quantities of one item, began to replace carvers. Additionally, the price of labor increased, so only the wealthy could afford to beautify their homes with the carvings of skilled craftsmen.
The Depression era (1930s to mid-1940s) significantly impacted all skills, including carving. In 1935, President Franklin D. Roosevelt spearheaded a program called the Federal Arts Project (FAP), meant to establish community art centers to educate children and adults in the arts, to provide artwork for nonfederal buildings, and to create jobs for unemployed artists on relief rolls. Through this program, woodworking and whittling classes for men and boys were operated in settlement houses, YMCAs, schools, museums, and recreation halls. The FAP was the largest employer of artists during the Depression, giving jobs to more than 5,000 artists. Today, many of the artists’ works are displayed in post offices and public buildings throughout the United States. In addition to providing jobs, the program also created a new awareness of American art and exposed thousands of would-be carvers to woodworking.
The Second World War gave way to modern, straight-lined architecture in buildings and furniture; very few decorative accents were used. Because of this trend, and because people were focused on the war effort, carving faced another decline.
When the war ended and the world economy began to grow, people could devote more free time to hobbies. Carving witnessed another revival. Today, thousands of people throughout the world enjoy this beautiful art form. With the retirement of the baby boomers, who will be looking for hobbies to fill their free time, woodcarving in the United States may continue to grow in popularity. And with all of the different types of woodcarving, artists and hobbyists alike will have plenty of options to explore.
This painted totem pole was carved by a Native American tribe from the Pacific Northwest. The pole is on display at the Horniman Museum in London, United Kingdom.
A shop sign for a shoemaker in France depicting St. Crispin at his workbench. The sixteenth-century French school carving is displayed at Musee de la Ville de Paris, Musee Carnavalet, in Paris, France.
Chapter Two
2 TYPES OF CARVINGS
Once you begin carving, only your imagination will limit what you can create.
If you’ve read Chapter 1, “A History of Woodcarving,” you probably noticed terms such as relief carving, chip carving, and architectural carving that describe some varieties of carving throughout history. Just as most arts and crafts have different styles—impressionism and cubism, for example, are styles of painting—carving also has different types. Within each specialty, you will find an unlimited number of things to carve. For instance, realistic carvings could encompass everything from birds to fish to human busts, all in exquisite, true-to-life detail.
How do you decide what to carve? If you feel overwhelmed and aren’t sure where to begin, start with what inspires you. Do you want to create something usable for your home? Try a utilitarian carving project. A simple spoon is ideal. Do you want to capture the human figure in wood? Make a bust your first carving. Do you want to memorialize a friend’s favorite pet? Create a realistic carving of a dog or a cat.
In the following section, I’ll show you examples of each style so you can recognize the types and their characteristics. If you’re a new carver, try as many varieties as possible. After carving for a period of time, you’ll probably find that you prefer certain types to others, but don’t be afraid to experiment with the different styles at first.
TWO-DIMENSIONAL CARVING
Two-dimensional carving refers to carving done only on the surface of a flat piece of wood. Don’t be fooled, though. Two-dimensional carving can range from relatively simple, like incised carving, to more difficult, like chip carving and relief carving.
INCISED CARVING
In incised carving, only the outline of an object is carved into the wood; the rest of the wood is normally left untouched. Cuts are made with V-tools, veiners, or knives of varying sizes, and deeper or wider cuts create highlights. Incised carving is used on furniture, for wood block printing, and for carving lettering into wood.
Tools: Tools capable of outlining cuts
Uses: Furniture decorating, carvings for wood block printing, letter carving
A dolphin exquisitely done in incised carving.
Incised Carving. The piece of basswood board was first painted black and then carved using a V-tool, making the outlines easy to see.
CHIP CARVING
One of the oldest forms of decorative woodcarving, chip carving has been used throughout the world to decorate homes, household items, and vessels. Chip carvers remove selected chips of wood to create patterns. The patterns are often repetitive and can have free-form chips, such as curves, or geometric chips, such as triangles.
Tools: Chip carving knives
Uses: Decorating items of all types
Chip Carving. Notice the characteristic geometric patterns in the borders and main designs of this chip carved box. A key to its beauty is the neat and even removal of chips.
Small Basswood Giftbox, with the pattern and carving by Todd Moor, measures 3″ × 5″ (7.6 × 12.7cm). The chip carving features a flower motif on the sides and is mirror-imaged on the top.
Basswood Bowl, a carving by Wayne Boniface of Kitchener, Ontario, is an excellent example of chip carving.
INTAGLIO
In intaglio (pronounced in-TALL-yo), a recess is carved, and the subject is carved into the recess. The surrounding surface is normally left untouched. This style of carving is effectively negative relief carving. Typically, intaglio is used to make designs in butter molds, candy molds, chair backs, and other furniture. Albrecht Dürer, who created the famous Hands of the Apostle, is one of the most renowned intaglio artists.
Tools: Various carving tools, especially long bent and short bent
Uses: Molds, furniture decorating, printmaking
Intaglio. An excellent example of negative relief carving, this candy mold from the Philippines shows the depth of the main image and the untouched surrounding wood.
Butter molds carved by Gene Wilson of Belleville, Illinois. The molds were used to identify who had made the butter.
Another carving by Gene Wilson—his largest cookie mold—of King William III. Carved from beech, the mold measures 5½″ × 12″ (14 × 30.5cm).
RELIEF CARVING
In relief carving, wood is carved away around an object to make it look as if the object is standing off the surface of the wood. This variety of carving uses techniques such as undercutting (cutting under an element to hide the line where the element meets the background) to create shadows and depth. Relief carving can be further divided into three categories:
In low relief, or bas-relief, only a small amount of wood is relieved from around the object, which extends off the background. These carvings normally have no undercuts but can be very detailed.
High relief is basically the same as low relief, except more wood is removed around the object and undercuts are made to create more shadows. Normally, at least half the object’s circumference projects off the wood. These differences make high relief more dramatic than low relief.
In pierced relief, areas of the carving are completely removed so you can see through those areas.
Usually, finished pieces of all three types are viewed only from the front. As you probably remember from Chapter 1, “A History of Woodcarving,” relief carving traces back to ancient Egypt and has been used throughout time to decorate homes, furniture, jewelry boxes, and household items.
Tools: Knives and other carving tools, especially gouges, V-tools, and veiners
Uses: Decorating items of all types
Low Relief Carving. Notice how little wood I removed from the surface of this low relief carving. The iris flower is raised no more than ⅛″ (3.2mm) at any place on the carving.
High Relief Carving. This highly detailed high relief carving is an antique from Europe and more than 100 years old. Carved in linden wood, the panel measures 11½″ × 20″ (29.2 × 50.8cm). Notice how the deeper cuts of high relief create very dark shadows.
Pierced Relief Carving. The open spaces between the horses, where I removed the wood completely, make this a pierced relief carving.
ARCHITECTURAL CARVING
In this style of carving, designs are carved in, or attached to, items such as furniture or architectural elements. Acanthus carving is one of the most popular specialties of architectural carving and can also fall under the category of relief carving. The ornate acanthus style incorporates concave and convex cuts to make flowing, stylized designs based on the acanthus plant. The Greeks and Romans used the acanthus in Gothic art and architecture; it carried into the Renaissance, and it also became very popular in the Scandinavian countries. It is still recognized as a Scandinavian style of carving today. Acanthus carving is used on furniture, on picture frames, and architecturally as a decorative accent.
Tools: Gouges, veiners, and V-tools of various sizes
Uses: Furniture and architectural decoration
Architectural Carving. This 32″ × 4½″ (81.3 × 11.4cm) cherry piece adorns the front of a fireplace mantel. The scroll-like form is typical in architectural carving.
Acanthus Carving. In this acanthus carving done in butternut, you can see how the leaves flow in convex and concave shapes.
An excellent example of rustic architectural carving by Greg Young of Germantown, Wisconsin.
BARK CARVING
Bark for carving, such as cottonwood bark, is thick and dense. Every piece of bark has a unique size and shape, so each carving conforms to an individual piece. Bark carvings are typically carved and viewed from only one side; however, they can sometimes be partially hollowed out. Though its medium is the first thing that sets it apart, bark carving also has some distinct techniques because it carves differently than solid wood. Fantasy buildings and wood spirits are two popular items carved in bark.
Tools: Knives and other carving tools
Uses: Fantasy decorative items
Untitled Wood Spirit, 4″ × 6″ × 23″ (10.2 × 15.2 × 58.4cm). Carved from plains cottonwood bark with lacquer and wax finish.
Bark Carving. 2″ × 3″ × 9″ (5.1 × 7.6 × 22.9cm) carving from plains cottonwood bark. The finished piece is finished with spray satin finish varnish.
CARVING IN THE ROUND
Any three-dimensional carving where wood is removed all around the subject, giving the work height, width, and depth, is called carving in the round. Carvings in this category can be viewed from any angle and have a subject that is visible from any side.
REALISTIC CARVING
Realistic carvings present a subject as true to life as possible. Carvers of this style rely heavily on photographs and direct observation of their subjects. Every scale, feather barb, or wrinkle is recreated in wood. Painting is equally detailed.
Amazingly detailed, bird carvings range in size from the smallest hummingbird to the largest goose.
Rarely done as life-size carvings, animal carvings are often miniature versions of the real creatures. No details, from the way the fur lies to the highlights in the eye, are overlooked.
Fish carvings vary in size—smaller fish, such as freshwater trout, are carved life size; larger game fish, sharks, and dolphins are often carved in miniature. Special tools exist for getting each and every scale correct.
Human figure carvings include life-size sculptures, busts, and miniature figures. Carvers who specialize in this subcategory work hard to capture facial expressions and body language.
Tools: Knives, gouges, veiners, V-tools, micro tools, and sometimes power tools
Uses: Sculptures or decorative items
Realistic Carving. This bust of a male figure in basswood shows the human figure variety of realistic carving. I used a 3/8″ (10mm) veiner and a V-tool to detail the beard and cap. I sanded only the face to create the smooth appearance of skin.
Cedar Waxwing, by Lori Corbett, is a fine example of realistic carving.
STYLIZED CARVING
Stylized carvings emphasize form over detail; these carvings represent a subject without recreating it exactly. Normally, stylized carvings are sanded to give smooth, flowing lines, and many works are left unpainted so the natural wood grain shows in the finished piece.
Tools: Knives and other carving tools
Uses: Sculptures or decorative items
An outstanding example of realistic carving: The Sentinel by Ralph Mueller. The great blue heron is carved in cedar.
Stylized Carving. The smooth lines and natural finish of this 12″ (30.5cm)-high stylized cat are characteristic of most stylized carvings. You’ll also notice that the majority of the details have been left out.
CARICATURE CARVING
A very popular type of carving, caricature deliberately exaggerates a familiar subject’s distinctive features or peculiarities. Emil Janel (1897–1981), one of the masters of caricature carving, referred to it as “exaggerated realism.” Artists in European countries carved in caricature to some degree, but Sweden had the most profound and lasting effect on this style of carving. Most caricature carvings are done in basswood.
Tools: Knives and other carving tools
Uses: Decorative figures, sometimes bottle stoppers
Caricature Carving. Like most caricature carvings, this golfer has exaggerated features, such as his hands and nose, but he still has elements of realism. I carved the golfer in a class given by one of the premier caricature carvers, Marv Kaisersat.
Pair of Pirate’s Parrots, by artist Joe You, is an excellent example of caricature carving.
FLAT-PLANE CARVING
Flat-plane carving, native to the Scandinavian countries, has become popular in recent years. It features simple, controlled knife cuts, which leave flat surfaces on the finished carving. Typical subjects are people and animals. Flat-plane carving was almost extinct but was revived primarily because of one person: Harley Refsal. Refsal spent an extensive period of time in Scandinavia, interviewing elderly carvers and studying this dying art form. He wrote books documenting the style and has traveled around the world demonstrating and teaching.
Tools: Knives
Uses: Decorative figures
Flat-Plane Carving. Flat-plane carvings are easily recognized by the flat knife cuts left on the surface of the finished carving. The bright coloring is also characteristic of this style.
Scandinavian Kick Sled by Harley Refsal. From the collection of Walter and Marcia Sanders, Jamestown, North Dakota.
Oscar, by Harley Refsal, is an example of flat-plane carving.
UTILITARIAN CARVING
Items intended to be useful and practical, such as spoons, bowls, and drawer pulls, are part of utilitarian carving. These carvings can include other styles; items can be created as stylized carvings, with natural finishes and few details, or carved in the realistic style, with highly detailed, decorative markings and beautiful painted colors.
Tools: Knives and other carving tools
Uses: Functional items that also can be decorative
Utilitarian Carving. Carved spoons and bowls are some of the most popular utilitarian items.
Utilitarian carvings can be both beautiful and functional. I carved these drawer pulls from cherry wood.
This oak leaf candy dish carved from walnut is a good example of a utilitarian carving that can also be used as a decorative item. It is 5½″ × 6½″ (14 × 16.5cm).
WHIMSIES
Nonfunctional, primarily entertaining types of carvings are called whimsies. Most often, they feature interlocking parts of an object that is carved from one piece of wood. Some of these carvings can be very intricate and complicated.
Tools: Primarily carving knives
Uses: Toys
Whimsies. Items such as this wooden chain with a ball in a birdcage and these jointed pliers are whimsies that can be toys, puzzles, or games.
Whimsies can be any size, such as this incredible chain carved from a matchstick.
With its trapped ball, this carving is another excellent example of a whimsy.
Chapter Three
3WOOD FOR CARVING
The more you know about wood, the more effectively you can use it.
Now that you’ve gotten a good look at the different types of carving and hopefully found one that sparks your imagination, let’s take a look at the medium you’ll be working in: wood. You’ll want to learn as much as you can about wood before you actually start because the more you know about wood, the more effectively you’ll be able to use it.
Selecting the right wood involves much more than just thinking about the finished product. To get the most out of the medium, you’ll also want to understand the makeup of wood and why it reacts to the environment and to carving tools the way it does. In this chapter, we’ll take a look at the various characteristics that determine how carvers use a tree for carving.
ANATOMY OF A TREE
A tree consists of three primary components: the trunk, the roots, and the crown. Each part can provide different types of carving wood. The way a tree grows and the health of that growth affect the quality of the carving wood.
TRUNK
Also called the bole, the trunk connects the roots to the crown and transports food to the roots and food and water throughout the trunk. The trunk is usually considered the portion of the tree without limbs. Because it has the least tendency to crack or split, wood from the trunk is generally the most stable wood for carving.
The bark of a tree’s trunk acts as a protective skin, keeping moisture and gases contained in the tree and resisting life-threatening attacks by insects, microorganisms, and weather. Bark consists of living and dead cells. The tree adds new bark cells each year to replace the outside bark, or dead cells, which will crack. If no new bark cells are made, the cracked area will expose the wood to the elements. Bark can be carved by itself if it has considerable thickness, or it can be carved through to expose the wood beneath.
ROOTS
The roots grow into the ground and anchor the tree, keeping it erect. They also absorb water and minerals from the ground, which are transported through strawlike vessels up through the trunk, limbs, branches, and twigs, and finally out to the leaves. While many carvers enjoy working with roots, these parts of the tree aren’t a good medium for beginning carvers. Roots are embedded with dirt, which dulls carving tools quickly. Also, many roots have a twisted grain, which is very difficult to carve.
CROWN
The limbs, branches, twigs, and leaves form the crown of the tree. Leafy branches offer habitat for many animals, shade from the sun, protection from the elements, and beauty to the landscape in all four seasons. Food, called sap, is produced in the leaves through the process of photosynthesis. Limbs, branches, and twigs can all provide good carving wood. Even small twigs can make great material for carving, especially whittling projects.
INTERNAL GROWTH
The trunk, roots, and crown are the tree’s primary visible components, but studying its internal characteristics gives us an even better understanding of the tree’s structure. Looking into the cross section of a tree is the best way to see its internal characteristics; understanding what you’re seeing helps you avoid costly and time-consuming carving errors.
The pith isn’t usually included when wood is cut into blanks, but if it is, orient the wood so the pith is less noticeable on your finished carving. On this piece, the pith is located toward the back of the carving.
PITH
At the tree’s center is the pith, the oldest part of the tree. The pith, together with the tree’s first few annual rings, is what’s called juvenile wood. Juvenile wood also forms where the initial growth of branches begins. As the tree grows, the pith usually dries out, becomes softer, and turns darker than the rest of the wood. The pith area also has a tendency to crack.
Because of these characteristics, avoid carving pieces of wood that include the pith. If you do carve wood with the pith intact, design the piece so the pith doesn’t show from the viewing angle.
Cross section of butternut tree 9″ (22.8cm) diameter.
ANNUAL RINGS
Radiating out from the pith are the annual rings. Each ring has two components: early wood (also called spring wood) and late wood (also called summer wood). Early wood grows at the beginning of the tree’s growing season, the tree’s period of active growth. This wood is made of large cells with thin walls. As the season progresses, the growth activity slows down, and the cells become smaller with thicker walls; this is the late wood. Late wood is normally darker than early wood because it has a higher concentration of cellulose. You will normally see one annual ring for each year of the tree’s growth. The rings can vary in width because of weather and other conditions during the growing season.
In a tree’s limbs and branches, the annual rings can reflect stressful or irregular growth. Because limbs and branches hang parallel to the ground for their entire life, some develop reaction wood, which grows unevenly to help support the branch. Blocks or pieces with reaction wood have a significantly higher chance of cracking or splitting, no matter what precautions you take. To check if the wood you want to carve has reaction wood, look for a pith that’s off-center. This phenomenon also will occur in trees that are leaning.
Studying the annual rings also helps us see how the rings appear as grain lines when wood is cut from a tree. Here are some common terms:
Plainsawn (sometimes called flatsawn) wood has arches on the face (the long surface), and curved parts of the annual rings are visible on the end.
Quartersawn boards have straight grain lines on the face and ends.
Riftsawn wood has slightly wavy grain on the face and slightly bent lines on the end.
Reaction Wood. A pith and annual rings that are off-center can indicate reaction wood, like the type found in this tree limb, most likely formed as the limb was drooping toward the ground. This cross section also shows the remnants of a knot and an encased internal flaw.
CAMBIUM LAYER
The annual rings progress out to the cambium layer, located between the bark and the wood. Cell division takes place here, and when the cells divide, they become either wood cells or bark cells. Normally, about 15 wood cells develop for every bark cell. The wood cells are primarily responsible for the tree’s increase in diameter.
Knowing when the cambium layer is active helps you choose wood that has been cut at the best times. If you cut a tree in the spring or summer, the cambium layer feels slippery and slimy because cell division is taking place. During this period, the bark and wood are loosely bonded together, so when the wood is dried, the bark may fall off. During the fall and winter, when almost no cell division takes place, the bark and wood are tightly bonded together. It’s imperative that a tree is cut in the fall or winter if you want the bark to remain intact.
Harvesting a tree during the fall or winter, when the bark and the wood beneath are tightly bonded, allows you to incorporate bark into the finished design.
The sapwood, which delivers nutrients to the canopy, is usually lighter than the heartwood, which no longer carries food. Most carvings are done in heartwood, but some carvers prefer to include the varying colors of heartwood and sapwood.
HEARTWOOD AND SAPWOOD
As you read earlier in this chapter, the trunk transports food to the roots and food and water throughout the trunk. Once a tree grows large enough, only a portion of the trunk is required to supply food and water. This active portion consists of the outer annual rings and is called the sapwood.
The vessels of the center rings, no longer needed to supply food and water, fill with extractives, minerals, and tannins. This section becomes the heartwood. Instead of conducting food and water throughout the tree, the heartwood gives strength, essentially becoming the tree’s vertebrae.
With the addition of new sapwood each year, the tree grows in diameter. The heartwood also expands because each tree requires only a certain number of sapwood rings. This number varies from one tree species to another.
In some species, you will see a distinct color contrast between the heartwood and sapwood. Other species, like basswood, show almost no difference between the two parts. Both heartwood and sapwood are ideal for woodcarving, but to maintain the same basic color, most carvings are done using the heartwood of the tree.
There is little difference between the colors of the heartwood and the sapwood in basswood.
VESSELS
Under a microscope, the cross section of any tree looks like the end of a large bundle of straws. These straws are the vessels that carry water and minerals from the roots to the crown. (In softwoods, or coniferous trees, these are called fibers. In hardwoods, or deciduous trees, fibers make up the walls of the vessels.)
Most transfer of water and nutrients occurs up and down in a tree. However, some transfer of nutrients occurs across the tree from the phloem, the inner bark, to the pith through vessels called medullary rays. The rays transport food (sap) horizontally across the tree and also act as food storage areas.
Understanding the microscopic vessels along with the annual rings is important for working with grain and figure. Though many people use the terms interchangeably, grain and figure are actually different. Grain is a broader term that refers to the arrangement of vessels in wood. Straight grain, spiral grain, coarse grain, and fine grain all refer to what we see when we look at a piece of wood. Earlier, we touched on grain when describing how boards are cut from a tree (see Annual Rings on here).
I cut out an area and inserted straws to simulate how it would look if this area were magnified.
Under a high-powered microscope, the vessels that run up and down a tree’s trunk are even more visible.
When a carving tool travels between vessels instead of across them, the tool tends to slip between the vessels, causing the vessels to split apart from one another; this is called “splitting with the grain.” Always cut across the vessels, even if you have to change the position of the wood or the grip on your tool, so you never give the tool an opportunity to go between the vessels.


