
Erhalten Sie Zugang zu diesem und mehr als 300000 Büchern ab EUR 5,99 monatlich.
- Herausgeber: Happy Fox Books
- Kategorie: Für Kinder und Jugendliche
- Sprache: Englisch
- Veröffentlichungsjahr: 2020
Inspired by the classic crafts that you made as a kid, Vacation Crafting provides more than 150 child-friendly projects for girls and boys ages 4 to 12. Kids will learn to make friendship bracelets, woven potholders, pony bead animals, plastic lanyards, wire art, rubber band jewelry, foam crafts, scoubidou, paracord gear, and more. Using inexpensive, readily available craft supplies and simple enough to take along to the mountains or beach, it's the perfect solution for any family vacation! This big book also provides a sure way to liven up parties, scout meetings, rainy days, camp activities, and after-school activities. Color photos, supply lists, easy-to-follow instructions, and full-size patterns make it easy to supervise the fun.
Sie lesen das E-Book in den Legimi-Apps auf:
Seitenzahl: 140
Das E-Book (TTS) können Sie hören im Abo „Legimi Premium” in Legimi-Apps auf:
Ähnliche


VACATIONCRAFTING
VACATIONCRAFTING
150+ SUMMER CAMP PROJECTS FORBOYS & GIRLS TO MAKE
Suzanne McNeill
CONTENTS
LOOK WHAT YOU CAN MAKE!
Introduction
Materials and Skills
Index
About the Contributors
Foam
Seashells
String
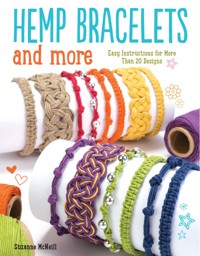
Hemp
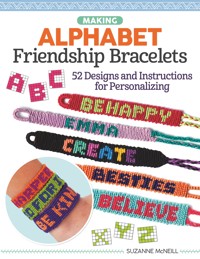
Friendship Bracelets
Plastic Lace
Rubber Bands
Pony Beads
Fusible Beads
Tie-Dye
Duct Tape
FOAM
SEASHELLS
STRING
HEMP
FRIENDSHIP BRACELETS
PLASTIC LACE
RUBBER BANDS
PONY BEADS
FUSIBLE BEADS
TIE-DYE
DUCT TAPE
INTRODUCTION
ARE YOU READY FOR A CRAFTY VACATION?
Getting away from it all doesn’t have to mean getting away from entertaining craft projects! Even during the most exciting school breaks, you sometimes have an hour—or a whole afternoon—with nothing to do. The fast, fun crafts in this book are perfect whether you’re enjoying a summer afternoon at the kitchen table or you’re away from home without all your usual art supplies. You only need easy-to-pack or inexpensive materials available almost anywhere you’ll be vacationing. These crafts can fill your downtime with inspiration and enjoyment for your entire family. And if you only have an hour free here and there, don’t worry—most of these projects work just fine if you start them, put them down, and pick them up again later in the day.
So, let’s get started! Use craft foam, seashells, or pretty string to make decorations for your room. Deck yourself out in hemp jewelry and make friendship bracelets for your besties. Practice your plastic lace skills on lanyards and your rubber band skills on cell phone cases. Make some pony bead animals and try your hand at tie-dye. From duct tape to fusible beads, there’s something here for everyone. It’s time for vacation—and time to get crafty!
MATERIALS AND SKILLS
A QUICK LOOK AT WHAT YOU MIGHT NEED!
There is such a variety of projects in this book that it would be impossible to list all the materials, tools, and skills you’d need for all of them in one place. Luckily for you, virtually every item to make every project in this book is available at large craft stores. If you’re at home, you’ll probably have some of the basics like scissors and glue on hand already. But if you’re going on a trip, you’ll want to make sure you look at the specific projects you want to make before you go so that you can bring along the materials and tools you’ll need. Some projects do require quite particular materials or tools that you might have trouble finding at the beach or deep in the woods! Read on to get an idea of the general materials you’ll need for each of the sections in this book.
FOAM: Foam crafts are all about what you add to the foam and what you add the foam to! You’ll need craft foam, which is available in a ton of colors, and then miscellaneous materials that can usually all be found at the craft store, like wood craft sticks, wiggle eyes, glitter glue, chenille stems, and more. Technique-wise, it’s usually as simple as cutting and gluing!
SEASHELLS: You can either purchase shells or use shells you’ve collected yourself during a sandy day at the beach. Speaking of sandy, be sure to wipe or wash your shells well before you start crafting with them to make sure the adhesive stays stuck! Since shells can be heavy and textured, it’s best to use hot glue or a heavy-duty glue like E6000 to glue shell projects.
STRING: You can use embroidery floss and craft thread for a surprising number of crafts! From funky string art to classic dream catchers, you usually don’t need much more than some kind of base material like a wooden plaque or a plastic canvas to make string projects.
HEMP: Knots are what make hemp projects come together! In general, all you need is hemp and the knowledge of a few basic knots to create some magical jewelry. You can also incorporate beads of any stripe into a hemp project. Hemp can be a good project to take in the car. See the notes for friendship bracelets, below, for more of what you might need.
Almost every project in this book requires a pair of scissors, a ruler, or both. So make sure you don’t leave the house without them! (They’re not listed in the individual materials lists.)
FRIENDSHIP BRACELETS: For any friendship bracelet project, you just need two things: embroidery floss and something to hold the bracelet down while you work! This can be tape, a safety pin, a heavy stack of books, or even something sticking out from a surface in the car or on a desk that you can loop the bracelet around. Wherever you are, you are sure to be able to whip your thread out of your pocket and get knotting.
PLASTIC LACE: Much like making hemp and friendship bracelets, you basically only need plastic lace and something to hold your project down while you work. You may want to incorporate lanyard hooks or key rings when making some projects. All the projects in this book use the flat kind of plastic lace, not the round kind. You can experiment with the round kind if you want, but most of the projects will look quite different with round lace, and some may not really work.
RUBBER BANDS: To make the rubber band projects in this book, you’ll need one or two rubber band looms, such as a Rainbow Loom′, plus the hook that comes with the loom. To make your life easier, you probably will also want the little plastic clips that come with loom kits and rubber bands, though you can use other found materials like paper clips if you need to. Other than that, all you have to buy is a collection of cute little rubber bands in all your favorite colors!
PONY BEADS: You’ll be amazed at how quickly projects made with pony beads come together! For most pony bead projects, you’ll need some kind of cord, like plastic lace, hemp, yarn, elastic, or really anything. You’ll also often need glue.
FUSIBLE BEADS: There are many brands of fusible beads out there, such as Perler Beads®, but they all pretty much work the same way—use a hot iron to melt them together! You’ll need special plastic pegboards (in various shapes) to create and hold together the designs you make, plus protective ironing paper like parchment paper. Be careful or get help from an adult when using the hot iron. Tweezers can be helpful for picking up and placing beads, but aren’t essential.
TIE-DYE: Get ready to get messy with tie-dye projects! Besides the dye, water, buckets, and other materials, you’ll want to make sure you are wearing clothes that you don’t mind getting a bit stained, and you should probably grab some rubber or plastic gloves to avoid staining your hands, too. There’s a lot more info about materials in the tie-dye section.
DUCT TAPE: To get the most out of duct tape, you’ll need a cutting mat and a craft knife to make clean cuts and keep your duct tape sticky. Be careful or get help from an adult when using a craft knife. You can also use scissors to make many cuts.
FOAM
LADYBUG VISOR
Clever and cute, this ladybug will complete your super summer look.
MATERIALS
•4" (10cm)-wide red foam visor
•Black permanent marker
•1 black chenille stem
•2 wiggle eyes
•⅛" (0.3cm) hole punch
•Glue
1.Using a black marker, outline the visor edge and draw random circles. Fill in the circles.
2.Glue wiggle eyes in place. Draw eyelashes above the eyes.
3.Punch two holes 2½" (6.5cm) apart into the top rim of the visor. Bend a chenille stem into a U shape, poke both ends up through the holes from the underside to the topside, and curl the antenna ends with your fingers.
DAFFODILS VISOR
Keep the sun off of your face when you’re working in the flower garden.
MATERIALS
•4" (10cm)-wide white foam visor
•Yellow silk daffodils
•White mini brads
•Pushpin
1.Using a pushpin, poke 15 holes evenly along the top rim of the visor.
2.Attach a silk flower to each hole with a brad.
3.Open the legs of each brad on the underside of the visor to secure the flowers in place.
CATERPILLAR VISOR
This bright visor is easy to make, adorable, and will add a touch of whimsy to any outfit!
MATERIALS
•4" (10cm)-wide green foam visor
•2 green foam pom-poms
•Adhesive-backed foam sheets in red, green, and light green
•Green permanent marker
•1 red chenille stem
•3 lime green chenille stems
•2 wiggle eyes
•⅛" (0.3cm) hole punch
•Glitter glue
•Glue
1.Cut adhesive-backed foam sheets into the following ½" (1.5cm)-wide strips: three green, two light green, and two red. Trim them to size and adhere them to the visor.
2.Cut chenille stems to match each strip and adhere them in place.
3.Add a wavy line of glitter glue to some of the strips and let dry.
4.Glue eyes onto the visor. Draw eye details below the eyes with marker.
5.Punch two holes 2" (5cm) apart into the top rim of the visor. Bend a green chenille stem into a U shape and poke both ends up through the holes from the underside to the topside.
6.Push a foam pom-pom onto each end of the chenille stem and bend the stem to make the antennae curve.
FIRECRACKER HAT
This fits-any-size hat is just the thing to celebrate the 4th of July, Veteran’s Day, or any holiday that could use some sparkle and pizzazz. If you don’t live in the United States, adjust the colors and lettering to reflect your own country.
MATERIALS
•9" x 12" (23 x 30.5cm) foam sheets in red, white, and blue
•12" x 18" (30.5 x 45.5cm) foam sheet in black
•1" (2.5cm) foam glitter sticker letters
•3 gold metallic chenille stems
•3 glitter 1¼" (3cm) pom-poms
•3 wood 2½" (6.5cm) craft sticks
•Gold glitter dimensional paint
•Acrylic paint in red, white, and blue
•Paintbrush
1.Cut a candle out of red, white, and blue foam and slightly round the corners with scissors. Cut a star out of red and blue foam. Cut a strip of black foam that is 1¼" (3cm) wide and long enough to fit comfortably around the head of the wearer with a little bit of overlap.
2.Glue pom-poms onto the chenille stems, then glue the chenille stems onto the backs of the candles.
3.Paint one craft stick in each color. When dry, glue one stick to the back of each candle to act as a support.
4.Glue the ends of black headband strip together. Glue the firecrackers to the front of the headband. Press on the glitter letters. Outline the stars with gold glitter paint and glue them on the hat.
LIME FUN FRAME
Quick, easy, and fun, rub-ons provide endless possibilities for giving a frame its own unique style.
MATERIALS
•Lime foam frame
•Rub-on flower designs
•Blue and green adhesive-backed rhinestones
•28" (71cm) of green ribbon, ⅜" (1cm) wide
•⅛" (0.3cm) hole punch
1.Apply rub-on flowers as desired to the entire frame. Don’t be afraid to overlap some flowers!
2.Adhere rhinestones to the centers of the flowers.
3.Punch two holes near the top corners of the frame. Thread ribbon through the holes and tie a bow for hanging.
CATERPILLAR FRAME
Foam critters sparkle on this cute frame that is perfect for any fans of creepy-crawlies who love to explore forests and streams.
MATERIALS
•Blue foam frame
•White foam adhesive letters
•Green foam caterpillar
•Green foam dragonfly with blue foam details
•Opal and blue glitter glues
•Black, blue, and white permanent markers
•4" (10cm) of silver 22-gauge wire
•Wire cutters or old scissors
•Round-nose pliers
•Glue
1.Outline circles on the caterpillar body with marker, alternating white and blue. Draw a smile and antennae. Use glitter glue to accent the body. Glue the caterpillar to the frame.
2.Outline the white letters with blue marker and adhere them to the frame.
3.Cut the wire into two 2" (5cm) pieces. Make antennae by creating a spiral on one end of each wire using round-nose pliers. Poke the other ends directly into the dragonfly’s head. Add details to the dragonfly’s body, then glue it to the frame.
SHINY FISH
Sequins transform into sparkling fish scales on this clever project for kids who can’t get enough of marine motifs.
MATERIALS
•Teal fish foam shape or sheet
•Lime sequins
•Glue
•⅛" (0.3cm) hole punch
1.If you don’t have a pre-made fish shape, cut one out. Punch a hole for the eye.
2.Draw scalloped rows on the fish with glue and apply overlapping lime sequins while the glue is wet. Let dry.
SWIRLY DOLPHIN
You’ll have fun drawing the watery swirls on this majestic mammal.
MATERIALS
•Blue dolphin foam shape or sheet
•1 small wiggle eye
•Opal glitter glue
•Glue
1.If you don’t have a pre-made dolphin shape, cut one out.
2.Using opal glitter glue, draw random swirls and squiggles onto the dolphin and let dry.
3.Glue on a single wiggle eye.
GLITTER SEAHORSE
Add some sparkle to your room or under-the-sea-themed party!
MATERIALS
•Teal seahorse foam shape or sheet
•1 small wiggle eye
•Glitter glues in teal, copper, and purple
•Glue
1.If you don’t have a pre-made seahorse shape, cut one out.
2.Apply glitter glue to the seahorse following the design shown and let dry.
3.Glue on a single wiggle eye.
FINGER PUPPET FAMILY
Project by Kathy Wegner
Create a story with finger puppets. This is a great activity for a scout meeting. It’s also fun if you want to make one to represent each member of your family!
MATERIALS
•Foam sheets/pieces in yellow, blue, green, red, tan, peach, orange, black, dark brown, and light brown—at least 4" x 5" (10 x 12.5cm) for each body
•Permanent markers in black, pink, and red
•3 white ⅜" (1cm) buttons
•Assorted seed beads
•White dimensional paint
•Glitter glue
•Glue
1.Use the patterns to trace and cut out the body parts you need. Roll the bodies into a tube and glue them together using the tabs. Then push the heads together and glue them in place, closing off the top of the tube.
2.Glue on faces, hair, and arms. Draw facial features with markers.
3.Decorate the bodies with glitter, buttons, and beads.
SPORTY SCHEDULE HOLDER
This sports activity magnet is just what you need to keep track of all your games and practices!
MATERIALS
•12" x 18" (30.5 x 45.5cm) foam sheet in royal blue
•9" x 12" (23 x 30.5cm) foam sheets in white, cream, light brown, brown, orange, and green
•⅝" (1.5cm) foam adhesive letters
•3 wood clip-style 1¾" (4.5cm) clothespins
•4½" x 13½" (11.5 x 34.5cm) magnetic adhesive sheet
•Black and red permanent markers
•Gold and blue glitter stars (¾"–1½" [2–4cm])
1.Cut the following foam shapes using the patterns: one soccer ball, one baseball, and one set of football stripes from white; one baseball bat from cream; one football from light brown; one basketball from orange; and one sports flag from green. Also cut a 5" x 18" (12.5 x 45.5cm) rectangle from blue foam and a thin strip of brown for the sports flagpole.
2.Draw lines on the balls and bat and a soccer ball pattern on the soccer ball.
3.Glue the brown flagpole onto the flag and add a name with adhesive letters. Glue the white stripes to each end of the football.
4.Glue the magnet sheet to the back of the blue foam. Glue one clothespin in the center front lower edge of the blue foam, then the other two clothespins about 2" (5cm) in from each side.
5.Glue stars to the clothespins as shown, then glue all the sports shapes and more stars to the blue foam.


