Woodcarving Illustrated
|
SPRING 2008
2
Publications Mail Agreement #40649125
Return undeliverable copies to:
Fox Chapel Publishing
PO Box 1051
Fort Erie, ON L2A 6C7
Spring 2008
Issue 42
FEATURES
22
The Work of Joe Wannamaker
By Bob Duncan
Late teacher shared his passion
with a generation of carvers
24
Best of Show
Award-winning carvings from
across the country
28
First Cuts
A carver’s journey to becoming a
member of the Caricature Carvers
of America
44
On The Wild Side
With Jeffrey Cooper
By Kathleen Ryan
Quality craftsmanship and
wildlife carvings combine for
delightfully whimsical furniture
in this
issue
24
Learn the fundamentals of three
distinctive styles of line carving.
36
www.woodcarvingillustrated.com
3
70
PROJECTS
19
Classic Ball in Cage
By Addison “Dusty” Dussinger
This old-time whittling project
is fun to carve and a real
attention-getter
28
Making Free-form, Custom
Wooden Boxes
By Mike Burton
This lesson in joinery and
“feeling” the wood produces
boxes that are a joy to hold
and touch
48
Elegant Oak Leaf
Mantel Clock
By Wayne Barton
Create a treasured family
heirloom with easy, positive-
image chip-carving techniques
58
Custom Presentation Plaque
By Floyd L. Truitt
Change the relief-carved
elements for a personalized
award
64
Stylish Birdhouse
By Barry McKenzie
Relief-carved shingles and
graceful designs adorn this
essential songbird house
70
Kolrosing: Norwegian
Line Carving
By Judy Ritger
Easy-to-learn carving technique
produces beautiful decorative
designs
TECHNIQUES
36
Line Carving:
Three Simple Styles
By Chris Pye
Master the basics of drawing
with a veiner
42
Express Yourself!
By Jim Farr
Photography by Roger Schroeder
Convey emotions with
exaggerated facial expressions
52
Realistic Skin Tones
By Lora S. Irish
Simple mixtures and techniques
to create a variety of flesh colors
74
Cut Your Own Carving Blanks
By Mark Duginski
Simple technique reduces the
time you spend roughing out
a carving
78
All About Files, Rasps,
& Rifflers
By Roger Schroeder
These versatile tools have a wide
range of carving uses
82
Woodburning Eyes
By Carole Jean Boyd
Foolproof method makes it easy
on the
cover
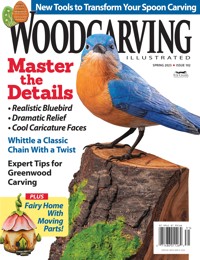
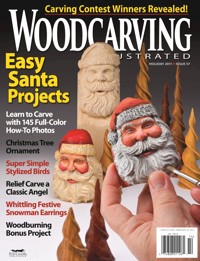
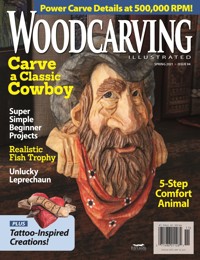
This beautiful birdhouse is sure to brighten
your backyard and can be made start-to-
finish in a single weekkend!
DEPARTMENTS
4
Editor’s Letter
6
From Our Mailbag
8
News & Notes
10
Tips & Techniques
12
Reader Gallery
14
New Products
16
Relief Column
86
Calendar of Events
92
Coming Features
93
Advertising Directory
& Classifieds
96
Teacher’s Corner
64
52
Woodcarving Illustrated
|
SPRING 2008
4
editor’s
letter
Identification Statement: Woodcarving Illustrated vol. 12, no.1
(Spring 2008) (ISSN#1096-2816) is published four times a year in the months
of February, May, August and November by Fox Chapel Publishing Co. Inc.,
1970 Broad Street, East Petersburg, PA 17520.
Periodical Postage paid at
East Petersburg, PA and additional mailing offi
ces.
POSTMASTER: Send address changes to Woodcarving Illustrated,
1970 Broad Street, East Petersburg, PA 17520.
Woodcarving and the use of associated equipment can potentially result in health hazards and
injuries.
While we cannot impose safety standards in every article, we do ask that you make safety
your number one priority.
Protect your respiratory system, hearing, vision and the rest of your body
with the proper safety equipment and prudent precautions.
Read manuals that are supplied with
your tools.
Be aware that most accidents occur when you are tired or distracted.
And when in doubt,
seek advice from professionals, on how to keep your tools sharp and maintained.
Announcement!
Our subscription database will now be handled
by a company that focuses solely on database
management and subscription fulfillment. The
editorial staff remains in Pennsylvania, but your
subscription payments will
now be processed out
of California.
The decision to make this change is a result of careful analysis of
how we allocate our primary resource—our staff. The spring season
provides an excellent
opportunity to look
back at the past year
with the wisdom of
hindsight and plan
for the future.
As we move
into 2008, our focus
will be on bringing
you the absolute
best in carving.
In future issues,
Fred Zavadil from
Canada will share some tips for carving realistic wrinkles and drapery.
Chris Pye continues his series with new projects to help you hone your
skills, and we’ll be featuring some fantastic carved chess sets.
Although our U.S. cover price is increasing to $6.99 per copy,
subscription rates will not change. Our subscription rates have not
increased since the first issue rolled off the presses 11 years ago! If
you’re currently purchasing
Woodcarving Illustrated
on the newsstand,
now is the perfect time to consider a subscription. And with our new
dedicated fulfillment system, it’s easier than ever to purchase or renew
your subscription. To help direct your inquiry to the proper staff
members, we’re pleased to provide the following guidelines:
For questions about your subscription:
For example: when your subscription expires, if your payment was
received, or if you want to purchase a gift subscription for a fellow
carver... Access your account online at
www.woodcarvingillustrated.
com
, call 888-506-6630 (outside North America 760-317-2314) or email
.
To order books or back issues:
For a free catalog of over 450 books, to order books or a single copy
of
Woodcarving Illustrated
... visit
www.FoxChapelPublishing.com
,
email
, or call us at
800-457-9112 (outside North America 717-560-4703).
For questions about editorial content:
For example: questions about a project, how to submit an article,
contact a contributor, or just general feedback... Call us at
717-715-8633, or email
. Bob
Duncan and I are always eager to hear from our readers. Nothing is
more important to us than your satisfaction.
Volume 12, Number 1 (Issue No. 42)
How-To Magazine for Carvers™
Internet: www.WoodCarvingIllustrated.com
Woodcarving Illustrated Magazine
1970 Broad Street, East Petersburg, PA 17520
Phone: 717-560-4703
Fax: 717-560-4702
Our Mission:
To promote woodcarving as an
artform and an enjoyable pastime.
Publisher/Editor
Alan Giagnocavo
Editorial Manager
Shannon Flowers
Technical Editor
Bob Duncan
Creative Director
Troy Thorne
Art Director
Jon Deck
Founding Editor
Roger Schroeder
Contributing Editors
Lori Corbett
Barry McKenzie
Lora S. Irish
Mike Burton
Studio Photographer
Scott Kriner
Technical Illustrators
Irene Bertils
Carolyn Mosher
Ad Sales
Paul McGahren
Domestic Newsstand Distribution
Curtis Circulation Company
©2008 by Fox Chapel Publishing Co. Inc.
All Rights Reserved. Printed in USA
Subscription rates in US dollars:
One year
$19.95
Two years
$39.90
Canada
One year
$22.50
Two years
$45.00
International
One year
$27.95
Two years
$55.90
Customer Service for Subscribers
Please call toll free 1-888-506-6630,
or visit our website:
www.WoodcarvingIlllustrated.com
Display Advertising/Classifieds
Please call or email Cindy Fahs, (ext. 26)
for rates and/or
a media kit.
Wholesale/Distribution
Woodcarving Illustrated is available to retailers for resale on
advantageous terms.
Contact Paul McGahren (ext. 42) for details.
Spring 2008
Note to Professional Copy Services — The publisher grants you
permission to make up to ten copies for any purchaser of this
magazine who states the copies are for personal use.
Customer Service for Subscribers
Visit www.WoodcarvingIllusrated.com, call 888-506-6630,
or write: Woodcarving Illustrated, Subscriber Services,
P.O. Box 460580, Escondido, CA
92046-0580
Printed in USA
Subscription
Services
888-506-6630
Editorial,
Books and
Back Issues
★
★
www.woodcarvingillustrated.com
5
Woodcarving Illustrated
|
SPRING 2008
6
from our
mailbag
Getting
Kids
Started
in Wood
Carving
FOX HUNT
Alden Wendt of Stanwood, WA, and Tom
Kinney of Ocala, FL, were randomly drawn
from all the participants who located the
Fox in the Holiday 2007 (Issue 41) of
WCI
.
The fox was on Page 88 in the Calendar of
Events listing.
If you find the fox in this issue,
contact us and tell us the page number
and location. Two readers randomly
selected from all correct replies will receive
a $25 Fox Chapel Publishing gift certificate.
Entries must be received by April 1, 2008,
to be eligible.
NOTE: If his feet were on the
“ground,” the contest fox always faces left
(other foxes appearing in
WCI
don’t count).
Send your entry to
Woodcarving
Illustrated
, Attn: Find the Fox, 1970 Broad
St., East Petersburg, PA 17520, or e-mail to
.
My son recently received his first
issue of
WCI
. He was very inspired
by the magazine and is looking
forward to getting started in
woodcarving.
I was excited to read that one of
your goals for the next 10 years is to
target your magazine/art to children
My son wants carving tools for
Christmas; however, I don’t know
where to start. Can you make some
suggestions for products for boys
ages 10-12?
Cherith Nottingham
Via E-mail
Editors note: We posted Cherith’s inquiry on our forum at
www.
woodcarvingillustrated.com
. Members suggested ordering a beginner’s kit
from Smoky Mountain Woodcarvers,
www.woodcarvers.com
, or Little Shavers,
www.littleshavers.com
. Both kits come pre-sharpened and provide a knife
and gouges to get you started. The kits also come with a strop and stropping
compound to keep the tools sharp.
Many members suggested a carving glove and thumb guard as well. While
neither will prevent a cut 100% of the time, both will make for a much safer
carving experience. The beginner’s kit from Little Shavers comes with both.
If you are concerned about safety, start the youth off carving soap. Soap
holds detail well, but is soft enough to be carved with a plastic knife.
Aside from tools, most carvers
suggested a visit to a local carving
retailer as a way to meet other
carvers and find a mentor. While
many carving clubs don’t allow
children under 14 to join because of
liability issues, they may be able to
direct you to a carver willing to teach
beginners in a one-on-one setting.
Boy Scouts and Girl Scouts also have
carving-related events.
A beginner carving kit from Smoky
Mountain Woodcarvers makes an
excellent gift for new carvers.
Set It Straight
The photo showing how to sharpen
the inside of the V-tool in the Teacher’s
Corner of Holiday 2007 (Issue 41), did
not emphasize the angled side of the
diamond stone enough. If you use a
stone that is not angled, it will damage
the V-tool. Charles Berold, the author
of the article, suggests that the end of
the stone be tapered at a 24° angle. The
metal backing of most credit card-sized
diamond stones can be tapered on a belt
sander. Charles does sell stones that have
already been tapered. Contact him at
6150 12th Ave., Miamisburg, OH 45342,
or 937-746-8125.
Local carving clubs are a good resource
to find an instructor for young carvers.
Taper the edge of the stone to prevent
damaging the “V” when sharpening
the inside of the tool.
www.woodcarvingillustrated.com
7
Woodcarving Illustrated
|
SPRING 2008
8
Ron Wells, a popular carving instructor and knife
maker, recently sold the knife making portion of
his business to Mike Shipley. Mike is the author
of five books, numerous articles in
Woodcarving
Illustrated,
and is also a carving instructor.
When Ron became ill, he had to tell some
of his dealers that their knife orders would be
delayed. Mike was one of the dealers affected.
“I was quite surprised and pleased when Mike
asked me if I had ever considered selling the
knife business.” Ron said. “We discussed it for a
few weeks and then worked together some. Mike
learned the production process and helped me
get caught up after my illness. In a few months
he was able to take over and I was able to retire.”
Mike was more than happy to take over Ron’s
knife making business.
“I couldn’t stand the thought of the knives
being retired,” Mike said. “I have been carving
for over 30 years and these knives are the best I
have found. But I can already see why Ron had
that big retirement smile on his face; making
knives is hard work!”
From carving knife to scalpel handle
When a surgeon contacted Leonard Lee, founder of Lee Valley
Tools, to talk about a modification to a carving knife handle, it
opened up a whole new market for Leonard.
Surgeon Michael Bell modified an ergonomically shaped
carving knife handle to use scalpel blades. Michael explained his
modification to Leonard, and asked what could be done to prevent
the rust created by the sterilization process.
Leonard visited Bell’s clinic, and immediately created a
stainless steel version of the tool—the start of Canica, Leonard’s
new medical supply company.
Leonard jumped right in and started designing other tools to
benefit doctors and surgeons. To date, Canica has designed three
new medical tools.
It’s rewarding to see how a surgeon’s hobby, and the desire to
improve the tools available in his profession,
led to the birth of a new company.
news and
notes
Mike Shipley (left) recently took over the knife
manufacturing business from Ron Wells (right).
Ron Wells’ knives
manufactured by
Mike Shipley
This scalpel’s design is based on
the ergonomic handle of a carving knife.
Both Mike and Ron specialize in the Ozark
flat-plane style of carving. The knives feature a
thin blade shaped from power hacksaw blades.
These thin blades are ideal for the flat-plane
carving style. Ron and Mike sand the handles
with coarse-grit sandpaper and apply an oil finish,
which provides a good gripping surface.
Knives are available for $25 with free shipping
to United States addresses. To purchase a Ron
Wells’ knife manufactured by Mike Shipley, call
417-284-3416 or visit
ozarkcountycharacters.com
.
Magazine Services:
While our main offi
ces remain in East
Petersburg, PA, our subscription fulfillment is
now being handled out of Escondido, CA (see
editor’s letter pg. 4). All future subscription
payments will be processed in California. For
fastest service, refer to the guidelines below
when inquiring about
Woodcarving Illustrated
.
Questions about your
subscription:
(address change, missing an issue, billing
questions, etc.) Find answers online at www.
woodcarvingillustrated.com or 888-506-6630,
Questions about editorial
content:
(project questions, article suggestions,
general feedback, etc.)
717-715-8633
re
t
o
Th
S
Q
Note To Professional Copying Services
can be
found at the bottom of the masthead on page 4.
For copyright purposes, take the entire magazine to
your copying or offi
ce supply store when requesting
copies of patterns found in WCI. The disclaimer is no
longer printed on individual patterns.
It’s not a scam!
Future subscription
payments will be sent
to California.
www.woodcarvingillustrated.com
9
Woodcarving Illustrated
|
SPRING 2008
10
tips and
techniques
Tool Sheath
From Hyung Jun-Yong
Gyeonggi-do, South Korea
I am a mechanic and amateur
woodcarver. I recycle the plastic
containers that oil comes in and
make sheaths for my carving tools.
Each sheath requires a 6"-8"-long
strip of plastic and three wire ties.
Tips from the Masters
How to determine if your
paint
wash is thin enough.
(Lora S. Irish, Page 52)
Perfect pattern placement
using tracing paper.
(Wayne Barton, Page 48)
Easy shading using the side
of a woodburning pen.
(Carole Jean Boyd, Page 82)
From Art Robillard,
Brandon, MB, Canada
While working on a relief carving,
I found repeatedly measuring
the different depths frustrating. I
generally work with about four levels
in a carving, so I made a simple depth
guide using a ½
" x ½
" x 18" piece of
wood and four round-head screws.
Insert the screws into the wood
on all four sides of one end. I locate mine about 8" from the end. You can adjust the distance the
screws protrude to customize the depth. I mark the depth in pencil next to the screw.
The gauge works best if your carving has a frame around it to rest the ends of the guide on. If
the carving does not have a frame, place the end of the depth gauge on a block the same thickness
as the carving blank.
If there are more than four levels in the carving, make an additional strip. You can match the
length of the strip and the placement of the screws to the size of your carving. A 6" square carving
would need a short strip, and a mural-sized carving would require a larger strip.
Shop made
depth guide
TOP TIP
in our next issue will win a Colwood Detailer
Woodburning Kit from The Woodcraft Shop.
Send your tip
to
Woodcarving Illustrated
, 1970 Broad St., East Petersburg,
PA 17520, or email to
.
TOP
TIP
✔
Storing Varnish
From Claude Freaner, Lake Ridge, VA
After you open a can of varnish for
the third or fourth time, the lid gets
bent, and air leaks in. The next time
you go to use the varnish, it’s all set
up and dry. To prevent this, pour
the varnish into a glass Mason jar
and put on the standard two-piece
jar lid (the flat cap and the screw
ring).
If the flat cap gets damaged,
throw it away and put on
a new one; they’re cheap.
Store the varnish-filled jar
inside a box to protect the
varnish from damaging
light sources.
A simple, shop-
made depth
gauge makes
relief carving
much easier.
Slide your tools into place.
Tighten two wire ties around
just the ends.
Then tighten a wire tie
around the outside fold.
Fold the strip in half.
Then fold
the ends towards the center fold.
1
3
2