Erhalten Sie Zugang zu diesem und mehr als 300000 Büchern ab EUR 5,99 monatlich.
- Herausgeber: Fox Chapel Publishing
- Kategorie: Lebensstil
- Sprache: Englisch
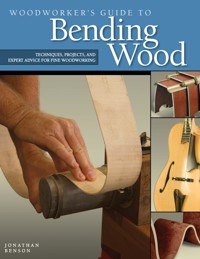
Learn the basic methods for bending wood in this comprehensive guide that includes bending green wood, bending with heat or steam, bending panels and laminations. Demonstration projects will take you through the process step-by-step, and include shaker boxes, a bow for an arrow, a rustic chair, and more.
Sie lesen das E-Book in den Legimi-Apps auf:
Seitenzahl: 246
Veröffentlichungsjahr: 2016
Das E-Book (TTS) können Sie hören im Abo „Legimi Premium” in Legimi-Apps auf:
Ähnliche


The curved chair arm in this close-up photo was made by gluing many thin layers of wood together. This is a good way to make curved parts. Larry and Nancy Buechley, Wishbone III detail, cherry and leather.
Dedication
To Laura and Sarah.
Lara Finley, Rocking Bench detail, laminate-bent white oak, 2003. Photo courtesy The Furniture Society Curv-iture exhibition.
Acknowledgments
I have been working with wood for more than 30 years. During that time, I have been lucky to cross paths with so many knowledgeable and insightful individuals, including teachers, students, clients, gallery owners, editors, and fellow woodworkers. Their enthusiasm, knowledge, and insights greatly contributed to the inspiration for this book. As I continue exploring this exciting field, I stand on the foundation that they have created.
I would like to thank those who contributed material to this book, including Bob Saunders of the Prairie Rose Woodworking Studio, for his instrument-making expertise; Jim Anderson for his beautiful bentwood boxes, and Darryl Keil of Vacuum Pressing Systems, for innovative pictures of the vacuum press. I enjoyed the exchange of ideas with John Kelsey as we worked on the photography in the shop. This book was also greatly enhanced by the editorial work of Gretchen Bacon and the staff at Fox Chapel Publishing.
This book would not have been possible without the love and support of my wife, Sherry.
About This Book
Wood is stiff, straight, flat, and, well, wooden.
Wood comes from trees, which are supple and alive.
When it’s cut into boards and dried, it’s really flat and stiff.
Curves sawn out of solid wood have weak short grain, and a lot of wasted wood.
But what if you could bend wood? Would you be able to create designs you never thought possible?
If you could bend wood, you could make chairs like this...
Bentwood chair (2007) by Jonathan Benson was made by bending fresh-cut willow saplings and branches. Green wood is supple and easy to bend; when it dries the curves set.
Miles (2002) by George Mahoney of Minneapolis, Minnesota, features curved parts made by laminate-bending thin layers of birch around a form. Photo courtesy The Furniture Society.
tables like this...
Arched Writing Desk (2001) by Matthew Steckley of Coral Gables, Florida, has legs laminated from many thin layers of wood. Photo courtesy The Furniture Society.
Constructivist Coffee Table by Jonathan Benson features a wave-shaped stretcher made by gluing many thin layers of walnut veneer together over a form. The semicircular legs are not bent wood, but rather were turned from solid walnut; the top is granite.
boxes like this...
Nordic-inspired box by Jim Andersen has thin sides made from bird’s-eye maple bent over a hot pipe, with curved handles carved from solid wood. Curvaceous guitar sides can be bent in the same way.
…and any other curvy thing you might want to make out of wood.
Toboggans are made by steam-bending white oak around a form.
The possibilities are endless.This book teaches you the four principal methods for bending wood, and how to choose and apply the one that best suits your project.
Bending green wood...
…bending with heat, water, and steam...
...bending with heat, ...bending thin layers of solid wood and gluing them together..
...bending plywood panels and veneer faces.
Figure i. Jonathan Benson, End Table, solid cherry and laminate-bent veneer, 2008.
Contents
Introduction
Chapter 1:Bending Wood Then and Now
A History of Bending Wood
Chapter 2:Getting Started in Bending Wood
The Principles of Bending Wood
To Bend or Not to Bend a Project?
Choosing the Right Method
Woodbending Properties
Chapter 3:Bending Green Wood
Working with Green Wood
Making a Green-Wood Chair
Chapter 4:Materials and Techniques for Bending Forms
Pattern Making
Form Building
Adhesives
Chapter 5:Bending with Heat, Water, and Steam
The Shaker Box
Bending with Water and a Bending Form
Bending with Heat
Bending with Steam
Bending with a Microwave Oven
Chapter 6:Solid-Wood Bent Laminations
Why Use Solid-Wood Bent Laminations?
Common Uses for Solid-Wood Bent Laminations
Forms for Solid-Wood Bent Laminations
Choosing the Proper Amount of Wood
Test Bending the Laminations
Cutting Laminations
Choosing an Adhesive
Bending Laminations
Using a Vacuum Press
Making Tapered Laminations
Chapter 7:Bent Panels
How Curved Panels Are Created
Bending Panels with Veneer
Tapered Bent Panels
Assembling the Cabinet
Chapter 8:Finishing the Edges of Bent Panels
Considering the Options
Hammer Veneering Bent-Panel Edge
Appendix 1:Glossary
Appendix 2:Resources
Figure ii. Here’s the top of the curved leg on the demonstration cabinet you’ll be seeing throughout this book. The legs, drawer fronts, door rails and panels, and front edge banding are all bent laminations. The leg-to-case joint is a tenon reinforced with screws.
Introduction
I began learning about woodworking by constructing objects that primarily consisted of straight lines, flat planes, and right angles. Working with straight lines is the best way to develop the skills to create objects from wood. When I began designing, I was drawn to curves. To me, curves complement the organic nature of wood. The grain pattern of most wood is not straight, but curvaceous and undulating, which seems to call for some sort of curve.
In my early designs, I took joinery techniques and applied them to more organic designs—taking large pieces of wood, creating joints, and cutting and carving shapes out of the wood. The projects were beautiful and sturdy but consumed a lot of wood. The size of the wood, its grain direction, the availability of a particular species in large size, and my budget limited the curves. For some projects, I still use this method, but for others, I incorporate bending.
Bending wood allows me to create designs I couldn’t imagine before. While there are still limits, bending allows for more shapes and longer arcs, permits the use of fine veneers on the surface, and adds strength—while using less wood. Throughout this book, you will find many ways to bend wood and will see the advantages and disadvantages of each. If you have a particular shape in mind and it pushes the limits of one process too far, try using a different process to create the same shape.
This book will start out with a discussion of basic wood properties and how wood reacts to bending. Then, it will describe in detail the various bending techniques—from bending green wood by hand to gluing thin laminations to vacuum pressing complicated curves. You will learn to apply the techniques and the pros and cons of each. I will take the mystery out of bending and show how anyone with a little woodworking knowledge and a few basic tools can create beautiful curved designs.
—Jonathan Benson
Figure 1-1. This archery bow was shaped from an Osage orange blank that had been split out of a green, fresh-cut log, a technique that ensures the wood grain does not run out. Here the steam-bent curve is retained by a single clamp while the wood dries.
CHAPTER 1
Bending Wood Then and Now
Green, fresh-cut branches bend easily, making them useful for constructing bows, baskets, and boats. Much later, bent wood became a popular way to construct furniture, and the methods for bending and stabilizing projects have grown. Craftsmen have long chosen wood-bending techniques for the beautiful results they give, and the added strength and economical use of materials they lend to a project.
A History of Bending Wood
Some type of wood bending has existed at least since the invention of the bow and arrow. For hundreds of years, boat builders have used wood bending to create the ribs that run across the width of boats (Figure 1-2), and bentwood bodies replaced hollowed out logs in the construction of stringed musical instruments by the mid-fifteenth century (Figure 1-3).
Figure 1-2. Wood bending has been used for hundreds of years to build ribs, planks, and gunwales in boats.
Figure 1-3. This violin, manufactured in 1658 by Jacob Steiner, offers excellent examples of wood bending on the sides, front, and back. Steiner (1617-1683) was among the best known Austrian luthiers. Traditionally, the arched tops and heads of violins and cellos were carved from solid wood. The sides are heat-bent pieces of solid wood, anchored to corner blocks.
The Origins of Bentwood Furniture
Unlike the origins of some other bentwood forms, the first use of bentwood for furniture is hard to pin down. Some evidence, in the form of tomb paintings and relics, suggests the ancient Egyptians used the process (Figure 1-4). In some cases, they simply carved wood into a curved shape or used tree limbs that were already bent, and in other situations actually bent the wood themselves. The mystery continues into the fifth century B.C. in ancient Greece, in the form of the Klismos chair, which could have been constructed using bent members (Figure 1-5). No original chairs have survived, so the exact construction technique cannot be determined. Chairs with bentwood backs were made during the Middle Ages and by the eighteenth century, both steam bending and solid-wood laminate bending were well-known techniques.
The first widespread use of bentwood to construct furniture in the Western world was the Windsor chair in early eighteenth-century England. The Windsor chair had a curved back that gained strength from the curved wood connected to the seat (Figure 1-6). This was most likely done to save labor and material rather than for aesthetic reasons.
Figure 1-4. A cedar chair with the figure of the Egyptian god of eternity, Heh, carved in the back. The original bentwood chair was found in Tutankamun’s tomb. and is on display at the Cairo Museum. This reproduction was made in 1976 by Michael Gold of New York City.
Figure 1-5. The Greeks could have used wood bending to construct chairs, like this Klismos. The Klismos is known only from ancient illustrations on pottery—no actual examples have survived.
Figure 1-6. The Windsor chair marked an early and widespread use of bentwood in furniture making. The back/arm piece is a single steam bend. This continuous-arm Windsor was made in 1998 by Michael Dunbar of Portsmouth, New Hampshire.
Bentwood Furniture and the Industrial Revolution
Wood bending for furniture really came into its own during the industrial revolution with the work of Michael Thonet, a German-Austrian furniture maker and industrialist. His elegant and simple designs were enormously popular in the mid-nineteenth century (Figure 1-7). Thonet experimented with bending solid wood and laminates, and developed a practical production method for bending using steam along with steel compression straps. By the mid-1800s, manufacturer J. & J. Kohn became Thonet’s chief rival, opening several factories internationally, employing an estimated 6,000 people and producing more than 7,000 pieces of furniture daily. The company’s growth and the expiration of Thonet’s patent for his wood-bending process led to the manufacture of large quantities of bentwood furniture by many manufacturers. The curvilinear shapes of bentwood also lent themselves to the emerging Art Nouveau style (Figure 1-8). The use of bentwood became popular for several reasons, including the efficient use of labor and material, the added strength of bentwood, and aesthetics.
Figure 1-7. Michael Thonet developed simple but elegant curved designs and a steam-bending method. His Model #14 chair—now 150 years old—is his most famous design.
Figure 1-8. The curvilinear shapes of bentwood fit in well with the organic Art Nouveau style.
Plywood
The next revolution in wood bending came with the development of plywood. In 1865, John Mayo first patented an early type of plywood in the United States. Plywood gains tremendous strength and stability from its construction, which features thin layers of wood glued together with the grain pattern of each layer perpendicular to the last. The construction method, called cross-grain lamination, keeps the grain of the wood from expanding and contracting, creating a panel stronger than solid wood. Plywood’s potential was not fully realized until the invention of the hydraulic hot press and moisture-resistant synthetic adhesives in the early part of the twentieth century.
By the 1920s and 1930s, Finnish architect Alvar Alto, Hungarian-born architect and furniture designer Marcel Breuer, and others were designing and manufacturing bent-plywood furniture. During World War II, new airplane technology developed by John Northrop of Newark, New Jersey, and Charles and Ray Eames of Los Angeles, California, resulted in many manufacturing advances for the molding and shaping of plywood. After the war, the new technology led to many popular furniture designs by the Eameses and later by many others (Figure 1-9). Another advancement was the introduction of the vacuum press, the use of which will be detailed in this book (Figure 1-10). The vacuum press allows anyone to create bent-plywood panels with an almost unlimited range of shapes and sizes.
Figure 1-9. Bent-plywood furniture became extremely popular in the 1930s and 1940s. This is a reproduction of an Eames design.
Figure 1-10. The inexpensive vacuum press opened up the possibilities for bending plywood panels in the small workshop.
Bending Wood Today
The availability of the vacuum press at a relatively low cost allowed individuals to create forms that previously only large enterprises with expensive equipment could produce (Figures 1-11 to 1-24).
Figure 1-11. Jefferson Shallenberger, of Fort Bragg, California, created Tendril in 2003. It features bent laminated legs, and for the writing surface, book-matched light mahogany veneer. The careful workmanship and striking design earned the piece an Award of Excellence from The Furniture Society. Composition: mahogany, jarrah, redwood burl, holly, silver. 29" (74cm) high by 49" (124cm) wide by 25" (64cm) deep.
Figure 1-12. Kevin Irvin, of Phoenix, Arizona, created Red Orbitz in 2004. The retro-styled piece features oval drawer boxes and compound-curved drawer fronts, which were made by bending veneers around a form. Composition: bubinga; 50" (127cm) high by 16" (41cm) wide by 14" (36cm) deep.
Figure 1-13. Matthias Pliessnig, of New Bedford, Massachusetts, made Shell in 2003. It’s strip laminated on a form, like a canoe. Composition: mahogany, concrete. 27" (69cm) high by 74" (188cm) wide by 16" (41cm) deep.
Figure 1-14.Serpentine Card Table (2003), by Richard H. Oedel of Salem, Massachusetts, features curved front and side aprons made by gluing face veneers onto a bent-laminated blank. Composition: mahogany, crotch birch, holly, Gabon ebony; 29" (74cm) high by 36" (91cm) wide by 18" (46cm) deep.
Figure 1-15. This Nordic pipe box by Jim Anderson is an example of the simple but elegant piece you can create through wood bending. Composition: black cherry, quilted maple and maple burl. 3½" (9cm) high by 6" (15cm) wide by 22" (56cm) long.
Figure 1-16.Oseberg Tine by Jim Anderson is another Nordic-inspired bentwood box. Composition: birdseye maple and maple burl. 6" (15cm) high by 7" (18cm) wide by 16" (41cm) long.
Figure 1-17. Handles constructed for Dragon Tray by Jim Anderson are Scandinavian-style dragons. Composition: black cherry and maple burl. 5" (13cm) high by 6½" (16cm) wide by 15½" (38cm) long.
Figure 1-18. Michael Craigdallie, of Nanaimo, British Columbia, Canada, worked Lotus Box in 2002. It won the People’s Choice Award at the 23rd Annual Box and Container Show in Seattle, Washington. The leaves presented the trickiest challenge, requiring 50 different jigs to form the bent laminations. The legs are cut from solid wood, but the ribs between the leaves are steam bent. The bud spins on a dowel rising from the base, and the leaves fold down to expose shelves. Composition: Quilted western maple, paudauk, maple. 43" (105cm) high by 18" (46cm) wide by 18" (46cm) deep.
Figure 1-19. Mark Koons, of Wheatland, Wyoming, worked A Simple Chair Prototype in 2003. The project is not as simple as its name suggests. Koons worked out the design over five years, first experimenting with steam bending but in the end using bent lamination and veneers. It contains 218 pieces and requires 50 clamps to shape the parts around forms. Composition: curly cherry veneer, kangaroo hide seat. 31" (79cm) high by 26" (66cm) wide by 22" (56cm) deep.
Figure 1-20.Spiral Coffee Table by Jonathan Benson incorporates curves that push the limits of bent panel lamination. Composition: mottled makoré and curly maple. 17" (43cm) high, 36" (91cm)-diameter glass.
Figure 1-21.Pedestal by Jonathan Benson features sides made using a two-part form in a veneer press. It’s made of pomele sapele veneer, maple burl, and a marble top. 43" (109cm) high by 15" (38cm) wide by 15" (38cm) deep.
Figure 1-22.Curved Cabinet by Jonathan Benson features solid wood-bent lamination and bent panel lamination. The differences and similarities in how the wood colors and the curved and straight pieces are used to add interest to the cabinet visually unify the piece. This is the demonstration cabinet shown throughout this book. Composition: walnut and cherry. 52" (132cm) high by 26" (66cm) wide by 19" (48cm) deep.
Figure 1-23. The curvy base of W Table by Jonathan Benson pushes the limits of bent panel lamination. It was made using a four-part bending form. Composition: bubinga. 17" (43cm) high by 44" (112cm) wide by 22" (56cm) deep.
Figure 1-24.Constructivist Hall Table by Jonathan Benson combines simple curves to create a strong sense of motion and energy. Composition: walnut and cherry. 35" (89cm) high by 48" (122cm) long by 15" (38cm) deep.
Figure 2-1. Steam and heat soften wood fibers, allowing them to bend. A steam box is simple to construct.
CHAPTER 2
Getting Started in Bending Wood
Before you actually start soaking, steaming, or heating wood for your next project (Figure 2-1), it’s helpful to have a good understanding of exactly how and why wood bending works and what considerations are most important when you’re planning your project. Chapter 2 will give you an overview of the science of wood bending and some information and checklists to use to make sure everything is in place before you begin.
The Principles of Bending Wood
Though the applications and methods for bending wood can seem complex, they are all based on a few fundamental principles. The wood fibers must be able to stretch and compress along the curve, and the proper amount of moisture and heat must be present to keep the wood pliable during bending.
Stretching and Compressing
Bending wood can be a challenging process until you understand just what happens to wood fibers when they are bent. While wood fiber can compress without failing, there is a limit as to how far it can be stretched without cracking or splitting.
Wood bending requires two things to happen simultaneously. The fibers on the outside of a curve need to stretch and the fibers on the inside need to compress (Figure 2-2). The cellular walls of wood compress much more easily than they stretch, which is why the most common failure when bending wood is splitting on the outside of the curve (Figure 2-3).
In some situations, splitting along the outside curve can actually be a significant factor, as illustrated in the following example. A piece of 3/4" (20mm)-thick red oak was bent to a 15" (38cm) radius. The original length of the piece was 341/2" (87.6cm) (Figure 2-4). After steam bending, the outside surface measured 361/8" (91.8cm) long, and the inside surface measured 343/8" (87.3cm) long, a difference of 13/4" (4.5cm). The differences mean the fibers on the outside of the curve had to stretch and slide by each other 3/4" (20mm), while the fibers on the inside were compressed 11/8" (29mm), all without the wood cracking or folding (Figure 2-5). This example is a strong testament to the forces going on inside a piece of wood as it is being bent. Because wood will more easily compress than stretch, a greater amount of change is seen on the inside curve. If you were to draw a line at the center of force or where the wood fibers do not move, it would be about two-thirds of the way in from the concave side or one-third of the way in from the outer surface.
Wood-Bending TERMS
Adjustable end blocks. Blocks of wood on both ends of a compression or bending strap that keep end pressure on the wood piece as it bends.
Air-dried. Wood dried without additional heat (as in a kiln). The moisture content of air-dried wood is often higher than that of kiln-dried wood.
Bent lamination. Taking several layers of wood, each of which is thin enough to bend on its own, or with the added moisture of an adhesive, and gluing them together in a curved form.
Compression or bending strap. A metal strap placed on the outside of a curve to keep the wood fibers in compression to help prevent the wood from splitting and cracking.
Grain run-out. Wood grain that travels through the outside surface of the bend and is likely to split at the point where it breaks the surface.
Heating. Bending wood by adding heat, such as with a bending iron.
Kiln-dried. Wood that has been dried in a kiln, usually to about 6% to 9% moisture content.
Lignin. A flexible, glue-like chemical in wood that, when wet, allows wood to bend and, when dry, gives wood rigidity.
Steam bending. Using steam and heat to bend wood, often through the use of a steam box.
Figure 2-3. Splitting along the outside of the curve is the most common failure in wood bending because wood fibers compress on the inside of the curve more easily than they stretch on the outside of the curve. Watch for grain that runs out to what will be outside surface of the curve.
The Principles of Bending Wood
All the various methods for bending wood are based on a few fundamental principles:
— Green, fresh-cut wood is supple and easy to bend because it contains a lot of moisture.
— Dry, stiff wood can be made supple for bending by adding both heat and moisture.
— Thin pieces of wood are easy to bend because the fibers on the outside of the curve don’t need to stretch around the curve.
— Thick pieces of bent wood can be built up from many thin layers glued together.
— Thick pieces of solid wood can be bent by adding heat and moisture, and by restraining the length so the outside fibers can’t stretch and break.
Figure 2-2. A thin piece of wood is flexible and easy to bend without breaking.
The difference is small between Length L+ on the outside of the curve, and length L- on the inside of the curve. The wood fibers don’t have to stretch very far.
You can glue many thin layers of wood together in a curved shape. This is laminate bending.
A thick piece of wood is difficult to bend.
When you bend a thick piece of wood, the difference is large between length L+ on the outside of the curve and length L- on the inside. The wood fibers must stretch a lot, and are likely to break.
A steel compression strap with end bocks prevents the wood fibers from stretching. Length L+ on the outside of the curve remains close to the original length L. In effect, the neutral axis shifts from the center of the wood toward the outside surface. This is steam bending.
Figure 2-4. The original length of the board was 34½" (38cm). After steam bending, the outside surface measured 36⅛" (91.8cm) long, and the inside surface measured 34⅜" (87.3cm).
Figure 2-5. This piece of ¾" (20mm)-thick red oak was steam-bent to a 15" (38cm) radius. During the bending process, the fibers on the outside of the curve stretched ⅝" (16mm) while the fibers on the inside of the curve compressed 1⅛" (2.9cm).
Figure 2-6. A metal compression strap helps keep the wood fibers in compression to prevent splitting and cracking.
Figure 2-7. Adjustable blocks on either end of the strap exert pressure on the ends of the wood and also help to keep the wood from splitting, cracking, or folding.
To help prevent the wood fibers on the outside of a bend from splitting and cracking, a metal compression or bending strap can be placed on the outside of the curve (Figure 2-6). The strap should be made of a flexible strip of galvanized, stainless, or spring steel. These types of steel will not react with the wood, and won’t create stains in the wood that cannot be removed.
In addition to the strap, adjustable blocks on both ends of the strap can be used to exert pressure on the ends of the wood (Figure 2-7). The compression exerted by the end blocks prevent the wood fibers from stretching, which also keeps the fibers from separating on the outside surface of the curve. Remember in the example above how much the outside surface of our board was lengthened and the inside shortened as the wood was bent? When end blocks are placed on either end of the wood, the wood will reach the length between the blocks partway through the bending process. As bending continues, the ends of the curves are forced into the end blocks, creating tremendous inward pressure that forces the fibers together. The controlled pressure is what allows the wood to bend, stretch, and compress, all at the same time, without splitting, cracking, or folding.
Moisture and Lignin
Wood’s biological makeup allows it to stretch and compress. You’ve probably witnessed wood’s natural elastic properties because wood must be able to bend as it grows. In some species, branches that grow out from the trunk of a tree spread out and drop down to allow the upper branches more room to grow. The added weight of twigs and leaves at the end of a branch can also cause a branch to bend down, but without breaking. Also, trees can become damaged but not killed by the weight of ice, snow, or other trees that may fall on them. They can be bent over by wind or can grow on a steep hill at an angle (Figure 2-8).
Moisture content plays a key role in wood’s ability to bend. To give you an idea of how much water is present in wood, consider that most freshly cut trees (which have nearly the same amount of water as living trees) weigh at least twice their dry weight, and almost all of the weight difference is the amount of water present in the wood. The water keeps lignin, a chemical in wood that acts like flexible glue, pliable. Lignin, in turn, helps wood stretch and compress without tearing. Conversely, when lignin hardens, it adds rigidity to wood.
It’s also important to understand moisture content on the microscopic level. Wood, like most other organic materials, grows by cell division. As the cells grow, they accept and transport moisture and nutrients much like a sponge does with water. Long after the tree has died, the wood cells continue to absorb and release moisture in this sponge-like manner, which is why solid wood will continue to expand and contract even after it has been cut, dried, and finished. Wood’s exceptional ability to absorb and release moisture is usually a headache for most woodworkers because it means the continual expansion and contraction of wood with seasonal moisture changes. However, the easy moisture exchange aids in bending of wood.
Figure 2-8. You’ve probably witnessed wood’s natural elastic properties. In this photo, the tree has grown at an angle under the weight of wind, snow, and ice.
Understanding that wood absorbs and releases moisture and does so even after it has been cut and dried suggests a variety of ways for us to add moisture to wood, which softens the lignin and makes the bending process easier. Because we also know lignin lends rigidity to wood when it dries, we know we want to allow the wood to dry properly so it better holds its curved shape. Remember, however, that bentwood will usually have a tendency to return to its original shape, so some springback should be expected.
To Bend or Not to Bend a Project?
Now that you know the basics of how wood bends, let’s look at what you’ll want to consider before starting a project. The first decision you will need to make is whether or not bending is right for your design. Ask yourself the following questions:
Is the shape easier to cut from a solid piece of wood? Cost plays a part here because there will most likely be a lot of waste resulting from cutting a curved shape from a straight piece of wood. The longer the curve and the tighter the radius, the more waste there will be. In most woods, the fibers are running in one direction, so there may be a weak spot where the grain is short.
Does the grain of the wood lend itself to bending? Some figured woods have grain that runs in an irregular pattern, which will tend to split or crack near the outer surface of the bend.
Where will the finished piece be used? Think about the finish you want to use and where the piece will be located. If the piece is to be painted or stained dark and kept inside, several solid pieces of wood may be able to be joined to create the desired shape.
Figure 2-9. Accurate wood bending requires the builder to construct forms and jigs, which can be quite time consuming. This example is a two-part form for bending a stack of thin wood laminations. The straight rails align the two parts of the form while they are being drawn together with clamps.
Figure 2-10.


