29,99 €
Mehr erfahren.
- Herausgeber: Packt Publishing
- Kategorie: Fachliteratur
- Sprache: Englisch
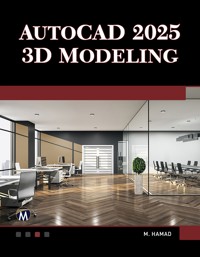
Master the art of 3D modeling with this comprehensive book tailored for AutoCAD 2025. Designed for beginners and experienced users alike, this book begins with an introduction to the AutoCAD 3D environment, providing clear and concise instructions for navigating its interface and essential tools. By building a strong foundation, it sets the stage for more advanced techniques.
As the chapters progress, readers are introduced to creating and editing solids, meshes, and surfaces, exploring AutoCAD’s powerful commands and features. Learn how to apply realistic materials, incorporate lighting, and generate stunning 3D renderings to bring your designs to life. The guide also delves into converting and sectioning tools, enabling you to create detailed and precise outputs for professional use.
By the end of this book, readers will have acquired a deep understanding of AutoCAD’s 3D capabilities, empowering them to tackle complex design challenges with confidence. Whether you are an architect, engineer, or CAD enthusiast, this guide will equip you with the skills to enhance productivity and deliver outstanding results.
Das E-Book können Sie in Legimi-Apps oder einer beliebigen App lesen, die das folgende Format unterstützen:
Seitenzahl: 244
Veröffentlichungsjahr: 2025
Ähnliche
AutoCAD® 20253D Modeling
Munir M. HamadAutodesk™ Approved Instructor
Copyright ©2024 by MERCURY LEARNING AND INFORMATION. An Imprint of DeGruyter Inc. All rights reserved.
This publication, portions of it, or any accompanying software may not be reproduced in any way, stored in a retrieval system of any type, or transmitted by any means, media, electronic display, or mechanical display, including, but not limited to, photocopy, recording, Internet postings, or scanning, without prior permission in writing from the publisher
Publisher: David Pallai
Mercury Learning and Information
121 High Street, 3rd Floor
Boston, MA 02110
www.merclearning.com
800-232-0223
Munir M. Hamad, AutoCAD® 2025 3D Modeling.
ISBN: 978-1-50152-317-5
AutoCAD is a trademark of Autodesk, Inc. Version 1.0, 2025
The publisher recognizes and respects all marks used by companies, manufacturers, and developers as a means to distinguish their products. All brand names and product names mentioned in this book are trademarks or service marks of their respective companies. Any omission or misuse (of any kind) of service marks or trademarks, etc. is not an attempt to infringe on the property of others.
Library of Congress Control Number: 2024938282
242526321 This book is printed on acid-free paper in the United States of America.
Our titles are available for adoption, license, or bulk purchase by associations, universities, corporations, etc. Digital versions of this title may be purchased at www.academiccourseware.com or other e-vendors. Companion files are available for download from the publisher (with proof of purchase)by writing to [email protected]. For additional information, please contact the Customer Service Dept. at 1-(800)232-0223 (toll free) or [email protected].
The sole obligation of Mercury Learning and Information to the purchaser is to replace the files, based on defective materials or faulty workmanship, but not based on the operation or functionality of the product.
Contents
Preface
About the Book
Chapter 1 AutoCAD 3D Basics
1.1 Recognizing the 3D Environment
1.2 Looking to Your Model in the 3D Environment
1.2.1 Using Preset Views
1.2.2 Using ViewCube
1.3 Orbiting in AutoCAD
1.3.1 Orbit Command
1.3.2 Free Orbit
1.3.3 Continuous Orbit
1.4 Steering Wheel
1.4.1 Zoom Command
1.4.2 Orbit Command
1.4.3 Pan Command
1.4.4 Rewind Command
1.4.5 Center Command
1.4.6 Look Command
1.4.7 Up/Down Command
1.4.8 Walk Command
1.5 Visual Styles
1.6 What is the User Coordinate System (UCS)?
1.7 Creating a New UCS by Manipulating the UCS Icon
1.8 Creating a New UCS Using UCS Command
1.8.1 3-Point Option
1.8.2 Origin Option
1.8.3 X / Y / Z Options
1.8.4 Named Option
1.8.5 The Rest of the Options
1.8.6 UCS Icon
1.9 DUCS Command
1.10 Two Facts About UCS and DUCS
Chapter Review
Chapter Review Answers
Chapter 2 Creating Solids
2.1 Introduction to Solids
2.2 Creating Solids Using Basic Shapes
2.2.1 Box Command
2.2.2 Cylinder Command
2.2.3 Cone Command
2.2.4 Sphere Command
2.2.5 Pyramid Command
2.2.6 Wedge Command
2.2.7 Torus Command
2.3 Editing Basic Solid Shapes Using Grips
2.4 Editing Basic Solid Shapes Using Quick Properties and Properties
2.5 3D Object Snap
2.6 Using Boolean Functions
2.6.1 Union Command
2.6.2 Subtract Command
2.6.3 Intersect Command
2.6.4 Solid History
2.7 Using the Presspull Command
2.8 Subobjects and Gizmo
2.8.1 Culling
2.8.2 Selection Cycling
2.8.3 Selecting Using Preset Views
2.8.4 Using Gizmo
Project 2-1-M: Mechanical Project Using Metric Units
Project 2-1-I: Mechanical Project Using Imperial Units
Project 2-2-M: Architectural Project Using Metric Units
Project 2-2-I: Architectural Project Using Imperial Units
Project 2-3-M: Mechanical Project Using Metric Units
Project 2-3-I: Mechanical Project Using Imperial Units
Chapter Review
Chapter Review Answers
Chapter 3 Creating Meshes
3.1 What are Meshes?
3.2 Mesh Basic Shapes
3.3 Manipulating Meshes Using Subobjects and Gizmo
3.4 Increase/Decrease Mesh Smoothness
3.5 Converting 2D Objects to Meshes
3.5.1 Revolved Surface Command
3.5.2 Edge Surface Command
3.5.3 Ruled Surface Command
3.5.4 Tabulated Surface Command
3.6 Converting, Refining, and Creasing
3.6.1 Converting Legacy Surfaces or Solids to Meshes
3.6.2 Refining Meshes
3.6.3 Add or Remove Crease
3.7 Mesh Editing Commands
3.7.1 Split Mesh Face
3.7.2 Extrude Face
3.7.3 Merge Faces
3.7.4 Closing a Hole in a Mesh
3.7.5 Collapse a Face or Edge
3.7.6 Spin Triangular Face
Project 3-1-M: Project Using Metric Units
Project 3-1-I: Project Using Imperial Units
Chapter Review
Chapter Review Answers
Chapter 4 Creating Surfaces
4.1 Introduction to Surfaces
4.2 Creating Planar Surface and Network Surface
4.2.1 Planar Surface
4.2.2 Network Surface
4.3 Using Blend, Patch, and Offset Commands
4.3.1 Blend Command
4.3.2 Patch Command
4.3.3 Offset Command
4.4 How to Edit Surfaces
4.4.1 Fillet Command
4.4.2 Trim Command
4.4.3 Untrim Command
4.4.4 Extend Command
4.4.5 Sculpt Command
4.4.6 Editing Surfaces Using the Grips
4.5 Project Geometry
4.5.1 Using Project to UCS
4.5.2 Using Project to View
4.5.3 Using Project to 2 Points
4.6 Creating NURBS Surfaces
Chapter Review
Chapter Review Answers
Chapter 5 Creating Complex Solids and Surfaces
5.1 Introduction
5.2 3D Polyline as a Path
5.3 Helix as a Path
5.3.1 Axis Endpoint Option
5.3.2 Turns Option
5.3.3 Turn Height Option
5.3.4 Editing Helix Using Grips
5.4 Using Extrude Command
5.4.1 Create an Extrusion Using Height
5.4.2 Create an Extrusion Using Direction
5.4.3 Create an Extrusion Using Path
5.4.4 Create an Extrusion Using Taper Angle
5.5 Using Loft Command
5.5.1 Lofting Using Guides
5.5.2 Lofting Using Path
5.5.3 Lofting Using Cross Sections Only
5.6 Using Revolve Command
5.7 Using Sweep Command
5.7.1 Alignment Option
5.7.2 Base Point Option
5.7.3 Scale Option
5.7.4 Twist Option
5.8 Editing Solid and Surfaces Using the Four Commands
5.8.1 Using Grips
5.8.2 Using Quick Properties
5.8.3 Using Properties
5.9 DELOBJ System Variable
Project 5-1-M: Project Using Metric Units
Project 5-1-I: Project Using Imperial Units
Chapter Review
Chapter Review Answers
Chapter 6 Solid Editing Commands
6.1 Introduction
6.2 Extruding Solid Faces
6.3 Tapering Solid Faces
6.4 Moving Solid Faces
6.5 Copying Solid Faces
6.6 Offsetting Solid Faces
6.7 Deleting Solid Faces
6.8 Rotating Solid Faces
6.9 Coloring Solid Faces
6.10 Extracting Solid Edges
6.11 Extract Isolines
6.12 Imprinting Solids
6.13 Coloring Solid Edges
6.14 Copying Solid Edges
6.15 Offsetting Solid Edges
6.16 Separating Solids
6.17 Shelling Solids
6.18 Finding Interference Between Solids
Chapter Review
Chapter Review Answers
Chapter 7 3D Modifying Commands
7.1 3D Move, 3D Rotate, and 3D Scale and Subobjects and Gizmo
7.1.1 3D Move Command
7.1.2 3D Rotate Command
7.1.3 3D Scale Command
7.2 Mirroring in 3D
7.2.1 XY, YZ, and ZX Options
7.2.2 3 Points Option
7.2.3 Last Option
7.2.4 Object, Z-axis, View Options
7.3 Arraying in 3D
7.4 Aligning Objects in 3D
7.5 Filleting Solid Edges
7.5.1 Chain Option
7.5.2 Loop Option
7.6 Chamfering Solid Edges
Project 7-1-M Project Using Metric Units
Project 7-1-I Project Using Imperial Units
Chapter Review
Chapter Review Answers
Chapter 8 Converting and Sectioning
8.1 Introduction to Converting 3D Objects
8.2 Converting 2D and 3D Objects to Solids
8.2.1 Thicken Command
8.2.2 Convert to Solid Command
8.3 Converting 2D and 3D Objects to Surfaces
8.3.1 Convert to Surface Command
8.3.2 Explode Command
8.4 Conversion Between Objects—Conclusion
8.5 Introduction to Sectioning in 3D
8.6 Sectioning Using the Slice Command
8.7 Sectioning Using the Section Plane Command
8.7.1 Select a Face Method
8.7.2 Draw Section Option
8.7.3 Orthographic Option
8.7.4 Type Option
8.7.5 Section Plane Type Options
8.7.6 Section Plane Grips
8.7.7 Adding Jog to an Existing Section Plane
8.7.8 Live Section Command
8.7.9 Generate Section Command
8.8 Sectioning Using the Flatshot Command
Chapter Review
Chapter Review Answers
Chapter 9 Printing
9.1 Named Views and 3D
9.2 3D and Viewport Creation
9.3 Model Documentation—Introduction
9.4 Model Documentation—Create Base View
9.5 Model Documentation—Create Projected View
9.6 Model Documentation—Create Section View
9.7 Model Documentation—Section View Style
9.7.1 Identifier and Arrows Tab
9.7.2 Cutting Plane Tab
9.7.3 View Label Tab
9.7.4 Hatch Tab
9.8 Model Documentation—Create Detail View
9.9 Model Documentation—Detail View Style
9.9.1 Identifier Tab
9.9.2 Detail Boundary Tab
9.9.3 View Label Tab
9.10 Model Documentation—Editing View
9.11 Model Documentation—Editing Components
9.12 Model Documentation—Updating Views
9.13 Model Documentation—Drafting Standards
9.14 Model Documentation—Annotation Monitor
Chapter Review
Chapter Review Answers
Chapter 10 Cameras and Lights
10.1 Introduction
10.2 How to Create a Camera
10.3 How to Control a Camera
10.3.1 Camera Preview Dialog Box
10.3.2 Grips
10.3.3 Front and Back Clipping Planes
10.3.4 Camera Display and Camera Tool Palette
10.4 Introducing Lights
10.5 Inserting Point Light
10.5.1 Name
10.5.2 Intensity Factor
10.5.3 Status
10.5.4 Photometry
10.5.5 Shadow
10.5.6 Attenuation
10.5.7 Filter Color
10.5.8 Exit
10.5.9 Target Point Light
10.6 Inserting Spot Light
10.6.1 Hotspot Option
10.6.2 Falloff Option
10.7 Inserting Distant Light
10.8 Dealing with Sunlight
10.9 Inserting Web Light
10.9.1 Web Option
10.10 Editing Lights
10.11 Dealing with Premade Lights
10.12 What is “Lights in Model”?
Chapter Review
Chapter Review Answers
Chapter 11 Material, Rendering, Visual Style, and Animation
11.1 Introducing Materials in AutoCAD
11.2 Material Browser
11.3 Methods to Assign Material to Objects and Faces
11.3.1 Using Drag-and-Drop
11.3.2 After Selecting an Object, Right-Click Material
11.3.3 Using Attach by Layer Command
11.3.4 Removing Assigned Materials
11.4 Material Mapping
11.4.1 Planar Mapping
11.4.2 Box Mapping
11.4.3 Cylindrical and Spherical Mapping
11.4.4 Copying and Resetting Mapping
11.5 Create New Material Library and Category
11.6 Create Your Own Material
11.6.1 Reflectivity
11.6.2 Transparency
11.6.3 Cutouts
11.6.4 Self-Illumination
11.6.5 Bump
11.6.6 Tint
11.7 Render in AutoCAD
11.7.1 Render Preset
11.7.2 Render Duration
11.7.3 Lights and Materials
11.8 Render Environment and Exposure
11.8.1 Environment
11.8.2 Exposure
11.8.3 Render Window
11.8.4 Render in Cloud
11.8.5 Render Gallery
11.9 What Visual Style is and How to Create it?
11.9.1 Face Settings
11.9.2 Lighting
11.9.3 Environment Settings
11.9.4 Edge Settings
11.10 3D Graphics Technical Preview
11.11 Animation
Chapter Review
Chapter Review Answers
Index
Preface
Since its inception, AutoCAD has enjoyed a wide range of user base, making it the most popular CAD software in the world since the 1980s. AutoCAD’s widespread use is due to its logic and simplicity, which makes it easy to learn. It evolved through the years to become a comprehensive software application that addresses all aspects of engineering drafting and designing.
This book explores the 3D environment of AutoCAD, teaching the reader how to create and edit 3D objects and produce impressive im-ages. This book is ideal for advanced AutoCAD users as well as col-lege students who have already covered the basics of AutoCAD 2025.
This book is not a replacement for AutoCAD manuals but is consid-ered to be a complementary source that includes hundreds of hands-on practices to strengthen the knowledge learned and to solidify the techniques discussed.
At the end of each chapter, the reader will find “Chapter Re-view Questions” that are the same type of questions you may see in the Autodesk certification exam; so, the reader is invited to solve them all. Correct answers are at the end of each chapter.
This book contains six projects from several types of engineering. Solving them will allow the reader to master the knowledge learned. These projects are presented in metric and imperial units.
ABOUT THE COMPANION FILES
The companion files for this book contain the following (all of the companion files are available for downloading from the publisher with proof of purchase by writing to [email protected]):
A link to retrieve the AutoCAD 2025 trial version, which will last for 30 days starting from the day of installation. This version will help you solve all practices and projects (if you are a college/university student, you might be able to download a student version of the software from www.autodesk.com)
Practice files which will be your starting point to solve all practices in the book
A folder named “Practices and Projects,” which you should copy to the hard drive of your computer
Two folders of projects: “Metric” for metric unit pro-jects, and “Imperial” for projects using imperial units
About the Book
This book discusses the 3D environment and commands in AutoCAD 2025. Many AutoCAD users do not know the real capabilities of AutoCAD in 3D, leading them to use other software to build their 3D models, create lights, load materials, assign materials, and then create still rendered images and animation. This book aims to clear up this misleading idea about AutoCAD and to introduce the real power of AutoCAD in 3D.
At the completion of this book, the reader will be able to:
Understand the AutoCAD 3D environment
Create 3D objects using solids
Create 3D objects using meshes
Create 3D objects using surfaces
Create complex solids and surfaces
Edit solids and use other general 3D modifying commands
Convert 3D objects from one type to another
Create 2D/3D sections from 3D solids
Use model documentation
Create 3D DWF files
Create cameras and lights
Assign material and create rendered images
Use and create visual styles
Create animation files
CHAPTER 1
AutoCAD 3D Basics
In This Chapter
How to use the 3D interface
How to view the 3D model
How to use UCS commands
1.1 RECOGNIZING THE 3D ENVIRONMENT
The user will use the same software to draw 2D objects and 3D models, but AutoCAD separates the two environments by applying two rules:
Use 3D template files, which are acad3D.dwt and acadiso3D.dwt. These templates will help you set up the 3D environment needed to start building the desired 3D model.
Use either the 3D Basic workspace or the 3D Modeling workspace. In this book we always use the 3D Modeling workspace to find the desired commands, because it encompasses tabs and panels that contain all AutoCAD 3D commands.
The image below illustrates the two concepts:
1. Tabs and Panel of 3D
2. Workspace
3. Viewport Controls
4. View Controls
5. Visual Style Controls
6. UCS Icon
7. 3D Model
8. 3D Crosshairs
9. ViewCube
10. Navigation Bar
PRACTICE 1-1
AutoCAD 3D Basics
Start AutoCAD 2025.
Open Practice 1-1.dwg file
Using Preset views, ViewCube (try all options), look at the 3D model to view it from all different angles.
Save and close the file.
1.3 ORBITING IN AUTOCAD
Orbiting is to rotate your model dynamically using the mouse. There are three types of orbiting in AutoCAD. These are:
Orbit
Free Orbit
Continuous Orbit
You will find all three commands by going to View tab, locating the Navigate panel, and clicking the Orbit button, as shown in the following (if this panel is not shown by default, show it first):
1.3.1 Orbit Command
Once you start the command, the mouse cursor will change to:
This command will allow you to rotate your model around all axes. Your limit will be the top view and the bottom view; you cannot go beyond them. This command will end by pressing [Esc].
Another way to do the same thing is by holding [Shift]+clicking and holding the Mouse wheel.
1.3.2 Free Orbit
Refer to the image below. An arcball will appear, showing four circles at each quadrant. Zoom and pan using your mouse wheel to center your model at the arcball:
Depending on where you are around the arcball, you will see a different cursor shape.
You will see the following shape: if you are at the circle at the right or left of the arcball. Click and drag the mouse to the right or left to rotate the shape around the vertical axis.
You will see the following shape: if you are at the circle at the top or bottom of the arcball. Click and drag the mouse up or down to rotate the shape around the horizontal axis..
You will see the following shape: if you are inside the arcball, which is similar to the Orbit command discussed above.
You will see the following shape: if you are outside the arcball, which will allow you to rotate the model around an axis going through the center of the arcball and outside the screen. To end this command press [Esc].
Another way to access this command is by holding [Shift]+[Ctrl]+Mouse wheel.
1.3.3 Continuous Orbit
When you issue this command, the mouse cursor will change to:
This command will allow you to create a nonstop movement of the model orbiting. All you have to do is to click and drag. Your model will start moving in the same direction you specified. To end this command, press [Esc].
1.4 STEERING WHEEL
The Steering Wheel will allow you to navigate the model using different methods like zooming, orbiting, panning, walking, and so on,
To issue this command, go to the View tab, locate the Navigate panel, and click the Steering Wheels button, as in the following:
Choose the Full Navigation option and you will see the following:
There are eight viewing commands, four located in the outer circle, and four located in the inner circle. In the outer circle, you will find the following:
Zoom command
Orbit command
Pan command
Rewind command
In the inner circle, you will find the following:
Center command
Look command
Up/Down command
Walk command
1.4.1 Zoom Command
This command will allow you to zoom in the 3D (although using the mouse wheel will do almost the same job). Move your cursor to the desired location of your model, start the Zoom option, click, and hold. Then move your mouse forward to zoom in and move your mouse backward to zoom out.
1.4.2 Orbit Command
This is a similar command to the Orbit command. Move your cursor to the desired location, select the Orbit option, click, and hold. Move the mouse right and left, up and down, to orbit your model.
1.4.3 Pan Command
This command will allow you to Pan in 3D. Move your cursor to the desired location, select the Pan option, click, and hold. Move the mouse right and left, up and down, to pan your model.
1.4.4 Rewind Command
This command will record all your actions that took place using the other seven commands. When you use it, it is as if you are rewinding a movie. Start the Rewind command; you will see a series of screenshots. Click and drag your mouse backward to view all of your actions.
1.4.5 Center Command
This command will allow you to specify a new center point for the screen. (You should always hover over an object.) Select the Center option, click and hold; then locate a new center point for the current view. When done, release the mouse. As a result, the whole screen will move to capture the new center point.
1.4.6 Look Command
Assuming you are located in a place, and you are not moving, your head is moving up and down, left and right. Move the cursor to the desired location, select the Look option, click and hold; then move the mouse right and left, and up and down.
1.4.7 Up/Down Command
This command will allow you to go up above the model or down below the model. Move your cursor to the desired location; then select the Up/Down option. You will see a vertical scale. Click and hold and move the mouse up and down.
1.4.8 Walk Command
This command will simulate walking around a place; you will have eight directions to walk through. If you combine this command with the Up/Down command, you will get the best results. Move your cursor to the desired location, select the Walk option, click and hold, and move the mouse in one of the eight directions.
The other versions of the Steering Wheel in the Navigate panel in the View tab are mini-copies of the Full Navigation. They are the following:
Mini Full Navigation Wheel, which will show a small circle, contains all the eight commands
Mini View Object Wheel, which will show a small circle, contains four commands of the outer circle in the full wheel.
Mini Tour Building Wheel, which will show a circle, contains four commands of the inner circle in the full wheel.
Basic View Object Wheel.
Basic Tour Building Wheel.
1.5 VISUAL STYLES
Visual styles will decide how your objects will be displayed on the screen. The default visual style in 3D templates is Realistic. To issue this command, go to the top left side of the screen and click Visual Style Controls:
Another way to reach the same is to go to the Home tab, locate the View panel, then click the upper pop-up list:
AutoCAD is equipped with ten predefined visual styles (and you can create more):
In 2D Wireframe visual style, you will see the edges of all objects. Lineweight and linetype of objects will be displayed.
In Wireframe visual style, you will see the edges of all objects without lineweight and linetype.
In Hidden visual style, it looks like Wireframe, but it will hide the obscured lines from the current viewpoint.
In Conceptual visual style, objects will be shaded and smoothed.
In Realistic visual style, objects will be shaded and smoothed; if materials are assigned, it will be shown with texture.
In Shaded visual style, you will get the same result of Realistic but without texture.
In Shaded with Edges visual style, you will get the same result as Shaded except the edges are highlighted.
In Shades of Gray visual style, the color of all objects will be shades of gray.
In Sketchy visual style, you will see lines of edges extended beyond their limit with jitter effect
In X-Ray visual style, objects will look transparent as if you can see through them.
The best way for you to become familiar with visual styles is to see them on the screen and experience the effects.
Using the View panel will allow you to see the effect of the visual style on the objects right away whenever you select the desired visual style.
NOTE
Shaded and Shaded with Edges is equipped with the new cross platform 3D graphics system, it is faster, and clearer.
When you choose Shaded and Shaded with Edges, you will see the word Fast beside the name like the below illustration:
PRACTICE 1-2
Orbit, Steering Wheel, and Visual Styles
Start AutoCAD 2025.
Open Practice 1-2.dwg file
Using Steering Wheels, try to navigate through the high-rise buildings.
Use different Orbit commands, try to rotate the high-rise building to see them from different angles.
Using different visual styles, try to view the high-rise buildings with different looks.
Save and close the file.
1.6 WHAT IS THE USER COORDINATE SYSTEM (UCS)?
In order to understand what UCS is, we must first discuss what WCS is. There is one WCS in AutoCAD, which defines all points in XYZ space, with XY as the ground, and Z pointing upward. Since in 3D we need to build complex shapes, we will need to work with all sorts of construction planes. That was the reason AutoCAD invented UCS. Who is the user? It is us. So, when an AutoCAD user needs to work in a plane, AutoCAD provides them with the power to create the desired UCS and create objects on it.
The relationship between X Y Z axes will remain the same; angles will remain 90 between axes, according to the right-hand-rule.
Below is the UCS icon:
There are three ways to create a new UCS:
Manipulating the UCS icon
UCS command
DUCS
1.7 CREATING A NEW UCS BY MANIPULATING THE UCS ICON
You can create a new UCS by manipulating the UCS icon. When you hover over the UCS icon, it will turn gold. To activate the process, click the UCS icon; it will change to the following:
As you can see, there is a grip at the 0,0,0, and three spheres at the end of each axis. If you hover over the grip, it will show the following:
There are three options to choose from:
Move and Align: This option will allow you to move the UCS origin to a new location and align it with an existing face.
Move Origin Only: This option will allow you to move the UCS origin to a new location.
World: This option will allow you to retrieve the WCS.
If you hover over one of the three spheres at the end of each axis, the following will be displayed:
User can do two things while in this menu:
Redirect the axis (X, Y, or Z) by specifying a point.
Rotate around the other two axes.
Using all the methods, whether using the grip at the 0,0,0, or the spheres at the end of each axis, will help you solve almost all the UCS case.
Check the following example:
You want to move and align UCS with the inclined face:
Click the UCS icon and hover over the origin grip; select the Move and Align option:
Move the mouse to align with the inclined face. Once the UCS is located in the right position, click once. You will receive the following result:
Now you will be able to draw on this plane. Refer to the following:
1.8 CREATING A NEW UCS USING UCS COMMAND
This command will create a new UCS based on information supplied by you, and it does not ask for objects to be drawn beforehand. This command offers so many ways to create a new UCS, which makes it a very important command for any AutoCAD user who wants to master 3D modeling in AutoCAD. We will discuss UCS options not according to their alphabetical order, but according to their importance. You can find all UCS options in the Home tab and Coordinates panel.
1.8.1 3-Point Option
To create any plane in XYZ space, you need three points. This fact makes this option the most practical when creating a new UCS. As the name of the option suggests, you will specify three points:
New origin point
Point on the positive X axis
Point on the positive Y axis
To issue this command, select the 3-Point button:
1.8.2 Origin Option
This option will create a new UCS by moving the origin point from one point to another without modifying the orientation of the XYZ axes. To issue this command, select the Origin button:
1.8.3 X / Y / Z Options
These are three options but they are similar. So, we put them together. The idea is very simple; you will fix one of the three axes, and then rotate the other two to get a new UCS. But how will you know whether the angle you have to input should be positive or negative? We will use the second right-hand-rule, which states, “Point the thumb of your right hand toward the positive portion of the fixed axis; the curling of your four fingers will represent the positive direction.” In the picture below, we take Y as an example. To issue the Y command, select the Y button:
1.8.4 Named Option
If you use a certain UCS frequently, AutoCAD gives you the ability to name/save it. This will help you retrieve it whenever you need it. After creating the UCS, select the Named button:
You will see the following dialog box:
Under the Named UCSs tab, you will see a list of the saved UCSs, plus, Unnamed, World, and Previous. Unnamed is your current UCS, which you created before issuing this command. Click it to rename it; then type the new name. Then press [Enter]. You will see the following:
To end the command, click OK.
In the Coordinates panel, there is a list of the preset UCS. You will see your saved UCS among them, as shown in the following:
1.8.5 The Rest of the Options
The above options were the most important ones; therefore, we will go through the other options just to illustrate them:
World option will restore WCS:
Z-Axis Vector option will create a new UCS by specifying a new origin and a new Z-Axis:
View option will create a new UCS parallel to the screen (this is good if you want to input text for 3D model):
Object option will align the new UCS based on a selected object:
Face option will create a new UCS by selecting face of a solid:
Previous option will restore back the last UCS:
While you are hovering over the UCS icon, right-click; you will see the following menu:
You will see all the options discussed above. This is another way to reach the same commands.

