Erhalten Sie Zugang zu diesem und mehr als 300000 Büchern ab EUR 5,99 monatlich.
- Herausgeber: IMM Lifestyle Books
- Kategorie: Lebensstil
- Sprache: Englisch
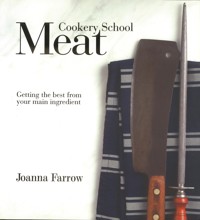
An indispensable guide to preparing meat, from sourcing and seasoning to boning and carving, with over 50 delicious recipes. If you have ever found yourself in a butchers' shop feeling overwhelmed at the variety of cuts of meat, then this is the book for you. Cooking meat doesn't have to be difficult if you are well prepared and have a few essential techniques mastered. The book begins with a detailed look at the various cuts of meat available with invaluable advice on sourcing and choosing ingredients. A techniques section follows covering the essential skills of meat preparation. Once the basics have been mastered, choose from 50 mouthwatering yet simple recipes, each clearly explained. Cookery School: Meat is a must-read for anyone looking to improve their skills in the kitchen and understand more about where the food we eat comes from.
Sie lesen das E-Book in den Legimi-Apps auf:
Seitenzahl: 180
Veröffentlichungsjahr: 2016
Das E-Book (TTS) können Sie hören im Abo „Legimi Premium” in Legimi-Apps auf:
Ähnliche


Contents
Introduction
Buying meat
Cuts of meat
Equipment
Preparation techniques
Roasting
Pot roasting
Slow roasting
Frying
Grilling and Barbecuing
Braising, Stewing and Casseroling
Baking
Basic recipes
Index
INTRODUCTION
Simply put, this book is designed for the inexperienced cook who likes to eat meat, as well as for those who have some experience of cooking and want a better understanding of the skills they require to become a competent cook. Learning to cook good food is both a creative and satisfying skill to master. So much of our social lives revolve around food, and cooking, eating and sharing food with others is a pleasurable experience. Making tasty food that you love to eat, whether it’s a meal for one, two or a crowd is one of life’s essential skills and there’s no better way to nurture those you love.
If you’re an absolute beginner, the trick is to begin cooking something familiar and that you enjoy eating. Plan ahead so that you have all the ingredients to hand before you begin. Ensure that you have the correct equipment, and that your cooking space is orderly and clean. Read the recipe through from start to finish to make sure you understand each process before you begin, and calculate the length of time the recipe will take to prepare and cook so that you can serve it on time without feeling rushed. Don’t forget to include time for preparing and cooking any accompanying dishes, and make sure you have sufficient hob or oven space for all the dishes. Follow the recipes religiously, specifically with regard to cooking times, until you’re confident enough to start adapting them to suit your own tastes. With a few successes under your belt you will relax and start to enjoy the process, as well as feel more confident in the kitchen.
This book aims to show you how to prepare delicious, interesting dishes for everyday eating without requiring the expertise or precision of a master chef. There are more than 60 tried-and-tested recipes to choose from to inspire your culinary endeavours and broaden your repertoire. Many will become time-honoured favourites that you cook again and again, while others will be special occasion treats on which you can lavish more time and attention. There’s really no mystery to delicious meat cooking – all you need is an understanding of the type and quality of meat you choose and some basic knowledge of temperatures, timings and suitable cooking methods for the various cuts.
BUYING MEAT
Many factors contribute to the success of a dish, and in part, the ultimate taste of the dish will be influenced by the quality of the meat that you buy. Buying good quality meat, that is expensive for the cut that you purchase, does not guarantee the success of a meal, but if cooked properly, it will certainly add to the taste of the dish. Meat can be purchased fresh or frozen from traditional butcher shops, markets, supermarkets or farm shops. Many supermarkets also sell locally produced, native breed, premium, properly hung meats that will give you fabulous results however simply cooked. It is also possible to buy online from reputable farms and suppliers. Prices and quality vary considerably so it pays to shop around until you find produce that you like the look of. Generally the more you pay, the better the quality of the meat, but how do you know what to look for?
Our budgets often determine the types of meat we buy. It’s difficult to resist meat from the supermarkets that’s pre-packed and invitingly low-priced, but if that meat has little flavour then it’s a false economy and a waste of your efforts. It’s better to choose a cheaper cut from a well-produced animal, then cook it properly and thoroughly enjoy your supper.
Quality meat is determined by how well the animal has lived, what it has eaten, and how it has been slaughtered and hung. Breed, rearing, diet and climate all affect the flavour of meat long before it gets to the butcher. Animals that have had a natural diet, and mature as nature intended will provide tastier meat than those that are poorly or force-fed and intensively reared. Generally the longer the period of maturation, the better the flavour of the meat. Seek out a knowledgeable butcher who will be able to advise you on cuts to use for various cooking methods. You’ll also be able to order ahead and buy joints that are butchered to exactly the weight you want. You’re more likely to be buying locally supplied meat too.
Generally, look for meat that is neatly butchered. Chops and steaks should be of similar thickness so they cook evenly. Bone ends should look neatly sawn, not splintered, and rolled joints should be neatly tied. Don’t buy cuts from which all the fat has been trimmed off since it is the fat that provides so much flavour and succulence as meat cooks. How much of the fat you actually eat is your choice.
Hanging meat
All meat needs hanging after slaughter to tenderize and to develop flavour. Even the best produced meat might be tough and lacking in flavour if not properly hanged. During hanging, whole or part carcasses are hung vertically on meat hooks in a cool environment, which allows natural chemical reactions to take place that alter the structure of the meat. At the same time moisture evaporates and the flavour becomes more concentrated. This is another reason why poorly produced meat is not hung. Its weight includes water content, which you pay for at the same price as the meat! Unfortunately for the cook who buys meat that hasn’t been hung properly, this excess water is forced out as the meat is cooked, spoiling your finished dish and reducing the volume of meat served – again, a false economy.
Hanging times vary depending on the type of animal, breed and other considerations. As a very rough guide, beef and mutton should be hung for the longest, about three weeks or more. Young lamb and pork require less hanging time – about one week. Venison, and furred and feathered game are also hung to develop their flavour and tenderize the flesh, though the hanging times are more dependent on individual taste. The longer the meat hangs, the stronger and gamier the meat becomes. For many, the flavour of well-hanged birds simply becomes too strong and unpalatable but for others it’s the gaminess that cuts the mustard!
Beef
Beef should be a deep dark red, sometimes almost purple, with what is known as a ‘marbling’ of fat running through the lean meat – these fine, thread-like traces of white fat help keep the meat moist and succulent as it cooks. Meat should not have an aged and grey palour to it. The surface fat should be creamy-coloured and both fat and flesh should look dry, not wet. Look for ‘dry-aged’ beef, which will have been aged naturally by hanging. Meat from cattle that have matured naturally will have a different colour to that of cattle that have been stressed.
Lamb
Sheep are seasonal breeders unlike other animals and it is this factor that inflates the price of the produce. Local lamb is only available for a short time, and the cost of importing this meat and shipping it long distances adds considerably to the purchase price, so you need to know that the cut that you buy is a quality one. Lamb should be very red, though the colour will depend more on the age of the animal. Mature lamb or mutton will be darker than spring lamb, with fat that’s creamier in colour.
Pork
Pork flesh should be a rosy pink colour and the fat should look white with no wateriness. Cheap factory-farmed pork is very pale and often looks wet. This moisture will evaporate during cooking and lead to huge shrinkage of the meat so avoid it at all costs. Occasionally you might see pork, particularly steaks or chops that have a shimmery sheen that indicates that the animal has been stressed. Instead look for pork that has a rosy pink flesh and pale fat with a firm texture.
Chicken
Intensively reared chickens are fed on a diet of feed and chemicals that plump them up to full maturity in a matter of weeks and, as you would expect, results in low-quality meat. This tends to be more true of imported birds, so if you care about how your meat is raised, ask where the chicken is from and how it was matured. A slow-reared chicken fed on a diet high in natural cereals will live for at least 11 to 12 weeks and will provide you with far more flavour and goodness. It can be difficult to assess the quality of a chicken by its appearance, but as a guide choose chickens that are labelled free-range. Even within this description there are differences in the way the chickens are reared.
Duck
Wild duck are small and very lean. Usually available from a good butcher, they require careful cooking to avoid drying out. Farmed ducks are bigger, fattier and easy to cook, though intensively farmed ones will lack the flavour of good free-range, naturally fed ones. It’s worth doing a bit of local research to source good suppliers. Farmers markets are a useful place to start.
CUTS OF MEAT
Butchers package meat into different cuts, many of which will be familiar to you, if only by name. As a simple guide it helps to think of the anatomy of the animal and divide it into three main parts. The front of the animal has the hardest working muscles and therefore the toughest cuts of meat such as neck, shoulder and shin. These cuts are generally inexpensive, but in order to get the greatest taste and texture from the meat, they are best cooked slowly and gently, usually using a low heat source and often incorporating other ingredients. The central parts of the animal are the least worked areas and include the prime, or most expensive, cuts such as fillet and loin. These can be cooked over high heat and using a fast method. The back section of the animal has muscles that are medium hard-working and includes cuts such as rump, leg and shank. Cooking methods for these cuts depends largely on the animal. In most cases they’re fine cooked slowly and gently, although a leg of lamb or pork leg steaks can also be fast cooked.
Which cooking method for which cut?
Deciding on the best cooking methods for different cuts and types of meat can be a daunting process for the novice meat cook. Cooking methods are basically either fast or slow. Roasting (with the exception of slow roasting), frying, grilling and barbecuing are fast dry-heat cooking methods and are only suitable for premium tender cuts of meat. Stewing, casseroling, braising, pot roasting, boiling and poaching are slow, moist cooking methods and are suitable for the cheaper, tougher cuts. Fast cooking cuts can also be slow cooked, but cheaper cuts will never tenderize if fast cooked.
A useful guide to suitable cooking methods for different cuts
BEEF
VEAL
LAMB
PORK
ROASTING
rib (fore/wing)
loin
leg
leg joint
fillet
topside
loin
loin (rack)
sirloin
shoulder
rack (best end)
chump
fillet
fillet
chump
shoulder (spare rib)
FRYING
fillet steak
escalopes (leg)
leg steaks
leg steaks
sirloin steak
loin chops
loin chops/cutlets
loin chops
rump steak
cutlets
chump chops
fillet (tenderloin)
rib eye steak
burgers
fillet (neck)
chump chops
T-bone steak
rump
burgers
burgers
burgers
escalope (leg/loin)
GRILLING AND BARBECUING
fillet steak
escalopes (leg)
leg steaks
legs steaks
sirloin steak
loin chops
loin chops/cutlets
loin chops
rump steak
cutlets
chump chops
fillet (tenderloin)
rib eye steak
burgers
fillet (neck)
burgers
T-bone steak
butterflied leg
spare ribs
burgers
burgers
STEWING AND CASSEROLING
stewing steak (shin/neck)
pie veal
fillet (neck)
chump chops
braising steak (leg)
shin
chump chops
belly rashers
oxtail
shoulder
shank
leg steaks
skirt
fore (shoulder) shank
pie pork (fillet/leg/shoulder/neck)
cheek
stewing lamb (scrag/neck) breast
cheek
POT ROASTING, SLOW ROASTING AND BRAISING
topside
leg
fillet (neck)
hock
top rump
topside
belly
belly
brisket
shin
shoulder
loin
silverside
shank
leg joint
fore (shoulder) shank
shoulder
breast
BOILING AND POACHING
brisket
fillet (neck)
leg
silverside
shoulder
hock
CUTS OF MEAT – BEEF
CUTS OF MEAT – LAMB
CUTS OF MEAT – PORK
CUTS OF CHICKEN
STORING MEAT
Meat is sold refrigerated and needs to be kept chilled until it is cooked or brought to room temperature prior to cooking. All meat has a definite lifespan, after which time it will start to smell unpleasant and become unusable. Buying the freshest possible meat and refrigerating it quickly will ensure a longer lifespan. If you’re in any doubt about the freshness of meat that’s been in the refrigerator for a while, discard it rather than risk eating it. A slightly unpleasant odour and greying of colour are sure signs that the meat is past its best.
Storing meat correctly is important and cannot be underestimated. There are a few essential guidelines to follow when handling meat. Always wash your hands thoroughly with soap and water after touching meat to avoid transferring bacteria between produce and surfaces. Bacteria thrives naturally on raw meat, and even on cooked produce that has come into contact with raw meat. Cooking raw food kills the bacteria.
All meat needs to breathe. If you are not cooking it straight away, unwrap the meat and transfer it to a plate or tray. Ensure that the receptacle is large enough to hold all of the meat and that no blood will run off the plate onto produce stored on shelves below. Place in the refrigerator and cover loosely with greaseproof paper so air can still circulate. Ensure that no other foodstuffs stored in the refrigerator come into contact with the raw meat. Make sure that the refrigerator is set at 5°C (41°F) or lower. If you are storing cooked leftovers from roast joints, for example, ensure that they cool to room temperature before chilling them. With the exception of minced meat, offal and poultry, most meats can be stored successfully in the fridge for a few days. Beef and lamb will keep for longer than pork.
Freeze meat on the day that you purchase it and wrap it well so that no cross contamination can occur. Label with cut of meat, weight and date. (It’s easy to remember what you’re freezing on the day of freezing, but not so easy to distinguish it a couple of months later, particularly in its frozen state) Defrost frozen meat in the refrigerator in a container that will contain any juices that may run.
Chicken doesn’t keep as well as red meats and is best used within two days of shopping. If storing for longer, make use of the freezer, returning it to the fridge the day before cooking.
EQUIPMENT
There are just a few items of equipment that are used repeatedly by the meat cook and could be described as essentials. Generally the better the quality the more robust the equipment will be and the longer it’ll last.
A couple of decent knives will make chopping, slicing and general preparation enjoyable rather than frustrating. Although expensive they will last many years provided they’re looked after and not put in the dishwasher to thrown in a drawer with other kitchen gadgets. Likewise a sturdy wooden chopping board that doesn’t slide around on the work surface will make preparation easier and safer. If your board is a little lightweight or the surface is uneven place a teatowel underneath to keep everything stable.
Pans are another great asset that’ll make frying, roasting and baking so much more pleasurable. Good quality frying pans will brown meat and vegetables without sticking or burning. You might also want to buy a ridged grill pan for cooking steaks and other pieces of meat that produce appealing and professional looking grill lines. A large heavyweight roasting tin, one that’s sufficiently sturdy to be used on the hob for gravy making, will come in useful for both roasts and pot roasts. For grinding spices a pestle and mortar is the easiest choice though you can get away with using a small bowl and the end of a wooden rolling pin for lightly crushing. Finally, a food processor is so useful for making sauces and pastes and is great for mincing meat if you don’t have an electrical mincer attachment on an electrical appliance, or the type of mincer that can be screwed onto the kitchen surface.
PREPARATION TECHNIQUES
Meat can be bought in various stages of ‘readiness’ for cooking. You might buy a large joint of beef, lamb or pork that needs a little preparation before you roast it, or a beautifully French-trimmed rack of lamb that only requires a sprinkling of seasoning before you pop it in the oven. What you buy depends largely on where you’ve shopped, what you’re cooking and how much of the preparation you want to do yourself. For some cooks part of the pleasure is in the trimming and chopping of a particular cut, while others want to get straight down to cooking. To really feel that you’ve mastered the skills of meat cooking it’s good to know how to tackle all the preparation techniques even if you won’t be using them all the time.
Trimming excess fat
Avoid buying cuts of meat that have been trimmed of all fat. It’s the fat in meat that provides its delicious flavour and succulence, particularly in slow-cooked dishes where it renders down and tenderizes as it cooks. Having said that, you don’t want to choose a cut of meat in which a large proportion is fat rather than flesh since that does not represent good value for money.
The fat on most joints is under the skin. When positioning the meat in a roasting tin (pan), make sure the fat side is uppermost so that it can naturally baste the meat during cooking. Many lean meats also contain thin threads of fat running through them known as ‘marbling’, which is a sure sign of well-produced meat. Some cuts, such as topside and top rump, contain very little fat and are more prone to dryness. To flavour these meats and prevent them from drying out during cooking, butchers wrap them in a layer of fat, in a process known as ‘barding’.
There are just a few occasions when you might want to remove some of the surface fat, for instance when roasting a fillet of beef. The strip of fat that runs through the joint can be cut away with a large, sharp knife. If the fillet is then being roasted in one piece, tie it at intervals with string to hold any loose pieces of meat in place. You might also want to cut away any loose areas of fat when dicing a shoulder of lamb, or on steaks or chops for barbecuing, as dripping fat can cause flare-ups while the meat cooks. It’s also best to trim the excess fat off steak before stir-frying.
Cutting meat into chunks
Meat can be bought ready-diced for using in stews, casseroles and pies, but by doing it yourself you can be sure that you are using a decent cut of meat and can cut it to the size you want. First cut the meat away from the bone (keep the bone for stock, see page 88–89) and discard any ragged pieces of fat. Cut the meat into chunks. These don’t have to be regular but 2–3 cm (¾–1¼ in) is fine for most dishes.
Making homemade mince
Bought mince is certainly convenient but by making your own you will know precisely the quality of the meat that’s gone into the mince and you can choose how coarse or fine you want it to be. Meat mincers are relatively inexpensive and work well but a food processor is much easier to use and chops meat cleanly to the texture you want (take care not to over-blend or it’ll be reduced to a smooth paste). The cut of meat you choose depends on what you’re making. For burgers it’s best to use a good-quality, lean steak mince while cheaper cuts with a little fat can be used for slow-cooked dishes. Your butcher can advise you on this.
First cut the meat into small dice by hand, including a little of the fat. Process in small batches as this will produce a more consistent texture than blending all in one go. Transfer the batches to a bowl while you mince the remainder.
You can easily make your own sausagemeat by taking your minced pork one stage further to a slightly more paste-like consistency – this is great for stuffings and pâtés.


