22,99 €
Mehr erfahren.
- Herausgeber: John Wiley & Sons
- Kategorie: Wissenschaft und neue Technologien
- Sprache: Englisch
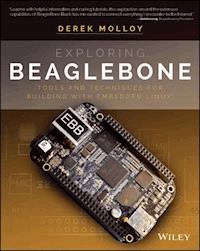
In-depth instruction and practical techniques for buildingwith the BeagleBone embedded Linux platform Exploring BeagleBone is a hands-on guide to bringinggadgets, gizmos, and robots to life using the popular BeagleBoneembedded Linux platform. Comprehensive content and deep detailprovide more than just a BeagleBone instructionmanual--you'll also learn the underlying engineeringtechniques that will allow you to create your own projects. Thebook begins with a foundational primer on essential skills, andthen gradually moves into communication, control, and advancedapplications using C/C++, allowing you to learn at your own pace.In addition, the book's companion website featuresinstructional videos, source code, discussion forums, and more, toensure that you have everything you need. The BeagleBone's small size, high performance, low cost,and extreme adaptability have made it a favorite developmentplatform, and the Linux software base allows for complex yetflexible functionality. The BeagleBone has applications in smartbuildings, robot control, environmental sensing, to name a few;and, expansion boards and peripherals dramatically increase thepossibilities. Exploring BeagleBone provides areader-friendly guide to the device, including a crash coursein computer engineering. While following step by step, you can: * Get up to speed on embedded Linux, electronics, andprogramming * Master interfacing electronic circuits, buses and modules, withpractical examples * Explore the Internet-connected BeagleBone and the BeagleBonewith a display * Apply the BeagleBone to sensing applications, including videoand sound * Explore the BeagleBone's Programmable Real-TimeControllers Hands-on learning helps ensure that your new skills stay withyou, allowing you to design with electronics, modules, orperipherals even beyond the BeagleBone. Insightful guidance andonline peer support help you transition from beginner to expert asyou master the techniques presented in Exploring BeagleBone,the practical handbook for the popular computing platform.
Sie lesen das E-Book in den Legimi-Apps auf:
Seitenzahl: 847
Veröffentlichungsjahr: 2014
Ähnliche


Contents
Introduction
Why the BeagleBone Black?
How This Book Is Structured
Conventions Used in This Book
What You'll Need
Errata
Digital Content and Source Code
Part I BeagleBone Basics
Chapter 1 The BeagleBone Hardware
Introduction to the Platform
BeagleBone Documentation
The BeagleBone Hardware
BeagleBone Accessories
Capes
How to Destroy Your BeagleBone!
Summary
Support
Notes
Chapter 2 The BeagleBone Black Software
Linux on the BeagleBone
Communicating with the BBB
Controlling the BeagleBone
Node.js, Cloud9, and BoneScript
Summary
Further Reading
Chapter 3 Exploring Embedded Linux Systems
Embedded Linux Basics
Booting the BeagleBone
Managing Linux Systems
Git
Desktop Virtualization
Code for This Book
Summary
Further Reading
Chapter 4 Interfacing Electronics
Recommended Equipment
Basic Circuit Principles
Discrete Components
Logic Gates
Analog‐to‐Digital Conversion
Concluding Advice
Summary
Further Reading
Notes
Chapter 5 Practical BeagleBone Programming
Introduction
Scripting Languages
JavaScript and Java
C and C++ on the BeagleBone
C++ with Classes
Summary
Further Reading
Notes
Part II Interfacing, Controlling, and Communicating
Chapter 6 Interfacing to the BeagleBone Input/Outputs
General-Purpose Input/Outputs
The Linux Device Tree
Analog Inputs and Outputs
Advanced GPIO Topics
Summary
Further Reading
Notes
Chapter 7 Cross‐Compilation and the Eclipse IDE
Setting Up a Cross‐Compilation Toolchain
Cross‐Compilation with Third‐Party Libraries (Multiarch)
Installing a Change Root
Cross‐Compilation Using Eclipse
Building Debian for the BBB
Summary
Further Reading
Chapter 8 Interfacing to the BeagleBone Buses
Introduction to Bus Communication
I
2
C
SPI
UART
Logic‐Level Translation
Summary
Further Reading
Note
Chapter 9 Interacting with the Physical Environment
Interfacing to Actuators
Interfacing to Analog Sensors
Interfacing to Display Modules
Remote Control BeagleBone
Building Dynamic Linked Libraries
Summary
Further Reading
Notes
Part III Advanced BeagleBone Systems
Chapter 10 The Internet of Things
The Internet of Things (IoT)
More Sensors (Things!)
The BeagleBone as a Web Server
A C/C++ Web Client
The BeagleBone as a Web Sensor
The C++ Client/Server
Managing Remote IoT Devices
IoT Physical Networking
Summary
Further Reading
Notes
Chapter 11 BeagleBone with a Rich User Interface
Rich UI BBB Architectures
Rich UI Application Development
Qt Primer
Remote UI Application Development
Cross‐Compiling Qt Applications
Summary
Further Reading
Notes
Chapter 12 Images, Video, and Audio
Capturing Images and Video
Streaming Video
Image Processing and Computer Vision
BeagleBone Audio
Summary
Further Reading
Chapter 13 Real‐Time BeagleBone Interfacing
Real‐Time BeagleBone
The PRU‐ICSS Architecture
Getting Started with the PRU‐ICSS
The PRU‐ICSS in Detail
Applications of the PRU‐ICSS
Additional PRU‐ICSS Tools
Summary
Further Reading
Notes
Titlepage
Copyright
Dedication
About the Author
About the Technical Editors
Credits
Acknowledgments
End User License Agreement
List of Tables
Chapter 1
Table 1-1
Chapter 2
Table 2-1
Table 2-2
Table 2-3
Table 2-4
Table 2-5
Table 2-6
Table 2-7
Table 2-8
Chapter 3
Table 3-1
Table 3-2
Table 3-3
Table 3-4
Table 3-5
Table 3-6
Table 3-7
Chapter 4
Table 4-1
Chapter 5
Table 5-1
Table 5-2
Table 5-3
Table 5-4
Chapter 6
Table 6-1
Chapter 8
Table 8-1
Table 8-2
Table 8-3
Table 8-4
Table 8-5
Table 8-6
Chapter 9
Table 9-1
Table 9-2
Table 9-3
Table 9-4
Chapter 10
Table 10-1
Table 10-2
Table 10-3
Chapter 11
Table 11-1
Table 11-2
List of Illustrations
Chapter 1
Figure 1-1
The BeagleBone Black computing platform (revision C board with printed pin labels)
Figure 1-2
(a) The BeagleBone Black (BBB) in an Altoids tin box; (b) the BeagleBone White (BBW)
Figure 1-3
Table of BBB subsystems and connectors
Figure 1-4
The BeagleBone Black (BBB) top and bottom views
Figure 1-5
Table of functionality available on the P8 and P9 headers
Figure 1-6
(a) BBB connected to micro‐HDMI‐to‐HDMI adapter and then to a low‐cost HDMI‐A‐to‐DVI‐D cable (b) A micro‐HDMI‐to‐VGA adapter with audio line output
Figure 1-7
The USB‐to‐TTL 3.3V serial cable and its connection to the BBB (connection colors are black, brown, red, orange, yellow, and green)
Figure 1-8
(a) USB Wi‐Fi adapters; (b) the Logitech C920 camera; and (c) a Velleman USB hub (bus powered)
Figure 1-9
The LCD4 cape (top and bottom view)
Figure 1-10
(a) The Proto cape; (b) Valent F(x) LOGi‐Bone; (c) Camera cape; and (d) Adafruit BBB case
Chapter 2
Figure 2-1
The BBB START.htm guide to setting up your BBB
Figure 2-2
Windows Network Connections with Internet‐over‐USB connection LAN 9, and a web browser connection
Figure 2-3
Configuring the Network Connection Sharing Properties under Windows
Figure 2-4
Windows Device Manager and opening a PuTTY serial connection to the BBB
Figure 2-5
PuTTY SSH Configuration settings beside an open SSH terminal connection
Figure 2-6
The SSH Chrome App
Figure 2-7
The GNU nano editor being used to edit an example file in a PuTTY Linux terminal window
Figure 2-8
Connecting to the Node.js web server
Figure 2-9
The Cloud9 IDE (light theme) running on the BBB, executing the SimpleWebServer.js example
Chapter 3
Figure 3-1
The full boot sequence on the BBB
Figure 3-2
The Linux user space and kernel space
Figure 3-3
Linux directory listing and file permissions
Figure 3-4
The basic Git workflow
Figure 3-5
VirtualBox running Debian as a guest OS on a Windows host machine
Chapter 4
Figure 4-1
The Waveforms application generating a signal and displaying the response from the physical circuit
Figure 4-2
(a) Ohm’s law circuit example (b) Voltage divider example
Figure 4-3
(a) Potentiometers and using a variable voltage supply (b) Current divider example
Figure 4-4
The breadboard with a 7408 IC (quad two‐input AND gates)
Figure 4-5
Measuring voltage, current, and resistance
Figure 4-6
The KA7805A/LM7805 voltage regulator and an example regulator circuit
Figure 4-7
Circuit and behavior of a 1N4001 diode with a 5 V AC supply and a 1 kΩ load resistor
Figure 4-8
LED example and a circuit to drive an LED with appropriate forward current and voltage levels
Figure 4-9
Duty cycles of pulse width modulation (PWM) signals
Figure 4-10
Circuit and behavior of a 1N4001 diode with a 5 V AC supply, 1 kΩ load, and parallel 10 μF capacitor
Figure 4-11
Ceramic (nonpolarized) and electrolytic (polarized) capacitors and an example decoupling circuit
Figure 4-12
Bipolar junction transistors (BJTs)
Figure 4-13
The BJT as a switch
Figure 4-14
Realization of the transistor as a switch (saturation) and confirmation that all relationships hold true
Figure 4-15
Frequency response of the BJT circuit (frequency is 500 kHz and 1 MHz)
Figure 4-16
Field effect transistor (FET) as a switch
Figure 4-17
Frequency response of the FET circuit as the switching frequency is set at 1 MHz and 5 MHz
Figure 4-18
Optocoupler (617A) circuit with the captured input and output characteristics
Figure 4-19
Various switches and configurations
Figure 4-20
(a) Switch bouncing with no components other than the switch and 10 kΩ resistor (b) Low‐pass filtered output at point B (c) A Schmitt trigger circuit (d) Output of the Schmitt trigger circuit at point C, versus the input at point A
Figure 4-21
General logic gates
Figure 4-22
(a) IC package examples (b) The JK flip‐flop
Figure 4-23
Gate signal levels on the input and output of logic gates (a) TTL (b) CMOS at 5 V
Figure 4-24
An AND gate with the inputs accidentally left floating when the switches are open
Figure 4-25
Pull‐down and pull‐up resistors, used to ensure that the switches do not create floating inputs
Figure 4-26
Open‐drain level‐shifting example
Figure 4-27
(a) Sinking current on the output (b) TTL fan‐out example
Figure 4-28
(a) The ideal op‐amp (b) An open‐loop comparator example
Figure 4-29
Output of the comparator circuit
Figure 4-30
The voltage follower op‐amp circuit
Chapter 5
Figure 5-1
Building C/C++ applications on the BBB
Figure 5-2
Memory allocation for variables running on the 32‐bit BBB
Figure 5-3
Example of pointers in C/C++ on the BBB (with 32‐bit addresses)
Chapter 6
Figure 6-1
The BBB P8/P9 headers with pin names, which describe each pin's default functionality
Figure 6-2
A FET-driven LED circuit
Figure 6-3
Scope output measuring the current through the LED for the flash.sh script
Figure 6-4
A GPIO button input example
Figure 6-5
Internal pull-down resistor example, with an external resistor connected (a) from the pin to GND, and (b) from the pin to the 3.3 V supply
Figure 6-6
The BBB P8 header pins
Figure 6-7
The BBB P9 header pins
Figure 6-8
The BBB C++ class flashing the LED
Figure 6-9
ADC LDR circuit (not recommended)
Figure 6-10
ADC LDR circuit using a voltage-follower circuit (recommended)
Figure 6-11
Measured voltages and current values with the op-amp in a voltage-follower configuration
Figure 6-12
PWM cycle with period 10,000 ns (100 kHz) and duty cycle of 50%
Figure 6-13
PWM cycle with period 1,000 ns (1 MHz) and duty cycle of 50%
Figure 6-14
Controlling a servo motor using PWM, positioning from –90° to +90° using different pulse widths
Figure 6-15
Time delay in lighting an LED in response to a button press at ∼0% CPU usage (a) using sys/poll.h (b) integrating callback functions and Pthreads
Figure 6-16
(a) Push button configured with an internal pull-up resistor making it active low, and (b) the time response of the Bone Keys C++ example
Chapter 7
Figure 7-1
Creating a new C++ project in Eclipse: (a) the project settings, and (b) the cross-compiler prefix
Figure 7-2
The Eclipse IDE cross‐compiling a Hello World C++ example application
Figure 7-3
Eclipse Luna settings for cross‐compilation
Figure 7-4
Connecting to the BBB for the first time
Figure 7-5
The built‐in Terminals window, connected to the BBB and executing the cross‐compiled BBBTest C++ application
Figure 7-6
Eclipse GitHub integration, displaying the exploringBB repository
Figure 7-7
Setting the debug configuration
Figure 7-8
Setting up gdb‐multiarch
Figure 7-9
Setting the BBB gdbserver port
Figure 7-10
The Debug Perspective view
Figure 7-11
Example Doxygen HTML output
Figure 7-12
Doxygen Eclox plug‐in running within Eclipse
Figure 7-13
The Kernel Configuration tool
Chapter 8
Figure 8-1
(a) The I
2
C bus configuration; (b) connecting the ADXL345 to the I2C2 bus on the BBB
Figure 8-2
Timings required for single/multiple read/write operations on the ADXL345 device
Figure 8-3
Using i2cget to read the DEVID register value
Figure 8-4
(a) Using SPI to connect to one slave; (b) testing SPI using a Linux configuration
Figure 8-5
The 74HC595 SPI example
Figure 8-6
The 74HC595 SPI signal and output
Figure 8-7
The ADXL345 SPI communication timing chart (from the ADXL345 datasheet)
Figure 8-8
SPI1 Connection to the ADXL345
Figure 8-9
(a) Simple OOP structure (not recommended); (b) more appropriate OOP design
Figure 8-10
Reading the 0x00 register on the ADXL345 using SPI
Figure 8-11
ADXL345 three‐wire SPI communication
Figure 8-12
BBB control of more than one slave device using GPIO pins and additional logic
Figure 8-13
UART transmission format for a one‐byte transfer
Figure 8-14
(a) Loopback testing the UART; (b) configuring the minicom program settings
Figure 8-15
The Arduino platform
Figure 8-16
UART communication between the BBB and the Arduino Pro Mini 3.3 V
Figure 8-17
Analysis of the UART communication between the BBB and the Arduino Pro Mini 3.3 V
Figure 8-18
Sending the command “On\0” to the Arduino and receiving the response string “LED On”
Figure 8-19
Adafruit four‐channel, Adafruit eight‐channel, and Watterott four‐channel logic‐level translators
Figure 8-20
Switching BSS138‐based translators from 3.3 V to 5 V logic levels at 50 kHz, 200 kHz, and 1 MHz
Figure 8-21
Connecting a 5 V Arduino UART to the BBB UART using a logic‐level converter
Chapter 9
Figure 9-1
(a) A small DC motor with an integrated gearbox; (b) unidirectional control of a DC motor
Figure 9-2
Simplified H‐bridge description
Figure 9-3
Driving a DC motor using an example H‐Bridge driver breakout board
Figure 9-4
(a) Stepper motor external and internal structure; (b) full-step drive signals
Figure 9-5
Driving a stepper motor using the open‐hardware EasyDriver board
Figure 9-6
Wiring configuration for different stepper motor types
Figure 9-7
Driving a stepper motor using the BBB and the EasyDriver interface board
Figure 9-8
(a) Controlling a relay using the BBB; (b) an example breakout board
Figure 9-9
(a) A typical diode clamping circuit (not recommended); (b) the signal response of the circuit to an input signal that is in range; (c) the clipped signal response of the circuit to an input signal that is out of range
Figure 9-10
Protecting the ADC inputs using 1.8 V powered op-amps (recommended); (a) the circuit to protect all BBB analog inputs; (b) linear response characteristic; (c) clipped response to an out-of-range input; (d) clipped response to a significantly out-of-range input
Figure 9-11
Scaling an input signal using voltage division with op‐amp ADC protection in place
Figure 9-12
(a) A general op‐amp signal conditioning circuit that inverts the input; (b) conditioned output when Vin is 0 V to 5 V; (c) output when Vin is −5 V to +5 V; (d) conditioned and amplified output when the input signal is 1.9 V to 2.1 V
Figure 9-13
Signal conditioning circuit connected to the BBB with gain set using R
1
and R
2
and offset set using R
3
and R
4
Figure 9-14
(a) Sharp infrared distance measurement sensor; (b) its analog output response
Figure 9-15
(a) A voltage divider circuit configured for the GP2D12 sensor; (b) the plot of the exponentially fitted data
Figure 9-16
The ADXL335 analog accelerometer and its connection to the BBB with further signal conditioning
Figure 9-17
(a) Seven‐segment display; (b) typical pin ordering; (c) typical common anode and cathode display configurations
Figure 9-18
SPI interfacing to arrays of common cathode seven‐segment displays using daisy‐chained 74HC595 8‐bit serial shift registers
Figure 9-19
SPI interfacing to character LCD modules using a 74HC595 8‐bit serial shift register
Figure 9-20
Output from Listing 9‐10 on a Newhaven display module.
Figure 9-21
The COM20 serial console on the desktop machine as connected to the custom service
Figure 9-22
The COM20 serial console on the desktop machine as connected to the custom service
Figure 9-23
Bluetooth‐connected BeagleBone
Figure 9-24
Windows connecting to the BeagleBone using an on‐board Bluetooth interface
Figure 9-25
RealTerm connected to the BBB using the Bluetooth Port 22
Figure 9-26
An example App Inventor Android application that uses the Bluetooth code library
Chapter 10
Figure 10-1
Different software communication architectures implemented in this chapter
Figure 10-2
(a) The Analog Device TMP36 Temperature Sensor; (b) the Texas Instruments SensorTag
Figure 10-3
A first web page on the BBB
Figure 10-4
A simple CGI script example
Figure 10-5
Temperature sensor web page
Figure 10-6
A PHP temperature sensor
Figure 10-7
A ThingSpeak web sensor example
Figure 10-8
Xively channel with API keys
Figure 10-9
Example IFTTT recipe
Figure 10-10
Client/server example
Figure 10-11
BBB remote monitoring
Figure 10-12
A selection of Wi-Fi adapters and test results when they are connected to the BBB
Figure 10-13
AdaFruit
pseudo
-PoE cable
Figure 10-14
True PoE connection for the T-568B wiring scheme
Chapter 11
Figure 11-1
(a) Connection to an HDMI and a Bluetooth adapter (b) a Bluetooth keyboard/touchpad
Figure 11-2
Screen capture of the BBB monitor display
Figure 11-3
The CircuitCo LCD4 cape
Figure 11-4
VNC Viewer on Windows
Figure 11-5
The GTKsimple application
Figure 11-6
The GTKtemperature application
Figure 11-7
Qt “hello world” BBB example executing using VNC
Figure 11-8
QTimer signals and slots example
Figure 11-9
Qt Creator IDE visual design editor
Figure 11-10
The Qt EBB Temperature Sensor GUI application
Figure 11-11
The UI components and associated slots
Figure 11-12
The Qt fat‐client GUI application client/server architecture
Figure 11-13
The Menu and the Server Settings dialog
Figure 11-14
A multi‐threaded server
Figure 11-15
The Qt Accelerometer Client/Server application
Figure 11-16
The Qt Accelerometer Client/Server application program structure
Figure 11-17
Qt Creator “BeagleBone Kit” configuration
Chapter 12
Figure 12-1
Logitech USB HD webcams (a) C270, (b) C310, and (c) C920
Figure 12-2
The fswebcam webcam capture (640x360) displayed using gpicview via Xming
Figure 12-3
The OpenCV image processing example: (a) the webcam image; (b) the edge-processed image
Figure 12-4
OpenCV face detection on the BBB: (a) grabbed live using the C270 webcam; (b) loaded from the Lena image file
Figure 12-5
(a) Seven‐port USB hub with multiple adapters; (b) the Sound Blaster audio adapter; (c) the Dynamode USB audio adapter
Figure 12-6
Bluetooth A2DP connections: (a) Sony Hi‐Fi; (b) Windows machine via motherboard Bluetooth
Chapter 13
Figure 13-1
The PRU‐ICSS architecture
Figure 13-2
Summary of the steps involved in deploying a PRU‐ICSS program
Figure 13-3
An example BBB PRU circuit
Figure 13-4
The PRU example output
Figure 13-5
PRU register bit field notation
Figure 13-6
The PRU‐ICSS memory address maps
Figure 13-7
Summary of the PRU instruction set
Figure 13-8
(a) Button press test; (b) high‐frequency switching test output
Figure 13-9
The PWM generator output
Figure 13-10
User‐defined waveform output
Figure 13-11
The HC‐SR04 ultrasonic distance sensor circuit
Figure 13-12
Signal response of the HC‐SR04
Figure 13-13
Signal response of the HC‐SR04
Guide
Cover
Table of Contents
Part
Pages
xxv
xxvi
xxvii
xxviii
xxix
xxx
1
3
4
5
7
8
9
10
12
13
14
15
17
18
20
21
22
23
25
26
27
28
29
30
31
32
33
34
35
36
39
40
41
42
43
44
45
46
47
48
49
50
51
52
53
55
56
58
59
61
62
63
64
65
66
69
72
73
74
75
77
79
80
81
82
84
85
86
88
89
91
92
93
94
96
97
98
100
103
104
105
106
107
108
110
111
114
115
116
117
118
119
120
121
122
123
124
125
126
127
128
129
130
131
132
133
134
135
136
137
138
139
140
141
142
144
149
150
151
152
153
154
155
157
158
159
163
164
165
166
167
168
169
170
171
172
173
174
175
176
177
179
180
185
187
188
189
190
191
192
194
196
197
198
199
201
202
203
204
205
206
207
208
209
210
213
214
215
216
217
218
219
220
221
222
223
224
225
226
227
228
229
230
231
232
233
234
235
236
237
238
239
240
241
242
243
244
245
246
247
248
249
251
252
253
254
255
256
257
260
262
263
264
265
267
268
269
270
271
272
275
277
278
279
280
281
282
283
285
286
289
292
293
296
297
298
301
302
304
307
308
309
310
313
314
316
319
321
322
323
325
326
327
328
329
330
331
332
334
335
336
339
342
343
344
346
347
348
349
350
351
352
353
354
355
356
359
360
361
362
363
364
369
370
371
372
374
375
377
379
381
382
383
386
387
388
390
391
392
393
394
395
396
398
399
400
401
403
404
406
408
410
413
414
419
422
423
424
425
426
427
428
429
430
432
433
434
436
438
440
442
443
446
447
448
449
450
451
456
459
460
462
464
466
469
470
473
475
476
477
478
480
481
482
483
486
487
490
492
493
494
495
497
498
499
500
501
502
503
505
506
507
508
510
511
512
513
514
515
516
517
518
521
523
524
525
528
529
531
532
537
538
539
540
541
542
543
544
545
546
Introduction
The BeagleBone is amazing! Given the proliferation of smartphones, the idea of holding in one hand a computer that is capable of performing two billion instructions per second is easy to take for granted—but the fact that you can modify the hardware and software of such a small yet powerful device and adapt it to suit your own needs and create your own inventions is nothing short of amazing. Even better, you can purchase it for as little as $45–$55.
The BeagleBone board on its own is too complex a device to be used by a general audience; it is the ability of the BeagleBone to run embedded Linux that makes the resulting platform accessible, adaptable, and powerful. Together, Linux and embedded systems enable ease of development for devices that can meet future challenges in smart buildings, the Internet of Things (IoT), robotics, smart energy, smart cities, human-computer interaction (HCI), cyber-physical systems, 3D printing, advanced vehicular systems, and many, many more applications.
The integration of high-level Linux software and low-level electronics represents a paradigm shift in embedded systems development. It is revolutionary that you can build a low-level electronics circuit and then install a Linux web server, using only a few short commands, so that the circuit can be controlled over the Internet. You can easily use the BeagleBone as a general-purpose Linux computer, but it is vastly more challenging and interesting to get underneath the hood and fully interface it to electronic circuits of your own design—and that is where this book comes in!
This book should have widespread appeal for inventors, makers, students, entrepreneurs, hackers, artists, dreamers—in short, anybody who wants to bring the power of embedded Linux to their products, inventions, creations, or projects and truly understand the BeagleBone in detail. This is not a recipe book—with few exceptions, everything demonstrated here is explained at a level that will enable you to design, build, and debug your own extensions of the concepts presented here. Nor is there any grand design project at the end of this book for which you must purchase a prescribed set of components and peripherals in order to achieve a very specific outcome. Rather, this book is about providing you with enough background knowledge and “under-the-hood” technical details to enable and motivate your own explorations.
I strongly believe in learning by doing, so I present low-cost, widely available hardware examples in order that you can follow along. Using these hands-on examples, I describe what each step means in detail, so that when you substitute your own hardware components, modules, and peripherals you will be able to adapt the content in this book to suit your needs. As for that grand project or invention—that is left up to you and your imagination!
When writing this book I had the following aims and objectives:
To explain embedded Linux and its interaction with electronic circuits—taking you through the topics from mystery to mastery!
To provide in-depth information and instruction on the Linux, electronics, and programming skills that are required to master a pretty wide and comprehensive variety of topics in this domain.
To create a collection of practical “Hello World” hardware and software examples on each and every topic in the book, from low-level interfacing, general-purpose input/outputs (GPIOs), analog-to-digital converters (ADCs), buses, and UARTs, to high-level libraries such as OpenCV, Qt, and complex and powerful topics, such as real-time interfacing with the PRU-ICSS.
To ensure that each circuit and segment of code is specifically designed to work on the BeagleBone. Every single circuit and code example in this book was built and tested on the BeagleBone.
To use the “Hello World” examples to build a library of code that you can use and adapt for your own BeagleBone projects.
To make all of the code available on GitHub in an easy-to-use form.
To support this book with strong digital content, such as the videos on the DerekMolloyDCU YouTube channel, and a custom website
www.exploringbeaglebone.com
, which has been developed specifically to support this book.
To ensure that by the end of this book you have everything you need to imagine, create, and build
advanced
BeagleBone projects.
Why the BeagleBone Black?
The BeagleBone Black is a powerful single-board computer (SBC), and while there are other SBCs available on the market such as the Raspberry PI and the Intel Galileo, the BeagleBone has one key differentiator—it was built to be interfaced to! For example, the BeagleBone's microprocessor even contains two additional on-chip microcontrollers that can be used for real-time interfacing—an area in which other Linux SBCs have significant difficulty.
Unlike most other SBCs, the BeagleBone is fully open source hardware. The BeagleBoard.org Foundation provides source schematics, hardware layout, a full bill of materials, and technical reference manuals, enabling you to modify the design of the BeagleBone platform and integrate it into your own product. In fact, you can even fork the hardware design on Upverter (www.upverter.com) under a Creative Commons Attribution-ShareAlike license (see tiny.cc/ebb002 for the full schematics). This is a very useful feature should you decide to take your newest invention to market!
How This Book Is Structured
There is no doubt that some of the topics in this book are quite complex—the BeagleBone is a complex device! However, everything that you need to master the device is present in the book within three major parts:
Part I: BeagleBone Basics
Part II: Interfacing, Controlling, and Communicating
Part III: Advanced BeagleBone Systems
In the first part in the book, I introduce the hardware and software of the BeagleBone platform in Chapters 1 and 2, and subsequently provide three primer chapters:
Chapter 3: Exploring Embedded Linux Systems
Chapter 4: Interfacing Electronics
Chapter 5: Practical BeagleBone Programming
If you are a Linux expert, electronics wizard, and/or software guru, then feel free to skip the primer chapters; however, for everyone else I have put in place a concise but detailed set of materials to ensure that you gain all the knowledge required to effectively and safely interface to the BeagleBone.
In the second part of the book, Chapters 6 to 9, I provide detailed information on interfacing to the BeagleBone GPIOs, analog inputs, buses (I2C, SPI), UART devices, and USB peripherals. You'll learn how you can configure a cross-compilation environment so that you can build large-scale software applications for the BeagleBone. This part also describes how you can combine hardware and software in order to provide the BeagleBone with the ability to interact effectively with its physical environment.
The final part of the book, Chapters 10 to 13, describe how the BeagleBone can be used for advanced applications such as Internet of Things (IoT); rich user interfaces; images, video, and audio; and real-time interfacing. Along the way you will meet many technologies, including TCP/IP, ThingSpeak, Xively, PoE, Wi-Fi, Bluetooth, cron, Apache, PHP, e-mail, IFTTT, VNC, GTK+, Qt, XML, multi-threading, client/server programming, V4L2, video streaming, OpenCV, Boost, USB audio, Bluetooth A2DP, text-to-speech, and the PRU-ICSS.
Conventions Used in This Book
This book is filled with source code examples and snippets that you can use to build your own applications. Code and commands are shown as follows:
This is what source code looks like.
When presenting work performed in a Linux terminal it is often necessary to display both input and output in a single example. A bold type is used to distinguish the user input from the output—for example:
molloyd@beaglebone:~$
ping
www.exploringbeaglebone.com
PING lb1.reg365.net (195.7.226.20) 56(84) bytes of data. 64 bytes from lb1.reg365.net (195.7.226.20): icmp_req=1 ttl=55 time=25.6 ms 64 bytes from lb1.reg365.net (195.7.226.20): icmp_req=2 ttl=55 time=25.6 ms ...
The $ prompt indicates that a regular Linux user is executing a command, and a # prompt indicates that a Linux superuser is executing a command. The ellipsis symbol “...” is used whenever code or output not vital to understanding a topic has been cut. Editing the output like this enables you to focus on only the most useful information. You are encouraged to repeat the steps in this book yourself, whereupon you will see the full output. In addition, the full source code for all examples is provided along with the book.
There are some additional styles in the text. For example:
New terms and important words appear in
italics
when introduced.
Keyboard strokes appear like this: Ctrl+C.
All URLs in the book refer to HTTP addresses and appear like this:
www.exploringbeaglebone.com
.
A URL shortening service is used to create aliases for long URLs that are presented in the book. These aliases have the form
tiny.cc/ebb102
(e.g., link two in Chapter 1). Should the link address change after this book is published, the alias will be updated.
There are several features used in this book to identify when content is of particular importance or when additional information is available:
WARNING This type of feature contains important information that can help you avoid damaging your BeagleBone.
NOTE This type of feature contains useful additional information, such as links to digital resources and useful tips, which can make it easier to understand the task at hand.
FEATURE TITLE
This type of feature goes into detail about the current topic or a related topic.
What You'll Need
Ideally you should have a BeagleBone Black before you begin reading this book so that you can follow along with the numerous examples in the text. Presently the board is manufactured by both CircuitCo and Embest—the boards from either manufacturer are compatible with the designs and operations in this book. You can purchase one of the boards in the U.S. from online stores such as Adafruit Industries, Digi-Key, Mouser, SparkFun, and Jameco Electronics. They are available internationally from stores such as Farnell, Radionics, Watterott, and Tigal.
A full list of recommended and optional accessories for the BeagleBone is provided in Chapter 1—if you do not yet have a BeagleBone, it would be worth reading that chapter before placing an order. In addition, each chapter contains a list of the electronics components and modules required if you wish to follow along with the text. The book website provides details about where these components can be acquired.
Errata
We have worked really hard to ensure that this book is error free; however, it is always possible that some were overlooked. A full list of errata is available on each chapter's web page at the companion website. If you find any errors in the text or in the source code examples, I would be grateful if you could please use the companion website to send them to me so that I can update the web page errata list and the source code examples in the code repository.
Digital Content and Source Code
The primary companion site for this book is www.exploringbeaglebone.com. It is maintained by the book's author and contains videos, source code examples, and links to further reading. Each chapter has its own individual web page. In the unlikely event that the website is unavailable, you can find the code at www.wiley.com/go/exploringbeaglebone.
I have provided all of the source code through GitHub, which allows you to download the code to your BeagleBone with one command. You can also easily view the code online at tiny.cc/ebb001. Downloading the source code to your BeagleBone is as straightforward as typing the following at the Linux shell prompt:
$
git clone
https://github.com/derekmolloy/exploringBB.git
If you have never used Git before, don't worry—it is explained in detail in Chapter 3. Now, on with the adventures!
Part IBeagleBone Basics
In This Part
Chapter 1: The BeagleBone Hardware
Chapter 2: The BeagleBone Black Software
Chapter 3: Exploring Embedded Linux Systems
Chapter 4: Interfacing Electronics
Chapter 5: Practical BeagleBone Programming


