Erhalten Sie Zugang zu diesem und mehr als 300000 Büchern ab EUR 5,99 monatlich.
- Herausgeber: Fox Chapel Publishing
- Kategorie: Lebensstil
- Sprache: Englisch
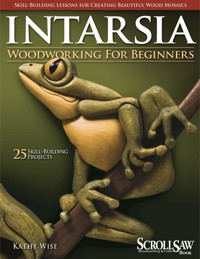
Learning the art of intarsia has never been easier thanks to celebrated intarsia artist and instructor Kathy Wise. With more than 40 skill building lessons, Intarsia Woodworking for Beginners will take you on a journey from the concepts and basics of working with an intarsia pattern, cutting, sanding, gluing, creating a backer board and finishing, to techniques that will take your work to the next level, such as staining, shims, overlays, laminations, wood burning and carving texture. With the projects divided into beginner, intermediate beginner and advanced beginner, this easy to follow book includes step-by-step instructions, over 20 intarsia patterns with reference photos, material lists, and tips and hints to help you turn multiple pieces of wood into a stunning work of art. Kathy's progressive teaching style offers something for anyone working with inlaid wood. The lessons not only cover the basics, but also describe details to look out for like the nuances of working with multiple shades of wood or the best way to create color breaks. This book offers valuable lessons that will be referenced again and again as you discover a love of intarsia.
Sie lesen das E-Book in den Legimi-Apps auf:
Seitenzahl: 116
Veröffentlichungsjahr: 2009
Das E-Book (TTS) können Sie hören im Abo „Legimi Premium” in Legimi-Apps auf:
Ähnliche


Sunflower, here.
© 2009 by Kathy Wise and Fox Chapel Publishing Company, Inc., East Petersburg, PA.
Intarsia Woodworking for Beginners is an original work, first published in 2009 by Fox Chapel Publishing Company, Inc. The patterns contained herein are copyrighted by the author. Readers may make copies of these patterns for personal use. The patterns themselves, however, are not to be duplicated for resale or distribution under any circumstances. Any such copying is a violation of copyright law.
For a printable PDF of the patterns used in this book, please contact Fox Chapel Publishing at [email protected].
Print ISBN 978-1-56523-442-0eISBN: 978-1-60765-890-0
Library of Congress Cataloging-in-Publication Data
Wise, Kathy.
Intarsia woodworking for beginners / by Kathy Wise.
p. cm.
Includes index.
ISBN: 978-1-56523-442-0
1. Marquetry. 2. Woodwork--Patterns. I. Title.
TT192.W56 2009
745.51’2--dc22
2009025324
To learn more about the other great books from Fox Chapel Publishing, or to find a retailer near you, call toll-free 800-457-9112 or visit us at www.FoxChapelPublishing.com.
Note to Authors: We are always looking for talented authors to write new books. Please send a brief letter describing your idea to Acquisition Editor, 1970 Broad Street, East Petersburg, PA 17520.
CONTENTS
About the Author
Introduction
How to Use This Book
Chapter 1: Mastering the Basic Steps of Intarsia: Goldfish Project
Lesson 1: Understanding and Working with Simple Intarsia Patterns
Lesson 2: Cutting Simple Intarsia
Lesson 3: How to Sand and Shape Intarsia Pieces
Lesson 4: How to Glue the Pieces Together
Lesson 5: How to Create the Backer Board
Lesson 6: How to Finish
Chapter 2: Simple Multiple-Wood Intarsia: Butterfly Project
Lesson 7: Understanding and Working with Multiple-Color Intarsia Patterns
Lesson 8: Cutting Multiple-Color Intarsia
Lesson 9: Creating Simple Color Breaks
Lesson 10: Fitting Together Multiple-Color Intarsia
Chapter 3: Intarsia Techniques
Lesson 11: Stains
Lesson 12: Using Shims to Add a 3-D Effect
Lesson 13: Using Overlays
Lesson 14: Making a Lamination
Lesson 15: Woodburning Texture
Lesson 16: Carving Texture
Lesson 17: Using CA Glue
Chapter 4: Projects
Level 1
Level 1 Step-by-Step Project: Iris
USA Keyholder
Baseball Mitt Picture Frame
Angel
Mice and Cheese
Cat
Beagle Puppy
Tortoise
Train Photo Frame
Level 2
Level 2 Step-by-Step Project: Horse
Frog
Lighthouse
Sunflower
Cowboy Boot Clock
Level 3
Level 3 Step-by-Step Project: Girl with Boots
Lily Cross
Raccoon
Birdfeeder
Boy on Swing
Girl on Swing
Appendix
Exercise 1: Cutting Simple Lines and Curves
Exercise 2: Cutting Order
Exercise 3: Practicing the Basics
Exercise 4: Cutting for Close Fit
Exercise 5: Recutting to Fit
Tool Information
Index
About the Author
Although Kathy Wise was a city girl for most of her childhood, she always had a strong love for animals. When she was a teenager, her family moved to a rural area in the thumb area of Michigan. She fell in love with country living almost instantly.
Kathy credits her mother, who is also an artist, for her interest in art. As a child, Kathy busily sculpted animals from soap and wood while her mother painted landscapes and people. High school and college art classes intensified her interest in art and sculpture. Adding sculpted clay animal figures to her pots during a ceramics class in college led to the creation of many other animal sculptures. Students were soon asking Kathy to create animals for them. Kathy graduated Magna Cum Laude with an Associates Degree in Commercial Art.
High Country Elk, 186 pieces, 18" x 25" (457mm x 635mm).
Kathy Wise shown with her lifesize intarsia project, Baby Giraffe—705 pieces, 6' x 26" (1829mm x 660mm).
Kathy began selling her one-of-a-kind animal sculptures at art fairs and shows. Soon she was supplying over 70 stores nationwide. In 1983, Gene Freedman (then president of Enesco Corporation) first saw Kathy’s work in a Seattle gift shop. This man, who launched Precious Moments, saw potential in Kathy’s art and contacted her to start the first of her many lines in the giftware industry. She has gone on to design animal figures and giftware for many other companies, including Simson, Westland, United Design, and Encore Group. Over the years, Kathy has designed and sculpted over one thousand different items in over forty lines that have been sold worldwide.
Kathy first began designing intarsia patterns for her father-in-law, Phil MacDonald. When his customers would ask for a special dog breed or custom intarsia of their pet, he would ask Kathy to create the pattern. She started to market the patterns and found intarsia artists loved her designs. She offers the greatest variety of dog breed intarsia patterns found anywhere. With Kathy’s knowledge and background in sculpting dogs, each pattern has a unique personality that is not found in any other intarsia patterns available in the marketplace.
In fall of 2004, Scroll Saw Woodworking & Crafts published Kathy’s first article, which featured her Boston terrier intarsia design and step-by-step instructions. Over 20 articles followed, including a bird wreath, calico cat, Arabian horse, maple leaf picture frame, turkey, and other assorted wildlife. Kathy’s art has been featured on several SSW&C covers. Her first book, Intarsia Woodworking Projects, features 21 projects ranging from beginner to advanced skill level. Kathy works on new patterns, articles, and beginner kits. She accepts special commissions for her intarsia work, including murals and large wall pieces. Her intarsia pieces are signed limited editions.
Go to Kathy Wise Designs for all of your intarsia pattern needs. Dog breeds, cats, horses, wildlife, landscapes, and more are available. For a free catalog of over 400 intarsia patterns, contact:
Kathy Wise Designs Inc.
PO Box 60
Yale, MI 48097
www.kathywise.com
Fax: 810-387-9044
Tiger Trail, 1045 pieces, 42" x 30" (1067mm x 762mm)—1st place winner in the intarsia category at the highly acclaimed 2009 Design in Wood Show in Del Mar, California.
Labrador-ables, 288 pieces, 34" x 19" (864mm x 483mm).
Introduction
Intarsia is an early Italian process of inlaying various colored woods onto a wood background. Over the years, it has evolved into a more sculptural style of wood-crafted art. Each intarsia artist (intarsianist) has his or her own technique and approach to the art form. I firmly believe there is no right or wrong way to create intarsia, just different intarsia styles. I like to use natural woods as much as possible in my work, but I use some stains or paints if I think it will add to the finished work. Having been a sculptor of animals and dogs for over 30 years, I like to add as much 3-D effect to my intarsia art as possible. The color of the wood in an intarsia piece is very important, as well as the light and dark values used in the design.
Subject matter often determines whether the piece will be viewed as a craft item or as a piece of art. Realistic animals and landscapes done in natural wood tones will be more accepted as art then a cutie train stained bright colors, no matter how nicely done it is. I have included a variety of intarsia patterns in this book, both fun and realistic designs.
This book will cover the basic skills needed to introduce you to the wonderful art of intarsia. If you are a beginner, follow the skill-building lessons in order; each project builds on the previous lessons. If you are already skilled in creating intarsia, browse through the lessons and projects—you will find many helpful hints and shortcuts. Feel free to change the patterns, substitute exotic woods, or add other materials, such as glass, stone, or plastic. Use stains, paints, oils, or dyes to enhance your colors to achieve the look you want. Add as much depth as possible to your intarsia piece to make it jump out at you. The pattern is just a starting point and guide for your own special brand of artistic creativity; make these projects into your own personal masterpieces of intarsia art. Above all, have fun!
—Kathy Wise
How to Use This Book
This book is structured so anyone—even someone without any knowledge of intarsia—can create beautiful works of art. The lessons break down the important techniques and steps of intarsia so they are easily understood. If you have never worked with a scroll saw or are not yet comfortable cutting basic lines, go to the appendix on here for simple cutting exercises.
Chapter 1 introduces the concepts of intarsia through six simple lessons. When you complete your first intarsia piece—a goldfish— you will understand the basics of working with an intarsia pattern, cutting, sanding, gluing, creating a backer board, and finishing.
Chapter 2 explains how to turn multiple pieces of wood into a colorful intarsia butterfly. Lessons 7 through 10 describe the nuances of working with multiple wood shades—understanding the patterns, cutting, creating color breaks, and fitting the pieces together.
Chapter 3 teaches a few techniques that will take your beginner intarsia to the next level. Lessons 11 through 17 illuminate the topics of stains, shims, overlays, laminations, woodburning, and carving texture.
Chapter 4 contains a wealth of projects for you to create. The 20 projects are divided into three levels. Each grouping starts off with a detailed step-by-step project. The rest of the pieces show everything you need to recreate the intarsia shown: a pattern, reference photos, materials list, and even helpful tips and hints.
The Level 1 section of Chapter 4 contains the Iris Step-by-Step, as well as a beagle, tortoise, panda, and several photo frame projects.
Level 2 starts off with the elegant Horse Step-by-Step project. Following are a selection of wonderful projects, including a sunflower, frog, and lighthouse.
The Level 3 section contains the most difficult projects in this book. After creating the step-by-step project, Girl with Boots, you can graduate to a handful of beautiful pieces worth the effort. They include a cross, raccoon, and birdfeeder.
The Appendix contains extra practice exercises and simple patterns to help you refine your cutting and fitting techniques.
1
CHAPTER 1
MASTERING THE BASIC STEPS OF INTARSIA:
Goldfish Project
This chapter utilizes photo-packed lessons to teach you the basic steps of intarsia—from how to work with a simple pattern all the way through to attaching the hanger. You will construct the 11-piece goldfish project by following along with the lessons. To help you learn the basic steps, only one type of wood is used for this piece. I chose a piece of yellowheart for a nice bright yellow. If you are just learning to cut, use a softer wood, such as poplar or cedar—it will be easier to cut and shape. You can also stain or paint spots on your goldfish for a variety of looks.
Goldfish
Materials
8½" x 11" x ¾"– 1" (216mm x 279mm x 19mm–25mm) yellowheart
⅜" (10mm) dowel
8½" x 11" x ¼" (216mm x 279mm x 6mm) backer board
LESSON 1:
Understanding and Working with Simple Intarsia Patterns
Intarsia patterns have a good bit of information on them—wood color suggestions, grain direction arrows, shaded grey shaping areas, shim lines, and woodburning lines, for starters. Another thing to consider is how many copies of the pattern you need. After you read this lesson, you will have a better understanding of how to work with and use intarsia patterns.
Copy: Make 3 copies of your pattern: one to keep as a spare, one to cut the fish, and one to use on your backer board. Cut out the patterns. I recommend making the spare copy because if I happen to need one in the middle of the process, I won’t have to stop what I’m doing to go make copies.
Clean: Be sure to wipe your board clean of dust and dirt before attaching the pattern to the wood. If your board is not flat, plane or sand it. Uneven or warped boards will make your cutting and fitting difficult.
Attach: Spray the back of your patterns with spray adhesive and stick to the shiny side of clear contact paper. Then cut out your patterns and peel the paper backing off. Stick to your wood, lining up your grain direction arrows.
Checkpoint: Here is what the project looks like at this point.
Tips
The pattern attached to the backer board can be used as a work surface. Later you will trace your outline on top of the pattern and cut it out, allowing for any adjustments.
If you are using Masonite as a backer board, be sure to attach your pattern to the rough side of the board.
Trim down your goldfish board if needed to make it easier to handle while cutting.
Using spray adhesive with contact paper will make it easy to remove the pattern pieces and reposition if you choose. It also will not leave a sticky residue on the wood.
LESSON 2:
Cutting Simple Intarsia
Beginners are often at a loss where to begin to cut. By cutting certain lines in a project, you can open up your project and make later cuts easier. As you cut more projects, you will know which lines to start with at a glance. With this in mind, the goldfish pattern is color-coded to make it easier for beginners. If you don’t have access to a color copier, keep the book handy to refer back to for the correct cutting order.
Review cutting order: Make sure your blade is square to the table and your wood is flat. Use a #5 reverse tooth blade or the blade of your choice to cut the lines in order of the colors, starting with the red lines. As you cut each line in order, it will open up the pieces, making the next lines easier to cut.
Cut straight lines:


