Erhalten Sie Zugang zu diesem und mehr als 300000 Büchern ab EUR 5,99 monatlich.
- Herausgeber: Fox Chapel Publishing
- Kategorie: Lebensstil
- Sprache: Englisch
Take your intarsia woodworking skills to the next level! Intarsia Woodworking Made Easy is a skill-building compendium of useful tips, techniques, and projects that are perfect for scroll sawyers, no matter their experience. Opening with detailed beginner-friendly overviews on blade selection, wood preparation, the stages of shaping, applying a finish, budget-friendly hacks, and so much more, this complete guide then presents 11 unique step-by-step projects and high-quality intarsia patterns that range in difficulty, from a simple succulent and a mermaid to an advanced lighthouse and carousel horse! An inspiring resource for anyone looking to build or improve their intarsia skills, this complete guide is the ultimate must-have!
Sie lesen das E-Book in den Legimi-Apps auf:
Seitenzahl: 189
Veröffentlichungsjahr: 2023
Das E-Book (TTS) können Sie hören im Abo „Legimi Premium” in Legimi-Apps auf:
Ähnliche


I would like to dedicate this book to my peers, the many intarsia friends I’ve met over the years, both virtually and in person. When I first began this journey, I had no idea that I would soon meet so many people with a shared passion for this amazing art form. Everyone was so welcoming and happily shared their knowledge. You helped me to find my passion and purpose. For that, I am grateful.
Special thanks to: Bruce Worthington, my intarsia partner in crime for many years. You challenged me with your designs, which built my confidence. Louise Hood, for encouraging me when I was just getting started. The late Charlie Norris, for helping and encouraging me to grow and nurture my art form. My customers, who thought my work was worth buying—especially those who trusted me to memorialize their precious furry loved ones. Kevin, my husband, who puts up with my wood addiction and messy shop, and provides honest feedback on my projects and designs. Marina Joseph, my best friend since high school. Your insight and wisdom helped me navigate the waters. Your reasoning kept me calm and focused. Your friendship keeps me grounded.
—Janette
© 2023 by Janette Square and Fox Chapel Publishing Company, Inc., 903 Square Street, Mount Joy, PA 17552.
Intarsia Woodworking Made Easy is an original work, first published in 2023 by Fox Chapel Publishing Company, Inc. All rights reserved. No part of this publication may be reproduced, stored in a retrieval system or transmitted, in any form or by any means, electronic, mechanical, photocopying, recording or otherwise, without the prior written permission of the copyright holders.
Managing Editor: Gretchen Bacon
Acquisitions Editor: Kaylee J. Schofield
Editor: Joseph Borden
Designer: Joe Rasemas
Proofreader/Indexer: Jean Bissell
Print ISBN: 978-1-4971-0298-9eISBN: 978-1-6374-1118-6
The Cataloging-in-Publication Data is on file with the Library of Congress.
To learn more about the other great books from Fox Chapel Publishing, or to find a retailer near you, call toll-free800-457-9112 or visit us at www.FoxChapelPublishing.com.
We are always looking for talented authors. To submit an idea, please send a brief inquiry [email protected].
For a printable PDF of the patterns used in this book, please contact Fox Chapel Publishing at [email protected], with 9781497102989 Intarsia Woodworking Made Easy in the subject line.
INTRODUCTION
The art of intarsia has been rapidly gaining popularity among scroll saw artists and hobbyists over the last few years. The desire to learn something new and improve upon existing skills has never been greater. This book will become your go-to reference for mastering your skills. Don’t be intimidated! Practice and patience go a long way in learning any new skill.
This book is full of new and fresh projects. It is geared toward all skill levels, and there is useful information for both beginners and seasoned enthusiasts. I will share with you what I have learned over more than 20 years of designing and creating intarsia. You will pick up new skills and refine existing ones to incorporate into your work. Whether you’re brand new or well-seasoned, my goal is to showcase projects that will enhance and advance your artistic and technical abilities.
With each project, I incorporate skill-building lessons and techniques for you to practice and hone. As you work through each, you will build your skills incrementally.
The Getting Started section is for those new to the craft. It explains what you need to begin your journey into the wonderful world of intarsia. I will then take you through the primary steps I follow for each project in the Basic Steps of Intarsia section. It will help you to build your own basic “go-to” method that works best for you.
The Shaping Tips and Finishing Touches sections provide guidance and ideas to transform your craft into art! As with all art forms, everyone has their own unique style. To develop this, you first learn the basic techniques, master them, then incorporate them into your own work. As they say, you first learn the rules so you can decide which ones to break!
The project lessons are broken down into easy-to-follow segments with tips and instructions. Each project will highlight new techniques and incorporate previous ones. Beginner, intermediate, and advanced sections allow you to gradually build your skills and confidence. As you progress, more complex skills are incorporated into the advanced projects.
Early on in my intarsia journey, at my very first craft show, I met a wonderful intarsia artist named Charlie Norris. “How do you create those beautiful, complex pieces?” I asked. He replied, “The same way you create the easy ones: one piece at a time”. To this day, I tell myself this simple yet profound message every time I begin a new project.
Table of Contents
Introduction
Getting Started
Safety
Tools and Materials
Wood Selection
How to Read Intarsia Patterns
Basic Steps of Intarsia
Introduction to Shaping
Finishing Touches
PROJECTS
Humpback Whale Fluke
Succulent
Fish Magnets
Mermaid
Dogwood Flowers
Ladybug on a Flower
Buoys on a Fence Post
Sports Car
Oregon Lighthouse
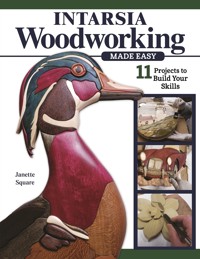
Wood Duck on a Branch
Carousel Horse
Patterns
Photo Credits
About the Author
Getting Started
Learning any new skill or craft can be intimidating, and intarsia is no exception. This book will help to conquer any fears you may have. It’s not as difficult as it might seem—and the best part is, if you mess up a piece, you simply cut another. A minor mishap won’t ruin an entire project like it can with other types of scroll sawing. When learning anything new, learn, practice, and learn some more. Each project in this book will take you a step further toward mastering the art.
Safety
While scroll sawing is pretty safe compared to many woodworking hobbies, there are still things to keep in mind before heading out to the shop. Not adhering to accepted safe practices can lead to serious injury. Keep these tips in mind each time you start a new project.
As with any tools, it’s important to read all the manufacturer’s instructions before use. A scroll saw is a fairly safe tool, but you can still hurt yourself. Always keep a firm grip on the piece and your fingers away from the blade when cutting. It’s easy for the blade to get caught up in the wood while you cut, which can lead to kickback. I’ve had the wood “jump” before, and when it comes down on your fingers, it really hurts!
While your needs might not call for a dust collection system as large as mine, every woodworking shop should use a dust collection system of some sort—even if that’s just a shop vacuum that connects to your powered tools to mitigate dust in the air.
The greatest hazard with intarsia, as with any type of woodworking, is sawdust. Because there is so much sanding involved, and we often use many varieties of wood that can be hazardous to your health, it is imperative that adequate dust collection is used at all times. I also recommend wearing a quality dust mask, especially when shaping your work. For hand sanding and power carving, I created a downdraft table that hooks up to the dust collector.
Always use protective gear. Pictured here are some of the essentials: a respirator, several dust masks, rubber gloves, and safety glasses. The remote allows me to turn my dust collector on from a distance.
When using any sanding tool, particularly one that spins, always be aware and careful while holding your work. I’ve had longer pieces kick back on me and, once, even rip my finger open. Keep your hair tied back and out of the way and don’t wear loose-fitting clothing. And, while it might seem counter-intuitive, don’t wear gloves while operating machinery, as they can get snagged in the moving parts.
When finishing your work, always have adequate ventilation, wear gloves, and wear safety glasses. Finish can easily splatter and get into your eyes. Be sure to dispose of used towels properly, as well. If left lying around, they can spontaneously combust, and that never ends well.
Enjoy your scrolling, but always be safe!
Ventilation, gloves, and safety glasses are essential when you’re working with finishes.
Tools and Materials
To get started, you only need a few basic tools. As you progress, you can increase your arsenal as budget and space allow. When I first started intarsia, the only tools I had were a scroll saw, a drill press for sanding attachments, and a small shop vacuum. This is all you really need to get started. Over the years, I gradually added several sanding tools and a more efficient dust collector. You will likely already have many of these tools around your shop, but this list is handy if you’re just setting up.
Scroll saw. If you don’t already have a scroll saw, I suggest buying the best one you can afford. This is the main tool in your toolkit, and it will get a lot of use. If possible, it’s always better if you have the option of trying it out beforehand to see how it runs and feels. At first, I purchased an inexpensive saw. It was okay to learn on initially, but it had a lot of vibration, and the blades were difficult to change. Overall, it wasn’t a pleasant sawing experience. I ended up buying a higher-end saw soon after. My advice is to purchase a better saw to begin with. When cutting pieces for intarsia, you will be cutting thicker, and sometimes harder, woods than with other types of scroll work. If the experience isn’t a pleasant one, it will discourage you from continuing. Everyone has their own opinion on which saw is the best. Do as much research as you can and ask other intarsia enthusiasts what works well for them. The best saw is the one you will use and enjoy!
Scroll saw blades. The type and size of scroll saw blade you use for intarsia varies depending on the type and thickness of wood you are cutting. Everyone has their own opinion as to the best blade to use. If you’re new to scroll sawing, I suggest purchasing several sizes and styles of different brands. Test them, make notes, and try them with different woods to see what your preference is. Ultimately, you will settle on a favorite for most of your cutting.
Using the correct size and type of blade for intarsia can greatly improve your cutting experience. I see people struggle trying to cut a very hard, thick piece of wood with too fine a blade. A finer blade in intarsia does not necessarily mean more accuracy. If it takes you an hour and four blades to cut one piece, you will not enjoy the experience. An undersized blade will also potentially cause problems with the fit of your pieces. The blade can bow while cutting, causing the edges of the pieces to be uneven. It can also burn the wood.
In general, for cutting out most intarsia pieces, I prefer to use a higher-end #7 reverse tooth blade. Most of the wood you will be cutting is about ¾″–1″ (1.9–2.5cm) thick. There are always exceptions, of course. For finer cuts on soft wood, a #5 would work well. For thick, exotic hardwood, a more aggressive blade would be better. The same blade number can vary with different brands and blade types. Some are more aggressive than others. I find Platinum OnLine #7 reverse tooth works well for me as an all-purpose blade for cutting intarsia. If I am cutting harder or thicker wood, or wood that burns easily, I will use a #7 Pegas Modified Geometry blade or a Flying Dutchman Polar blade. All are #7 but cut very differently.
You also want to have finer blades on hand for different types of cutting. Backer boards for intarsia projects are thin, usually plywood that is ⅛″–¼″ (3.2–6.4mm) thick. For this type of cutting, a fine blade such as a #2 or #2/0 works well. Using a higher number blade on such thin pieces will result in tear out and much less control over your cutting. When separating project pieces you’ve cut together (such as the rope in the Buoys on a Fence Post project), you will also need a finer blade. Depending on the thickness and type of wood, a #2, #3, or even #5 may be needed. You want the thinnest blade that will do the job well and without difficulty.
The most important thing about blades is to change them often. Blades can dull quickly. As soon as you notice yourself beginning to push the wood to cut it, it’s time for a new blade. Cutting with a dull blade can result in cuts that aren’t square, fatigue, frustration, and a poor fit. The life of blades can vary greatly depending on the wood you’re cutting and the blade itself. Always let the blade do the work. If cutting is difficult, try using a different type of blade more suitable to what you are cutting. You should be steering the wood and holding it down, but not pushing it.
Sanders
Drill press with flex drum sander attachment (Option 1). I started with, and still use, flex drum sanders for most of my shaping. Flex drum sanders are simply dense foam wrapped in sandpaper of varying grits. They are inexpensive, work well, and can be attached to almost any motor that runs at about 1,725 rpm, which is the ideal speed for shaping intarsia pieces. At first, I used a drill press, interchanging grits as needed.
Sanding/buffing machine (Option 2). Eventually, I purchased a sanding/buffing tool that I can slide the flex drum sanders onto directly. I have a coarse-grit (80–120) on one side and a fine-grit (220) on the other. Bench grinders, lathes, and other motors can also be adapted for this purpose. You can purchase an arbor attachment for use on any of these. The key is to avoid anything that will spin too fast (over 2,000 rpm), or you will do more burning than sanding.
Inflatable drum sander (Option 3). An inflatable drum sander is another good option. This would be mounted in a similar manner as the flex drum sander. They are more expensive, but you don’t need to replace them, just the sanding sleeve. You can also adjust the amount of air in them depending on your sanding needs. Inflatable drum sanders come in a variety of sizes, as well.
Oscillating spindle sander. An oscillating spindle sander is handy for adjusting minor fitting issues. You can remove small amounts of the edge of a piece for a better fit or square up the edge of a piece. The smallest spindle is a good option for this, whereas the larger spindles are great for removing a lot of wood at once. I use it often for shaping concave pieces, such as cat’s ears. It is great for creating dips and curves to add dimension to a piece. Because it has a variety of spindle sizes, it is a versatile tool to have.
Rotary tool. A rotary tool with a flex shaft and assorted power carving bits is great for finer detail work or shaping small pieces. It also works well for getting into small areas. I use it a lot to rough in the overall shape of a project or an area within a project, such as an animal face—basically carving the general shape I’m trying to achieve, then using the flex drum sander to remove the scratches and fine-tune the individual pieces. It’s important that the flex shaft is comfortable for you to hold. They come in varying sizes, so try it out ahead of time to ensure it will be comfortable in your hand.
Mop sander. A sanding mop attachment is a must-have for my toolkit. As you will see in the project instructions, I utilize it to remove the “fuzzies” from the bottom of each piece. It is also used as the final sanding step to “buff” each piece to a smooth, soft finish. I use this sander on the drill press.
Belt sander. A belt sander is handy for flattening the bottom of the wood pieces before you begin cutting. It also works well for thinning pieces or removing a lot of wood. You can do some shaping with it as well, but it’s not the ideal sander for this purpose.
Dust collection system. Sanding intarsia pieces creates a lot of fine sawdust. Some varieties of wood can be quite toxic. I highly recommend some sort of dust collection system, especially when you are shaping and sanding. There are many options available from homemade to commercial grade. A simple shop vac will do for starters. The downside is that you must reposition it for each tool you’re using at the time, but it works well. If your budget allows, the ideal setup includes a proper dust collection unit with pipes, hoses, and gates going to the tools you use most.
Dust mask or respirator. Again, some woods can be highly toxic. Even for woods that are not, sawdust can wreak havoc on one’s respiratory system. For these reasons, it is vital to invest in a good dust mask or respirator and get into the habit of wearing it whenever you are cutting or sanding.
Safety glasses. When working with wood and machinery, always wear shatterproof safety glasses to protect your eyes.
Square. A 2″ (5.1cm) square is ideal for squaring your scroll saw blade.
Magnifier light. This will reduce eye fatigue and help you achieve more accurate cuts.
Foot pedal for saw. This leaves both hands free to cut your pieces.
Clear packaging tape. This is placed on the wood before the pattern is adhered to it. It makes the pattern easy to remove and provides lubrication to your blade.
Spray adhesive. This is used to adhere pattern pieces.
Assortment of wood. The woods you will need will vary depending on your project and personal tastes.
Scissors. These are for cutting out patterns.
Sandpaper sheets. While you will do much sanding using powered sanders, you will need to hand sand at points.
Assorted clamps. These are mostly used for adhering the backer to the project.
Highlighter, black markers (both wide and thin), pencil, and eraser. These will be used for marking your patterns and wood pieces.
Two-sided turner’s tape. This is used for adhering pieces to a sanding shim.
Blue painter’s tape. This is used for protecting areas of wood for various reasons.
Wood glue. This is used for gluing your project together.
CA (cyanoacrylate) glue. This is a fast-acting glue that we will use to adhere various parts on some projects.
Waxed paper. You will often need to place your project on waxed paper so it does not stick to your work surface.
Awl. This is mostly used for tracing your project onto carbon/graphite paper.
Assorted drill bits. You will need several different sizes of drill bits for your projects.
Drill bit gauge. This will help determine what size drill bit you should use.
Dental tools, sharp-tipped and rubber-tipped. These are mostly used for cleaning wood finish out of hard-to-reach areas.
Wood Selection
This first step to creating an intarsia piece is an important one: selecting your wood. You can change the look of a project greatly just by the woods you choose for each piece. Try to maximize the use of color and grain in the wood to make the finished piece more interesting. Look at the pattern and photo of the project to help decide what type of wood and/or color would work best. I also like to find photographs of the subject I’m creating for additional ideas and reference. Once you’ve selected the wood, decide which direction the grain should go. Sometimes, the grain itself is more important than the actual color. I like to choose wood with interesting grains, particularly for areas such as water, rocks, or larger areas that will stand out and really highlight the personality of the wood. By taking advantage of the wood grain, you can make a good project spectacular.
To give your project more depth, choose woods with interesting grain patterns.
When you’re just starting out and haven’t yet accumulated many different types of wood, I suggest starting with domestic woods. They are more affordable and generally easier to work with, particularly soft woods. They can have some great grain patterns, as well. As you complete more projects and the need arises, you’ll no doubt go on the hunt for certain colors or species. This is when the wood addiction begins! If you have a specific project that requires certain shades, buy a little extra to have on hand for that next project. You will accumulate a good variety in no time! Domestic and exotic woods come in just about every color imaginable. Be aware that with some species the colors may change over time, dramatically even. Take this into account when planning your project. If you’re not sure, put the board in sunlight or a bright area, cover part of it from exposure to the light, and examine it over time to compare the exposed area with the covered area.
Generally, boards between ¾″–1″ (1.9–2.5cm) thick are ideal for intarsia. Any thinner and you lose the three-dimensional appearance that intarsia is known for. Any thicker and cutting can become difficult with a scroll saw. You don’t have to have every piece of a project the same thickness. Sometimes, you can only find certain types of wood as ⅞″ (2.2cm) or 15/16″ (2.4cm), for example. Thickness can be reduced during the shaping process. Adding risers in strategic areas to make them thicker will also add dimension. The size of your overall project will factor in as well. Small projects, such as ornaments, don’t need to be created with thicker woods, but a very large project would look flat if all the wood was thin.
TIP
One trip to the lumber store will reveal that there are many options. Something to keep in mind is that more common types of wood will often come in different forms. They can be anywhere from rough-sawn to planed and sanded on all sides. Generally, the less processing the mill has to do, the cheaper the board will be. Lumber also comes in different grades. The more defects in the board, the cheaper it will be. If you have the ability and don’t mind doing some prep work, you can save quite a bit of money by purchasing less-processed lumber. When first starting out, I suggest getting S4S (sanded on four sides) to start with because it is easier to work. Since you’re cutting small pieces out of a board, a lower-grade board may not be an issue and can save you some money. Keep in mind that there will be more waste. You will have to work around knots and other defects or incorporate them into your project. I tend to buy the board that has the most interesting grain in it, rather than straight, defect-free grain.


