Erhalten Sie Zugang zu diesem und mehr als 300000 Büchern ab EUR 5,99 monatlich.
- Herausgeber: Fox Chapel Publishing
- Kategorie: Lebensstil
- Sprache: Englisch
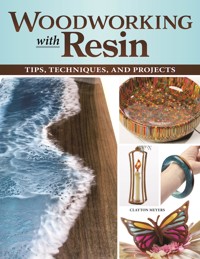
Learn to use epoxy resin in your scroll saw and woodturning projects! A complete guide to show beginner to intermediate woodworkers everything they need to know, Woodworking with Resin is a skill-building guide that offers more 13 step-by-step scroll saw projects that all incorporate resin elements and progress in difficulty. Opening with insightful sections on the scroll saw and turning basics, applying patterns, avoiding common pitfalls, selecting a blade, mixing and pouring resin, practice exercises, and so much more, you'll be fully equipped with all the essential knowledge and skills you need before you begin. From holiday fretwork ornaments to compound cut butterflies, a pinecone pen, a colored pencil bowl, and so much more, Woodworking with Resin offers a treasure trove of inspiration and skill-building projects to take your woodworking technique to the next level – all while you work with resin!
Sie lesen das E-Book in den Legimi-Apps auf:
Seitenzahl: 104
Veröffentlichungsjahr: 2022
Das E-Book (TTS) können Sie hören im Abo „Legimi Premium” in Legimi-Apps auf:
Ähnliche


© 2023 by Clayton Meyers and Fox Chapel Publishing Company, Inc.,
903 Square Street, Mount Joy, PA 17552.
Woodworking with Resin is an original work, first published in 2023 by Fox Chapel Publishing Company, Inc. All rights reserved. No part of this publication may be reproduced, stored in a retrieval system or transmitted, in any form or by any means, electronic, mechanical, photocopying, recording or otherwise, without the prior written permission of the copyright holders.
Managing Editor: Gretchen Bacon
Acquisitions Editor: Kaylee J. Schofield
Editor: Joseph Borden
Designer: Wendy Reynolds
Proofreader: Nancy Arndt
Indexer: Jay Kreider
Print ISBN: 978-1-4971-0299-6
eISBN: 978-1-63741-120-9
LCCN: 2022947546
To learn more about the other great books from Fox Chapel Publishing, or to find a retailer near you, call toll-free 800-457-9112 or visit us at www.FoxChapelPublishing.com.
We are always looking for talented authors. To submit an idea, please send a brief inquiry to [email protected].
For a printable PDF of the patterns used in this book, please contact Fox Chapel Publishing at [email protected], with 781497102996 Woodworking with Resin in the subject line.
Introduction
This book is designed to give even the most novice woodworker the knowledge and abilities to integrate resins into their own work. Whether you prefer to work with a scroll saw, band saw, lathe, or any combination of woodshop tools, this book will give you the aptitude needed to take your projects to a whole new level. These projects will give you a small glimpse into the world of resins and their capabilities. I will highlight some common ways to use resins along with a few not-so-common ways. It is my goal that this book will give you the knowledge and skills needed to feed your own imagination and expand your artistic capabilities. I hope you enjoy these projects as they open a door to a whole new world of craftsmanship.
Before we dive in, I’d like to share a little about my woodworking experience. I grew up woodworking with my father. Spending hours together covered in sawdust, we would build small things like score keepers and calendars and take them to craft shows. Now, I have been woodworking for more than 30 years and I am constantly looking to expand my capabilities. I have worked with almost every type of wood you can imagine. I love how different grain patterns, knots, and imperfections can give each piece its own personality. I have made projects with materials ranging from expensive hardwoods to partially burnt chunks of used firewood. That is one of the things I love about this hobby: we are only limited by our imaginations and materials. Over the last decade, I have experimented with different ways to use resins. I have found that adding resins can increase what materials are available, and I have found that it grossly feeds my imagination.
While wood by itself has a beautiful and warm feeling to it, incorporating resins can add endless possibilities to make every project unique. In this book, I get to share some of my experience in working with different resins. I will explain different ways of using resin to add a super high gloss finish, add pops of color, and even how to use resin to turn an otherwise unusable piece of scrap wood into an extraordinary work of art. Within these pages, you will see how adding the contrast of colored resins can complement the natural look of wood, how a thick clear coating can bring a grain pattern to life, and how to work with resin and wood to create something truly special.
Contents
Introduction
Getting Started
Traditional Uses of Resin
Shop Requirements
Equipment and Consumables
Workshop Safety
The Basics of Working with Resins
Resin as a Surface Finish
Using Resin with Additives and Colorants
Using Resin to Cast Mixed Media
Molds and Castings
Projects
Holiday Ornaments
Compound Cut Gemstone
Rose Keepsake
Citrus Glass Charms
Compound Cut Candle Ornament
Festive Pine Cone Ornament
Pine Cone Pen
Ocean Plaque
Butterflies
Ocean Bangle
Colored Pencil Bowl
Filled Photo Plaque
Cutting Board with Epoxy Inlay
Gallery
Patterns
Photo Credits
About the Author
Getting Started
Traditional Uses of Resins
Resins have a lot of different purposes. Often, it is used for things such as thick coatings for bar tops, tabletops, boat exteriors, and flooring. But, most commonly, resins have been used as adhesives. Mixing resin with hardener creates an epoxy adhesive that can be applied to pretty much any material. It can bind metals, plastics, woods, and there are even varieties that can adhere foam and glass. Some of these mixtures will harden in as little as 30 seconds, making them perfect for quick fixes, while others can take a week or longer. Epoxies create a permanent bond that can be stronger than the original material that it is gluing together.
Resins have become more versatile in recent years. They now incorporate ultraviolet light inhibitors that prevent the epoxy from yellowing over time. These variants are perfect for outdoor projects. Food-safe varieties have also been developed. Use these for a brilliant high-gloss surface on handmade dishes, cutting boards, and tabletops. Whatever your needs are, there is most likely an epoxy resin that can handle the job.
There are many types of resins, each with specific purposes. We will mostly be using a tabletop epoxy resin, which is made up of two parts: a resin and a hardener. Most epoxy resins are a 1:1 mixing ratio, but some are 2:1. Be sure to check the instructions for your specific brand.
We will also be using a deep pour casting resin. These are best used for large projects and projects that require deep pours. This is an ideal resin in which to cast objects.
While we won’t use any in this book, coating/doming resins are great for applying a thin finishing coat to a small project. Likewise, we will not use any polyester resins, which are often used for deep pours and are glass-like when cured, as these are trickier to work with. Once you feel you have sufficient experience working with resin, feel free to branch out to these types!
Tabletop epoxy (left) is best for shallow pouring over flat surfaces, while deep pour epoxy (right) is best for projects requiring deep layers. Check your manufacturer’s instructions for specific pour-depth specifications.
Shop Requirements
Introducing resin work into your woodshop will add a whole new twist on an already beautiful art form. That said, there can be some unexpected bumps. To make using resin a positive experience, there are a few things that you will want in your shop that you might not already have. I’m not talking of a complete overhaul here—just a couple of small tweaks to make life with resins a little easier.
The first thing I will recommend is a decent ventilation system. Again, nothing fancy here. A fan in a window or a bathroom vent fan that leads outside will be enough. Most types of sawdust will make your shop smell earthy, warm, and fresh (even so, you should still wear proper safety equipment and set up a ventilation system if working with wood). In fact, a lot of perfumes and colognes use wood oils as a base. Resins, on the other hand, will probably never be used as an air freshener. They are strong and noxious. Resin fumes in concentrated areas can be toxic, cause respiratory inflammation, and irritate the skin and eyes. Therefore, you must have a way to vent the fumes. (Plus, you will have some explaining to do to your spouse if you don’t.) If not vented well, the smell will fill the house and vacate your entire family.
A clean, level surface is also key to success when working with resins. Resin is a viscous liquid. If you pour resin onto a surface or into a mold, it will naturally level itself out. When it sets up and cures on a non-level surface, it will end up thicker on one side than it is on the other. To ensure you get uniform coverage and even filling, you need a level surface. A simple sheet of plywood set on a couple of sawhorses works well as long as you shim the legs to make the surface level. Before beginning any resin project, use a level to check your work surface to ensure it is perfectly level and plumb. The resin will drip and spill, also, so make sure the work surface is not something you care too much about and is easily replaceable. A tarp or plastic sheeting placed under your work area will help control the mess. Don’t use your granite countertops.
A plywood board set on a pair of sawhorses makes an effective work surface.
Resin fumes can be extremely hazardous when concentrated in a small area. Use a fan to vent fumes through an open window.
Equipment and Consumables
The projects in this book use relatively small amounts of resin. Most require 8oz (29.6ml) or less. These small amounts are easy to mix by hand with scrap pieces of wood that are cut into sticks. You can also buy popsicle/craft sticks for a few dollars at any craft store. The containers that I use throughout this book are very low tech. Disposable, transparent drink cups make great vessels for mixing in. They are cheap and easy to handle, and being able to throw them away makes cleanup a breeze.
To complete the projects in this book, you will need the following tools and materials:
Scroll saw. A scroll saw uses a very thin blade that moves up and down at a high speed. The small size of the blade is perfect for fine, detailed cutting such as fretwork. It will be used for some compound-cut projects as well. If a scroll saw isn’t in your budget, a simple coping saw will also work, though it will take much longer. If your scroll saw has the necessary components, be sure to hook your dust collection system or shop vac up to it.
Belt sander. A small belt sander will be very handy for quick surface sanding. It is essentially a continuous band of sandpaper that rotates over a flat surface. Some of the projects in this book will be a lot easier with this piece of equipment. If your belt sander has the necessary components, be sure to hook your dust collection system or shop vac up to it.
Drill press. A drill press will take the guesswork out of making sure your holes are perfectly perpendicular to the piece you are drilling. This will be used to drill pilot holes for the scroll saw blade to pass through.
Disc sander. A disc sander uses an abrasive wheel to quickly remove material. These are usually mounted on a bench and are often a two-in-one piece with benchtop belt sanders. If your disc sander has the necessary components, be sure to hook your dust collection system or shop vac up to it.
Hot glue gun. This will be used for making temporary molds.
Table saw or band saw. Both machines can be used to size down some larger chunks of wood to more manageable pieces. The table saw uses a circular saw blade and is great for quick, straight cuts. The band saw uses a continuous-loop blade, and while it will cut more slowly than the table saw, you can cut simple curves and arcs with it as well. If your table saw or band saw has the necessary components, be sure to hook your dust collection system or shop vac up to it.
Orbital sander. An orbital sander is a handheld tool that rotates a sandpaper disc at high speeds so you can quickly sand workpiece surfaces. If your orbital sander has the necessary components, be sure to hook your dust collection system or shop vac up to it.
Wood lathe. This will only be needed for bowl and pen turning. The lathe works by turning the wood in a continuous revolution. You remove material by applying a variety of cutting tools to the wood’s surface as it spins. Generally, the lathe is used for shaping round objects such as baseball bats, spindles, and bowls. You will, of course, need a variety of shaping tools and some special attachments. Check each project to determine specific tool needs.
Heat gun/blowtorch. These items are important for popping surface bubbles in the epoxy/resin.
Planer. A wood planer is used to remove a layer of wood to create a smooth and level surface. For these projects, a simple hand plane will also do.
Shop vac. This is handy to have in any shop, but especially when you’re working with wood and resin. Use a shop vacuum to help manage dust and particulates.
Reaming tool.


