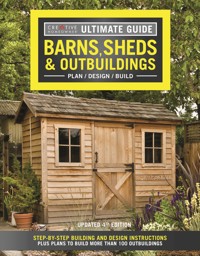
Ultimate Guide: Barns, Sheds & Outbuildings, Updated 4th Edition E-Book
Editors of Creative Homeowner
Erhalten Sie Zugang zu diesem und mehr als 300000 Büchern ab EUR 5,99 monatlich.
- Herausgeber: Creative Homeowner
- Kategorie: Lebensstil
- Sprache: Englisch
Adding a backyard storage shed, a new detached garage, an attractive playhouse, or any other type of utility building not only improves the functionality of your home but also adds value to your property. Written with the do-it-yourselfer in mind, Ultimate Guide: Barns, Sheds, and Outbuildings gives you the information you need to enhance your property by constructing one of these buildings. Whether you plan to do the work yourself, or you just want to know the basics before you hire the work out to someone else, this new updated edition provides information on planning, building, and finishing in clear text aided by 60 easy-to-follow photographic sequences. Select from dozens of ready-to-build plan packages and order readily available construction blueprints, CAD files, cost estimates, and materials lists.
Sie lesen das E-Book in den Legimi-Apps auf:
Seitenzahl: 506
Veröffentlichungsjahr: 2021
Das E-Book (TTS) können Sie hören im Abo „Legimi Premium” in Legimi-Apps auf:
Ähnliche


Copyright © 2002, 2005, 2010, 2019 Creative Homeowner
This book may not be reproduced, either in part or in its entirety, in any form, by any means, without written permission from the publisher, with the exception of brief excerpts for purposes of radio, television, or published review. All rights, including the right of translation, are reserved. Note: Be sure to familiarize yourself with manufacturer’s instructions for tools, equipment, and materials before beginning a project. Although all possible measures have been taken to ensure the accuracy of the material presented, neither the author nor the publisher is liable in case of misinterpretation of directions, misapplication, or typographical error.
Creative Homeowner® is a registered trademark of New Design Originals Corporation.
Content on here provided by Design America, Inc., St. Louis, MO.
Ultimate Guide: Barns, Sheds & Outbuildings, Updated 4th Edition
Vice President-Content: Christopher Reggio
Editor: Laura Taylor
Technical Editor: David Schiff
Designer: David Fisk
Indexer: Jay Kreider
Print ISBN 978-1-58011-799-9eISBN 978-1-60765-505-3
The Cataloging-in-Publication Data is on file with the Library of Congress.
We are always looking for talented authors. To submit an idea, please send a brief inquiry to [email protected].
Creative Homeowner®, www.creativehomeowner.com, is an imprint of New Design Originals Corporation and distributed exclusively in North America by Fox Chapel Publishing Company, Inc., 800-457-9112, 903 Square Street, Mount Joy, PA 17552, and in the United Kingdom by Grantham Book Service, Trent Road, Grantham, Lincolnshire, NG31 7XQ.
Note: The buildings as shown in the photographs and renderings in this book may differ from the actual blueprints. When studying the building of your choice, please check the floor plans carefully. All plans appearing in this book are protected under copyright law.
Reproduction of the illustrations or working drawings by any means is strictly prohibited. The right of building only one structure from the plans purchased is licensed exclusively to the buyer, and the plans may not be resold unless by express written authorization.
For a printable PDF of the patterns used in this book, please contact Fox Chapel Publishing at [email protected], stating the 9781580117999 and Ultimate Guide: Barns, Sheds & Outbuildings, Updated 4th Edition of the book in the subject line.
SAFETY
Although the methods in this book have been reviewed for safety, it is not possible to overstate the importance of using the safest methods you can. What follows are reminders—some do’s and don’ts of work safety—to use along with your common sense.
□Always use caution, care, and good judgment when following the procedures described in this book.
□Always be sure that the electrical setup is safe, that no circuit is overloaded, and that all power tools and outlets are properly grounded. Do not use power tools in wet locations.
□Always read container labels on paints, solvents, and other products; provide ventilation; and observe all other warnings.
□Always read the manufacturer’s instructions for using a tool, especially the warnings.
□ Use hold-downs and push sticks whenever possible when working on a table saw. Avoid working short pieces if you can.
□Always remove the key from any drill chuck (portable or press) before starting the drill.
□Always pay deliberate attention to how a tool works so that you can avoid being injured.
□Always know the limitations of your tools. Do not try to force them to do what they were not designed to do.
□Always make sure that any adjustment is locked before proceeding. For example, always check the rip fence on a table saw or the bevel adjustment on a portable saw before starting to work.
□Always clamp small pieces to a bench or other work surface when using a power tool.
□Always wear the appropriate rubber gloves or work gloves when handling chemicals, moving or stacking lumber, working with concrete, or doing heavy construction.
□Always wear a face mask when you create dust by sawing or sanding. Use a special filtering respirator when working with toxic substances and solvents.
□Always wear eye protection, especially when using power tools or striking metal on metal or concrete; a chip can fly off, for example, when chiseling concrete.
□Never work while wearing loose clothing, open cuffs, or jewelry; tie back long hair.
□Always be aware that there is seldom enough time for your body’s reflexes to save you from injury from a power tool in a dangerous situation; everything happens too fast. Be alert!
□Always keep your hands away from the business ends of blades, cutters, and bits.
□Always hold a circular saw firmly, with both hands, if practical.
□Always use a drill with an auxiliary handle to control the torque when using large-size bits.
□Always check your local building codes when planning new construction. The codes are intended to protect public safety and should be observed to the letter.
□Never work with power tools when you are tired or when under the influence of alcohol or drugs.
□Never cut tiny pieces of wood or pipe using a power saw. When you need a small piece, saw it from a securely clamped longer piece.
□Never change a saw blade or a drill or router bit unless the power cord is unplugged. Do not depend on the switch being off. You might accidentally hit it.
□Never work in insufficient lighting.
□Never work with dull tools. Have them sharpened, or learn how to sharpen them yourself.
□Never use a power tool on a workpiece—large or small—that is not firmly supported.
□Never saw a workpiece that spans a large distance between horses without close support on each side of the cut; the piece can bend, closing on and jamming the blade, causing saw kickback.
□ When sawing, never support a workpiece from underneath with your leg or other part of your body.
□Never carry sharp or pointed tools, such as utility knives, awls, or chisels, in your pocket. If you want to carry any of these tools, use a special-purpose tool belt that has leather pockets and holders.
CONTENTS
Introduction
PART I: DESIGN
CHAPTER 1
PLANNING
Building Permits & Codes
Design Guide
Construction Drawings
Understanding Blueprints
Evaluating the Site
Power to the Site
Design Ideas
CHAPTER 2
TOOLS AND MATERIALS
Tools
Ladders, Scaffolds & Fall Protection
Lumber
Plywood & Panel Products
Fasteners
PART II: BUILDING BASICS
CHAPTER 3
FOUNDATIONS
Foundation Types
Preparing the Site
Working with Concrete
Concrete Footings
Concrete Slabs
Piers & Posts
Wall Foundations
Skid & Trench Foundations
CHAPTER 4
FRAMING FUNDAMENTALS
Approaches to Framing
Building Loads
Framing Floors
Installing Subfloors
Stair Openings
Framing Walls
Windows & Doors
Rib Construction for Sheds
Pole Barns
Timber-Frame Barns
Sheds from Kits
Stair Construction
CHAPTER 5
ROOF FRAMING
Roof Basics
Gable Roofs
Shed Roofs
Roof Trusses
Gambrel Roofs
CHAPTER 6
SIDING, ROOFING & MORE
Wall Sheathing
Vertical Siding
Wood Panel Siding
Horizontal Siding
Metal Roofing
Roof Sheathing
Roof Flashing
Roofing Materials
Types of Doors
Hanging a Door
Installing a Prehung Door
Installing Windows
Adding Ventilation
CHAPTER 7
WIRING & PLUMBING
Wiring Basics
How to Set Up Service
How to Run Cable
Outdoor Cable
Plumbing Basics
All About Pipe & Tubing
Sinks & Toilets
Utility Faucet Valves
CHAPTER 8
FINISHING TOUCHES
Storage
Living Space
Drywall
Trimwork
Paint & Stain
PART III: PROJECTS & PLANS
CHAPTER 9
OUTBUILDING DESIGNS
Case Studies
Garden Tool Shed
Backyard Storage Shed
Gambrel Shed
All-Purpose Garage
Livestock Barn
Artist’s Studio
Pole Barn
Three-Bay Garage
Gambrel Barn
Timber-Frame Garage
Shed-Roof Shed
Attached Shed
Gable-Roof Shed
Barn-Style Shed
Building Plans
Resource Guide
Glossary
Photo Credits
Metric Equivalents
INTRODUCTION
Adding a barn, a backyard shed, a new detached garage, or some other type of outbuilding not only improves the functionality of your home but also adds value to your property. Written with the do-it-yourselfer in mind, Ultimate Guide: Barns, Sheds, and Outbuildings gives you the information you need to enhance your property by constructing one of these buildings. Whether you are a novice builder or seasoned pro and plan to do the work yourself or you just want to know the basics before you hire the work out to someone else, the book provides information on planning, building, and finishing in clear text aided by easy-to-follow photographic sequences. For those who wish to build an existing design, there are projects and blueprints available.
GUIDE TO SKILL LEVEL
Easy. Made for beginners.
Challenging. Can be done by beginners who have the patience and willingness to learn.
Difficult. Can be handled by most experienced do-it-yourselfers who have mastered basic construction skills. Consider consulting a specialist.
Part 1: Design
Part 1 covers the planning stage of your project. You will find information to help you locate your building properly, decide on its design, and decipher architectural plans and building codes. This section also introduces you to the tools and materials you will be using to construct your project. For the most part, you will be able to build the typical barn, shed, or other outbuilding using basic tools and buying the materials you will need at the local home center or lumberyard.
Part 2: Building Basics
In this section, individual chapters detail the basics of building. Each chapter covers a specific area of construction, beginning with foundations. In this chapter, you will learn how to construct everything from simple shed foundations to poured concrete slabs. There is a chapter on framing, including extensive sections on pole buildings and old-fashioned timber-framing techniques—the way all barns were built in the past. This is followed by chapters on closing in the framing, including information on all types of roofing and siding, and installing doors and windows.
To let you include some of the comforts of home, other chapters cover the basic wiring and plumbing needs of your building, and your options for interior and exterior finish and trimwork.
All of the building chapters guide you through the construction process. Step-by-step photo sequences will have you building like a pro.
Part 3: Projects and Plans
While Parts 1 and 2 supply the basics you need to know for building a barn, shed, or other type of outbuilding, Part 3 provides you with inspiration in the form of already designed buildings.
Starting on here, you will find designs for structures you can build, including sheds, barns for a variety of purposes, garages, and other utility buildings, including four simple backyard sheds. The range of buildings should meet the needs and the capabilities of most homeowners. The designs are flexible, meaning you can adjust the dimensions to meet your needs.
On here, you will find plans for popular utility building designs. They range from large barns suitable for raising livestock to yard and garden sheds and one-car garages. Many of the larger garages, feature added living spaces. If you like the designs, you can purchase a complete set of blueprints for construction.
Full-size barns, opposite, can be used for livestock care or for extra storage. Be sure to plan your barn to fit your needs.
Yard and garden sheds, above, come in handy for storing gardening equipment, toys, or swimming pool accessories.
Garages, right, not only protect our cars from the elements but also provide extra storage space.
PART I
DESIGN
CHAPTER 1
PLANNING
BUILDING PERMITS & CODES
DESIGN GUIDE
CONSTRUCTION DRAWINGS
UNDERSTANDING BLUEPRINTS
EVALUATING THE SITE
POWER TO THE SITE
DESIGN IDEAS
Begin planning your barn, shed, or other outbuilding by deciding how you will use the building. Don’t forget to allow for expanded use in the future. Before purchasing plans or creating your own design, check with the local building department about codes and restrictions governing the project. It is also a good idea to have a building site and orientation picked out before settling on a final design. This chapter covers the basics of prebuilding planning, including understanding building codes, evaluating the site, developing a design, and reading and interpreting construction drawings.
BUILDING PERMITS & CODES
Getting Permits
Most towns, cities, and counties require permits for buildings over a certain size or for any structure with a permanent foundation. In some cases, plans to build a small garden shed do not require a permit, but always check with the local building inspector early in the planning process to be safe. To find the phone number, look under your town’s name in the phone book, and search for either “permits,” “building inspector,” or “inspector.” Then call and describe the type of structure you plan to build and the size and basic characteristics of your lot. Ask whether you are required to submit a building plan, how long before beginning you must submit it, how long the review process takes, and whether you may reapply on appeal.
Also ask what a complete permit package contains. Some municipalities want just a site plan and two elevations (side views); others may want floor plans and detailed building specifications as well. If zoning is particularly restrictive in your town, they may even want to know the type of roof you plan to use and the color of the barn. Also, your permit application may require the opinions of a soil specialist or an engineer. You can get all this information by phone and then start to assemble your permit package using the pieces outlined in the sections below, including a site plan, floor plans, elevations, sections, and specifications, which combined are sometimes simply called drawings or construction drawings.
Restrictions
Many municipalities have restrictions that limit where you can build a new structure. A setback is the minimum distance between a building and the property line. An easement is the legal right for another property owner (or often a utility company) to cross or have limited use of another’s property. Height and lot coverage restrictions limit how high you can build and what percentage of your lot can be covered by structures (including your house).
If local zoning permits you to maintain livestock, you will probably be restricted as to how close to your property lines you can locate a livestock structure. Always check with the local building department. You may find that your particular zoning does not allow livestock at all or restricts their numbers.
Codes
No matter how lenient the permit requirement may appear, it cannot exempt you from building your structure to conform with area building codes. These codes are the minimum building specifications required by law and are enforced by your local building inspector.
Codes ensure that standard building practices are used to make your building structurally sound and safe. To find out more about building codes, you can consult the many code handbooks available, even though every effort has been made in this book to represent common building practices that pass code inspections. That said, note that codes vary even regionally. The local building inspector is the expert in this regard, so ask about the code requirements.
TYPICAL CODE AND ZONING RESTRICTIONS
TYPICAL GARAGE DIMENSIONS
TYPICAL POTTING SHED
TYPICAL EQUIPMENT SHED
DESIGN GUIDE
Take your time when deciding on the layout, size, and overall design of your barn or shed. A great deal of effort goes into constructing a building—not just physical work but permits and financing as well. It is often worth the relatively minor effort and expense to expand a barn beyond what you expect to use today, just on the possibility that you’ll need the space later. Ten years from now, for example, you may need an extra-large door for larger garden equipment.
If you already have a shed and need more space, it’s not that expensive to build a second small shed or buy a prebuilt metal one. But if you’re going to the trouble of building a large primary garden shed from scratch, you should think about the details you might want to add, such as wide, barn-style double doors and a sturdy ramp. If the shed will double as a workspace, you may want to add one or two windows, lights, and electrical outlets—or even a utility sink.
Designing for the Building’s Purpose
The best thing to do when designing your structure is to list all possible uses you and your family can anticipate. Then sit down with this list and some graph paper, and figure out your space requirements.
For a storage shed, measure the equipment that you will need to store, and add at least a 12-inch buffer zone around the equipment so that you have room to walk around. If you want one room of an outbuilding to be a ceramics shop, for example, measure the potter’s wheel, determine how much space you’ll need to use it comfortably and safely, and be liberal when deciding on storage space.
For any kind of shop, whether you’ll be working on cars or building furniture, you should mentally walk yourself through various projects to make sure you’ve allowed enough working space. For instance, in a woodworking shop where you’ll need to rip a 4 x 8-foot sheet of plywood, you’ll need at least 8 feet of clearance space in front of and behind the table saw.
Wiring & Plumbing
Also keep in mind your potential needs for electricity and water. If your eventual plan is to use part of a barn for living space or for keeping livestock, it makes sense to rough in some of the plumbing and heating—especially if it will be installed within a slab—so that the disruption is minor when you convert the barn to a heated structure. Adding wiring after you’ve finished the building may not be as disruptive as adding plumbing and heating, but if your building will have interior walls, you’ll want to rough in the wiring before the walls are installed.
If you will be finishing furniture in your new shop, you will want to plan on an adequate ventilation system. And don’t forget about a built-in vacuum system for removing dust from sanding and finishing. And if you will be spending a lot of time in your new outbuilding, you may want to include wiring for a sound system and perhaps even some sort of internet access.
Plan for the way the building will be used. Here, clear glazing over part of the roof framing turns this potting shed into a greenhouse/potting shed. Note how runoff from the roof will flow into the flower box that runs along the eave of the building.
Accommodating Expansion
Be sure to position entryways carefully, and keep in mind that although second-floor access may not be an issue today, it may be necessary in coming years. Think about how to design your structure to accommodate expansion. You may find it worth building an oversize header into one wall so that you can add a wing onto this side of the barn later and allow for a wide entryway. The same is true for window and door headers. It is messy work to install window and door headers after a building is built. But it is a cinch to install a header in the initial framing that could serve an additional window or door later. Just be sure to note these hidden elements in your plans for future reference.
In addition to housing animals, barns and other outbuildings can enhance the landscape. This eye-catching structure also provides valuable vertical space for climbing plants.
SMART TIP
FEED STORAGE
Controlling rodents at the feed storage area is crucial. This can be as simple as storing food in a sealed garbage can. But if you use feed bins, it’s going to take some planning to line them properly to keep out rodents.
If your barn has a dirt floor, you should pour a minimum 4-inch-thick concrete floor slab in a storage room to help control pests. Purchase bags of premixed concrete, and mix it on-site using a rented mixer or (for very small rooms) hand tools and a wheelbarrow.
TYPICAL HORSE BARN
Horse barns have a central aisle, which makes it easier to clean the stalls. There should be sufficient stall space for the type of horse, and a large tack room for saddles and other equipment.
Guidelines for Animals
Animals have specific minimum space requirements, which are given in the table on the opposite page. When building a barn for animals, you’ll also need to consider storage space for feed, as well as providing sufficient water and perhaps electricity. Don’t forget manure: if you have animals in stalls much of the time, you will want enough space near the stalls to drive in some type of tractor.
When you have animals in a barn, you also need to provide sufficient ventilation so that your barn is free of noticeable levels of ammonia and methane fumes. For a barn that doesn’t vent well naturally, you may have to install a fan that provides for a minimum of four air changes per hour in winter and up to 40 air changes per hour in summer to keep the air clean, depending on how many animals you have.
Horses. In most climates, horses can be kept outside year-round, as long as they are provided with a three-sided shelter from storms. If you want to stall your horses, the barn should be designed to be warm in winter, cool in summer, and easy to muck out. A wide aisle between two rows of stalls works well. A dirt floor is the cheapest option, but it must be well-drained and kept covered in sawdust or straw. If your barn site is low or has drainage problems, excavate from 8 to 12 inches and then fill the hole with crushed rock. Cover this with a layer of tamped clay.
Cattle. For calves, milk cows, and beef cattle (cows, steers, or bulls), a three-sided open-front barn with access to the outside and individual feeding stalls is a minimum requirement. In most climates, cattle don’t need to be kept warm in winter, but (like horses) they do require a windbreak and protection from rain and snow. An indoor pen for cows and their calves can have a dirt floor. Keep in mind when site planning that full-grown dairy cows or beef cattle may each need about 3 acres of forage pasture.
Pigs. For pigs, access to outside pastures is essential, along with an insulated, ventilated hutch for resting. In summer, pigs will need at least a roofed area to protect them from the sun. In cold winters, they’ll need an enclosure to shield them from cold winds.
Sheep & Goats. Sheep and goats generally don’t need any housing at all, unless they will be birthing during the winter. A 6 x 6-foot pen inside a larger barn generally is more than enough space for a doe or ewe and her offspring. A free space in the barn for shearing sheep will come in handy; if you plan on milking goats, allow an area for a milking station.
Poultry. Chickens, turkeys, and other domestic fowl require a closed-in building of their own, or a pen within a closed barn to protect them from wind, cold, and precipitation. The living area density for chickens should be no greater than 2 square feet per bird. Chicks need warmth and feeding space big enough so that half of them can eat at any one time. Turkeys require at least 3 square feet of housing per hen and 5 square feet per tom.
Because requirements vary for animals region to region (and even among breeds), always consult the local Cooperative Extension Service and code authorities on your plans.
Animals require not only sufficient space inside a barn, but also enough area and properly fenced pasture outside to provide them with grass and room to exercise.
Construction drawings not only provide the local building department with information about your project, they also help you keep everything organized during the planning and building phases.
CONSTRUCTION DRAWINGS
Drawings are simply a set of plans or blueprints that you’ll follow when building your project. Basic barn and shed plans are readily available in home centers, lumberyards, bookstores, and the like. If you don’t find a barn plan that fits your needs, consider creating a customized version of one of the designs in the back of this book. If you try your hand at drawing plans yourself, be sure to hire an engineer or architect to review them for structural integrity.
Blueprints are drawn to scale; typically, a ¼-inch space on a blueprint represents a 1 foot space in the structure. Though the ¼-inch scale is common, some blueprints use a 3/32-inch or ½-inch scale. Check the requirements of the local building department including the type and number of drawings you must submit.
Order Plans to Build Your Own Barn, Shed, or Outbuilding
To view designs and order plans for a variety of barns, sheds, and other types of outbuildings, turn to here.
Many Plans, One Building
If designers and architects were to put all the features of a building onto one sheet of the blueprint, it would be difficult to read and too complicated to follow. So at the design stage, an architect or engineer breaks the building down into different plans: a site plan, floor plan, elevation, wall sections, and the like
COMMON CONSTRUCTION DRAWINGS
SITE PLAN
Site plans show from a bird’s-eye view what your lot will look like with the new structure and any new roads or landscaping. Site plans need to show your property lines and how far the barn will be from each line. They will typically also show orientations to north, easements and right of ways, and existing structures.
FLOOR PLAN
Floor plans give the location of exterior and interior walls and the location of windows and doors. If they’re included in your project, the floor plans will also include location and types of major appliances, plumbing fixtures, and wiring, as well as exterior features such as stairs or a porch.
ELEVATION
Elevation drawings are detailed one-dimensional renderings of the sides of a building. If two sides are identical (for example, the east and west walls), one drawing will suffice. Like floor plans, these can be a great aid when maintaining design and construction consistency during the building process.
SECTION
Sections are cutaway views of a wall, roof, or foundation that show what is contained within the structure. Sections can be helpful to show structures that are difficult to read on other building plans. Some inspectors may demand wall sections to see what will be within your finished walls.
UNDERSTANDING BLUEPRINTS
Blueprints may look confusing at first glance, but if you know the basics of how to read them, they eventually will become clear. First, learn how to read the lines, because it is with various types of lines that a blueprint represents a structure’s component parts. Then turn your attention to the symbols commonly used so you can have a complete understanding of what is shown. Bear in mind that some architects and engineers litter blueprints with construction notes.
Blueprint Lines
A solid line on a blueprint indicates an object’s visible outline. You would see a solid line along both edges of a concrete wall where it meets the floor because those edges would be visible. A broken line indicates a hidden object. When a basement slab hides the footing below, a broken line can indicate the shape of that structure.
Aspects of a building, such as a window or door, often have to be located precisely in a wall or floor. This positioning is often handled with a centerline to establish the center point of an area. A centerline is indicated by a C and a broken line drawn perpendicular to the wall or window frame.
A section line indicates where an aspect of the building is shown in cross section. It indicates the point at which the structure is sliced and the section view is shown. A break line indicates a shortened view of an aspect of the building that has a uniform and predictable shape. A leader line simply points from a specific measurement or note on the side about a detail or other aspect of the building to that part of the building.
Blueprints also give dimensions, or distances between various points of a building. Lines play a role here, too. If the distance between two walls is 10 feet, the dimension 10’-0” interrupts a solid line with arrows pointing outward on both ends. Sometimes a dimension line has dots or slanted lines instead of arrows at its ends. An extension line establishes a reference away from the building lines where dimensions are noted.
Utility Symbols. To maintain consistency in the construction industry and avoid confusion, blueprint floor plans use standard symbols to show the positions of heating and plumbing components (such as radiators, thermostats, and water heaters) as well as parts of the electrical system (such as outlets, switches, utility panels, and smoke detectors).
BLUEPRINTS
Twin peaks, matching doors, and a small side porch are included in the whimsical design of this small outbuilding, left. Many such buildings mimic design features found on the main house.
UTILITY SYMBOLS
To maintain consistency in the construction industry and avoid confusion, blueprint floor plans use standard symbols to show the positions of heating and plumbing components (such as radiators, thermostats, and water heaters) as well as parts of the electrical system (such as outlets, switches, utility panels, and smoke detectors).
This three-story barn is unusual in that it has a concrete-block first floor topped with conventionally framed second and third floors. The block will keep the interior cool in summer.
UTILITY SYMBOLS
Blueprints include special symbols to represent features of utility and mechanical systems in the building.
WALL SYMBOLS
Blueprints also sometimes include graphic patterns to indicate materials. When a structure is drawn on a blueprint, the walls are represented as a line. But that line can be a brick wall, a wood wall, or even stucco over a wood frame.
EVALUATING THE SITE
There are four main things to consider about a potential site for your barn or outbuilding: access to both roads and utilities, soil type, drainage, and topography. If a number of places on your property satisfy these criteria, you might also consider other factors, such as solar orientation, weather protection, and the direction of prevailing winds.
Access to Roads
Good roads are expensive to engineer and build—even thousands of dollars per mile if you have to blast bedrock. They involve excavation, design for proper drainage, and careful selection of materials. You cannot just dump loads of gravel onto grass or bare earth and expect it to serve as a sound road surface for very long.
Also, once a road is in place, it has to be maintained. Gravel needs to be dressed every other year or so because the finer pieces sift down into the larger rocks. Blacktop cracks need to be sealed to prevent frost heaving that can tear apart all your costly work.
If you can position your barn so that it doesn’t need a new road built to it, all the better. If you want to build your barn away from existing roads and your region endures winter weather (and a muddy spring), you will likely struggle with access over rutty roads and mud unless you construct a solid road bed. You will have to decide whether that’s a price you’re willing to pay to put off spending what it takes to build a good road.
Access to Utilities
You should always consult a licensed electrician in the planning stages. Depending on your circumstances, you may also need to contact the power company. Local utilities often regulate the maximum distance between a meter and a breaker panel, so check requirements. You should also check to determine whether you can run an outdoor circuit to your barn directly from your house’s main service panel or whether you need to have a separate subpanel installed in the barn.
Whether or not your local government requires it, all work should conform to the requirements of the National Electrical Code (available in local libraries). If you will be keeping livestock, bringing water to your barn is an absolute necessity. You’re probably not going to want the expense of a new water main and septic system just for your barn; you’ll want to hook it into your house’s system, if possible. In regions with cold winters, water-supply pipes need to be buried 4 feet or more in the ground; the closer you are to your well and septic system, or to the municipal water and sewage lines, the less time-consuming (and costly) this digging will be. Remember that some areas impose very strict standards for septic systems, and require perc tests, special permits, and inspections.
ACCESS ROAD CONSTRUCTION
County soil maps are available from your Cooperative Extension Service office. They include aerial photos of the county with an overlay of coded soil types.
LOAD-BEARING VALUES OF SOILS
Class of Material
Load-bearing pressure (lbs. per sq. ft.)
Crystalline bedrock
12,000
Sedimentary rock
6,000
Sandy gravel or gravel
5,000
Sand, silt sand, clayey sand, silty gravel, and clayey gravel
3,000
Clay, sandy clay, silty clay, and clayey silt
2,000
Details make the difference when it comes to building design. The curved-top double garage doors aren’t the only components that stand out on this detached garage—note the panel door in the gable and the leaded-glass window.
Soil
If you have a garden, you may already have an idea of what type of soil you have on your property—whether it’s mostly sand, clay, silt, or loam. Before building a large structure, however, obtain a copy of a local soil survey map, which is available from the Cooperative Extension Service, to find out exactly what type of soil on which you’ll be building. (A sample of what these maps look like is shown below.) The soil types are drawn onto aerial photographs with a key that explains the qualities of each soil type, including engineering properties and how suitable it is for different types of construction methods.
Soils are rated for their load-bearing capacity—that is, how much weight per square foot they can support without having to be modified with soil stabilizers such as gravel, stepped landscaping, or retaining walls.
Bedrock, the most stable building surface, has the greatest load-bearing pressure rating. Sedimentary stone, such as sandstone, and gravel support slightly less weight; sand, silt, and clay soil support much less. Depending on your soil type, you can increase the width of the foundation footings to spread the load or even modify the soil itself by bringing in fill from elsewhere—an expensive option.
If you have any doubts about the bearing capacity of your soil, consult a soil engineer and the Cooperative Extension Service. Building on soil that can’t support your structure will cause it to settle, crack the foundation, and rack the walls.
DRAINAGE
SOIL MUST DRAIN THOROUGHLY, especially in areas where the weather reaches freezing temperatures. Otherwise, moisture retained in the soil will freeze and cause frost heaving. Frozen soil can increase in volume as much as 25 percent, which presses the soil (and your barn’s foundation) upward. In cold climates, prevent damage from heaving by installing your footings below the average frost depth, which is available from your local building department.
It’s also important to have good drainage around your structure for water that runs off the roof and groundwater that may run downhill and be blocked from its normal path by your structure. The soil around your structure should slope away from the foundation, generally at ¼ inch or more per foot for at least 6 feet. If needed, a swale, or shallow depression, can be used to direct surface water. A perimeter drain made of perforated pipe can be used to direct groundwater away from your building into a drainage ditch or collection pond.
A typical perimeter drain has several inches of gravel in the bottom, a perforated drain pipe to carry away water, and more gravel topped with filter fabric.
To keep perforated drain pipes from clogging, cover the gravel trench with filter fabric, or slip on a filter-fabric sleeve that lets water through but keeps out dirt.
LEVELING A SLOPE
Topography
The topography of your site is the three-dimensional shape of your lot including major physical characteristics, such as standing water, large rocks, and trees. You can alter the topography of your lot, but it’s expensive. Generally, it’s better to adjust your barn to the topography.
A sloped site presents challenges when designing your foundation slabs. For example, you must excavate a flat pad, which could mean building a retaining wall. For walls, you can excavate the slope or use a stepped foundation. However, a sloped site isn’t always a bad thing. If the lot slopes to the south, for instance, you will have a site that’s warmer than surrounding flat areas because ground sloping 10 degrees to the south receives the same amount of solar radiation as level ground 700 miles to the south. Plus, mildly sloped sites are good for drainage, so if you prepare your barn’s perimeter drains and swales properly, you will have a well-drained site and a dry barn.
Sun & Wind
In the Northern Hemisphere, the climate is slightly warmer on south-facing slopes and slightly colder on north-facing ones. To reap gains from passive solar heating, buildings should have the longest dimensions running approximately east and west with most windows on the south side and few on the north. In that way, the winter sun can help heat the building. (See how the sun’s path during different part of the year in “Winter Solar Path,” right.) In hot climates, you’ll want to do just the opposite to prevent solar gain. Of course, other elements in your environment may not permit you to orient your barn this way.
When you position your barn, note that positive pressure from wind will drive cold air into the barn, and negative pressure on the far side will suck warm air out of it. As you orient your barn for sun and wind, keep in mind that, for the winter, you want to expose the wall with the most glazing to the south to collect solar heat while exposing the fewest openings to the ends of the barn that are perpendicular to the prevailing wind.
As for trees, there are different scenarios for dealing with either year-long prevailing winds that come from one direction or prevailing winter winds that shift from north to south between the winter and summer seasons.
The arrangement of trees is important, but so is the type of tree you plant. Deciduous trees bear leaves in the summer but lose them during the cold winter months. These trees are excellent for the south side of a barn because their leaves will shield the roof from the harsh summer sunlight and heat and—when the leaves drop—admit sunlight and heat in the winter. Carefully placed after close observation of prevailing winds, deciduous and coniferous trees can be used to direct cooling breezes toward your structure in the summer and block cold winds in the winter.
WINTER SOLAR PATH
In northern climates, larger buildings that will house livestock or people should be built facing toward the sun and away from prevailing winds to take advantage of solar heating.
SMART TIP
THE RIGHT WINDOWS
Use windows to help control your building’s environment. To keep heat in, choose windows with low U-factors. To let in the most light, look for windows with high visible transmittance ratings—the closer to 1 the better.
WIND DIRECTION
The direction of the wind and the pressures it creates affect how you should orient your building. The shortest side with the fewest windows should face into the prevailing wind.
If seasonal winds blow from opposite directions, plant any type of tree where it will help channel summer breezes, but only put evergreens where they will deflect winter winds.
If winter and summer winds blow from the same direction, plant tree types that will direct cooling summer breezes toward the building but direct winter winds away from the building.
POWER TO THE SITE
You can often bring power to saws and drills by running a power cord from a nearby house. Just be sure the cord is a heavy enough gauge to support the amp rating on your tool. An undersize cord can deprive a tool of the needed power and ruin the tool. This is because power encounters resistance in the cord and drops off over longer distances. You decrease this resistance by using heavier gauge wire. Generally use 10- or 12- gauge cords. They are not as flexible and light, but they will protect your tools in the long run. (For more information, see “Recommended Extension-Cord Wire Gauges,” opposite bottom.)
If you can’t get power nearby, you have two choices: make power with a generator, or install a temporary power pole. This setup includes a conduit mast, a meter base and meter, a turn-off switch, GFCI breakers, some outlets, and a rod hammered into the ground to act as a ground. Some utility companies will set up these poles for you for an installation fee and monthly power consumption charge. They will often have a minimum charge. An electrician can make one for you, but it will still have to be inspected by the utility company before the power is turned on. The building inspector may also want to take a look before it’s approved for use.
If you do the work yourself, be sure to check specs with the local utility because there are often strict requirements about weatherproofing, pole height and depth in the ground, minimum distances from the service to the center of the street, and pole placement on the site. After you have the pole approved and power is flowing, you’ll have to distribute it throughout the site through GFCI-protected cords and weatherproof outlet boxes.
There are a number of reasons to run electricity to your outbuilding. The most obvious is to provide light and power to the building itself, but outbuildings can also help you light remote areas of your property. Note the security light on the building above.
TEMPORARY SERVICE PANEL
A portable generator can supply power on a remote site. Fill it with oil and gasoline (top); start it; and plug in your cords (bottom). Buy or rent a model with enough power to run your equipment.
A lived-in look adds to the charm of this small outbuilding tucked into the corner of the yard, left. Note the full-size door on the building’s side.
Working barns, below, usually rely on natural ventilation such as the cupola on the roof and the large louvered vents on the sides of the building.
A garden shed, above, is indispensable for storing tools and gardening supplies close to where the work takes place.
The detached garage, right, provides parking spaces and presents the opportunity for annexing additional living space on the second floor.
Even small outbuildings, below, increase the overall storage capacity of most homes.
CHAPTER 2
TOOLS AND MATERIALS
TOOLS
LADDERS, SCAFFOLDS & FALL PROTECTION
LUMBER
PLYWOOD & PANEL PRODUCTS
FASTENERS
To construct a durable building you will first need to select the correct tools and materials for the job. Good tools are essential for any building project, but you don’t need to invest in top-of-the-line tools—good-quality midpriced tools will go a long way in helping you work efficiently and safely. This chapter discusses the basic tools you will need for this type of construction project, including tools for layout, cutting, attachment, and working safely. You will also learn how to select the right materials, including distinguishing from among the different types of lumber available.
TOOLS
Construction Levels
It is essential to build any structure plumb, level, and square. To do that, you will at least want to have a 4-foot spirit level for checking framing, and a line level and mason’s string for checking long spans.
Spirit Levels. Spirit levels come in many lengths. A 4-foot model is best for working with framing. You can also extend its useful range by resting it on a long straight 2x4.
Digital Levels. Unlike spirit levels, digital levels beep when they are level or plumb. The tools never go out of whack because you can reset them electronically. Some electronic levels also work as inclinometers to give you the angle of rafters. That feature can be handy when you have to match roof pitches in separate, distant locations.
Water Level. A water level is basically colored water in a long clear tube with gradation marks on both ends. Because water seeks its own level no matter what the distance or terrain, you can use the tool for long-distance level checks. Once any air bubbles are removed, stretch the hose from one place to another (even up and down over rough terrain) and the water line at both ends will be level.
For grading sloped land and laying out level foundations, you’ll need to use a transit, a builder’s level, or a laser level. These tools allow you to sight a level line across large distances. These are expensive items, so you should rent them.
Spirit levels are indispensable tools for carpentry. A 4-ft. level is needed for many aspects of framing and finishing; smaller levels are good for doors and windows.
Digital levels are used much like spirit levels, but they have a digital readout. Most kinds will also emit a beep when they are held at level or plumb.
A water level is used for marking level points across long distances. They are especially useful for checking formwork before pouring a foundation.
SAFETY TOOLS
COMMON SENSE SHOULD TELL YOU not to do construction work without first having some basic safety equipment, such as eye and ear protection. Wear goggles or safety glasses that have aerated side guards whenever you work with power tools. The U.S. Occupational Safety and Health Administration (OSHA) recommends that hearing protection be worn when the noise level exceeds 85 decibels (dB) for an eight-hour workday. When you consider that a circular saw emits 110 dB, however, it is clear that even much shorter exposure to loud noises can contribute to hearing impairment. Both insert and muff-type ear protectors are available; whichever you choose, be sure it has a noise reduction rating (NRR) of a least 20 dB.
Wear a dust mask when creating sawdust, especially when cutting pressure-treated wood. Two basic kinds of respiratory protection are available: disposable dust masks and cartridge-type respirators. A dust mask will allow you to avoid inhaling dust and fine particles. Respirators have a replaceable filter. Both are available for protection against nontoxic and toxic dust and mist. Whichever you buy, look for a stamp indicating that the National Institute for Occupational Safety and Health/Mine Safety and Health Administration (NIOSH/MSHA) has approved it for your specific job. When you can taste or smell the contaminant or when the mask starts to interfere with normal breathing, it’s time for a replacement.
Work gloves are also advisable, at least when you’re moving wood or doing other rough jobs. Similarly, heavy-duty work boots will protect your feet. Steel toes will prevent injuries to your toes from dropped boards or tools, and flexible steel soles will protect your feet from a puncture by a stray nail. Lastly, wear a hard hat when you’re working in the basement or others are working above you.
Masonry Tools
Whether you’re working with concrete, brick, or unit masonry, you’ll need many of the same basic masonry tools. You can easily rent many expensive items, so check before you buy a tool that you may not use often.
You’ll need trowels and floats for the placing and finishing of concrete, and a bull float (made of magnesium or steel) or a darby (made of wood) to finish the upper layer of curing concrete. With a finishing trowel, you can create a smooth surface once the concrete is leveled; then you’ll use edging and jointing trowels on the surface of the smooth concrete. An edging trowel makes a rounded edge on a concrete slab, which is safer and more durable than a sharp edge. A groover has a ridge down the center of its blade to form grooves or control joints. Jointers are metal rods (round or square) attached to a handle that you use to create various mortar joints when working with brick and concrete block.
Masonry Tools. Rubber float (A), striking tool (B), mason’s trowel (C), wood float (D), 5-lb. hammer (E), magnesium float (F), jointer (G), brickset (H), notched trowel (I), and groover (J).
An air-powered nail gun has a clip of banded nails that feed into the gun and are fired with a trigger squeeze. While handy, it is not cost-effective for the occasional builder of small projects.
A framing hammer has a straight claw and a heavy head. It is used to drive nails. Lighter hammers are best for siding and finishing work.
The batteries in today’s drills/drivers are powerful and lightweight, and they hold a charge for a long time. As a result they have replaced corded drills for most jobs.
Driving Nails and Screws
Hammers. Pros often use a 20- to 24-ounce waffle-head, or serrated, straight-claw framing hammer. Wooden (hickory) handles tend to absorb vibration better than fiberglass handles, so some people think wooden handles lessen your chances of developing repetitive motion ailments like carpal tunnel syndrome. If you’re not used to manual labor, a 24-ounce hammer may be too heavy for you, and you’ll probably be better off with the 20- or 16-ounce size.
Nail Gun. A pneumatic, or air-driven, nail gun, which uses a magazine that holds up to 100 or more nails, can take much of the tedium out of repetitive nailing. But you pay a price: nail guns are expensive and heavy, and you need compressors and hoses to run them. Nail guns really don’t pay for themselves—purchased or rented—unless you have a great amount of nailing to do all at one time.
Most guns handle 6d through 16d nails. You’ll need a compressor, gasoline or electric, and at least 100 feet of air hose. If you have a choice, go with the quieter electric compressor. Also, make sure you set the compressor’s in-line regulator to the pressure required for the tool you’ll be using.
Power Drill. A corded or battery-powered drill is essential not only for driving wood screws but also for quickly and precisely drilling holes. If cost is an issue, buy a plug-in heavy-duty ⅜-inch drill with variable speeds. If you can afford the extra cost, you’ll find a cordless drill even handier. Cordless drills come in an array of voltage ratings; the higher the voltage, the more powerful the drill. A 12-volt drill generally is powerful enough to fill all your needs.
Other Basic Tools
Drill Bits. The standard twist drill bit bores holes in wood, plastic, or metal. Spade bits quickly make large holes in wood, but not as cleanly as other bits. Masonry bits drill holes into brick and concrete. Hole saws make large, accurate holes up to several inches in diameter. Single-twist auger bits have a small cone-shaped point at the tip to make them more accurate than traditional bits. Forstner bits cut holes with very little tear-out. An adjustable screw pilot bit will stop at a predetermined depth and cut a countersink.
Wrenches. Combination wrenches, adjustable wrenches, nut drivers, and socket wrenches have countless applications. You’ll use pipe and spud wrenches when working with plumbing. For wiring, electrician’s pliers, the multipurpose tool, and the cable ripper come in handy. Slip joint, diagonal-cutting, and needle-nose pliers have many practical uses.
Woodworking Tools. Use a tool belt when carrying nails and screws. Sanders, planes, and files help even out surfaces. Use measuring tapes to lay out the site and plan for cuts. Use knives and chisels to cut small amounts of material in places where a saw is not practical. You can use a pry bar as a lever. A screwdriver is often the only practical means of driving a screw.
Drill Bits. This basic collection includes a standard twist drill bit (A), spade bit (B), masonry bit (C), hole saw (D), single-twist auger bit (E), Forstner bit (F), and adjustable screw pilot bit (G).
A socket wrench kit or a set of combination wrenches is necessary for driving lag screws as well as nuts onto bolts. If you’re building a pole barn, buy extra-deep sockets.
Wrenches: combination (A), adjustable (B), pipe (C), spud (D), nut driver (E), and socket (F). Wire stripper (G), wire cutter/stripper (H), slip-joint pliers (I), cable stripper (J), cutting pliers (K), and needle-nose pliers (L).
Woodworking Tools: Tool belt (A), belt sander (B), plane (C), scrap-er (D), reel-type tape (E), screwdrivers (F), utility knife (G), measuring tape (H), sandpaper (I), wood chisels (J), wood files (K), pry bar (L).
SQUARES
FOR ACCURATE RAFTER LAYOUT, you’ll need a framing square. It’s etched for layout of plumb and seat cuts for common rafters or hip rafters. A rafter square, often referred to by the brand name Speed Square, is a heavy-duty aluminum right triangle that fits in your tool belt. It’s great for striking cut lines and guiding your circular saw. A combination square and a sliding T-bevel are also used to mark cut lines on framing lumber.
FRAMING SQUARE. A framing square is an L-shaped tool made of steel or aluminum. It is indispensable when cutting rafters, marking cut lines on lumber, and making sure corners are square. It is etched with tables that will help you calculate rafter lengths.
COMBINATION SQUARE. A combination square is a ruler with a sliding bracket mounted to it at 90 degrees. The bracket has a second surface, which you can use to make 45-degree cut lines on lumber. Some squares have a pointed metal scribe to mark work for cutting. This tool is handy, but the rafter square will serve most of your needs.
SLIDING T-BEVEL. Often called a bevel square or bevel gauge, this tool is useful for some complicated framing problems. You can set a sliding T-bevel at any angle and use it to transfer the same angle from one place to another.
A framing square is a useful tool for checking stud layout, squaring up corners, and marking long cuts. For roof framing, a framing square with rafter tables is a useful addition to your toolkit.
A combination square has a sliding blade, ideal for making short measurements, checking right angles, and marking lumber cuts. Some combination squares have a spirit level embedded in the tool.
A sliding T-beve l has an adjustable pivot point between the blade and the handle. This enables you to mark angled cuts commonly needed on rafters and the framing for skylights.
PREVENTING DANGEROUS KICKBACK
THE WORKPIECE MUST BE FIRMLY SUPPORTED, typically on sawhorses or some other stable surface, before you cut it with a circular saw. The offcut must be able to fall freely away at the end of the cut. If you support a board on both sides of the cut, the kerf will fold in as the cut ends, causing the blade to bind, potentially resulting in kickback—a dangerous occurrence in which the saw jumps back at you. Kickback can also happen if you try to rush the cut. When ripping on a table saw, kickback can be caused by tension in the wood that causes the kerf to close around the blade.
You can buy anti-kickback blades, which have modified tooth designs, but you can best reduce kickback by not rushing a cut and by stabilizing your work. Never stand directly behind a circular saw, and don’t remove the saw from the workpiece until the blade has stopped. Keep your hands as far as possible from the cut, and clearly sight your cut line to make sure it’s free of obstructions such as nails or extension cords. Firmly place wood on a cutting surface; never cut wood held in your hand.
SAWS
FRAMING DOESN’T DEMAND THE PRECISE CUTS that finish carpentry does, but you still need high-quality saws with sharp blades. With power saws, a 7¼-inch circular saw is a practical choice. Look for one with good balance that is light enough for you to maneuver and easy to adjust for angle and depth. Make sure it has a comfortable handle. A table saw also adds tremendous capability because you can rip sheets of plywood and boards quickly and accurately.
HANDSAWS. Crosscut saws are versatile handsaws about 24 inches long, with seven or eight teeth per inch. You can also buy specialized trim saws and rip saws. Backsaws—shorter, stiffer, and broader than crosscut saws, with finer teeth—are good for detail and trimwork. Hacksaws are essential for cutting pipe, nails, and other materials too tough for a wood saw. Keyhole saws have a narrow-point blade handy for making small cutouts; stubbier versions with coarser teeth are called utility saws and are good for cutting outlet and other openings in drywall. Coping saws are used mainly to join curved-profile moldings.
CIRCULAR SAW. A circular saw is capable of quickly crosscutting, ripping, and beveling boards or sheets of plywood. The most popular saws are those that take a 7¼ inch blade. With this blade size you can cut to a maximum depth of about 2½ inches at 90 degrees. Some contractors use circular saws with larger blades for cutting posts in one pass, but a 7¼-inch circular saw is easier to control, and it allows you to cut anything as large as a 6x6 with a second pass. Smaller saws are also available, some of which are battery powered. These saws are often referred to as trim saws. Battery-driven models can be useful in situations when extension cords would get in the way.


