Erhalten Sie Zugang zu diesem und mehr als 300000 Büchern ab EUR 5,99 monatlich.
- Herausgeber: Creative Homeowner
- Kategorie: Lebensstil
- Sprache: Englisch
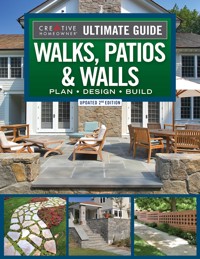
Designing the outside of the home adds to curb-side appeal, creates ambiance and increases the value of the home. A complete DIY guide to enhance your home with walkways, garden walls, and patios, Ultimate Guide: Walks, Patios & Walls, 2nd Edition provides the homeowner with all the information needed to integrate popular hardscape designs into their overall home landscape. Included are dozens of design ideas with easy-to-follow, step-by-step instructions for a variety of landscape projects, including brick, mortar, and concrete walks and patios, flagstone and tile patios, brick and mortared stone walls, and so much more. With hundreds of building tips and construction drawings for projects, also included in this updated edition is new content on hardscaping design and materials, choices to consider that combat climate change, pervious versus impervious surfaces, terracing, and other elements that influence stormwater runoff and site planning, and more.
Sie lesen das E-Book in den Legimi-Apps auf:
Seitenzahl: 281
Veröffentlichungsjahr: 2023
Das E-Book (TTS) können Sie hören im Abo „Legimi Premium” in Legimi-Apps auf:
Ähnliche


COPYRIGHT © 1997, 2004, 2010, 2023
This book may not be reproduced, either in part or in its entirety, in any form, by any means, without written permission from the publisher, with the exception of brief excerpts for purposes of radio, television, or published review. All rights, including the right of translation, are reserved. Note: Be sure to familiarize yourself with manufacturer’s instructions for tools, equipment, and materials before beginning a project. Although all possible measures have been taken to ensure the accuracy of the material presented, neither the author nor the publisher is liable in case of misinterpretation of directions, misapplication, or typographical error.
Creative Homeowner® is a registered trademark of New Design Originals Corporation.
ULTIMATE GUIDE TO WALKS, PATIOS & WALLS
SENIOR EDITOR
Kathie Robitz
GRAPHIC DESIGNER
Kathryn Wityk
PHOTO COORDINATOR
Mary Dolan
JUNIOR EDITOR
Angela Hanson
PROOFREADER
Sara M. Markowitz
DIGITAL IMAGING SPECIALIST
Frank Dyer
INDEXER
Schroeder Indexing Services
COVER DESIGN
Kathryn Wityk
FRONT COVER PHOTOGRAPHY
Jerry Pavia (right, top left & center left), Todd Caverly/Brian Vanden Brink Photos (bottom left), design: George Snead, Jr.
BACK COVER PHOTOGRAPHY
John Parsekian/CH
UPDATED SECOND EDITION
MANAGING EDITOR
Gretchen Bacon
EDITOR
Kelly Umenhofer
TECHNICAL EDITOR
Mark Wolfe
DESIGNER
Freire SL
Ultimate Guide Walks, Patios & Walls, Updated 2nd Edition
Print ISBN 978-1-58011-585-8eISBN 978-1-63741-249-7
The Cataloging-in-Publication Data is on file with the Library of Congress.
We are always looking for talented authors. To submit an idea, please send a brief inquiry to [email protected].
Creative Homeowner®, www.creativehomeowner.com, is an imprint of New Design Originals Corporation and distributed exclusively in North America by Fox Chapel Publishing Company, Inc., 800-457-9112, 903 Square Street, Mount Joy, PA 17552.
safety
Although the methods in this book have been reviewed for safety, it is not possible to overstate the importance of using the safest methods you can. What follows are reminders—some do’s and don’ts of work safety—to use along with your common sense.
■ Always use caution, care, and good judgment when following the procedures described in this book.
■ Always be sure that the electrical setup is safe, that no circuit is overloaded, and that all power tools and outlets are properly grounded. Do not use power tools in wet locations.
■ Always read container labels on paints, solvents, and other products; provide ventilation; and observe all other warnings.
■ Always read the manufacturer’s instructions for using a tool, especially the warnings.
■ Use hold-downs and push sticks whenever possible when working on a table saw. Avoid working short pieces if you can.
■ Always remove the key from any drill chuck (portable or press) before starting the drill.
■ Always pay deliberate attention to how a tool works so that you can avoid being injured.
■ Always know the limitations of your tools. Do not try to force them to do what they were not designed to do.
■ Always make sure that any adjustment is locked before proceeding. For example, always check the rip fence on a table saw or the bevel adjustment on a portable saw before starting to work.
■ Always clamp small pieces to a bench or other work surface when using a power tool.
■ Always wear the appropriate rubber gloves or work gloves when handling chemicals, moving or stacking lumber, working with concrete, or doing heavy construction.
■ Always wear a disposable face mask when you create dust by sawing or sanding. Use a special filtering respirator when working with toxic substances and solvents.
■ Always wear eye protection, especially when using power tools or striking metal on metal or concrete; a chip can fly off, for example, when chiseling concrete.
■ Never work while wearing loose clothing, open cuffs, or jewelry; tie back long hair.
■ Always be aware that there is seldom enough time for your body’s reflexes to save you from injury from a power tool in a dangerous situation; everything happens too fast. Be alert!
■ Always keep your hands away from the business ends of blades, cutters, and bits.
■ Always hold a circular saw firmly, usually with both hands.
■ Always use a drill with an auxiliary handle to control the torque when using large-size bits.
■ Always check your local building codes when planning new construction. The codes are intended to protect public safety and should be observed to the letter.
■ Never work with power tools when you are tired or when under the influence of alcohol or drugs.
■ Never cut tiny pieces of wood or pipe using a power saw. When you need a small piece, saw it from a securely clamped longer piece.
■ Never change a saw blade or a drill or router bit unless the power cord is unplugged. Do not depend on the switch being off. You might accidentally hit it.
■ Never work in insufficient lighting.
■ Never work with dull tools. Have them sharpened, or learn how to sharpen them yourself.
■ Never use a power tool on a workpiece—large or small—that is not firmly supported.
■ Never saw a workpiece that spans a large distance between horses without close support on each side of the cut; the piece can bend, closing on and jamming the blade, causing saw kickback.
■ When sawing, never support a workpiece from underneath with your leg or other part of your body.
■ Never carry sharp or pointed tools, such as utility knives, awls, or chisels, in your pocket. If you want to carry any of these tools, use a special-purpose tool belt that has leather pockets and holders.
Contents
Introduction
CHAPTER ONE
DESIGN BASICS
Your Site, Your Lifestyle
Basic Site Design
CHAPTER TWO
PLANNING YOUR SITE
Soil
Drainage
A Comfortable Patio
A Useful Walk
Site Design
CHAPTER THREE
WALK BASICS
Plan for Your Needs
Edging
Grading
CHAPTER FOUR
SOFT WALKS
Layout and Preparation
Stone Aggregate
Wood Aggregate
Loose Aggregate Walks
Lumber Walks
CHAPTER FIVE
DRY-LAID WALKS
Setting Hard Walks
Tools You Will Need
Material Selections
Setting Stone Directly on the Ground
Walks on a Gravel-and-Sand Base
CHAPTER SIX
MORTARED WALKS
Anatomy of a Mortared Walk
Tools for Working With Mortar
Preparing Paving Materials
Pouring Concrete
Ceramic and Stone Tile
CHAPTER SEVEN
BUILDING STAIRWAYS
Design Basics
Building a Wooden Stairway
Building a Landscape Stairway
Building a Concrete Stairway
Building a Brick Stairway on Concrete
CHAPTER EIGHT
DRY-LAID PATIOS
Dry-Laid Basics
Installing Patio Pavers
CHAPTER NINE
MORTARED PATIOS
Concrete Patios
Patios on Concrete Slabs
CHAPTER TEN
DRY-LAID STONE WALLS
What You Need
Wall-Building Basics
Building the Wall
CHAPTER ELEVEN
WALL FOUNDATIONS
Foundation Fundamentals
Working with Concrete
CHAPTER TWELVE
MORTARED STONE WALLS
General Requirements
Wall Construction
CHAPTER THIRTEEN
CONCRETE BLOCK WALLS
About Concrete Block
Building a Block Wall
Finishing in Stucco
CHAPTER FOURTEEN
BRICK WALLS
Brick Basics
Types of Brick Walls
Working with Brick
Building a Single-Wythe Wall
Building a Double-Wythe Wall
CHAPTER FIFTEEN
RETAINING WALLS
Retaining Wall Basics
Landscape Timber Walls
Interlocking Concrete Block Walls
Dry-Laid Stone Walls
Resource Guide
Glossary
Photo Credits
Metric Equivalents
Introduction
WALKS, PATIOS, AND WALLS turn outdoor areas into usable living spaces. Walks connect the focal points of your yard, both physically and visually. A patio links your house and yard, providing outdoor living, eating, cooking, and entertainment spaces. A brick, stone, or block wall adds character and privacy.
This book will help you get started creating these structures for your yard. An extensive design section aids in laying out your property and planning your project. The section also deals with the practical matters of drainage, and sun and climate control.
The rest of the book is devoted to helping you design and build the projects that will increase the value of your home and make your yard more livable. Grouped into sections that cover walks, patios, and walls, each chapter covers a specific type of structure. Each section contains dozens of design ideas that you can use in your own yard. The projects themselves are the most popular among homeowners and designers. The materials and tools needed to complete them are readily available. The instructions provided here are simple and straightforward. Each sequence lists the tools and materials you will need to do the job and easy-to-follow directions for completing the projects.
GUIDE TO SKILL LEVEL
Easy. Even for beginners
Challenging. Can be done by beginners who have the patience and willingness to learn.
Difficult. Can be handled by most experienced do-it-yourselfers who have mastered basic construction skills. Consider consulting a specialist.
Greenery allowed to grow between the stones of this patio enhances the natural look of the design, above.
Rough-cut stone adds a rustic charm to the walls and walks around this house, opposite.
This stone walk guides you through the garden without feeling formal, top right.
A fun, tropical feel is achieved through the bold color of this brick patio, right.
1
design basics
YOUR SITE, YOUR LIFESTYLE
BASIC SITE DESIGN
GOOD LANDSCAPE DESIGN requires a blend of elements. There are technical considerations dictated by the site and your budget, and creative possibilities determined by how you plan on using the landscape. Each site is unique and offers its own challenges, especially when it comes to hardscapes such as walls, walks, and patios. But there are basic principles you can follow that will help you create a design that meets your needs.
YOUR SITE, YOUR LIFESTYLE
In many ways, the concept of site design goes back a long time. The Romans called it genius loci—spirit of place. When designed correctly, a place affects all of our senses by providing a combination of sights, sounds, smells, textures, and temperatures. A place is memorable; we can return to it again and again in our minds whenever we want. We all have special places that we hold dear. A good site design can and should provide a memorable experience for all who visit that particular place. Essentially, there are two factors for you to consider as you begin the design process: your site’s features and how to enhance them.
Identifying. Your first order of business should be recognizing the unique combination of elements that your site has to offer. These could be such things as special views and vistas; natural features such as trees, rocks, or streams; or even historical artifacts or events that occurred there in the past. Any and all of these will add up to the unique spirit of your particular location. Spend some time getting acquainted with your landscape and noting these special features. Every site has something to tell you.
Intensifying. Once you feel that you understand the special qualities and elements of your site, think of ways in which these features can be preserved and, better yet, enhanced through the placement of such things as walks, walls, patios, and vegetation.
A low wall, above, helps to contain a hilly site without obstructing the view. Plants soften the look.
A walkway constructed of native stone, left, helps to connect a home to its geographic location.
Locating outdoor living spaces, opposite, to take advantage of views enhances relaxation and open-air activities.
In terms of material and design, this patio, opposite, is an extension of its California Mission-style home.
Working with Your Surroundings
If your site is in a historic district or an architecturally distinct region—New England or the Southwest come to mind—your design will fit into these contexts if you make an effort to work with the prevailing materials, colors, and architectural elements. This doesn’t necessarily mean copying or mimicking every little detail you can find in your neighborhood. There’s still plenty of latitude here to design your personal interpretation of what you think makes your region or neighborhood unique. Of course, the choice of whether or not you want to fit into or stand out from your surroundings is entirely up to you. In fact, with so many of today’s newer houses looking the same as others in the neighborhood, this is the perfect opportunity to express your personal values and tastes.
One design concept popular in landscape planning involves creating designs that are “of the site” versus those that are not. A design that is considered of the site appears to grow or spring directly from what is already a part of the site, as if the new design were always meant to be there. Frank Lloyd Wright liked to call this “organic design.”
Imported Designs. The opposite of an “of the site” design is one that seems to come from somewhere else, such as a New England Cape Cod house in the middle of the Sonora Desert. Although most professional site designers prefer the more organic approach, that doesn’t mean you can't incorporate a Japanese Zen rock and sand garden into your design if you wish. It simply means not forcing something onto the site that seems unnatural or incongruous. However, it’s best to work with the site.
A somewhat formal look has been achieved with this symmetrical design, below left.
FORMAL OR INFORMAL?
CONSIDER WHETHER YOU WANT a formal layout; a relaxed, informal layout; or some combination of both. Consider the size and shape of your lot, the style of the house, and your lifestyle. Formal layouts are usually symmetrical and uniform, whereas informal layouts are typically asymmetrical with irregular or naturally flowing shapes. Some of the most satisfying site plans have aspects of both.
Combining informal and formal elements in close proximity enhances and strengthens both through their contrasts. For example, you might try a formal patio layout integrated into a system of informal curvilinear walks, walls, and planting areas. But remember that informal doesn’t mean random or chaotic. An underlying sense of balance is just as important to informal layouts as it is to formal layouts. Base a curving walk or wall on circles, radii, and tangents, not just careless squiggles across your site.
A wall composed of random rocks and a crushed-stone path, below, have a rustic, casual appeal.
A yard that isn’t perfectly flat isn’t necessarily an obstacle to building a patio. This is a slightly hilly location, but with some site grading, it became an idyllic spot for grillin’ and chillin’.
An excellent example of a positive space, above left, features a walkway and borders.
Tucked into a corner, the patio, above right, has a sense of privacy and security.
Positive and Negative Spaces. Site designers often talk about creating positive and negative spaces. This is a simple yet extremely important aspect of designing a good site. Positive space refers to well-defined and enclosed spaces, while negative space refers to poorly defined spaces and/or spaces with little or no sense of enclosure. Think of trying to drink out of a good, solid coffee mug versus a sieve. Positive spaces, with well-defined borders and edges—walls or walkways, for example—help to gather and contain as well as define spaces. They have a feeling of reaching around and embracing you. Negative spaces, on the other hand, tend to leak and flow out and away from you. As human beings, we tend to find negative or shapeless spaces much less satisfying than well-defined, positive spaces.
Enclosure. The best site designs provide varying degrees of enclosure. A good way to think of enclosure is in terms of shelter—how much we are protected from the elements and how much the enclosure provides a sense of privacy and intimacy. A sense of enclosure or positive space is really very simple to achieve, but it certainly does not mean an airtight box. After all, you want to be outdoors to enjoy a free, open feeling. To achieve a satisfying degree of enclosure, a low wall along the edge of a planting area or along the side of a walk—even the edge of a patio with one or more low planters—is all you need.
A Sense of Security. Perhaps you remember how pleasant and secure it felt to sit on the front porch of your grandparents’ house in the summertime, or maybe you have another special place that gave you a feeling of security. Ever wish you could re-create that feeling? Well, you can. The people who study these types of things say that humans have a natural tendency to seek slightly elevated and sheltered places and to avoid open, exposed places whenever possible. The slight elevation allows you to see farther in all directions, and the semi-open shelter provides you with a sense of security and allows you to watch and participate in the passing world. Whether it's in your front or backyard, you can create this sense of security by elevating your patio slightly above the surrounding grade, providing a sense of enclosure with a few low walls and planters, and perhaps adding an overhead trellis or patio roof to provide shade and rain protection. Voila! Time to make some lemonade.
FORCING PERSPECTIVE
HERE ARE A COUPLE OF NEAT TRICKS to use when working with small spaces. The perceived size of a space can be increased by slightly narrowing the far end of the area in relation to the width of the end nearest the viewer. This is called forced perspective, and it is a trick that landscape designers learned from painters. It works because our eyes trick our brains into thinking that the space is longer than it really is. You can create this type of perspective by placing larger or taller trees or shrubs in the foreground of a space and then placing smaller, shorter trees or shrubs toward the far end of the space.
Outdoor Scale. A quick note about outdoor scale versus indoor scale. No rocket science here, folks. Outdoor spaces need to be scaled up from the typical dimensions used for rooms inside. If you are using an average-size room inside your house to get a feel for the size of your new patio, add a few extra feet to the dimensions, if possible. What seems like a perfectly adequate space inside can feel uncomfortably cramped and small when it is outside.
And you thought you weren’t going to get a good reason for making that new patio just a little bit larger!
An undulating shape makes this tall wall, opposite, feel less imposing while it carries the eye along the site.
Varying Texture. Use fine and coarse textures to increase (or decrease) your perception of spatial depth. Think about standing on a small mountaintop and looking out into the distance. You can see every leaf on the trees and shrubs near you. Then, as you look farther out into the distance, the leaves begin to blur until you can no longer perceive individual leaves or even individual trees. By varying the textures of the vegetation and/or the wall surfaces in small spaces, from coarse at the near end to finely textured at the far end, you can trick your eyes into thinking that the space is larger than it really is. The reverse is also true (just in case you want to make a large space look smaller).
smart tip
STEAL SOME IDEAS
DON’T BE AFRAID TO BORROW IDEAS AND DESIGNS FROM FRIENDS AND NEIGHBORS. MOST PEOPLE FIND IT FLATTERING WHEN SOMEONE COPIES THEM. IT IS ALSO A GOOD WAY FOR YOU TO LEARN ABOUT POTENTIAL MAINTENANCE PROBLEMS AND LONG-TERM LIFE-CYCLE COSTS.
Small rock plants, tucked between the slabs of a walkway, opposite, vary the texture from hard to soft.
BASIC SITE DESIGN
To get to the point where you can put your ideas onto a site drawing, you will first have to understand some basic techniques and terms. Don’t worry if you don’t grasp the terms immediately. Read through the next section before attempting a design. As you work on your plan, you will find that terms and ideas will become apparent to you.
Design Techniques
These basic design techniques are more or less common to all design professions, including artists.
Mexican tiles border a mosaic walkway, above, that comprises shards of flat stone.
Balance. Arrange various site elements so that they are resolved and balanced. A visually heavy or larger object can be balanced by a lighter or smaller one that is darker in color, is unusually or irregularly shaped, is contrasting in texture, or is more elaborately detailed.
These strategies help to draw attention to the smaller object and visually balance it with the larger one. For example, let’s say you have a large clump of conifer trees on one side of your yard. To visually balance them, you might plant smaller, more colorful ornamental trees on the other side of the yard, or you might install a man-made object, such as a fountain or a gazebo.
OTHER CONSIDERATIONS
Color is an important unifying factor. The color of the stone links the wall to the evenly spaced face and foundation of the house, opposite.
Harmony. Harmony can be achieved by selecting and using elements that share a common trait or characteristic. By using elements that are similar in size, shape, color, material, texture, or detail, you can create a cohesive feeling and relation among the various elements on the site. An example of this might be a brick patio that is bordered by a brick planter near a brick walkway leading to a brick-lined garden area. In this case, the various elements are made of a common material. Another example might be using a common shape, such as a square. Imagine having a square concrete patio scored in a square (or diamond) pattern with a square table, square chairs, and a square-checkered tablecloth. The results can be extremely pleasing.
Unity and Variety. While both balance and harmony are used to achieve unity, too much unity can be boring. That’s where variety and contrast come in handy. By varying size, shape, color, material, texture, and detail, you can introduce a note of interest or a focal point into the total composition. For instance, placing a round wooden planter onto the square-pattern patio discussed earlier will provide a pleasing contrast of both shape and material. The contrasting object (the round wooden planter) will draw attention to itself and provide a degree of visual relief and interest to the total setting. This is the right time and place to add your individual touch, including a bit of whimsy or humor if that feels right. However, too much variety can be worse than too much unity and result in a confusing, chaotic jumble. When introducing variety into your plan layout, it’s probably better to lean toward the conservative side.
Rhythm. In design terms, rhythm—or the spacing of elements relative to similar elements—can create another type of unity in a composition. Rhythm helps to establish a visually satisfying progression or sequence to a site design. For example, on a walkway, you can establish a regular rhythm if you place a band of decorative brick at 4-foot intervals. This acts as both a control joint and as a source of visual rhythm. Or as another example, you can place pilasters or half-columns along a brick or masonry wall at regular intervals. On the other hand, a song composed of only one sequence of notes is boring. You can avoid visual boredom by varying such things as the interval, color, size, shape, texture, or material of the elements you use to create your sequence. Another fun way to introduce an interesting visual rhythm is to create subsets of elements between the evenly spaced elements. You could also install a series of colorful glazed tiles with their own rhythmic sequence between regularly spaced pilasters of a brick or masonry wall.
Keep rhythm in mind, particularly if you will be installing a long wall. Concrete pilasters keep the eye moving and look refined in contrast to the rough-cut stone face of this wall, left.
Emphasis. A lot like unity and variety, emphasis assumes that within your site some of the elements have more significance or importance than the rest and that these special elements should be somehow identified as such. You can emphasize an element in any one of a number of ways, including making it larger than other elements, placing it among items that have a different shape, centering it within a circle or at the end of a walkway, or highlighting it at night with floodlights or accent lights. But as with unity and variety, if you emphasize everything then nothing is really emphasized and you end up with a chaotic, visually confusing site design. Use this one with caution.
Simplicity. Don’t be fooled. Just because simplicity is the last item on the list doesn't mean it’s the least important. In fact, to many designers it’s probably the most important concept of all—and you thought this was going to be complicated! Ironically, simplicity is also one of the hardest things to achieve in any design concept. That’s because when you realize how many design tools and elements you have to work with, you have a natural tendency to want to use all of them.
Remember trying to mix every color in your new watercolor set together just to see what that color would look like? Remember the results? In virtually every case, the most elegant and satisfying site designs are those that begin and end with simplicity as a guiding design principle. The Zen rock gardens of Japan are perhaps the best example of this way of designing—so much is said with so little effort. And that’s probably because so much is left to our own individual interpretations. Subtlety and simplicity are good words to remember.
Evenly cut stone slabs installed tightly in a horizontal pattern make a simple but strong statement on this patio, opposite.
Low walls and walkways surrounding the patio and pool, above, help to define and connect the various outdoor living areas of this home.
smart tip
PLAN FOR THE FUTURE
THE WAYS IN WHICH YOU USE YOUR NEW PATIO WILL HELP DETERMINE ITS VALUE. DON’T FORGET TO ADD SOME AMENITIES, SUCH AS A LIGHTING SYSTEM, AN OUTDOOR ELECTRICAL RECEPTACLE, SPACE FOR A GRILL, STORAGE FOR PATIO FURNITURE, AND ROOM TO ADD A SPA OR HOT TUB LATER.
DIVIDING YOUR DESIGN INTO SPECIFIC PARTS
THERE IS MORE TO A DESIGN, however, than the actual physical parts and conceptual places of any given site. To help you arrive at your overall plan, you will have to juggle the following design elements.
Centers. Centers are gathering areas where people come together for a common purpose. We are typically drawn to centers because of their location or placement on the site and their sense of importance within the design. On a larger scale, some examples of centers might be the town square in a traditional New England village or even Rockefeller Center in New York. For our purposes, the obvious example of a center is the patio you are about to design. What are some of the social activities you intend to accommodate in your new patio?
Edges. Edges can be thought of as the linear boundaries between distinctly different areas. Edges can take many forms: natural features, such as streams and rows of shrubs, or man-made elements, such as walls. Low walls, such as the ones illustrated in this book, provide very effective edges that separate areas in a yard, such as planting beds and lawns. Edges give these areas a crisp definition that is much more aesthetically pleasing than unclear, poorly defined boundaries.
Districts. Districts can also be thought of as areas, zones, or fields. For our purposes, examples of districts might include lawn areas, flower beds, play areas, gardens, and especially patios.
Paths. Paths are the obvious complements to the areas of your site. Paths or, better yet, walks connect the outdoor rooms of your site together and make them usable and accessible, and therefore deserve a high degree of thought and consideration on your part.
Nodes. Nodes are basically the same as centers, except that they are more closely associated with walks. You might also think of them as intersections or crossroads. Because intersections are typically busy places when there is a lot of traffic, consider enlarging the major nodes or intersections of your site plan to accommodate passing room or the occasional impromptu conversation.
Stone tiles unify a multifunctional patio, opposite. Evenly spaced individual tiles on the ground make a visually interesting walkway.
Organizing Your Site Design
So how are you going to organize all the elements of your site? That’s where the use of one or more ordering systems can help make sense of it all. These are the planning tools we can use to gather and arrange the physical places of your site into a cohesive, unified whole instead of a haphazard assortment of unrelated spaces.
Keep in mind, though, that using an ordering system doesn’t exclude variety, spontaneity, and points of emphasis within your plan. Also, you might consider using more than one ordering system, depending on which element or place you’re designing. For example, a grid system might work best when you are laying out the walls for a lawn and garden area; then you might switch to a symmetrical layout for the patio and to an axial layout for the walks. Impress your friends and neighbors, not to mention your family. Let’s see what’s in the planning toolbox.
Axes. An axis is an imaginary yet powerful line. You can arrange your outdoor rooms or the lineal elements such as walks and walls on either side of an axis to achieve a sense of balance. An axis will end either in a panoramic view or with a symmetrical vertical element such as a statue, a fountain, or an arbor. Walks and sight lines are good places to use an axial layout.
Grids. Grids can be useful in site design. For example, you might think of your yard as a nine-square grid. When planning your layout, you might overlay this grid on your site to organize such elements as patios, play areas, gardens, and a gazebo. In arranging elements in your grid, consider such factors as traffic patterns, views, and the path of the sun over the yard.
A soaring chimney serves as the endpoint of the axis layout in this patio’s design, top.
Pathways intersect at a center fountain in a European-inspired garden, right.
Hierarchy. You will use hierarchy to rank spaces and elements by order of importance. Every site plan has certain spaces that are more important than others. Think of it this way: normally, the living room is a far more important space than the utility room. You put your best furnishings and carpets and the most money into the living room—not the utility room. Your priorities are up to you. but it’s a good bet that your new patio is probably going to be the most important space you are planning. You can give your important spaces the amount of attention they deserve by making them larger than the other spaces. By giving them an unusual or unique shape (for example, a round space within a square grid), or by locating the space in a prominent position, such as the center of your site or at the end of an axis.
Datum. A datum is a reference point, or more accurately, a reference line or plane. An axis is a datum in that it gives elements on either side of it a common line of reference. Walls make good datum lines. Their presence and continuity often help emphasize unique elements. For example, a fence could act as a datum to emphasize plantings of various shapes. Interestingly enough, grids also make good datum lines, as when you overlay a variety of differently shaped objects on a regular pattern. The grid holds everything together.
BASIC GEOMETRY
GEOMETRIC SHAPES are always fun to use when designing just about anything, especially site plans. The basic geometric shapes are the circle, square, and triangle. With these shapes, combined with the other ordering systems, you can design just about everything that comes along. Interesting geometric variations include overlapping the basic shapes to form a third shape (or space) and creating spiral or pinwheel compositions. All of these geometric systems can be combined, overlapped, rotated, and shifted relative to each other and themselves for added variety and complexity. In your yard, the geometric elements might be a triangular trellis, rectangular patios, and round shrubs.
Arranging stone tiles in a grid gives this patio, opposite, a modern look.
A compass rose surrounded by tile, right, draws attention to the area in front of the patio’s focal point—a fireplace—and provides a logical axis around which to arrange furniture.
The edge of the patio, below, keeps the circle created by the landscaping uninterrupted. Notice how the low shrubs in front of the tall trees play with perspective.


