Erhalten Sie Zugang zu diesem und mehr als 300000 Büchern ab EUR 5,99 monatlich.
- Herausgeber: Creative Homeowner
- Kategorie: Lebensstil
- Sprache: Englisch
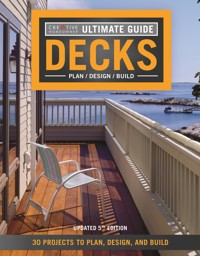
Decks continue to be one of the most popular additions to homes today as more and more homeowners seek to enjoy outdoor living and expand living space. Ultimate Guide: Decks, Updated 5th Edition leads the homeowner through the process of designing and building a deck, whether as a do-it-yourself project or working with a contractor. Hundreds of step-by-step color photographs highlight the clear, concise, and friendly text. The authors provide helpful advice on generating ideas, selecting materials, and using tools as they lead the reader through the complete process. Further inspiration comes from dozens of deck designs and ideas from the nation's top deck designer/builders. Finally, 30 different deck projects, complete with plans and materials lists, are included so that even a novice can create a finished deck with this complete guide.
Sie lesen das E-Book in den Legimi-Apps auf:
Seitenzahl: 539
Veröffentlichungsjahr: 2021
Das E-Book (TTS) können Sie hören im Abo „Legimi Premium” in Legimi-Apps auf:
Ähnliche


Copyright © 1997, 2001, 2005, 2010, 2018 Creative Homeowner
This book may not be reproduced, either in part or in its entirety, in any form, by any means, without written permission from the pulisher, with the exception of brief excerpts for purposes of radio, television, or published review. All rights, including the right of translation, are reserved. Note: Be sure to familiarize yourself with manufacturer’s instructions for tools, equipment, and materials before beginning a project. Although all possible measures have been taken to ensure the accuracy of the material presented, neither the author nor the publisher is liable in case of misinterpretation of directions, misapplication, or typographical error.
Creative Homeowner® is a registered trademark of New Design Originals Corporation.
All Decked Out® is a trademark of Gary Marsh.
Ultimate Guide: Decks, Updated 5th Edition
Vice President-Content: Christopher Reggio
Editor: Anthony Regolino
Cover Designer: Justin Speers
Page Designer: Justin Speers and David Fisk
Technical Editor: David Schiff
Technical Consultant: Ken Kroog
Indexer: Jay Kreider
Print ISBN 978-1-58011-796-8eISBN 978-1-60765-504-6
For a printable PDF of the patterns used in this book, please contact Fox Chapel Publishing at [email protected], stating the ISBN and title of the book in the subject line.
The Cataloging-in-Publication Data is on file with the Library of Congress.
We are always looking for talented authors. To submit an idea, please send a brief inquiry to [email protected].
Creative Homeowner®, www.creativehomeowner.com, is an imprint of New Design Originals Corporation and distributed exclusively in North America by Fox Chapel Publishing Company, Inc., 800-457-9112, 903 Square Street, Mount Joy, PA 17552, and in the United Kingdom by Grantham Book Service, Trent Road, Grantham, Lincolnshire, NG31 7XQ.
SAFETY
Although the methods in this book have been reviewed for safety, it is not possible to overstate the importance of using the safest methods you can. What follows are reminders—some do’s and don’ts of work safety—to use along with your common sense.
• Always use caution, care, and good judgment when following the procedures described in this book.
• Always be sure that the electrical setup is safe, that no circuit is overloaded, and that all power tools and outlets are properly grounded. Do not use power tools in wet locations.
• Always read container labels on paints, solvents, and other products; provide ventilation; and observe all other warnings.
• Always read the manufacturer’s instructions for using a tool, especially the warnings.
• Use hold-downs and push sticks whenever possible when working on a table saw. Avoid working short pieces if you can.
• Always remove the key from any drill chuck (portable or press) before starting the drill.
• Always pay deliberate attention to how a tool works so that you can avoid being injured.
• Always know the limitations of your tools. Do not try to force them to do what they were not designed to do.
• Always make sure that any adjustment is locked before proceeding. For example, always check the rip fence on a table saw or the bevel adjustment on a portable saw before starting to work.
• Always clamp small pieces to a bench or other work surface when using a power tool.
• Always wear the appropriate rubber gloves or work gloves when handling chemicals, moving or stacking lumber, working with concrete, or doing heavy construction.
• Always wear a disposable face mask when you create dust by sawing or sanding. Use a special filtering respirator when working with toxic substances and solvents.
• Always wear eye protection, especially when using power tools or striking metal on metal or concrete; a chip can fly off, for example, when chiseling concrete.
• Never work while wearing loose clothing, open cuffs, or jewelry; tie back long hair.
• Always be aware that there is seldom enough time for your body’s reflexes to save you from injury from a power tool in a dangerous situation; everything happens too fast. Be alert!
• Always keep your hands away from the business ends of blades, cutters, and bits.
• Always hold a circular saw firmly, usually with both hands.
• Always use a drill with an auxiliary handle to control the torque when using large-size bits.
• Always check your local building codes when planning new construction. The codes are intended to protect public safety and should be observed to the letter.
• Never work with power tools when you are tired or under the influence of alcohol or drugs.
• Never cut tiny pieces of wood or pipe using a power saw. When you need a small piece, saw it from a securely clamped longer piece.
• Never change a saw blade or a drill or router bit unless the power cord is unplugged. Do not depend on the switch being off. You might accidentally hit it.
• Never work in insufficient lighting.
• Never work with dull tools. Have them sharpened, or learn how to sharpen them yourself.
• Never use a power tool on a workpiece—large or small—that is not firmly supported.
• Never saw a workpiece that spans a large distance between horses without close support on each side of the cut; the piece can bend, closing on and jamming the blade, causing saw kickback.
• When sawing, never support a workpiece from underneath with your leg or other part of your body.
• Never carry sharp or pointed tools, such as utility knives, awls, or chisels, in your pocket. If you want to carry any of these tools, use a special-purpose tool belt that has leather pockets and holders.
CONTENTS
Introduction
PART I
DECK DESIGN AND CONSTRUCTION
CHAPTER 1
YOU AND YOUR DECK
Beginning the Process
Choosing a Design
Improving Your House and Yard
Design Challenges
Overlooked Deck Locations
Final Drawings
CHAPTER 2
DECK BUILDING TOOLS
Tools for Building Decks
Excavation and Concrete
Measure and Layout
Cutting and Sanding
Fastening Tools
Accessories
CHAPTER 3
MATERIALS FOR DECKS
Lumber
Lumber Species
Lumber Defects
Synthetic Decking
Concrete
Fasteners
Deck Hardware
CHAPTER 4
BUILDING TECHNIQUES
Measuring and Marking
Cutting Using a Circular Saw
Nailing
Drills and Screw Guns
Decay-Resistant Design
Laying Out and Cutting Curves
CHAPTER 5
FOOTINGS AND FOUNDATIONS
Laying Out the Deck
Distributing the Load
Site Work
Footings
Digging Postholes
Pouring Concrete
CHAPTER 6
DECK FRAMING
Framing Basics
Sizing and Spacing Frame Members
Ledger Designs
Attaching the Ledger
Positioning the Posts
Making and Installing Beams
Modular Joist Layouts
Using Practical Tools
Framing Hardware
Special Cases
Installing Joists
Building around Trees
Bridging
Framing for a Curved Section
Decking over a Slab
Roof Decking
CHAPTER 7
INSTALLING DECKING
Decking Options
Estimating Materials
Installing Wood Decking
Installing Synthetic Decking
Fascia Boards and Skirting
CHAPTER 8
STAIRS AND RAILINGS
Design Options
Installing a Platform
Installing a Landing Pad
Stairway Layouts
Building the Stairs
Railings: Basic Choices
Railing Materials
Railing Basics
Railing Design Choices
Railing Options
Installing Railings and Balusters
Building a Composite Railing
Installing a Plastic Rail Kit
Installing the Stair Rails
PART II
DECK DESIGNS
CHAPTER 9
DECKS BY KIEFER
Techniques to Use
Sleek Retreat
Raised Deck with Sweeping Overlook
Front Porch/Deck for a Corner Lot
Veranda with Turned Balusters
Multi-Retreats on Multi-Levels
Elevated Deck with a Sweeping Staircase
CHAPTER 10
BARRETT OUTDOORS
Techniques to Use
Curvy Party Deck
Relaxation Station
CHAPTER 11
CASA DECKS
Techniques to Use
Floating Octagons with Walkways
Aboveground Pool Surround
Twin Decks Surrounding a Porch
Cozy Deck with Benches and Planters
Making a Square Deck Livelier
A Deck Built for Entertaining
Poolside Deck
A Shaded Area to Enjoy the Views
Small Details Enhance Great Views
CHAPTER 12
ROLLING RIDGE DECK AND OUTDOOR LIVING
Techniques to Use
Log Cabin Chic
Scallops and Curves
Private Family Room
Rocky Mountain High Life
CHAPTER 13
ALL DECKED OUT
Techniques to Use
Sweeping Elegance in a Small Space
Sheltered but Open
Shady Garden Spot
Soaking and Dining Areas with Shingled Siding
Stately and Symmetrical
Promenade with Circular Viewing Area
CHAPTER 14
DECKS APPEAL
Techniques to Use
Freestanding Deck with Spa and Fire Pit
Circular Eating Area
Two Low Levels with Angles and an Overhead
Resource Guide
Glossary
Metric Equivalents
Credits
INTRODUCTION
Adding a new deck is one of the most popular ways to enhance the outdoor living area of your home. Decks make entertaining easy, providing a pleasant spot where you can enjoy the company of your family and friends. Or use your deck as a private getaway—a spot to enjoy a good book or take a nap in the warm afternoon sun.
Ultimate Guide: Decks provides both building knowledge and design inspiration. You’ll learn how to build a deck, including information on framing, decking, and stairs. Use the appendices to brush up on tools, materials, and construction techniques. The second section contains 30 unique deck designs to help you create the deck of your dreams.
GUIDE TO SKILL LEVEL
Easy. Made for beginners.
Challenging. Can be done by beginners who have the patience and willingness to learn.
Difficult. Can be handled by most experienced do-ityourselfers who have mastered basic construction skills. Consider consulting a specialist.
Adding curves, left, to a deck makes the design more appealing and distinctive.
Built-in benches, opposite, add to a deck’s usefulness. The wide railing cap is used for serving food.
Separate activity areas, opposite, make a deck more useful. Note how the deck “walkways” connect the different areas.
“Making a Square Deck Livelier”
Slotted Benches
Deck design depends on how you want to use the deck, the shape of the house, and the size and terrain in your yard, among other things. The deck designs that begin here include an overall drawing, such as the one show above, a framing detail, materials list, and construction details, such as the bench shown at left. The designs are from six deck designers who each represent a different area of the country. Use them as inspiration to create the deck you want.
Benches, right, add seating and can provide a sense of enclosure. Note how the planters support the benches on this deck.
PART I DECK DESIGN AND CONSTRUCTION
CHAPTER 1 YOU AND YOUR DECK
BEGINNING THE PROCESS
CHOOSING A DESIGN
IMPROVING YOUR HOUSE AND YARD
DESIGN CHALLENGES
OVERLOOKED DECK LOCATIONS
FINAL DRAWINGS
For some people, the hardest part of building a deck, or having one built for you, may be coming up with a design that meets all of your requirements and suits the terrain of your yard. How will you use the deck? What’s the best place in your yard to place the deck? Will it be on one level or do you want a multilevel design with separate activity areas? These are only a few of the questions you need to consider during the design process. This chapter will guide you through that process so that you can create an original design. Or you can select from one of the dozens of decks from six of the country’s top deck designers. (See here.) To actually build the deck, you will need only basic carpentry tools and techniques.
BEGINNING THE PROCESS
We all have different reasons for adding a new deck to our home. Most people find they want a new deck for a variety of practical and financial reasons. With a deck, you expand your living space and increase your home’s value for a fraction of what it would cost to build an addition. You enhance your living style as well, gaining a new space for entertaining and socializing. But for a deck to do all these things, you need to start out with a good plan.
A well-planned deck will harmonize with the house in both size and shape and provide a smooth transition down to the yard. It can offer more exposure or more privacy, and either take advantage of a cool breeze or protect you from a stiff ocean wind.
What to Expect. Building a deck is a straightforward job, and anyone with some basic carpentry skills and the time to work carefully can handle the task. The project won’t totally disrupt your home life, either, as kitchen remodeling would. All the mess is kept outdoors, and as long as you have a good place to store materials, the job can stretch from weekend to weekend with no major problem.
During your initial planning, include the whole family and develop a wish list of features. Gradually, you will pare away the excesses and zero in on a design that works for your situation. Then you’ll work through the project step-by-step, from drawing plans, getting permits, choosing a framing style, and selecting materials and patterns for your decking, railings, and stairs, to applying finishes and maintaining your deck.
In some cases, a deck is the only way to gain outdoor living space, above.
A small pond adds an unusual feature to this deck, left.
The proportions of a well-designed deck fit with the house, top right.
This deck, right, includes a graceful transition to the yard.
CHOOSING A DESIGN
While deck materials, shapes, sizes, and costs can vary widely, there are several design decisions common to almost every deck project. Although most decks are simply platforms raised above the yard, they are really an extension of the house—more like living space than yard space—even though they are outside. Because a deck connects to and expands the adjacent indoor space, deck additions are likely to be most appropriate and useful added onto living/family room areas and kitchen/dining room areas. For example, replacing a solid wall with sliding glass doors leading to an expansive deck is a quick and relatively inexpensive way to make a cramped living room seem a lot larger.
Draw a series of rough sketches as you proceed. Expect to fill a wastebasket or two with these. Don’t think of them as actual designs so much as focal points for conversations—it’s usually easier to point to a place on your drawing than to walk around the house.
Feel free to steal ideas from books, magazines, and other decks in your neighborhood. When you see a deck that particularly pleases you and seems appropriate for your situation, talk to the owners about how their deck works for them. Jot down some notes, and ask permission to take a few photos. Most people will be flattered that you like their deck and will be more than happy to tell you all about it. And don’t forget about the designs that begin here.
You will probably discover lots of terrific deck ideas that you end up not using, either because you no longer like the way they look, you discover that they just won’t work with your design, or the extra expense for exotic materials will blow the budget. Don’t be discouraged. In fact, expect it to happen—and happen several times—before you come up with a design.
How You Will Use Your Deck
Everyone in the family probably has different visions of the ideal deck. Gather all their opinions, and figure out an overall design that will work for everybody. Consider the following items.
Entertaining and Barbecuing. Plan a convenient cooking area, probably somewhere near the kitchen. Figure out where you’ll put tables for sit-down dinners as well as a good place to set up a buffet table. If you’ll have a grill on the deck and plan to do a lot of barbecuing, you might want to add a small sink near the cooking area.
Begin the design process by settling on how you plan on using your new deck, left. Sharing meals was a prime consideration for this deck.
Decks are great places to entertain during pleasant weather, opposite top.
Built-in benches, opposite bottom, provide seating and design interest. A circular design helps promote conversation among people on the deck.
SMART TIP
START AN IDEA SCRAPBOOK
Keep your ideas and your wish list in order by starting a design scrap book. Buy a notebook that contains flaps on the covers. That way you’ll have a place to keep photos you take of decks you like and pages from magazines and catalogs, as well as ample space to jot down your ideas and plans
Lounging and Sunning. Pencil in space for a hammock or a swinging chair—a shady spot is often best. Sun worshippers will congregate on an expanse of deck that gets full sun.
Balancing Privacy and Openness. Think about whether you want the deck to feel airy and open to the world or cozy and secluded. A small deck will generally feel cozier than a large deck. Low benches and railings designed with large, open sections give a feeling of openness. A narrow deck that hugs the house will have a more sequestered feel than one that juts into the yard.
Decks are usually raised off the ground, which might mean that you and your family will be on display for all the neighborhood to see. Existing fences may be too low to shield you from view. Sometimes the problem can be solved by stepping the deck down in stages or by planting trees and shrubs.
If you feel overexposed, a well-placed trellis or pergola added to the deck can give you some nice climbing plants to look at as well as provide a pleasant enclosure and screen.
Enjoying the View. Plan your landscape along with your deck to get the best view. Orient the deck so that you will be looking at the best features of your yard and to take advantage of a nice view beyond your property line.
Planning for Children’s Play. A jungle gym will probably look better in the yard, but your deck design should provide an inviting place where kids can play. Build the stairway extra wide or have a series of descending platforms, and children will spend hours playing with dolls and trucks and letting their imaginations run wild. Plan a spot for a comfortable chair where you can relax while keeping an unobstructed eye on the kids in your yard.
Lighting for Nighttime Use. Plan some appropriate lighting if you want to use the deck after dark. Whether you choose standard 120-volt wiring or a low-voltage Light Emitting Diode (LED) option, plan to run the wires somewhere out of sight, maybe even underground.
Including a Pool or Whirlpool. Built with a surface of rot-resistant wood or composite material, a deck makes an ideal surface next to a pool or spa. Both materials are softer than tile or concrete and wood, making the deck a pleasant place to sit or lounge when you get out of the water. An inexpensive aboveground pool gains a lot of class when you surround it with a deck. If your design includes a spa or hot tub, position it for privacy as well as an unobstructed view of the stars.
Container Gardening. It is almost impossible to put too much foliage on or near a deck. Find planters that will go well with your deck and your house, or plan to build some from the same material as the decking. With enough sun, tomatoes, peppers, and all sorts of vegetables do well. An herb garden flourishes without a lot of work and still looks great after a bit of harvesting. If you’re an avid gardener, you might even consider putting a greenhouse on the deck. Just be sure that water from planting containers doesn’t get trapped on the deck—standing water invites rot.
Plan a lighting scheme if you plan on using your deck after dark, below.
Closed designs tend to make a deck feel cozier than one that is open, opposite. This design also provides a certain amount of privacy.
Be sure to plan on connecting your deck to the indoors with passages to the most frequently used rooms in the house. Don’t forget stairs that lead down to the yard.
Traffic Patterns
Make the deck easy to reach by installing French doors or sliders—the more entrances, the better. Large windows that look onto the deck will entice people outside. If you plan to eat a lot of meals out on the deck, make sure it’s close to the kitchen.
Also take the time to plan the approaches to the deck. Plan a clear, unobstructed path to the deck from indoor entertainment areas and from areas where your family spends a lot of time. A door out to the deck near the kitchen and another near the living room help avoid bottlenecks during parties. A small patio or concrete pad at the bottom of the stairs down to the yard reduces wear and tear on the grass and is usually required by code.
Weather Considerations
Think about how the weather and the seasons will affect the ways you use the deck, and plan accordingly. For example, a deck with a greenhouse on a southern exposure will help extend the growing season in a cold climate. The three main weather variables with which you need to concern yourself are sun, wind, and rain.
TRAFFIC PATTERNS
SEASONAL CONDITIONS
MIDDAY SUMMER SUN stands high in the sky: buildings and trees cast little shadow.
LATE AFTERNOON SUMMER SUN casts a small amount of shade on the north and east of buildings.
MIDDAY SPRING AND AUTUMN SUN is lower: buildings and full-leafed trees cast considerable shadows.
LATE AFTERNOON SPRING AND AUTUMN SUN is low in the sky;long shadows to the north and east.
MIDDAY WINTER SUN is at its lowest point; buildings cast deep shadows; leafless trees cast little shadow.
AFTERNOON WINTER SUN stands low and to the south; buildings cast deep shadows to the north and east.
Sun. Decide how much sun and how much shade you want, and take this into account when siting the deck. A deck on the north side of a house will be in shade most of the day. This can be an advantage if you live in a very hot climate and a disadvantage for most everyone else. An eastern exposure gives the deck morning sun and afternoon shade; this is often the best choice in warm climates. In cold climates, a southwest exposure provides full late afternoon sun, making the deck warmer on cool days in the spring and fall.
Also consider the angle of the sun above the horizon. The sun is highest in the summer and lowest in the winter. This means that in the winter a south-oriented deck will receive less direct sunlight than during the summer. A fence or tree that does not block out the high summer sun may block out sunlight during other times of the year when the sun is lower.
You may want continuous shade for a hammock, afternoon shade only for an eating area, and as much sun as possible for potted plants and a sunning area. You may need to change your foliage, pruning branches or planting more trees and shrubs.
Wind. If heat is a problem and you want to maximize the breeze, plan to prune trees or remove shrubs. If you have more wind than you want, you may need to plant new foliage. A raised deck will be windier than one near the ground.
For extreme conditions, you may need to construct a windbreak of some sort. A louvered or lattice wall covered with climbing plants is much more attractive than a solid fence and does a good job of diffusing a strong wind.
Rain. Most people think of sunny, clear weather as the best time to enjoy life on the deck, but you may live in an area where it rains much of the year, or perhaps you just like to watch the rain. If your house’s roof has little or no slope, consider extending it to cover part of the deck. Or install a large set of sliding glass doors between the deck and the living room, so you can open the doors and enjoy the patter of rain as it falls on your deck and potted plants.
Envisioning the Contours
You’ll find that areas defined on sketches tend to look larger than they actually are in real life. To avoid disappointment later in the project, transfer the scale drawings to the actual building site. You can drive stakes into the ground and connect them with string to outline the deck.
Arrange lawn furniture inside the deck’s planned outline, and try it on for size. Imagine yourselves doing what you hope to do on your new deck, and ask some obvious questions: is there enough room for a planter here? Is this the right-size space for a buffet table if you have a party with 15 guests? Is there room for a table and chairs here, and room for people to get to their seats? Will the hammock fit over there? Where will the barbecue be? Would an L- or T-shape work better? What if you put some hanging planters or large potted plants over there, to give a sense of separate spaces? In this way, you will come up with some fairly specific ideas about the shape and size of your deck.
If it feels cramped, consider extending the deck in logical increments. Using 12-foot-long joists instead of 10-footers, for example, has little effect on labor costs and increases material costs only marginally, but may dramatically increase the deck’s usefulness and sense of space.
If you have the space and the money, you may be tempted to build a very large deck. If you’ve got a large house and plenty of deck furniture, this can work well, but a jumbo deck can sometimes overwhelm a smaller home. Plan deck areas that feel comfortable and are scaled to the size of your house.
SMART TIP
PREVIEW THE DECK CONTOURS
To help you visualize the actual size of a deck plan that’s sketched out on a drawing, measure the rough dimensions on several of the potential building sites and stretch out an extension cord or a garden hose to mark the contours.
The surrounding area will play an important role in determining how popular the deck becomes. Create designs that enhance the views.
IMPROVING YOUR HOUSE AND YARD
A deck usually does not stand alone; it is attached to your house and sits on top of your yard. So consider not only how the deck itself will look but also how it will fit in with its surroundings. This does not necessarily mean striving to make the deck blend in and disappear, but any contrasts should be pleasing to onlookers rather than jarring.
Although the decking boards are probably the most visible element when you look at the deck from the house, the structural elements may loom large from other perspectives. Railings, stairways, and fascia boards are often the things people see first. If the deck is raised far above the ground, the posts, beam, and even the framing hardware may become the most prominent visual features.
Basic Elements
There are four basic elements to consider when matching your deck design with your house and yard: shape, mass, color, and texture.
Shape. The shape you choose for the deck should harmonize with the lines of your house. The alignment of a deck should in most cases be much more horizontal than vertical. This will give it the light, breezy feeling that you want from an informal space. However, if you are building a raised deck, the posts will define strong vertical lines. If your house is tall and narrow, some of this vertical sense will be welcome, and you may want to repeat these lines. In many cases, you will want to soften the vertical aspect with a series of horizontal lines, using decking and railings.
Think about the deck’s overall shape, as well. If your house has a pleasing L-shape, for example, you can repeat that shape with a deck. A house with a confusing shape can be softened with a deck that is simple, and a plain-looking house can be jazzed up with a deck that has a bold shape.
Most people choose to have a deck that is attached to the back of the house and leads to the backyard. You may want to consider other options, such as a wraparound deck, a deck that incorporates a tree, or an island or peninsula deck.
Also examine your house and your yard for existing lines: rectangles, curves, projections, even triangles. Use these as starting points, and think of your deck as providing variations on those themes. If your existing lines are a bit boring, you will want to liven things up a bit with some new angles—octagonal and other rectilinear shapes are good choices, as are curved lines. But if you already have a good variety of lines, adding complex shapes with your deck will only make for a muddled general impression. Usually, simplicity is best: two or three lines artfully repeated are more pleasing than a jumble of shapes.
You probably can’t change the shape of your house to suit your deck, but it is often possible to change your landscape in conjunction with building a deck. You can also design garden edgings or patio surfaces to complement the lines of your deck.
Sharp angles create areas for built-in seating and planting.
A curved deck provides the setting for a graceful railing design.
DECK SHAPES
WRAPAROUND
A wraparound deck allows you to follow the sun or the shade.
OBLIQUE
This deck is accessible from two doorways and incorporates a large tree.
ISLAND
An island deck is unattached to the house,so it can be surrounded with foliage.
PENNINSULA
With this penninsula design, you walk onto a place that feels much different from the house.
Mass. The size of a deck should suit the house. The most common problem is a deck that is too massive and overpowers a small house, making the house appear even smaller than it is. Decide which vantage points are the most important, and think about how your deck will appear from the yard and the house.
Many factors affect the visual mass of a deck. For example, building low to the ground or designing railings that are low or light-looking will help the deck recede and thus appear smaller. Large visible beams, railings that are densely packed with boards, and wide fascia boards all will make a deck seem more massive.
Thick 6x6 posts supporting an elevated deck might be the most obvious feature, but an interesting pattern of cross bracing draws attention to thinner wood. And the longer these posts are, the less thick they appear.
Color. When people think of a deck, they automatically think of exposed wood. The colors of wood and patterns of wood grain project a relaxed, casual mood. Redwood or cedar decking has beautiful color and looks great right away, but some people find the green tint of some pressure-treated decking unpleasant. All of them will gradually fade to gray after a few years of exposure to the sun unless you stain the deck regularly.
Deck stains come in a wide range of colors, so you can easily find a stain that complements the color of your house. Often a combination of natural wood and stain works—one option is to stain the entire deck except for the cap piece that sits on top of the railing. Another option that avoids a lot of maintenance is to use composite decking and railings that are made to look like wood.
Texture. Wood has a fairly rough texture: Knots, minor cracks, and rough spots are usually considered part of the charm of a deck. Such casualness goes well with almost all landscaping, but it may be unsuitable beside your house. If you need to clean up the lines a bit, buy more-expensive wood with fewer knots. Some synthetic decking materials have an embossed surface that imitates clear wood grain. Some of the better synthetic products have color variations that do a very good job of imitating the look, if not the feel, of wood. (See Chapter 3, for more on these products.) Other options include metal railings, glass windscreens, latticework, and rough-sawn lumber.
Plan the size and shape of your deck so that it works with the design of the house.
This decking, complements the textures of the garden.
SMART TIP
PLAN FOR A BETTER VIEW
Avoid one of the common flaws in many deck designs: a railing that blocks your view. Because most railings rise at least 36 inches above the deck surface, it’s wise to place them far away from glass doors and windows. Even on a sloping site where you want the main deck area close to the ground, you can add platform steps near the house, and install the railings around the perimeter of the main deck area. Place shade structures close to the house where they won’t block the views.
Built-in benches are a popular option.
Consider how the deck will form a transition from the house to the yard or garden beyond.
Bridging House and Yard
Your deck will be a destination for outdoor living, but it will also be a bridge linking your house and your yard. In fact, a well-designed deck will feel something like a bridge, not only because it is suspended over the ground but also because it balances the amenities of the indoors with those of the outdoors. In addition to the basic elements of mass, shape, color, and texture, here are some specific ways to ensure that your deck makes a graceful transition:
Stepping Down. Where possible, avoid long sections of stairway. Use a series of landings on multiple levels to step down in a way that feels more natural and graceful. Often the challenge is to make sure that each level is a usable and visually pleasing space. Solve this by making the levels cascade—falling off each other at different points or even at different angles—rather than just progressing downward in a straight line like huge steps.
Deck stairs look best when they are wider and more gradual than you’d typically find indoors. A standard 36-inch-wide stairway starts to look like a ladder if it is more than six steps long. An accurately scaled drawing can help you visualize the best design.
Patio Transition. The stairway from your deck might lead down to a lawn, but a patio or path at the bottom of your steps might work better. Materials that echo your house—bricks, concrete pavers, or colorful crushed stone—are good choices because they strike a nice balance. Patio materials can be rustic or formal, ranging from rough landscaping timbers to mortar-set tiles. Natural stone and brick, which are midway between formal and rustic, often work well. Plan the lines of your patio carefully—they are a continuation of the lines in your deck, which in turn should be tied to the lines of your house.
Configuring Planters. It’s hard to go wrong with foliage, as long as you can keep it healthy. Any color combination looks great—nature doesn’t agonize over paint chips. You can make a planter of the same material as the deck, and use plants in it that are similar to those in your yard to create a tie-in between deck and yard. And if you can build a planter that harmonizes with the house’s exterior, then you can tie in all three elements.
Incorporating Trees. If you have a tree that looks great next to your house, don’t cut it down. Build your deck around it, instead, to take advantage of the shade and help the deck blend into the site. Trees near the edge of the deck work well too, forming a sort of arch from yard to house, with the deck in the middle.
SMART TIP
DESIGN FOR SAFETY
Don’t forget these elements when designing your deck:
• A railing system that complies with building codes
• Adequate lighting for nighttime safety
A series of broad deck levels, opposite, guides people from the main area down to the pool.
An open deck includes a planting area, right top. Decks give you the option of incorporating shrubs and trees in the design.
Wide steps, right, provide plenty of room for placing container plants and other yard and garden accents.
Adding an Outbuilding. If a gazebo, shed, or play structure is in your future, include it in your plans now. There may be a simple way to tie it to the deck and the house. For example, make the roof of the same materials as the roof on your house and paint the rest of the structure the same color as your house. Play structures can usually be built of the same woods used to build the deck.
Theme and Variation. The best decks take one or two great ideas and then work out variations on those general themes.
The theme could be a gently curved line that you use in several places, such as the edge of the decking, the railings, and a path next to the deck. Or you may experiment with a unique decking pattern: have three or four sections that break off of each other at similar angles, for instance. If you have a large octagonal-shaped projection, you may be able to add a smaller version of it elsewhere on the deck, or you can echo the shape by building an octagonal table or bench.
The most visible elements of a deck are often those that project vertically. Choose railings or benches to harmonize with the overall structure. Planters should echo the deck structure.
A great deck usually has a stunning focal point, something that immediately grabs your attention. Perhaps you already have one—a beautiful tree, a lovely view, an inviting pool. Or you can supply a new eye-catcher yourself—a hot tub, a huge potted plant, a series of flower boxes, a well-kept greenhouse, or a statue. Play to your strengths, and position the deck and furniture to accentuate your focal point.
DESIGN CHALLENGES
Every design project hits a snag now and then, whether it turns out that your railing hits the house in the middle of a window or the stairs end in the middle of the driveway, but learn to see these challenges as opportunities to create pleasing points of interesting detail. Solutions to some of these problems are given later in the book, but now is the best time to start thinking about them.
Storage Space. Add storage space by providing access to the area under your deck or by building an attached shed. List the things you need to store, and make sure you have enough room, or they will clutter up your deck.
Lighting. Installing a lighting system adds a lot of charm to your deck, and if you plan now, you can hide at least some of the wires by running them through parts of your deck framing. This is much easier to do before you put the decking down.
Drainage Problems. Drainage will only be a problem in the future if it is a problem now. For minor problems, plan a gravel-filled trench in the ground to collect runoff from your deck and direct it away from the site. If you have major water problems, such as frequent standing water or significant erosion, be sure to deal with them before you build the deck.
The designer of this deck extended the railing design up to the trim on the gazebo roof, opposite.
If you are planning on adding a shade structure, incorporate it into your plans from the beginning, right.
Pergolas and arbors add vertical visual interest to deck designs, below.
In addition to being compatible with the surroundings, this deck conforms to the site.
Sloping Sites. A sloping site makes the construction process more difficult but also presents an opportunity for an interesting, multilevel deck.
Trees. Trees on a deck site also present a chance to do something stunning, such as building the deck around the tree. Consider the age of your tree and how fast it will grow, and plan to leave ample space.
Pools and Hot Tubs. Building a deck with a pool, hot tub, or spa requires precise planning, engineering, and cutting. Think carefully about how high and wide you want the decking around pools and tubs for maximum sitting and sunning pleasure. Hot tubs usually require a foundation that is separate from the deck structure, such as their own piers.
Shade and Access. If you want some shade but don’t have foliage overhead, add some louvered structures or brightly colored awnings. For areas with heavy rainfall, build a roof extension.
Plan access hatches so you can get at plumbing or electrical service junctions underneath the deck, just in case something needs repairing someday. Little trap doors and hatches that would look tacky inside are charming on a deck.
Railings are usually required on any deck over 30 inches above the ground. Plan now if you want to include any custom design features or unusual patterns in your railings. A built-in bench adds visual interest to a long expanse of railing as well.
OVERLOOKED DECK LOCATIONS
Decks aren’t always found hugging the ground right next to the back door. An island deck isn’t attached to the house at all, so it can go virtually anywhere on your property.
And don’t forget to look up when you’re searching for the perfect deck location. A rooftop deck usually offers better views, more breeze, and a more private setting.
Almost any patch of flat or low-slope roof can support a roof deck. You can run posts down to ground level, but the easiest system is to make removable platforms that lie down directly on the roof. The panels must be removable because you may have to fix a roof leak at some point. If the decking were permanent, you would have to rip it out to make a roof repair.
One popular option is to build a private deck off the master bedroom and change a window into a door.
A new deck need not be built tight against the house. This section of deck juts out into the garden for a better view of the surroundings.
When planning, think of the various uses for your deck. Here, having a shaded spa was an important consideration.
FINAL DRAWINGS
Once you have made all your decisions regarding site, substructure, decking, stairs, and railings, you are ready to finalize your plans. The finished drawings should be clear: do not rely on scribbled-over and often-erased sheets—take the extra time to draw a clean set of plans because they will be easier to follow.
The set of deck plans at the end of this chapter is a good example of what you’ll need to produce in order to get your building permit. After reviewing these drawings and your site plan, your building department will either issue you a permit or ask for some changes.
Plan Drawings
Plan drawings show the deck framing from above. For these drawings, it is common to leave out the railings and decking. Be sure to include the following:
• Correct dimensional drawing of the perimeter
• All joists, beams, posts, and footings
• Dimensions for all lumber
• The distance spanned by beams and joists
• Indication of size and direction of decking (It’s not usually necessary to draw this)
• Hardware, such as joist hangers, angle brackets, and bolts
• Exact locations of doors and windows
• Any electrical and plumbing fixtures and lines
Elevation Drawing
An elevation drawing shows the deck in cross-section from the side. Draw at least one elevation, including these elements:
• A detailed drawing of the railing system, including all dimensions that pertain to local codes
• Views of the concrete footings, with dimensions showing how deep and wide they will be
• Hardware list, including sizes of post anchors, tread cleats, and bolts
• Height of the tallest post
• A rough approximation of the site’s slope
Detail Drawings
Draw close-up views of complicated spots on your deck. Sometimes you will need to make a detail drawing to satisfy the building department. At other times, you may need it yourself in order to figure things out. Draw details for situations like these:
• Where the stair railing meets the rest of the deck railing
• Hatchways for access to electrical and plumbing
• Framing around trees or hot tubs
• Changes in level
• Any area of the deck with special framing, such as extra joists under a section of deck that will support a portable hot tub
• Flashing around ledger
SAMPLE DETAIL DRAWING
SAMPLE PLAN DRAWING
SAMPLE ELEVATION DRAWING
CHAPTER 2 DECK BUILDING TOOLS
TOOLS FOR BUILDING DECKS
EXCAVATION AND CONCRETE
MEASURE AND LAYOUT
CUTTING AND SANDING
FASTENING TOOLS
ACCESSORIES
A fairly modest set of tools is all you need to build most decks. For the most part, they are the tools you would normally find in a homeowner’s toolbox. However, building a deck is a big project and some power tools will make the work go faster. Consider investing in good miter and circular saws; they will prove invaluable on the job site. A good-quality drill/driver will make the drilling of holes and the driving of screws go smoothly. Beyond that, you might want to consider additional purchases carefully. If you will rarely use the tool after the deck project is completed, is it really worth the price? And if there’s a tool you’ve just got to try, consider renting it for a day instead of buying it for a lifetime.
TOOLS FOR BUILDING DECKS
The people on TV home-improvement shows always seem to have an endless supply of specialized tools for their projects. If you can find a tool manufacturer to sponsor your deck, you’ll probably have a big pile of tools too, but chances are that you’ll need to build your deck with the tools you own now, plus a few additions.
Once you decide which tools you actually need to buy, the next decision is how much to spend. Should you buy the $279 cordless drill, or will the $39.99 model work just as well for the kind of work you’ll be doing?
Typically, the answer lies somewhere between these two extremes. The high-end, professional model will probably build dozens of decks before breaking down. But you probably don’t need that kind of durability if you’re working on only a few projects every year. Conversely, a bargain-basement tool might quit before you finish one project. For most DIYers, a midpriced model is a practical compromise. It will serve on a heavy-duty project, such as building a deck, and still be around for ongoing repair and improvement projects around the house.
You’ll need the standard supply of basic hand and power tools, of course, including a circular saw with a sharp blade and a drill-driver (cordless or not). You probably have most of them already. But you may want to check into some of the more specialized tools and gadgets (included throughout the book) that are available today.
SAFETY EQUIPMENT
Common sense should tell you not to do carpentry without first having some basic safety equipment, such as eye and ear protection. Wear safety goggles or plastic glasses whenever you are working with power tools or chemicals. Both earplugs and earmuffs will protect your hearing. Whichever you choose, be sure that it has a noise reduction rating (NRR) of at least 20 decibels. Protect your lungs, especially if you are working with pressure-treated wood. A simple dust mask is good for short-term use, but a respirator with a replaceable filter is best for toxic dust and fumes from finishing products. Work gloves are nice for avoiding hand injuries—catching a splinter off a board or developing a blister digging post holes is not a good way to start a workday. Steel-toe work boots will protect your feet and prevent injuries from dropped boards or tools. Flexible steel soles will protect you from puncture by a rogue nail.
PROTECT YOURSELF WITH (A) gloves, (B) ear protection, (C) hard hat, (D) knee pads, (E) respirator/dust mask, (F) safety glasses, (G) work gloves, (H) first-aid kit.
EXCAVATION AND CONCRETE
Posthole Digger. Whether you use tubular concrete forms or pour your concrete directly into the ground, you will need to dig deep, narrow holes for your footings. Essentially two mini-shovels hinged together, a posthole digger picks up dirt in “bites” as you spread the handles. This tool allows you to work directly above the hole without creating sloping sides.
Round-Point Shovel. The most basic digging tool there is, the round-point shovel gets plenty of use on a deck site, from excavating to spreading gravel. Use a file to keep the edge of the shovel sharp—it’ll cut through small roots like a hot knife through butter.
Hoe. A standard garden hoe is handy for mixing concrete; a special mason’s hoe, which has two holes in the blade, works even better.
Wheelbarrow. This is a handy place to mix and transport small amounts of concrete—one 80-pound, premixed bag fits nicely in most wheelbarrows. You’ll also use your wheelbarrow to transport gravel, soil, sod, and sand.
Square-Nosed Shovel. The front edge of this shovel is perfect for cutting sod when you need to remove grass from your building site. You’ll also find that this is the best shovel for scooping up dirt or gravel from a driveway.
Metal Rake. For spreading soil or gravel, and for sloping a site for drainage, a metal rake, or garden rake, is the best tool.
EXCAVATION TOOLS (A) wheelbarrow, (B) posthole digger, (C) standard garden hoe, (D) round-point shovel, (E) selection of trowels including a finishing trowel and a pointing trowel, (F) square-nosed shovel with a sharp front edge, (G) metal garden rake.
MEASURE AND LAYOUT
Water Level. For some decks you will need to check for level over long spans. For this task, a water level is ideal. The water level is more accurate and more expensive than a line level. It is basically a water-filled hose with clear tubes attached to each end. Because water always seeks its own level, the water in the two tubes always settles out at the same height. This is especially useful when you need to level two spots around a corner from each other.
Angle Square. Often called by the brand name Speed Square, this triangular piece of aluminum is extremely versatile, yet it is tough enough to get banged around on the job and not lose its accuracy. Its triangular shape enables you to lay out a 45-degree angle as quickly as a 90-degree angle; it also enables you to find other angles quickly, though not with great precision. Held firmly in place, your angle square makes a good cutting guide for a circular saw. You will probably find it the most useful of all the squares you may own.
Carpenter’s Level. An accurate carpenter’s level is crucial when building a deck. A 4-foot level is a good choice; a 2-foot level will probably do, but an 8-footer is often awkward to use. A level made of wood and brass is more durable than the cheaper aluminum levels but not necessarily more accurate. An aluminum model is an excellent choice for the occasional carpenter.
Take care of your level; all it takes is one good drop or a hard hit to make it inaccurate. Test the level regularly, especially before you buy it. To test, set the level on a smooth surface, and note the bubble. Flip the tool end-for-end and put it in the same spot. The bubble should read the same. (Also see laser level, here.)
Framing Square. This L-shaped piece of flat metal measures 16 inches along one edge and 24 inches along the other. Use it for laying out stair stringers and also for checking the squareness of your layouts and string lines.
Post Level. If your design calls for any long posts, consider getting a post level. This very specialized but inexpensive tool straps onto the post, so you don’t have to keep holding up a level while you are moving heavy material. A post level usually has two bubble vials set at 90 degrees from each other so you can check for plumb in both directions at once. Some post levels use a single, round bull’s-eye vial to show perfect plumb instead.
Folding Rule. If you get a folding rule, find one that has a sliding extension on one of the end sections. This is a great tool for getting interior measurements—such as the length of a handrail between two existing posts. Many carpenters prefer a folding rule for short measurements.
Torpedo Level. You will find a 9-inch torpedo level handy for leveling small objects. It fits easily into your toolbox or your pouch.
Combination Square. This square has an adjustable blade that slides up and down. It shows both 90- and 45-degree angles, and the adjustable blade is handy for transferring depth measurements and as a pencil guide for running a line along the length of a board.
Measuring Tape. Purchase a high-quality measuring tape. A 25- or 30-foot tape is preferred, and a 1-inch-wide blade is far superior to one that is ¾ inch wide, since it is more rigid and will not quickly fold when you extend it.
Mason’s String Line. You’ll pull your string line very tight and it needs to last, so it’s a good idea to get the professional stuff—nylon is a good choice.
Reel Measuring Tape. For large decks, where you are laying out long distances, it’s helpful to have a 50-foot or 100-foot reel measuring tape. This tool doesn’t automatically retract, like your 25-foot measuring tape—you wind in the plastic or metal tape the way you turn a fishing reel.
Chalk-Line Box. The tool that aligned the ancient pyramids, a chalk line will enable you to mark long, perfectly straight lines in just a few seconds. Use blue chalk because the other colors are so permanent that they often can’t be washed away.
T-Bevel. If you need to duplicate angles other than 45 or 90 degrees, use a T-bevel (or sliding bevel square). This has a flat metal blade that can be locked into place at any angle.
Carpenter’s Pencils. Have plenty of pencils on hand—they have a tendency to disappear. Flat carpenter’s pencils are better than regular pencils because they need sharpening less frequently.
Line Level. A line level consists of a single bubble vial that clips onto a tightly stretched string line. When reading the bubble, make sure the string is stretched taut, and place the level near the center of the string line. Check the level by taking it off the string and reversing it. If the reading is the same both ways, then your line level is accurate.
Plumb Bob. To pinpoint the location of posts, you will need to drop a perfectly straight vertical line from a given spot. A plumb bob hangs from a string and tapers to a sharp point. Once the bob stops swinging, gravity ensures that the top of the string and the tip of the point are in perfect plumb alignment. The tapered shape of many chalk-line boxes allows them to double as suitable plumb bobs.
LAYOUT TOOLS (A) water level, (B) angle square, (C) 4-ft. level, (D) framing square, (E) post level, (F) ruler, (G) torpedo level, (H) combination square, (I) measuring tape, (J) string, (K) reel tape, (L) chalk-line box, (M) T-bevel, (N) pencil, (O) line level, and (P) plumb bob.
CUTTING AND SANDING
Power Miter Saw. If you need to make a lot of angle cuts or if you don’t feel able to make consistent, precise cuts at all angles, it may be a good idea to buy or rent a power miter saw. These tools (also called chop saws) are simply circular saws mounted on a pivot assembly that allows you to make precise, repeatable cuts. Make sure you get a chop saw that will do the job: a saw with a 10-inch blade will not be able to completely cut a 2x6 at a 45-degree angle.
Another version of the miter saw, called the compound miter saw, makes both miter and bevel cuts in one pass. You probably won’t need this ability on a deck, but if you are buying a miter saw and plan to install interior molding, it may make more sense to get a compound miter saw.
You can put together a jig that will help guide 45-degree cuts with a handheld circular saw. But it won’t work as well as an adjustable chop saw, and will pay off only if you’re using an angled decking pattern where the end of each board needs the same angled cut.
Circular Saw. Most carpenters and do-it-yourselfers prefer circular saws that use 7 ¼-inch-diameter blades. This size will allow you to cut to a maximum depth of about 2 ⅜ inches at 90 degrees and to cut through a piece of two-by lumber even with the blade beveled at 45 degrees.
You can get a rough idea of a saw’s power and overall quality from the amperage the motor draws and the type of bearings it uses. A low-cost saw will pull only 9 or 10 amps and will run its drive shaft on sleeve bearings. This will mean less power, a shorter life, a tendency to heat up during continual use, and sometimes less precise cuts because the blade might wobble a bit.
Better saws carry a 12- or 13-amp rating and use ball bearings or roller bearings on the motor’s shaft. This combination of extra power and smoother operation makes for long life and more precise cutting. As is often the case, a mid-priced model may well be your best choice.
Worm-drive saws have the most powerful motors and the longest-lasting bearings. They’re built like tanks and weigh almost as much. These are primarily professional contractor’s tools, and they take some getting used to. They last quite a long time, but do-it-yourselfers should probably avoid them.
A plastic housing is no longer the sign of an inferior tool, because many new plastic composites are actually tougher than metal and highly impact resistant.
Check out the saw’s base carefully: if it is made of thin, stamped metal, one drop from sawhorse height could bend it out of shape for good. Look for a thicker base that is either extruded or cast aluminum.
Use carbide-tipped blades in your circular saw. These cost a few dollars more but last up to five times longer than comparable blades made from high-speed steel (HSS). A 24-tooth blade is usually the best choice for deck construction and general use. There is a trade-off between the number of teeth and cut rates and quality: a blade with fewer teeth will cut faster, but the cuts will tend to be ragged. More teeth will produce a finer cut. Have an extra blade on hand; wet wood and dense treated lumber can dull your saw’s blade quickly.
Though you can use a file to touch up a damaged tooth on an HSS blade, send it to a sharpening shop when it needs a major tune-up. Take your carbide-tipped blades to a professional sharpening shop as well.
Router. Though by no means essential for deck-building, a router equipped with a chamfering or roundover bit can be quite handy for adding detail to your deck.
Belt Sander. Use a belt sander to clean up your decking and to round off the edge of the deck and railings as a finishing touch. Use this tool with care; it’s easy to oversand, especially if you are working with soft wood such as cedar or redwood.
Reciprocating Saw. For demolition and for cutting off posts, a reciprocating saw works well, but don’t buy one just for building a deck—a handsaw will work fine for the few cuts of this kind on your deck.
Saber Saw. This is a good choice if you need to make cutouts or if you want to make some curved cuts. If you need to do a lot of this kind of cutting, get a heavy-duty saber saw. With a standard do-it-yourself model, you’ll cut through two-by lumber very slowly and the saw will have a tendency to wobble, which produces a ragged-looking cut.
Pad Sander. A vibrating or oscillating pad sander is great for smoothing decking and railings, but a sanding block will often suffice for a deck project.
Block Plane.


