Erhalten Sie Zugang zu diesem und mehr als 300000 Büchern ab EUR 5,99 monatlich.
- Herausgeber: Fox Chapel Publishing
- Kategorie: Lebensstil
- Sprache: Englisch
Fast, efficient, and effective, Japanese handplanes are attracting increasing notice among Western cabinetmakers, carpenters, and woodworkers. These tools are meant to be used, used hard, and produce rapid, excellent results. Author and woodworking instructor Scott Wynn shows you how to choose, set up, maintain, and use these versatile tools to achieve stunning results. Japanese blades are arguably the best in the world, and Scott shares his methods for keeping those blades sharp. Japanese-style planes are also quick to build, and Scott shows how to make your own custom plane in a special section. Discover why this traditional tool has a home in your modern workshop, with step-by-step instructions, full-color photos, detailed illustrations, and clear diagrams.
Sie lesen das E-Book in den Legimi-Apps auf:
Seitenzahl: 251
Veröffentlichungsjahr: 2017
Das E-Book (TTS) können Sie hören im Abo „Legimi Premium” in Legimi-Apps auf:
Ähnliche


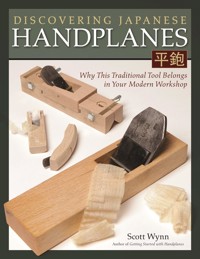
DISCOVERING JAPANESE
HANDPLANES
DISCOVERING JAPANESE
HANDPLANES
Why This Traditional Tool Belongs in Your Modern Workshop
Scott Wynn
Author of Getting Started with Handplanes
ACKNOWLEDGMENTS
To my father, Jerry, who taught me always to watch and listen; and to my daughter, Josephine, who stands on her grandfather’s shoulders watching, listening, and learning—and teaching all of us.
I would also like to acknowledge the untiring support of Kathy Tam, the helpful guidance of technical editor Rick Mastelli, and the encouragement and long hours of Jerry Konicek, whose Woodworking Academy gave me the opportunity to verify and refine my techniques.
All illustrations by Scott Wynn.
Photos by Rick Mastelli, Scott Wynn, and Mike Mihalo.
© 2017 by Scott Wynn and Fox Chapel Publishing Company, Inc., 903 Square Street, Mount Joy, PA 17552.
Discovering Japanese Handplanes is an original work, first published in 2017 by Fox Chapel Publishing Company, Inc. Portions of this book appeared in Woodworker’s Guide to Handplanes by Scott Wynn. The drawings and illustrations contained herein are copyrighted by the author. Readers may make copies for personal use. The drawings and illustrations, however, are not to be duplicated for resale or distribution under any circumstances. Any such copying is a violation of copyright law.
Print ISBN 978-1-56523-886-2eISBN 978-1-60765-938-9
Library of Congress Cataloging-in-Publication Data
Names: Wynn, Scott.
Title: Discovering Japanese handplanes / Scott Wynn.
Description: East Petersburg : Fox Chapel Publishing, [2017] | Includes index.
Identifiers: LCCN 2017003864 | ISBN 9781607659389 (pbk.)
Subjects: LCSH: Woodwork. | Planes (Hand tools)--Japan.
Classification: LCC TT186 .W958 2017 | DDC 684/.082--dc23
LC record available at https://lccn.loc.gov/2017003864
To learn more about the other great books from Fox Chapel Publishing, or to find a retailer near you, call toll-free 800-457-9112 or visit us at www.FoxChapelPublishing.com.
CONTENTS
INTRODUCTION
CHAPTER 1: ANATOMY OF THE JAPANESE PLANE
The Blade
A Primer on Steel
The Chipbreaker
The Dai
Reliability
CHAPTER 2: HOW A PLANE WORKS
Techniques for Achieving Best Performance
1. Angle of the Blade
Blade Steels for Different Woods
Blade Angles for Different Woods
The Japanese Blade
Pitch Angles
2. Mouth Opening
3. Chipbreaker
Japanese Chipbreakers
4. Bevel Angle
The Correct Bevel Angle
How an Edge Dulls
Honing a Hollow-Ground Bevel
Plane Geometry: A Summary
5. Shape of the Blade Edge
6. Length of the Plane/Width of the Blade
The Proportion of Length to Width
CHAPTER 3: TRADITIONAL TECHNIQUES
The Jack, Jointer, and Smoothing Planes
Jack: Shaping and Dimensioning
Jointer: Truing
Smoothing
Jack Variations
The Ideal Edge Shape
CHAPTER 4: PLANES FOR JOINERY
Rabbet Planes
Using the Fillister Plane
Side-rabbet Planes
CHAPTER 5: PLANES FOR SHAPING WOOD
Compass Planes
Western Versus Japanese Planes for Curves
Using a Compass Plane
The Correct Sole Configuration
Hollows and Rounds
Hollows & Rounds
Other Shaping Planes
Block Plane, Then Chamfer
CHAPTER 6: SETTING UP JAPANESE PLANES
Bench Planes
Flattening the Back of the Plane Blade
Tapping Out a Japanese Blade
Gauging Straightness
What Really Happens
The Oiler
Winding Sticks
Adjusting a Japanese Plane
Setting Up Rabbet Planes
Setting Up Side-rabbet Planes
Setting Up Hollows and Rounds
Troubleshooting
Efficient Planing
Keep Your Eyes on the Prize
A Well-Tuned Plane
Keep the Surface Flat
CHAPTER 7: SHARPENING
Jig Drawbacks
Bevel Shape
Grinding
Grinding Out a Nick
Grinding on a Sanding Belt
Sharpening Stones
Listening
Stone Choices
Using and Maintaining Waterstones
Sharpening
Technique
CHAPTER 8: HOLDING THE WORK
Simple Stop
A Simple Bench
CHAPTER 9: MAKING AND MODIFYING PLANES
Making a Japanese-style Plane
Laying Out a Block for a Japanese Plane
Chiseling the Chipwell, Mouth & Blade Seat
Making Chibi-Kanna
Making a Compass Plane
Hollowing, Rounding, and Spoonbottom Planes
Laying Out a Block for Hollowing and Rounding Planes
Cutting a Block for Hollowing and Rounding Planes
Laying Out and Cutting the Mouth Opening for Hollowing and Rounding Planes
INTRODUCTION
I began woodworking in the late 1960s, a move to be expected, I suppose, because I was raised in a family of cabinetmakers, patternmakers, turners, gunsmiths, and house builders. I felt it was a logical extension of the hands-on building design work I was doing at the time. I picked up what tools I could from the local hardware store and what tips I could from my relatives and a few scattered, scarce written sources. The tools available at that time were immediately disappointing. These were not the tools that built the works of art in the museums. Certainly over the course of 3,000 or more years of woodworking, our predecessors, who did all of their work by hand, had developed effective ways to maximize their efforts to produce flawless work. The hand tools available to me at that time were not capable of flawless work by any means, and what they could do took backbreaking, hand-blistering effort.
I began to look further afield, searching the available sources. In the early 1970s, I drove across the country from my home in Ohio to Berkeley, Calif., to search out an obscure Japanese-tool dealer to look at what were then exotic tools. (The drawings of them in the Whole Earth Catalog looked too bizarre to be real!) Those tools were a revelation—and a validation. Japanese tools were meant to be used, used hard, and to produce rapid, excellent results. Well-made hand tools could be a joy to use and be highly productive! I began experimenting with any I could get my hands on, identifying strengths and weaknesses, and the work for which were best suited. Moreover, I used them daily to make my living.
Clearly, I was not alone in my frustration with the quality and availability of Western tools during the rebirth of woodworking that began in the late 1970s. At that time in the San Francisco Bay Area there were a number of highly skilled craftsmen formally trained in Japan doing work and training scores of woodworkers in Japanese carpentry and the care and use of Japanese tools. The woodworking community shared this knowledge back and forth, bolstered by demonstrations of visiting craftsmen that were promoted by Japanese manufacturers and the two importers of Japanese hand tools in the Bay Area. This tradition continues today.
There has since been a resurge in the quality of Western hand tools, planes in particular. These tools are more familiar to us and now are capable of producing better work than in previous decades. In addition, James Krenov was one of those who spearheaded the woodworking revival, and his handmade planes have a great allure. Norris-style planes were rediscovered; who could resist the beautiful combinations of steel, brass, and exotic hardwoods? But none of these planes have the blades. The blades are nearly an afterthought; they’re like an excuse to build an elaborate, expensive mechanism. You can spend a week’s salary on a Norris reproduction and the blade you get is cut from common flat stock; and the chipbreaker, un-hardened and not for hard use, is used more to attach the adjuster. And the elaborate mechanism is just that: elaborate, often awkward, sometimes ungainly. Or, if you’re interested in productivity, you might say—slow—and expensive. Are these forms just a result of marketing? We all are attracted to the handsome pieces of machinery these tools are, but many of us use them so little we can’t tell the difference in the performance of the blades, so why bother, perhaps the manufacturers are asking, to put the extra time and effort into a better blade?
If you use your planes a lot and you expect them to perform, take a look at Japanese planes.
Japanese planes are a delight to use. They are fast, efficient, effective. They sit low on the work giving great feedback and a relaxed stability. Despite the clean, lean geometric, almost modernist aesthetic of the block and blade, they accommodate the hands quite well and in a multitude of planing positions, and are quite comfortable to use for long periods. And of course the blade: individually worked to achieve a balance of resilient structure, fine grain, and a hardness that maximizes the life of the edge, the blade’s cutting abilities and ease of resharpening.
Additionally, Japanese planes also can be highly effective for shaping work, because they can be easily modified or fabricated in an hour or two for same-day use. They are easy to adjust, and the adjustment is precise. Because the chipbreaker is not attached to the blade, it can be easily adjusted up or down to accommodate a variety of work, or even left off if need be. Also, partially for this reason, the blade removes quickly for re-sharpening and re-installation. Taking the blade out for sharpening requires only a few taps of a hammer; no loosening and tightening of very tight screws or tedious adjustment of the chipbreaker that tends to shift as that screw is tightened. If the blade is not particularly dull, I can knock it out, sharpen, reinstall, and adjust to use in three to four minutes. Taking the blade out, putting it back in, and adjusting it to use—without sharpening it—takes about 45 seconds. And the results from use of the plane can be stunning, as the blades available are arguably the best in the world.
Though the form is very dissimilar to Western planes, Japanese planes use the same anatomical “tactics” to do their work as do the Western planes. In this sense, they are familiar. These tactics are then altered in the same way according to the work the plane is intended to do. Unlike Western planes, however, Japanese planes are elegantly simple in concept, but complex and refined in execution. The basic plane consists of only two pieces: blade and block.
Because of the wedge-fit of the blade, and the independence of the chipbreaker, initial set-up requires instruction and perhaps some patience, but this is true of any plane from which you expect good results. Getting half-decent instruction in how to do this, does greatly speed things up (the intention of this book). I find the plane, being made of wood, does require you to pay attention to it, but otherwise, I find it to be to be surprisingly reliable and once set up, it will perform consistently with only some attention to detail. Storing the plane in a cabinet or drawer with the blade loose when not in use reduces the amount of tuning-up of the dai you may have to do because of temperature and humidity swings.
Some of the information I present here may break from tradition. I have been working with the planes for four decades and have made some adaptations and have experimented to better accommodate Western woods and projects, but the amount of variation from tradition is minimal, and from what I can observe, no different than you might find among individual Japanese craftsmen.
1
ANATOMY OF THE JAPANESE PLANE
The Blade
The blade is the heart of a Japanese plane; in contrast to a Western plane, often a complex and weighty construct of machined metal where the cost of the body is 10 times the cost of the blade or more, in a Japanese plane the blade may be 10 times the cost of the body, and sometimes much more. Traditionally, the blade is forge laminated and, on any plane of quality, hand-forged. This is something you will not find on a contemporary Western plane of any quality. The hand-forged blade is what sets the Japanese plane above its overelaborate competitors. Its production is the result of nearly 1,000 years of metallurgical tradition. Much of the Japanese plane’s ability to cut cleanly comes from this singular ability of the blade to get incredibly sharp, and to shear without tearing. This blade, at an appropriate angle and combined with a fine throat and/or a well-set chipbreaker, will smooth the most difficult of woods.
Japanese-Style Smoothing Planes.
Only two components constitute a complete plane: the blade and the wood block that holds it. Or four if you add a chipbreaker and its retaining pin. The plane’s conceptual simplicity, however, belies its great sophistication and structural refinement. The blade itself is thick and wedge shaped and fits into a precisely cut escapement in that block of wood. (Contrary to a popular misconception, except in the occasional specialty plane and some new, modern variations, the chipbreaker is not traditionally used to wedge the blade into position.) However, many nuances to the shape of the blade and details of the block that are not readily apparent must be attended to when setting up the plane. Besides the blade being wedge-shaped, the top face of the blade (the side opposite the bevel) is hollow ground. Much of this hollow is formed at the forge, so not much steel is removed when the blacksmith finishes it on the grinder. This hollow makes flattening the back of the blade easier, something that all blades (not just Japanese blades) must have done to them when they are first sharpened. I am always thankful the hollow is there because the steel of the laminated blade is so hard.
Figure 1-1 Japanese-Style Smooth PlaneThis blade has harder pieces of steel inlaid into the top and corners to reduce mushrooming from being adjusted with a hammer; Independent chipbreaker; Tapered blade wedges into custom-fit bed and abutments; Cross pin to wedge chipbreaker
Figure 1-2.The traditional Japanese blade is always laminated with hard edge steel and softer backing steel. If you look closely at the backing steel here, you can see some layering and variations that reveal its handworked origins.
The blade is also concave along its length on the bottom (bed side) and the plane bed must be made convex and fitted to this bevel side of the blade (and since most blades are virtually handmade, this is a custom fitting). This shaping of the blade and body is done to reduce lateral shifting of the blade during use.
The blade is also tapered across its width, being slightly narrower at the edge than at the top. This is to allow room for lateral adjustment, while still maintaining a good grip on the blade.
The blade angle most commonly available is about 40°, or more accurately 8 in 10 (the Japanese use a rise and run based on 10 rather than degrees. This explains some of the odd degree settings sometimes encountered.) Some suppliers will have planes with 47.5° (11 in 10). On rare occasion you might encounter 43° (9 in 10). The Japanese believe a really sharp blade is more effective than use of higher blade angles, though mainly I think it’s because the vast majority of their market works softer woods. The advent of 47.5° blade angle was largely a result of one of the American suppliers requesting it from the maker for his American market. I also think the Japanese woodworker does not hesitate to make his own planes at whatever angle he thinks he needs; up until the 1930s all craftsmen made their own planes, buying the blade and the block separately.
While recently some planes have been made available with alloy and even high speed steel blades, often aimed at the less experienced or the home owner, and there have been some experiments with hi speed steel for use in difficult woods, the vast majority of blades you will encounter will be basically fine-grain carbon steel. The two most common types are what are called white steel and blue steel (or white paper steel and blue paper steel). They derive their name from the color of the identifying paper label applied by the steel maker (usually Hitachi). Both have carbon in the 1% to 1.4% range with .1% to .2% silica and 0.2% to 0.3% manganese. Blue paper steels technically are alloy steels with .2% to .5% chromium and 1% to 1.5% tungsten, with up to 2.25% tungsten in the super blue steel.
A PRIMER ON STEEL
The key to understanding edge steel is in its anatomy. For the needs of the woodworker, three characteristics define steel’s anatomy—grain, structure, and hardness.
GRAIN
For woodworking hand tools, the grain of the steel is the most important characteristic of a blade. Ordered, repetitive arrangements of iron and alloy atoms in a crystalline structure comprise steel. The crystals can be small and fine or large and coarse. They can be consistent in size (evenly grained) or vary widely, with odd shapes and outsized clusters in among the rest. The steel’s grain affects how finely the blade sharpens and how quickly it dulls. Generally, the finer and more consistent the grain, the more finely it sharpens, the slower it dulls, and the better the blade performs.
Grain is a function of the initial quality of the steel used, the alloys added, and how the steel is worked or formed. In addition to the average size of the crystals, the initial quality of the steel may include impurities, called inclusions, which may persist throughout refining. Inclusions add large irregularities to the grain. Irregularities sometimes are used to good effect in swords and perhaps axes, but except for the backing steel on laminated blades, impurities are a detriment to a plane blade. Sharpening impurities out to the edge causes them to break off easily, causing chipping and rapid dulling of the edge.
Alloys change the texture of the grain. They may be part of the steel’s original composition (though usually in small amounts), or added in a recipe to increase the steel’s resistance to shock and heat. Alloys often coarsen the grain, so there is a trade off. While the edge of an alloy blade may be more durable, especially under adverse working conditions, it may not sharpen as finely as an unalloyed blade. To shear wood cleanly, no other attribute of an edge is more important than fineness of the edge.
STRUCTURE
Structure, the second most important aspect of a woodworking blade, results from changes in the original composition of the steel because of heating it and changing its shape with a hammer (or rollers), often called hot work. Heat causes the crystals of the steel to grow. Hammering steel when it is hot causes its crystalline structures to fracture and impedes growth as the grains fracture into smaller crystals. Before being hot-worked, the crystals of steel are randomly oriented, and frequently inconsistent in size. Through forging (repeatedly re-shaping with a hammer while the steel is hot), the grain aligns and knits together in the direction of the metal flow. Proper forging increases grain structure consistency. When exposed at the edge through sharpening, crystals consistent in size and orientation break off one at a time and dull the blade, rather than breaking off randomly in big clumps. The consistency of the crystals allows for a sharper blade that stays sharp longer.
The techniques used in preparing steel for woodworking tools are hammer forging, drop forging, and no forging. Hammer forging, where repeated hammer blows shape the steel, is the most desirable because it aligns the grain particles (or crystals) of the steel. It is a time-consuming, skillful process and therefore expensive. If improperly done, hammer forging stresses the steel, reducing, rather than increasing reliability. With the general decline in hand-woodworking skills during the last century, and the increased reliance on power tools, the discriminating market that would appreciate the difference forging makes has shrunk considerably. As a result, hand-forged tools are not commonly manufactured or available in the United States, but are still the prevalent method of producing plane blades, chisels, and other edge tools in Japan.
Drop forging verges on die cutting. A large mechanized hammer called the punch drops on the heated blank, smashing it into a die (mold), giving the tool blade its rough shape, often in just one blow. Drop forging imparts a marginally more consistent structure than a blade cut or ground from stock, because the steel often elongates in the process resulting in some improvement in the crystalline structure alignment. Drop forging is a common way of producing chisels in the West.
Drop forging is preferable to no forging at all. No forging is an over-simplification because all tool steel receives some hot work during reshaping. Bar stock is hot-formed by rolling or extruding the ingot into lengths of consistent cross section. The process rearranges the crystalline structure and the crystals tend to align in the direction of the flow as the steel lengthens. However, the arrangement is not very refined compared with the structure resulting when steel is hot-worked further at the forge. Modern Western plane blades, even many after-market premium blades, are usually ground from unworked, rolled stock.
HARDNESS
Hardness is a major selling point in the advertising of woodworking tools made from various types of steel. However, as explained earlier, grain and structure are the most important factors in the performance of a blade.
Hardness must be in balance with the intended use of the tool. High-impact hand tools, such as axes, should be softer than plane blades. Otherwise, the edge fractures quickly under the pounding an ax takes. The blades of fine tools for fine work can be very hard, but if their hardness exceeds the ability of the steel to flex without breaking at the microscopic edge, the tool will be next to worthless. It is the task of the bladesmith to produce blades that are in balance.
The Rockwell C (Rc) scale measures the hardness of woodworking blades. This is a unit of measurement determined by the impact of a ball-shaped point into the steel measured in terms of the depth of the resulting impression. Decent plane blades are in the range of 60–66 Rc range. Only some finely wrought steels work effectively in the upper-half of this range, principally high-quality hand-forged Japanese blades, and some high-alloy steels. In carbon steels, Rc 66 seems to be a limit above which the edge breaks down too rapidly in use, though I have heard of a Japanese master blacksmith who has made it a personal goal to develop steel that will hold an edge at about Rc 68. However, his experiments have not been available commercially.
The tungsten makes the blue steel harder to forge but increases its wear resistance when cutting difficult woods. On the other hand, adding tungsten widens the critical temperature range needed for hardening the steel, and makes this step a little easier for the blacksmith. In contrast, some white steels are fussy about their hardening temperatures. White steel is easier to sharpen, and takes the keen edge necessary for soft woods.
The difference between white and blue steel is subtle. A Japanese woodworker I know makes an enlightened distinction between the two. He describes white steel as having a sharp, angular grain structure, and blue steel as having smaller, rounded grains. This allows the white steel to be sharpened a nuance sharper, but under harsh conditions or with difficult woods white steel’s grain structure breaks off a little quicker and in slightly larger clumps. For that reason, dealers often recommend blue steel for working hard, abrasive, or difficult tropical woods.
Both white and blue steel are too hard to use for the whole blade; it is too susceptible to shock and prone to cracking during use (it is also too expensive). It would also be too difficult to sharpen a blade made entirely of such hard steel. Instead, a thin layer of it is forge-welded (laminated) to a back of softer steel that has more tensile strength. The combination is better able to absorb shock without breaking.
The backing steel used for these blades is a low-carbon, softer, and more flexible steel.
Figure 1-3. Fine Japanese Blade and Chipbreaker by Blacksmith Miyamoto Masao.If you look closely at the edge of the chipbreaker, you can see the color difference that distinguishes the edge steel from the backing steel.
It is basically wrought iron with impurities: before the mid-nineteenth century, smelting techniques allowed the inclusion of impurities, which in the grain structure appear as strands, somewhat similar to the glass in fiberglass. The impurity increases the steel’s flexibility and resistance to breaking—both desirable qualities. However, because the smelting process improved after the 1850s, steel produced since then lacks these impurities. Scrap iron produced earlier is highly coveted by Japanese blacksmiths who stockpile these treasures, such as pre-1850 anchor chain, for future use as backing steel in laminated blades.
The Chipbreaker
The best chipbreakers are also laminated, like the blades (Figure 1-4). And in all but the very cheapest planes, the chipbreaker has at least had its edge hardened and tempered; again, not a feature you will find in any Western plane. Chipbreakers do get dull, especially when they are repeatedly set close to the edge for difficult work. The Japanese chipbreakers extend the time between required maintenance; they are also easier to make sharp and crisp and to use set right down to the edge without wearing out or leaving gaps that catch the chip. The chipbreaker has two ears on the top end which are bent or straightened slightly to give the right amount of wedging action against the cross pin. The ears also provide adjustability for the wedging action of the chipbreaker, so it contacts the blade tightly and securely.
The Dai
The block of wood that holds the blade—it’s a single block, not a laminate—is called the dai. It’s a very dense oak, called kashi either white or red, though one reliable source (only one) says it is a type of cherry; perhaps this discrepancy may be due to a confusion over scientific names. White kashi is generally preferred as it tends to be denser and heavier, but I have experienced pieces of red kashi dai that were far denser than almost any wood I’ve worked; my chisel almost bounced off one piece I worked with. The trees are 40 to 70 years old and are felled between late December and early March; trunk diameters are from 30cm to 50cm. Until the 1920s the blanks for the dai were split, giving material that last better and is resistant to warping, but now it is all sawn to size. The dai-maker buys his blanks from the sawmill and stores them for two to three years before fitting blades to them. Incidentally, the dai-maker has no part in the production of the blade or chipbreaker; that is another trade. He merely fits them individually to the block.
Figure 1-4. How to Hold the PlaneThe Japanese-style plane is normally pulled in use, though it can, of course be pushed, and the smaller planes are surprisingly comfortable when used like this. I sometimes push the plane on the jobsite when holding is awkward and I have to remove a lot of wood. Here, a Japanese-style compass plane, its sole shaped to a gentle curve, smoothes the sweep of a bench seat.
The whole concept of the Japanese plane with its wedge shaped blade is based on the resiliency of the wood block that holds it. The wood must not give too much as this may result in blade chatter or the blade losing its adjustment. But it must give some—just the right amount—or the blade would not be adjustable. If you’re making your own planes, finding a substitute for the woods traditionally used in Japan is tricky.
The plane is meant to be pulled rather than pushed (see Figure 1-4), and the Japanese apparently are virtually the only woodworking culture where this is true. Many woodworking traditions have a few pulled tools, but not even their Asian neighbors, from whence their tools were derived, have major planes that are pulled. This may have evolved because the majority of Japanese craftsmen sit while they work, the cabinetmakers and furniture makers using an inclined planing board set on the floor. The board has a stop on the near end and slopes toward the user, allowing an efficient, ergonomic movement. On a wide piece, the work is shifted along the stop with the foot in between strokes of the plane. (See The Workbench Book by Scott Landis, Taunton Press, 1987, for more details on Japanese benches and working style.)
RELIABILITY
Japanese planes have a reputation for having to be tuned a lot. I have not found them to move any more than any other wood plane, but, because I expect a high degree of performance from my planes, I always check them before using. You can greatly reduce maintenance by proper storage.
When you are done using the plane, or at the end of the day, whichever comes first, always fully loosen the blade and then gently tap it and the chipbreaker back in just enough to keep them from falling out when you pick the plane up. Store it in a drawer or cabinet closed off to reduce temperature and humidity swings. (It is always a good idea to keep your shop at a consistent humidity as best you can year round, anyway.) Traditional houses and workshops in Japan were wide open to the air with only a hibachi for heat. Without central heating, and both summers and winters being humid, wide swings in humidity were unknown. (For that matter, the same was true in Europe until barely 30 years ago.)
2
HOW A PLANE WORKS
Techniques for Achieving Best Performance
Though Japanese planes may look different than those from the West and other cultures, they all share a common anatomy; that is, they all work the same. Understanding these anatomical similarities is key to getting the most out of your handplane.
Figure 2-1.All planes, including this Bailey-style iron Jack and Japanese-style Jack plane use the same anatomical tactics to produce efficient, quality work.
THE TACTICS
These core techniques for efficient, effective performance involve six anatomical features common to all styles of handplanes, including Japanese planes:
1. Angle of the blade to the work.


